This article provides step-by-step instructions that will help even an inexperienced user successfully unlock bootloader And install custom recovery Cyanogen Mod.
Your data is subject to deletion. If you need to save important information, we recommend making a backup. You perform all your actions at your own peril and risk. Please note that the author is not responsible for the “bricking” of the user’s smartphone.
Getting ready for installation
1. Download and install drivers. You can do this by following our link below.
2. Unpack the archive anywhere on your hard drive.
3. Turn off the phone.
4. Start the phone in fastboot mode, for which you should press “Volume -”, and while holding it, press “Power”.
5. The PC will display a message indicating that a new device has been found.
6. Go to the device manager (path: Control Panel – System – Device Manager).
7. Find an unknown device, which is usually indicated by a yellow triangle with an exclamation mark.
8. Double click on it.
9. In the window that appears, you need to click: Update driver – Search for drivers on this PC – Select drivers from the list of installed drivers – Install from disk – Select the folder where the drivers were unpacked – Check the “Search in subfolders” checkbox - complete installing drivers.
10. The device is completely ready for further manipulations.
11. Download ADB and Fastboot according to the operating system bit size: for x32/86 or x64. Unpack the archive into a folder of your choice. It is necessary that the path does not contain Russian letters (Cyrillic) and numbers. For example, I unpack a folder in d:\ADB.
12. Download custom Recovery: CWM and drop the *.img file into the same folder as ADB.
Bootloader unlock
First you need to unlock Bootloader on your smartphone. To do this, you need to connect your smartphone to your PC and put it in fastboot mode. To switch to this mode, you need to turn off the phone and during shutdown, press and hold two buttons: “Volume -” and “Power”. In Fastboot mode, a green robot with an open stomach will appear on the smartphone display.

Next, you have to launch the command line: start – in the “run” line write “cmd” (without quotes) – “cmd.exe” should appear at the top - right-click “cmd.exe” - Run with administrator rights.
After that, we go to the folder in which ADB is located (in my case it is located on the path d:\ADB): first I enter “d” (no need to enter quotes) and press Enter - I enter “cd ADB” and press Enter again. The command line window now looks like this:
To unlock Bootloader you need to enter the following command:
fastboot oem unlock
We accept the unlocking by pressing the “Volume +” button and confirm the action by pressing the “power” button.
So, Bootloader is unlocked. Now we reboot into the system. The smartphone will make the necessary changes, boot up, after which you should carry out the initial setup from Google (I’m skipping a lot, since the phone will still be rebuilt). Next – launch fastboot and install custom Recovery.
Now install custom Recovery. To do this, enter the command into the command line
fastboot flash recovery ***
A bootloader (Hboot) is a program that controls the kernel of your device’s operating system so that it boots normally. Moreover, this applies not only to Android, but also to other devices with an OS, such as a PC, laptop, and even an old push-button phone. In addition, it is the bootloader that gives permission to install any programs and firmware. For this reason, users are interested in factory unlocking the bootloader on an Android phone.
Hboot is activated when the device is turned on, and is an analogue of Bios in a computer. It prepares all the data for the kernel, loads it into memory, after which the system starts directly. If its integrity is damaged or something interferes, thanks to the bootloader you can get into recovery mode to clear the data, or perform a reset to factory settings. To do this, before turning on the device, hold down the power and volume down keys and do not release them until booting (in some cases, the combination of buttons may differ).
Why is the bootloader locked?
Manufacturers block for two reasons:
1. Oblige the owner to use the operating system that was developed for his device.
2. Security. Many smartphones and tablets are sold online or in retail stores. In both cases, the seller or intermediary may, at its discretion, add advertising or malicious software that should not exist. For the same reason, Xiaomi began to block the bootloader of devices released after 2016, due to numerous complaints about the presence of viruses in their firmware (which were not initially present).
Benefits of an unlocked bootloader
An unlocked bootloader opens up exactly the same possibilities for the user as on a PC, namely:
- Flash any operating system (available for your device).
- Installation of individual modules, OS kernels, applications, patches.
- Freely migrate between stock firmwares, especially if they are based on different versions of Android.
- Easily create backup copies of the current OS and/or applications, as well as restore them without using a PC.
- Use Dual-Boot and install two or more operating systems, both in internal memory and on an external SD card.
- Wider recovery options in case of unsuccessful firmware.
And this is not the entire list of possibilities after factory unlocking Android.
How to unblock
Each device has its own version of the bootloader, which means the unlocking method will differ depending on the model and manufacturer. When submitting an application, the block can be removed by the company itself (especially if you are an Android developer), but most often, this happens by hacking previously found vulnerabilities in the system.
Risks and consequences
Unauthorized unlocking of the bootloader will void your warranty service. In addition, your device becomes less secure and vulnerable to hacker attacks. An open bootloader allows you to bypass set passwords, gain access to personal information, or erase everything and install different firmware.

Conclusion
There is no need to worry too much about problems with the bootloader, especially when it comes to personal information. Found or stolen devices most often have their data erased, and rarely will anyone restore anything. An open bootloader is more needed by advanced users who know what to do with it, regularly flash something and experiment.
Leave your questions in the comments to the article below - we will try to answer.
Was the article useful to you?
Rate it and support the project!
Hi all! Today we will look at the simplest and most convenient methods for flashing your smartphone (or tablet).
The article is divided into the following sections:
Why is flashing needed?
Everything here is clear: either you have problems with your device, or you want something new, but the developers have stopped introducing new versions of the OS.
What are the firmware methods?
There are only two of them, but each in turn is divided into several more.
- Firmware via phone.
- Firmware using a computer.
Now we will look at several methods of flashing firmware using a PC.
Necessary preparation before the stitching process
All this needs to be done so that there are no disruptions to the installation of the new OS.
- Fully charge your device and your computer;
- Make a backup of your old OS;
- Check if the USB cable is working properly.
Making a backup
The example shows Android 5.0 OS, but all the steps described below are almost the same in any version. Therefore, just carefully review these instructions.
- Go to your device's settings.
 2. Select “System Information” and the “Memory” section.
  3. Now click on the “Backup” button.
 4. Now everything is simple: make a backup by selecting the items you need to save, as shown in the pictures.


5. That's it, the backup is ready. You can copy it to another device or use it. 

Firmware using FASTBOOT
Now that all possible security measures have been taken, you can proceed with the firmware.
First, download Fastboot to your computer. Make the program boot folder in the root directory of drive C. For example, C:\fastboot. In this case, it will be easier for you to register the location of the firmware in the future.

The installation file can be downloaded from the link (Android debugging utility).
First let's unlock Bootloader
Bootloader is a program outside the Android system that provides access to the kernel of the device. It can be compared to the BIOS on a computer.
By unlocking it, we will get root rights - open access to the system. On devices from different manufacturers this is done using different software. But there is only one algorithm, and it’s like this:
- You download and install the unlocking program in accordance with the device manufacturer.
- Then connect your smartphone via USB cable in debugging mode.
- Open the downloaded program, select your device and click “Unlock”.
Unlock example
Here is an example of unlocking a device manufactured by HTC.
1. Download and install HTC Bootloader Unlock.
2. Then connect the device to the computer in debug mode. Everything is quite simple here: go to the “For Developers” settings section and select “USB Debugging”.

3. Now open the downloaded program and confirm debugging (on your Android device).

4. All that remains is to simply unlock it by pressing the “Unlock” button. The process can actually be done through the Windows command line. This program only automates the unlocking process.

5. To exit HTC Bootloader Unlock, click “Finish” after completing the botloader unlocking process.

Note: There are unlocking programs for a smartphone or tablet from any manufacturer. For example:
Nexus – Nexus Root Toolkit;
Samsung - Kies;
Sony – Sony Bootloader Unlock.
If your device is from another manufacturer, just search the Internet for the appropriate utility.
Firmware process
- The first thing you need to do is connect to your computer in USB debugging mode. How exactly to do this is described a little earlier.
- First move the new firmware to the C:\fastboot directory
 3. Now put your device into fastboot mode. At the command prompt, enter the commands as shown in the screenshot.

4. In order for flashing to be successful, you need to format all directories on your device. Enter these commands in the command line one by one (after each - “Enter”):
- fastboot erase boot
- fastboot erase userdata
- fastboot erase system
- fastboot erase recovery
- fastboot erase cache
5. Now you can start flashing the firmware. From the folder with the firmware (the “fastboot” folder), run the flash-all bat file. This is what it looks like on the command line:

6. After the successful flashing process, you will see a message about this.  That's all, the device has been reflashed. And after rebooting it, you can verify this.
Reflashing using the ODIN MULTI DOWNLOADER program
1. First, you need to connect your phone to your computer using a USB cable, in debugging mode. After this, be sure to run the Odin Multi Downloader program as an administrator.

2. Then specify the location of the firmware you want to install. Here's what you need to do: click on the BOOT button and select the firmware file.


Note: if your firmware consists of several files (mostly there are three), then the path must be specified accordingly:
PDA file – in the “PDA” field;
file Phone – in the “Phone” field;
CSC file – in the “CSC” field;
3. Now you need to restart your phone. This can be done using key combinations (volume up + screen lock button + center button). As a result, the computer should recognize the phone, thereby a yellow field with the name of the COM port will appear on the screen.

4. After you click the “Start” button, the system update will begin. During this time, do not disconnect the phone from the computer. During the installation process, the smartphone will reboot several times, but you should not pay attention to this. After successful firmware installation (which takes about 10 minutes) the word “PASS” will appear on the computer screen.

After completing all the steps according to these instructions, you will be able to use any version of the Android operating system. In addition, it is worth noting that this program is suitable for flashing Android devices from any manufacturer.
Flashing an LG Android device using the KDZ UPDATER program
If you have a phone or tablet from the manufacturer LG, then it will be easier and more correct to flash it using the KDZ Updater program. How exactly to do this?
1. First download the KDZ Updater program. Actually, this is an archive that needs to be unpacked into a folder located in the root of the system drive C of your computer.


2. Add the firmware you need to the same root folder. Here is the executable file of the program, this is the only way the firmware will be visible to the program.

3. Be sure to install the action policy file called msxml.msi
4. Now enable USB debugging mode. Exactly how to do this is described above.
5. Switch the device to S/W Upgrade mode. Namely:
- turn it off;
- take out the battery;
- hold down the volume down key and insert the USB cable.
- the corresponding inscription “S/W Upgrade” will appear.
Notes:
if you were unable to enter the S/W Upgrade mode, then try doing all the steps described above without removing the battery;
also try pressing both “sound rockers” instead of the volume down key;
In order for the firmware to become possible, you need to disable the LGE Mobile USB Modem program in Device Manager.

6. Now it's time to start flashing. Run the executable program KDZ_FW_UPD.exe from the root folder on drive C as an administrator.
Note: hover over the program icon and right-click. Select "Run as administrator".

7. Set all parameters as shown in the screenshot and click “Launch software update”.

8. After some time (about 10 minutes), the firmware will be completed. Just reboot your device and enjoy the new interface.
Firmware for smartphones and tablets from Lenovo
Why did I also bring up this topic separately? Because Lenovo devices have their own nuances that create certain difficulties. However, there is also a program that compensates for them. What exactly? Ease of use and its intuitive interface.
So, let's begin.
1. You need a program for flashing SP Flash Tools. Download it.
2. To continue the firmware, you need to install drivers on the device. As a rule, they are not automatically installed upon connection. Therefore you need to do it manually.
download drivers according to your device model;
enter into the device manager on your computer (the above shows how to do this);
turn off the device;
connect the device via USB cable to the computer;
right-click on the device that appears (unidentified) and select “Install driver from a specified location”;
select driver.

3. Now launch SP Flash Tool. And specify the path to the executable firmware file (scatter file). Click on "Scatter Loading".


5. And only now connect the device to the computer.
6. Once the flashing is completed, you will be notified of this by the appearance of a bright green ring on the computer screen.

When you turn on the device, the first boot of the system will take quite a long time (5-10 minutes). That's how it should be, don't worry.
Brief summary
As you can already see, for Android devices from some manufacturers there is special software that facilitates the firmware process. So use it first.
However, there are many methods for flashing an Android device using a computer. There are so many utilities that make this process easier. But the above methods, in my humble opinion, are among the most convenient and easiest. So read, understand and go ahead!
Hello friends. Today, we can say, a spontaneous post happened, what it will be about, you could already guess from the title. The thing is that just today a parcel arrived from the USA, and I became the owner of a brand new Google LG Nexus 4. And now I have two Nexuses at once - Samsung Galaxy Nexus and LG Nexus 4 - maybe I’ll even write a comparison review, if you're interested, but that's not what we're talking about today.
Yes, who cares, and I’m sure that many – the issue price is 12k rubles with delivery! But again, that’s not what I’m talking about...
Yes, Pure Android 4 is wonderful in itself - convenient, fast and almost perfect. Please note that I am talking specifically about the android that is installed in Nexus Google phones, and not all other phones (htc, Samsung, sony, etc.), because... they have been seriously reworked and changed, unfortunately, not for the better. So what could be better than almost perfect firmware? Improved custom firmware, of course!
So today I turned on the phone for the first time just to make sure it worked at all. When I was convinced of this, I turned it off and started “dancing with a tambourine.” Hot on the heels, I’ll tell you how to unlock Bootloader on Nexus 4, install recovery and flash any firmware.
In fact, all these dances with a tambourine are not such dances and even almost not with a tambourine =) I, as an already experienced user, felt confident, did not worry and did not even make any backups. As it turned out, all the procedures described below are completely identical to the procedures that I did a year ago on the Galaxy Nexus. Everything will be simple, I promise!
First you need to prepare a little and download the necessary drivers:
Download the drivers usb_driver.rar - they will be useful for connecting the device in bootloader mode to our PC. We also download the adb.rar archive - it contains Fastboot and ADB files.
Unpack the Fastboot and ADB archive to the root of drive C, it should look like C:\adb.
We also unpack the drivers to the root of drive C, it will turn out to be C:\usb_driver.
Now into battle!
Installing drivers and unlocking Bootloader in LG Nexus 4
First you need to unlock Bootloader, without this nothing can be done.
There are various solutions and even programs that allow you to unlock, get root and install recovery in one click, but I somehow don’t trust this approach, because the procedure is delicate. Although I still tried to use the NEXUS 4 TOOLKIT 1.3 program today, but, as it turned out, you can only download the basic version, and the update is available only after payment, and without the update the choice of android 4.2.2 support is not available. In short - not our option!
Three simple steps and no show-offs:
- Turn off the phone and put it in Fastboot mode (press the Volume Down + Power buttons), connect the USB cable.
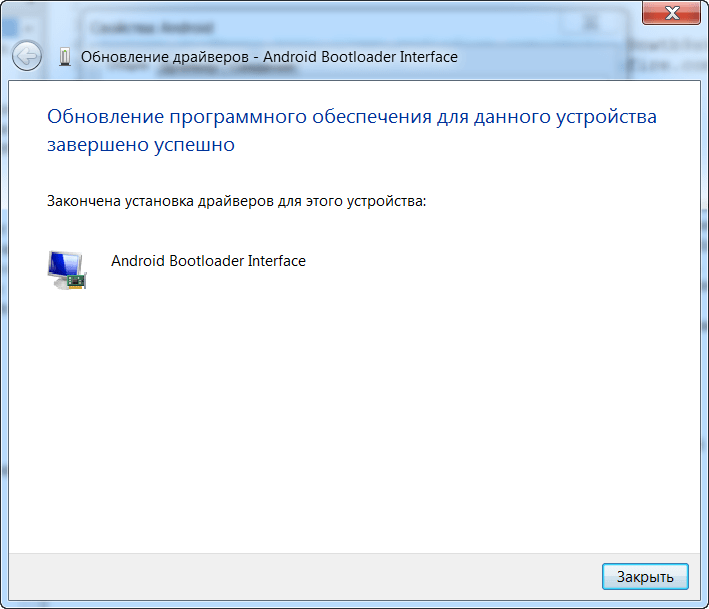
Windows will show a message in the tray such as “Installing software for the device.” For obvious reasons, the drivers will not install themselves. Therefore: right click on My Computer => Device Manager => We will see the unknown Android device. Click on it twice, and in the window that opens: click Update driver... => Search for drivers on that computer => Select the folder C:\usb_driver and click next. The installation will begin, some question about security will appear, install it anyway. As a result, we will see the message: “The installation of drivers for this Android Bootloader Interface device has been completed.” In the device manager it will be written that the device is working normally - that’s what you need :) Close the manager.
- Open the command line (Start - write cmd in the search box - press Enter):
- In the command line write cd C:\adb and press Enter
- Next we write fastboot oem unlock and press Enter
- A warning will appear on the phone screen: “Unlock bootloader?” and blah blah blah. Use the volume key to select Yes and confirm the selection with the power button. Attention! This will delete all data on your phone. Immediately after this, the fastboot screen will appear, where LOCK STATE – unlocked will appear.
It's simple, right?
Installing custom recovery on LG Nexus 4
Now we need to install recovery, without which we simply will not be able to flash firmware, kernels and any tweaks and mods.
For recovery, I recommend TWRP Team Win Recovery Project. You can view the description and features on XDA in the official topic for NEXUS 4, there is always the current version there. At the time of writing this post, the newest version is 2.4.4.0. Here is a convenient direct download link. Have you downloaded it? Great, let's move on.
We have a file openrecovery-twrp-2.4.4.0-mako.img. If you put it in the c:\adb folder and rename it twrp.img it will be easier in the next step.

Well, the bootloader is unlocked, recovery is installed. The simplest thing left is to install new firmware. By the way, we don’t need to get root if we are going to install custom firmware, root will already be there by default.
Installing custom firmware on LG Nexus 4
For almost a year of using my previous Samsung Galaxy Nexus, I tried a whole bunch of different firmware, often reflashed it, and conducted all sorts of experiments. And you know, one day I found the ideal firmware, the firmware of my dreams - this is ParanoidAndroid. I simply cannot recommend anything else other than this firmware. But, one way or another, the choice is yours; the procedure for installing different firmware is identical.
This is what your Nexus 4 might look like after installing ParanoidAndroid:
Here is a video review of the same firmware, but for those who have not personally used ParanoidAndroid, little will be clear:
So, we have decided on the firmware, we need to download it. Official topic for firmware developers, there is also a description, links and new versions. You can download the firmware itself in the mako section on goo.im, and you will also need to download Google Apps in the corresponding section on goo.im.
We downloaded the firmware and gapps, now we need to somehow upload them to the phone. If the phone is normally visible in the explorer, then skip the block of text below; if you can’t get into the phone’s memory through the explorer, then read.
A small snag may arise here, but only if you do not read this post - because all the snags are resolved for me, and I will definitely write about it!
I’m sitting and connecting the phone via USB using a cable, but it’s charging, but in the explorer I can’t see it as a folder to put our archives there for the firmware. If you have the same story, then here is the solution!
I don’t know why, but Windows decided to install ADB drivers when the phone was turned on (this does not mean fastboot, but the running android system). Maybe I did something wrong somehow, but the fact is the fact - the phone folder is not visible in Explorer. I thought that some drivers were missing, I Googled for a long time, but found nothing. I decided to use the harsh method: We go to the device manager, we see “Android device something like ADB” - just right-click on it and select Delete. We disconnect the phone and immediately connect it back - Windows should re-detect the device and install the correct drivers on it. This worked for me and the required Nexus 4 folder appeared in Explorer!
Select the folder Nexus 4 / Internal memory / Download and drop the archives there, in my case it’s pa_mako-3.10-11MAR2013-131748.zip and pa_gapps-full-4.2-20130308.zip. In your case, these will be newer versions; it’s not at all difficult to understand the markings.
When all the archives are downloaded, disconnect the phone from the computer and turn it off. We need to get into recovery mode again, to do this we hold down Volume Down + Power until fastboot turns on, where we use the volume buttons to select Recovery mode and press Power.
If it suddenly happened that you didn’t see the main screen of TWRP (it’s very easy to identify, there will be no doubt about it), but you saw an android lying on its back with a red triangle, then there is a way out, but what would you do without it?
To do this, hold down the Power button until the phone turns off. We boot into fastboot again, connect the phone via USB and repeat the recovery installation script. When the recovery is installed, do not reboot, but use the volume buttons to find the Recovery mode item and select it with the power button. Now TWRP will definitely start, which means we follow the instructions below.
We will see the main screen of TWRP, click on the top right Wipe button, and then Factory Reset - this will delete all data on the phone!
After a complete reset, you need to return to the previous screen and click on the upper left Install button. On the screen that opens, select Download from the list of folders, and then first click on the pa_mako firmware file, then Add More Zips and immediately select the pa_gapps file and finally do Swipe to Confirm Flash. Now both the firmware and Google Apps applications will be flashed immediately, about a minute of waiting and we should see the inscription Successful. It is very important to clear all caches; to do this, select the Wipe cache/dalvik button. Everything is ready - click Reboot System.
Now the system will boot, but with the ParanoidAndroid firmware. After a long download, we find ourselves in the initial phone setup menu, where you need to select a language, specify an account, etc.
Actually that's all! Good luck to you friends. If you have any questions or suggestions about the firmware process or about ParanoidAndroid, please write in the comments.
Note: How to access the developer menu on any firmware.
Open the settings, select the “About phone” item at the very bottom, scroll the screen to the “Build Number” item, it will say JDQ39, which corresponds to android version 4.2.2, you may have something else written, it doesn’t matter. Press this line 7 times in a row. As a result, the message “You have become a developer!” should appear. It turns out how easy it is to become a developer for androind =))) We return back to the settings menu, we see a new item “For Developers”.
UPD: If suddenly the phone turns into a “brick” - what should you do?
You never know what happens... Like today, for example, a colleague bought himself the same Nexus 4 and gave it to me so that I could install custom firmware. “No problem,” I said and went to follow my own instructions written above. A strange thing happened - all the data (zip file of the firmware image, for example), which I uploaded to the internal drive for subsequent firmware after the reset, they were deleted, self-destructed for some unknown reason.
In short, the phone turned into a brick, i.e. It won’t turn on, but something needs to be done. Therefore, the easiest way is to download Factory Image to your phone, i.e. factory image so that the phone looks like what you saw when you first opened the package. And here are the instructions:
- It is assumed that you have already installed the drivers and the phone connects to the computer when it is in fastboot mode. And also the bootloader is unlocked. In short, all the steps under the heading “Installing drivers and unlocking” have been completed.
- Now download the official image of the phone from here https://developers.google.com/android/nexus/images#occam At the moment, the current version is 4.3 (JWR66V), click Link opposite and download.
- We downloaded the archive occam-jwr66v-factory-08d2b697.tgz, inside it is another archive occam-jwr66v-factory-08d2b697.tar, and inside there are several files and another archive image-occam-jwr66v.zip - this is what we need needed, take and transfer image-occam-jwr66v.zip to the folder C:\adb
- Open the command line and write:
cd c:\adb press Enter;
fastboot erase boot press Enter;
fastboot erase cache press Enter;
fastboot erase system press Enter;
fastboot erase userdata press Enter;
fastboot reboot-bootloader press Enter;
fastboot -w update image-occam-jwr66v.zip press Enter and wait.
After the last operation, the phone should reboot itself and turn on. - Now your phone is like new :) And you can repeat what didn’t work. Namely, upload zip archives to the phone’s memory and try to flash them again. By the way, we didn’t touch recovery during the recovery process, so you still have TWRP, which means turn off the phone, press Volume Down + Power, select recovery and go!
Well, now that’s all for sure!
See you later, friends. And I’m sorry that I stopped writing about SEO often, I promise to improve in the near future.
The ADB and Fastboot utilities are included in the Android SDK development kit (do not confuse it with Android Studio, much less download its cumbersome installation file, unless, of course, you intend to develop for Android). ADB is a debugging tool that allows you to access the Android console from a computer (by connecting the gadget to a PC via USB. At the same time there should be . Fastboot is designed to work with the device when it is loaded in the mode of the same name (if your device has one).
Using ADB, you can manage your smartphone/tablet from your computer: make a backup of applications, record a screencast, put your smartphone in Recovery mode, and much more. In addition, you can work with ADB via Wi-Fi. To do this, your device must have root rights, and you will also need a special application that connects to your computer over the network. For example, ADB Wireless or WiFi ADB. But this is material for a separate article.
Using Fastboot, you can, custom Recovery (or), unlock Bootloader (on HTC, Motorola, Sony, Nexus, Huawei, the latest LG devices it is blocked), clean system partitions.
How to install ADB and Fastboot: instructions
1. Go to the official website where you can download the Android SDK: https://developer.android.com/studio/index.html. Scroll down to the “Command line tools only” section and select the archive for Windows.

2. Check the “I have read and agree with the above terms and conditions” checkbox and click the “Download Android Command Line Tools for Windows” button. The archive will begin downloading.

3. Download it and unzip it to the root of Drive “C:”.
4. You also need to download the Java Development Kit from the official page. Go to the website, agree to the terms of the license agreement by checking the “Accept License Agreement” box, and download the JDK version that matches the bit size of your system.

First way
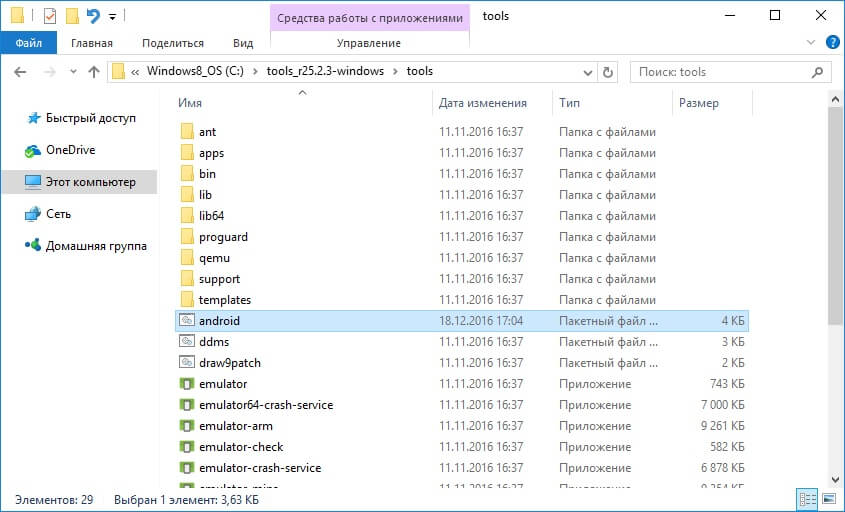
Go back to the Android SDK folder, open “tools” and run “android”.
Check "Android SDK Platform-tools" (and also "Google USB driver" if you have a Nexus device) and click "Install Packages".

Read below about installing drivers for other devices.
Select "Accept License" and click "Install".

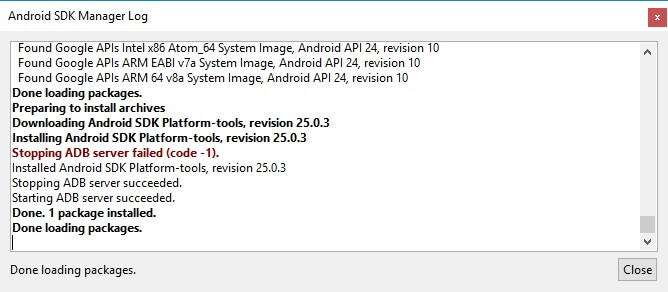
My log showed that there was an error. But in the end everything ended successfully.
After completing the above steps, in the “sdk-tools-windows-” folder version“platform-tools” will appear, and it will contain the “ADB” and “Fastboot” that we are interested in.


Second way
Go to the folder "sdk-tools-windows- version» → “tools” → “bin” and, holding down the “Shift” key, right-click on an empty area. Select "Open a command window" or "Open a PowerShell window here" if you have one of the latest builds of Windows 10 installed on your PC or laptop.

Paste the command into PowerShell or Command Prompt (in PowerShell add ./ at the beginning):

Click "Enter" to execute the command. The files will download and an installation prompt will appear:

To enable, type y, that is, “yes”, and press “Enter”, after which the installation of “platform-tools” will begin.

At the end, a message will be displayed on the command line that the procedure completed successfully. And the “platform-tools” folder with ADB and Fastboot inside will appear in “sdk-tools-windows- version».
(!) If for some reason you cannot install ADB and Fastboot using the previous methods, use the third option - simply download the “platform-tools” archive and unzip it to the “C:” drive.
Installing ADB and Fastboot drivers for Windows
For a computer, smartphone or tablet, you need to download the USB driver:
- Samsung - the driver is included in the Kies utility: http://www.samsung.com/ru/support/usefulsoftware/KIES/ or you can download it separately by selecting the desired model: http://www.samsung.com/us/ support/downloads
- HTC – as part of HTC Sync Manager: http://www.htc.com/ru/software/htc-sync-manager/
- Nexus - Android driver is installed along with the Android SDK, as described above.
- Huawei - together with the HiSuite utility: http://consumer.huawei.com/minisite/HiSuite_en/index.html
- LG – install LG PC Suite: http://www.lg.com/ru/support/software-firmware
- Motorola - see this page: https://motorola-global-portal.custhelp.com/app/answers/detail/a_id/88481
- Sony Xperia - FastBoot drivers for all models are here: http://developer.sonymobile.com/downloads/drivers/
- Xiaomi – Mi PC Suite: http://pcsuite.mi.com
- MTK – for Chinese devices on MediaTek chips: http://online.mediatek.com/Public%20Documents/MTK_Android_USB_Driver.zip
- Lenovo – select your smartphone or tablet model and download the ADB driver: http://support.lenovo.com/us/en/GlobalProductSelector
- Look for solutions for devices from other manufacturers on their official websites.
There are various universal ADB driver installers (for example, this one: http://adbdriver.com/downloads/) - they can also be used, for example, when for some reason it was not possible to install the official solution.
If your model comes with a driver without an installer, you will have to do the following:
1. Go to “Control Panel” → “Device Manager”. In Windows 10, just right-click on the Start menu and select Device Manager.

2. Find in the list the device for which you need to install drivers. Right-click and click Update Drivers.

As you can see, the computer correctly recognizes my Nexus 7 tablet. If your PC detects the smartphone incorrectly or there is a yellow triangle with an exclamation mark inside next to the device, “manual” installation of Android drivers is required for you.
3. Select “Browse this computer for driver software.”

4. Specify the path to the driver folder on your PC.

Wait until the installation is complete and then reconnect the gadget to your computer via USB.
How to get started with Fastboot and ADB
Working with ADB or Fastboot is done from the command line; the utilities are launched in two ways:
1: Right-click on “Start” and select “Command Prompt (Admin)” or “Windows PowerShell (Admin)”. Next, using the commands, specify the path to the folder with ADB and Fastboot (after entering each, press “Enter”).
To return to the root of the "C:\" drive, use:
Thanks to this command we open the desired folder:
In my case it turned out like this:
cd\tools_ version-windows\platform-tools

You will get (Google developers changed the name of the archive after writing the original version of this instruction):
cd\sdk-tools-windows- version\platform-tools
The path to Fastboot and ADB is indicated, now we work with them from the console.
To avoid having to do this every time, add the path to "platform-tools" to the "Path" variable. First, go to the folder, in the navigation bar, right-click on “platform-tools” and select “Copy Address”.

Go to "Control Panel". To do this, press “Win” + “R” and in the “Open:” field, paste control . Click OK.

Select System → Advanced System Settings → Environment Variables....


Find the "Path" variable, highlight it and select "Edit...".

Click New, paste the path to the "platform-tools" folder and click OK.
