One of the innovations that Google has added to its operating system Android 4.0 Ice Сream Sandwich has become a navigation bar located at the bottom of the screen of tablets and smartphones that are not equipped with hardware buttons “Menu”, “Home” and “ Latest apps».
Many people find this panel convenient, but some feel that it wastes screen real estate. If you belong to last category users, one of the independent developers from the XDA-Developers forum, known under the nickname MrBIMC, created a very interesting and useful application Ultimate Dynamic Navbar(or UDN).
Ultimate Dynamic Navbar allows you to hide the Android navigation bar in favor of a slide-out panel that you can customize entirely to your liking.
Moreover, the application works even on devices that are equipped with hardware navigation buttons and can be very useful to those owners who have one (or even all) of these buttons out of order.
The only limitation that UDN imposes on a device is whether it has root rights.
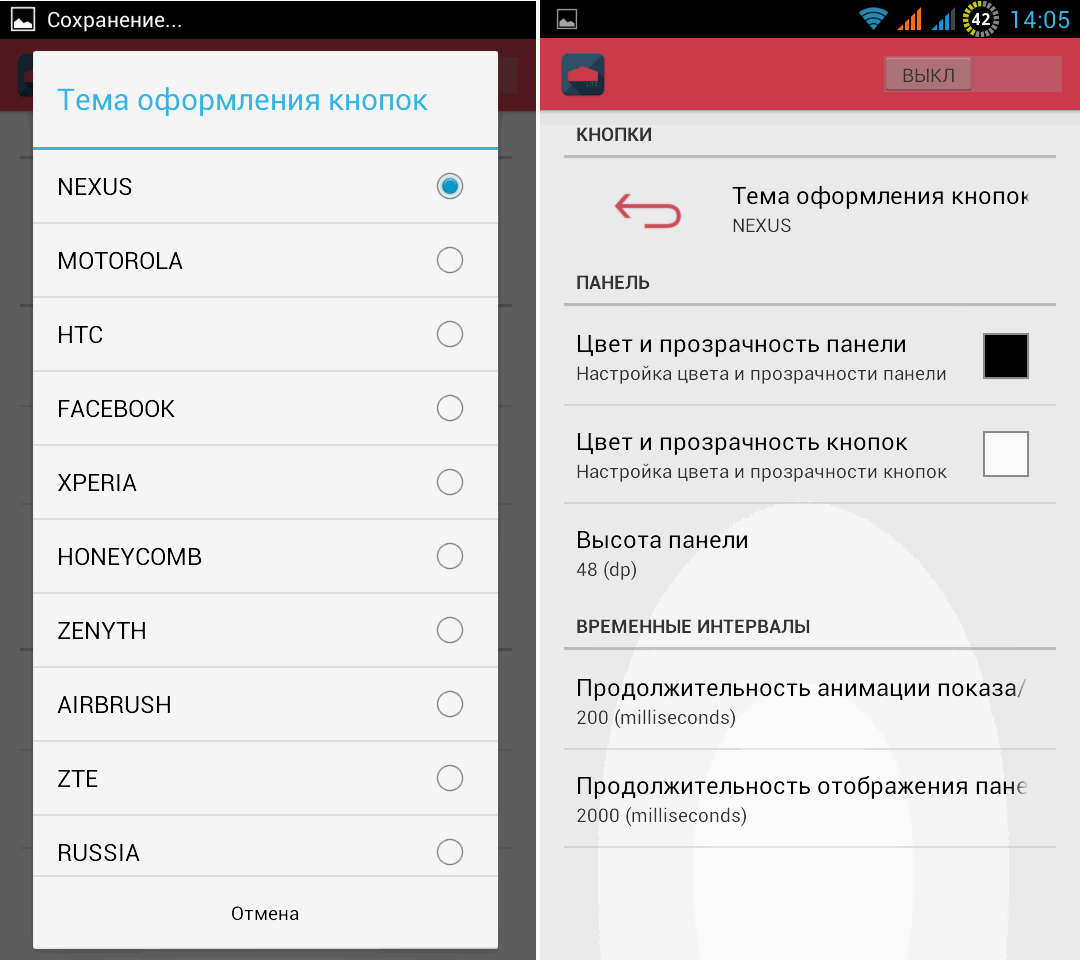
Using the application is quite simple and convenient. All settings are clear and you can fully customize your new navigation bar by changing the functions of the buttons, adding new buttons, changing their color, design style and transparency.

In addition to the standard three buttons Menu, Home and Recent apps, you can add two more buttons to the panel, which can be assigned to call functions such as menu, search, blank screen, increase or decrease volume, close all applications and etc. Moreover, you can assign two actions to each button (simple and long click).
![]()
The appearance of the panel can be changed quite widely using more than a dozen themes, such as Facebook, Xperia, Honeycomb, Zenyth, ZTE, Samsung, etc. You can change the color and transparency of the buttons, as well as the height and transparency of the panel.
The only downside that some might consider this app is that when it appears, the new panel overlaps other elements located on the screen of your tablet or smartphone, such as application shortcuts or the Quick Launch panel (dock).
Download the latest one, and free version applications you can always
Today, many Android smartphones are deprived of hardware navigation buttons and instead offer the user to control the device through bottom panel with virtual buttons. This solution, of course, has its advantages: the devices are smaller in size and the ability to customize the sequence of virtual buttons on some devices. However, this solution also has disadvantages, and the main one is the reduction of the actual working space of the screen due to the navigation bar.
Google engineers have long found a way to compensate for this nuance by introducing into Android 4.4 “KitKat” the ability to run applications in full screen. However, not all developers have yet taken advantage of this opportunity, and many old games still run without hiding the bottom panel. But we are not only interested in games or videos. For example, it would be much more useful to use the entire screen to surf an Internet browser or social network clients.
Well, fortunately, Android is quite a flexible system, and in this article, I will tell you how to hide the navigation bar in any application using third-party applications.
Method number 1. GMD Full Screen Immersive Mode
This method is the simplest, because... does not require presence of Root- is right, but at the same time it requires Android version no lower than 4.4, and in general it does not always work correctly. However, it's worth trying before taking on more serious tools - you may be completely satisfied with it.
Significant disadvantages of this application include the inability to call the keyboard in full screen mode, and incorrect operation in some applications. For example, TapTalk in full-screen mode did not respond to screen taps at all for me, but GMD Immersive performed well in most games.
Method number 2. Xposed + Ultimate Dynamic Navbar
This method is the most convenient, reliable and flexible, but requires Root and uses two different applications at once. Follow the instructions carefully and you will succeed.
First we need the Ultimate Dynamic Navbar application
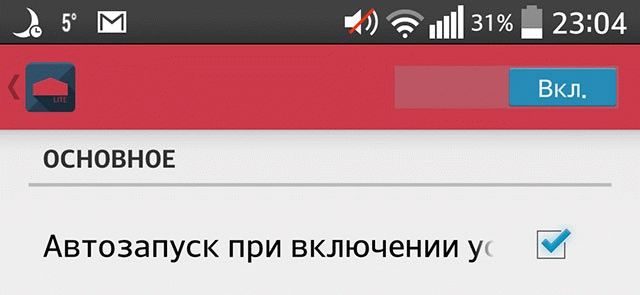
As you can see, we now have a “floating” navigation bar, but the standard fixed panel has not disappeared; to hide it, we need the Xposed Framework tool. I will tell you what this is in more detail in one of the following articles.
Hello Kedrov resident, as I promised in the previous article, I will write more, since the article was received very warmly by the community. Actually, the idea for this article was born a long time ago, but since I am, again, a lazy person, I was too lazy to write, I needed motivation, and here is another tablet ^_^, which, if I win, of course, I will give to my seven-year-old sister. I won’t hide the fact that I want to win it, it’s a good motivation, but I don’t want to write anything, the material should be useful. Nexus also found its owner (he didn’t keep it), for which many thanks to Keddr and the Asus company. But the article is about something else, namely about the customization of Android, which many so furiously point out to users and supporters of the other camp of mobile operating systems.
Introductory part
Many people are probably thinking now - “Oooh? again, another nerd will install a launcher and start harping on how Android is super customizable.”
I will say that in part, yes, but not entirely. In this article I will get by not only with the launcher, but also with some privileges root access well, since in addition to cosmetic changes to the system, I will also make functional ones, because as a geek, I can’t help but pass by such privileges.
Many can again say, as often happens in the comments, “Why should I buy a tablet or phone to change something in it, I want it to work.” And here I will answer as I see it from my bell tower.
Yes, it’s corny because I like it. In the same way, some people buy cars and refurbish them, some assemble computers rather than make do with ready-made assemblies, some build a house themselves, renovate a new apartment and much more, some simply like it. But let’s not talk about the sad stuff, let’s get straight to the fun stuff, to customization.
As a geek (I think I can safely call myself one), I am not very happy with the solutions that manufacturers provide out of the box. I miss some functionality and convenience in certain things. Many of the solutions I need are already implemented in custom firmware, for example CyanogenMod, ParanoidAndroid, but I don’t need much there either, some things are still better on stock firmware, for example, the same stability of the system as a whole. I don’t argue that some custom firmwares are stable, no, but for some reason it’s the custom firmwares that suffer from my “playful” hands, software starts crashing and the like; on stock, this happens much less often.
First steps, installing root rights
First, we need to get those treasured root rights on the tablet, with which we will do a lot. For example, I will use my Nexus 7, wifi version with 16 gigabytes. On this tablet all this is quite simple to do. First, you need to install fastboot and adb on your computer. For the purity of the experiment, I virtual system installed Linux Mint and stock, clean firmware on the tablet, Android versions 4.4.2.

To install fastboot and adb, just enter the following commands in the console:
sudo add-apt-repository ppa:nilarimogard/webupd8
sudo apt-get update
sudo apt-get install android-tools-adb android-tools-fastboot
Then unlock the bootloader on the device:
fastboot flash recovery twrp.img
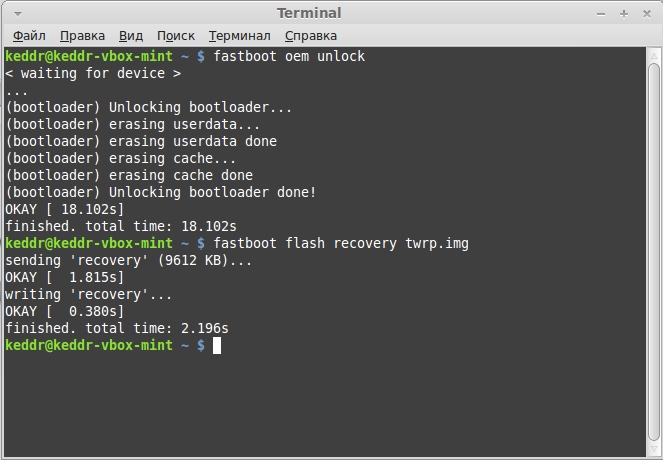
Ready. Boot into recovery and install SuperSU. Afterwards, for convenience, I set the application request for root rights, access level, to grant.

Notification curtain
A useful thing, but only if we received something on the tablet, some kind of notification, but it would be much more convenient for me to use this space. For example, set there shortcut keys to turn on/off communications - bluetooth, wifi, navigation, etc. This is what we will do, open Google Play and look for the Power Toggles application there. By using this application you can install those same shortcut keys as a widget on the desktop, but then there will be no constant access to them from applications, and that’s exactly what we need. To do this, in the application itself, go to the “Notification” section.

We drag both switches to the activity state and by default in the status bar we will see a round battery charge indicator on the left, and two functional lines have appeared in the notification shade.
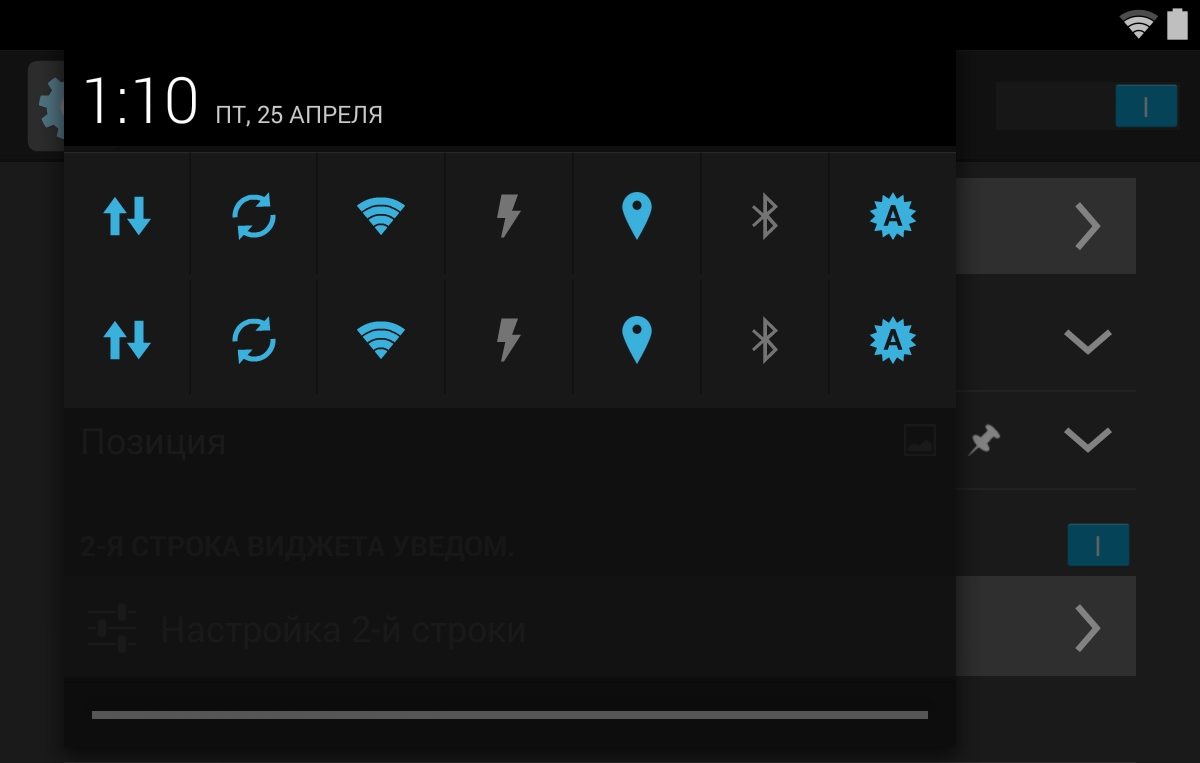
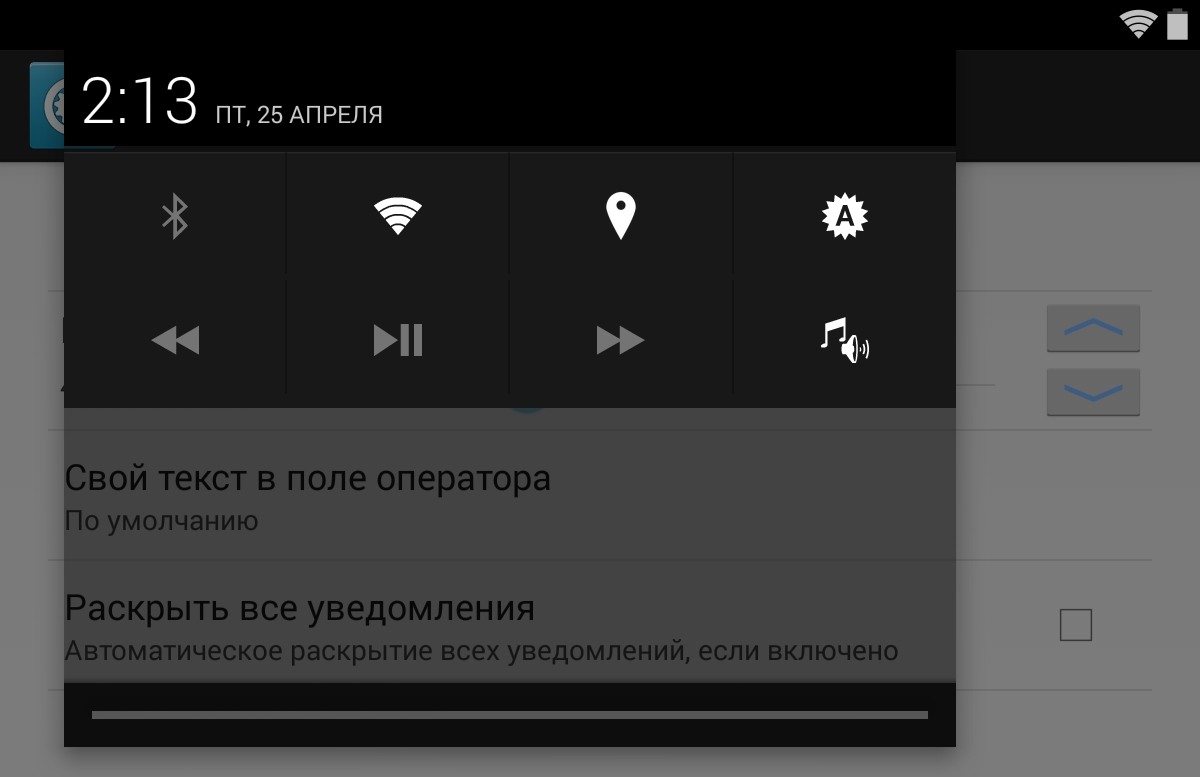
First, let's change the battery indicator, for example, to a calendar, since we will later return to the main indicator, and the calendar will be useful in some cases and set up the notification shade. For myself, in the top line I left quick on/off bluetooth, wifi, gps and brightness settings. On the bottom line are player control buttons. I also checked the box to automatically minimize when pressed. There are plenty of options for adding, everyone can choose according to their taste, you can also set your own icons as desired.


Comprehensive, useful interface improvements
This is where we’ll go wild, change the top notification line, change the battery level indicator, add some features to the bottom navigation bar, change the multitasking window and much more. Fortunately, all this can be done with one mega powerful tweak, Xposed Installer. Unfortunately, it is not on Google Play, so we go to 4pda and download it there, or follow the link.
Attention!!! You do all subsequent actions at your own peril and risk!!!
Nothing has happened to me yet in the few months I've been using this tweak, but I must warn you, since the program uses root rights and changes a lot in the system.
The application greets us with a notification that the required Framework is not installed, we click on install, agree to reboot and go back to the application.

We go to the download section and look for GravityBox there, in my case it’s GravityBox, that is, KitKat. We download, agree to the installation, return to the Xposed Installer root menu and in the modules section put a checkmark next to the one you need. Then we reboot. Now you can go from the menu to GravityBox and start playing around.

Lock screen
In the lock screen settings, you can change the background and its transparency. You can assign up to 7 different shortcuts to applications.
You can display the battery status in the form of an additional circle around the unlock ring, turn on the flashlight when you click on the unlock ring, double-click to sleep, move the lock ring in different directions, configure widgets, change the operator text, and more.
Status bar
The status bar settings item is divided into sub-items. IN quick settings you can choose what will be on the tile panel, their number, size, order, association of certain tiles with applications, etc. For clarity, I included all possible tiles.

It is possible to customize the color of the status bar and the color of the icons, but I think we won’t touch this, white icons on a black bar look good. In another menu, you can set the transparency level of the notification curtain, the background, and your own text in the operator field. As for me, it looks good and gives some ease of perception.
In the “Battery Settings” section, you can select the display type (stock, round, round with percentages, KitKat, KitKat with percentages), and also hide the indicator, leaving, for example, only the charge indicator in percentage; at the same time, you can adjust the font size, its style, etc. I like it, round with percentages.
In the clock settings menu item, you can hide it, leave it in the center, turn on the display of days of the week, text size, display or show the alarm icon, and assign an application to the clock when you hold or press the indicator.
Another nice and useful element in the notification bar is the ability to turn on the traffic monitoring indicator. There are two options, simple, which sums up the overall speed, and omni, which separates sending and receiving. You can configure the indicator position (left, right), monitoring mode (output only, receive only, both directions), icon display (arrows), and indicator size.
And the last, no less interesting settings for the status bar is the ability to block these same notifications from various programs, turning on the brightness setting by swiping your finger along the status bar and the ability to “put to sleep” the device by double-tapping your finger on the status bar.
Navigation bar
What can you do with the navigation bar? Yes, a lot of things. The first nice thing is the ability to enable the display of the menu button (3 dots to call context menu). You can swap the back keys and the key running applications. You can also enable a custom button on which you can assign different functions, applications, application lists. You can also assign different actions when you tap, double-tap, or hold.
You can also enable adding arrows when typing to make it more convenient to control the cursor. And finally, you can set the height of this panel.

In games that do not support auto-hide, you can force hide the navigation bar, but not only in games. It is possible to enable a fan menu, which will be convenient in the absence of a navigation bar; it can be called by swiping from any side to which you attached it. There are also a lot of settings, right down to the color and functions of the fan buttons.

Food menu
GravityBox also has tablet power settings. Features include a shutdown on the lock screen, an advanced reboot menu ( Soft reboot, reboot, reboot into recovery and downloader), screenshot, video recording from the screen, setting up various sound notifications when charging is connected, the battery level is low...

Media Settings
In the multimedia section, it is useful to expand the capabilities in this direction
- Change tracks by holding the volume keys when the screen is off;
- More volume levels (more precise adjustment);
- Enable the volume buttons to change places when you rotate the screen;
- Safe volume (when connecting headphones, volume less than 30%);
- Advanced volume control panel;
- Adjust the transparency of the volume control panel.

Navigation buttons
In this menu item you can configure both physical and on-screen buttons. The buttons can be configured for both holding and double pressing, double pressing speed, and holding time. You can customize the volume buttons to move through text while editing.
Other settings
In the “Other settings” menu item, you can change the panel of running applications. Add a button to close all applications and a line displaying the quantity random access memory on the device.

At this stage, the interesting features of GravityBox are over; I have not described everything, but the most important ones. Now let's move on to installing useful extensions for the lock screen.
DashClock Widget
In Google Play we look for the DashClock Widget application, install it and simultaneously deliver useful permissions for this program. Using it, you can display useful notifications and interesting information on the lock screen.

Pushbullet
Added to the list of useful functionality extensions. As for me, the program is a “must have” for many. Using it, you can exchange links between your computer browser and your tablet, and vice versa, exchange files, pictures, and so on (all the pictures in the article were transferred to the computer via Pushbullet). Everything is done very simply, on a tablet, for example, select a picture in the gallery and click share using Pushbullet, that’s it, the picture is on the computer. You can also use this program to monitor notifications on your Android device from a computer.
StickMount
If we are talking not only about cosmetic modifications, then the StickMount program will also be useful for devices that by default cannot connect a flash drive to their gadget. When connecting, you must provide root program rights and the drive will be mounted as a regular directory
Launcher and icons
Launcher is not only beautiful, but also useful addition, in some launchers you can customize a lot, from desktops to sorting icons and widgets in the menu. I prefer to use Apex Launcher paired with MIUI X5 icons. In the menu, all my icons should be sorted into folders (categories), so it’s much faster to navigate the menu, but now it’s already 4 at night, it’s almost morning and I won’t sort the applications, I’ll just post a screenshot.

You can “usefully” decorate your desktop with widgets, I use weather widgets and for quick notes, change the picture or try a more interesting launcher in terms of customization, for example Buzz Launcher.
Results
As you can see, Android can be not only “beautifully”, but also usefully customized, although this requires root access. I hope this article will be useful and useful to someone. I was able to change the top notification line, both curtains in the top line, changed the bottom navigation bar, window open applications, some functionality of the keys, expanded some menus with useful items, changed the lock screen and more... I think you won’t scold me too much for some of my mistakes, I wrote at night, I didn’t really want to sleep, but I was a little inattentive.
Share your Android customization options in the comments, or better yet, write on blogs if the material is worthwhile.
Like, repost, retweet, star and everything else, leave comments and I will write more.
Thanks for reading, good luck everyone :)
If you find an error, please highlight a piece of text and click Ctrl+Enter.
Greetings, dear readers and admirers of Helpix. Today I present to your attention a tweak for pure Android - GravityBox version 3.5.7 for Android 4.2 (4.4 and 5 have their own versions) from the developer C3C076.
Applications for decorating the graphical interface of the operating system have always been, are and will be... there. There are resources. But nevertheless, the demand for them, as well as the supply, does not dry out. At one time, Android was served under the guise of fully customizable GUI to suit the tastes of the end consumer - you and me. At this point in time (it was 2015 in the morning), there are a lot of applications for decorating and transforming Android, well, just a lot. You can change everything, and not just change the picture on your desktop.
There are also various tweak applications for optimizing the performance of Android (in general, there are tweaks for any OS, but we are talking about Android for now). Stock Android does not have all the settings we need and want.
Many manufacturers of smartphones and tablets, especially large ones (Samsung, Sony, LG, Lenovo, HTC, etc.), have long taken the path of developing their own, supposedly unique user interfaces for Android. For example, you buy samsung smartphone and you get TouchWiz. And along with HTC, Sense comes into play. Lenovo installs, you won’t believe it, Lenovo Launcher on its devices (I wonder if this is an ambitious name or if there just wasn’t enough imagination for another name?). The proprietary user interface, of course, gives the user much greater customization options, as well as a more pleasant and beautiful (controversial point) appearance. But do you like everything about the proprietary firmware? Or is there something you wouldn't mind changing? But, as you know, you can’t please everyone. And manufacturers tend to make their firmware (launchers, user interfaces) not only effective, but also spectacular, which is not always good.
In addition to branded firmware, there are so-called custom or unofficial firmware. The meaning is the same, but the premises are diametrically opposed. Branded firmware comes from the manufacturer and imposes something of its own on us. Custom firmware is handicrafts made by enthusiasts (singles or small groups), designed to meet the needs of ordinary users. The enthusiasts themselves are the same users as we are, only they know and are able to do a little (or not a little) more than us. The advantages of unofficial firmware are many additional functions (useful and cosmetic) and programs, often root rights, as well as speed of operation and so on. But glitches are not uncommon, so there’s no need to hide them.
It is with these intricacies of thoughts that I bring you to the topic of today’s review. After all, you don’t have to reflash it, you can install GravityBox and change the stock (and not only stock) firmware beyond recognition. Completely unrecognizable both in appearance and partially in functionality. You can selectively customize the firmware of your device so that it suits exactly your tastes, preferences and desires, and not the tastes of guys from Samsung, Lenovo, LG, Google and others.
What can GravityBox do? Is it worth the trouble? After all, the device will have to be rooted, without this there is no way. The list of features of GravityBox is quite wide and large; just look at the main form:
That is, you can:
As you can see, you can do such a lot of things that you’ll get pumped up! Or you'll fall. You will fall off your feet from surprise or lose heart at the sight of a brick that you will now have to reflash to revive it. Therefore, I will repeat the developer: do not install GravityBox until you have completed system backup. I made a backup - go for a walk safely.
So, let's throw ourselves into the abyss of settings and modes. But let's start with the initial data, that is, with our experimental subject. This is a Lenovo P780 with Android 4.2.1 on board and Lenovo Launcher installed on top.
Please note that GravityBox is not guaranteed to work on Samsung TouchWiz. HTC Sense, MIUI and LeWa. Not guaranteed, but not prohibited either. I tried installing GravityBox on a Samsung 3 Lite tablet: many functions did not work, but many felt right at home (especially the settings for the status bar, fan menu and navigation bar). On some devices, GravityBox may not even start. Lenovo Launcher was unable to do anything against GravityBox and surrendered to the mercy of the winner in almost all positions.
And further. You haven't forgotten, have you? Remember that all this
I’ll note right away that I won’t rewrite or screenshot every single setting, otherwise it won’t be a review, but a multi-volume instruction manual. I will mention simple and uninteresting settings in a word or two. Let's get started.
Lock screen settings
In the "Lock screen background" section, we configure, of course, the background of the lock screen. Filling with color, standard (from the desktop) and custom wallpaper, last screen as wallpaper, disabling the lock screen shadow - all this is selected here. Everything works, only I didn’t like the last screen as wallpaper on the lock screen because it takes too long to think (while it’s taking a screenshot, while it’s applying it, etc.).
The "Unlock Ring" section is more interesting. And the item “Unlock ring shortcuts” is interesting.