Today I’ll tell you how to enable it for the site Adobe Flash Player in Google browser Chrome and others from its family (Opera, Vivaldi, Yandex, Chromium etc.).
At a certain point in the browser Google Chrome The policy has changed. And if before Adobe Flash Player was included for all sites, now by default everything is the other way around: Adobe Flash Player switched off for all sites. And in order to enable it for a certain site (or even all sites), you need to carry out a fairly simple sequence of actions, 3 options of which are described below.
Option No. 1, simple
Find the place on the page where the player should have been:
Click the mouse pointer on this place. You kindly allow in the window that appears: 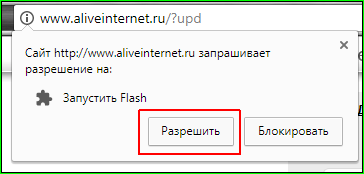
Option No. 2, difficult
Especially for those who don’t like poking the mouse on the page. You need to go to the address bar and click the letter “i” in the circle in front of the site address (if you hover your mouse over it, the “Site Information” hint will pop up): 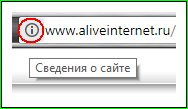
Select "Flash" from the drop-down menu: 
There, select the option “Always allow on this site”: 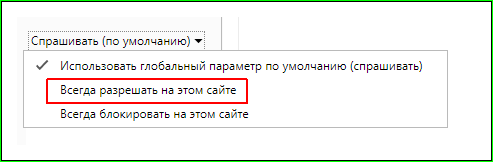
The browser may want to reload the page:
I advise you to do this.
That's all. As you can see, it's not very difficult.
There is also a 3rd option (you can allow Flash on all sites), but I would strongly advise against using this option. But for those who want to take a risk.
Option No. 3, dangerous
Go to Google Chrome content settings. In order not to go through the menu for a long time, you can immediately copy from here and paste into address bar this address - chrome://settings/content/flash
. And then, of course, switch to it.
There you need to put the switches like this 
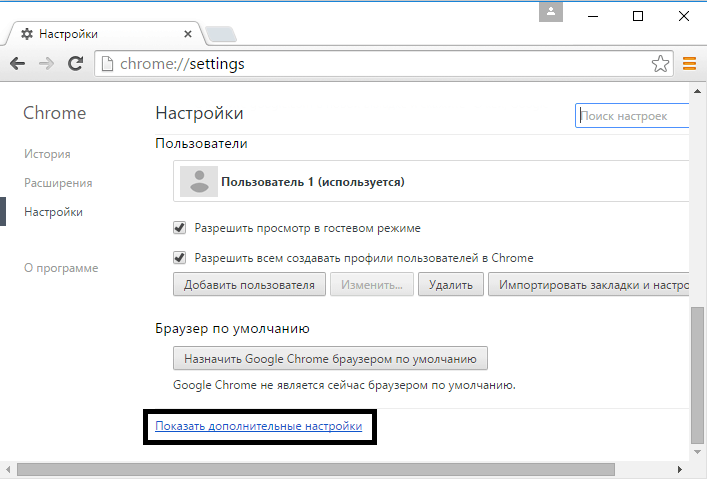
If you take the long route, then go to “Settings”: 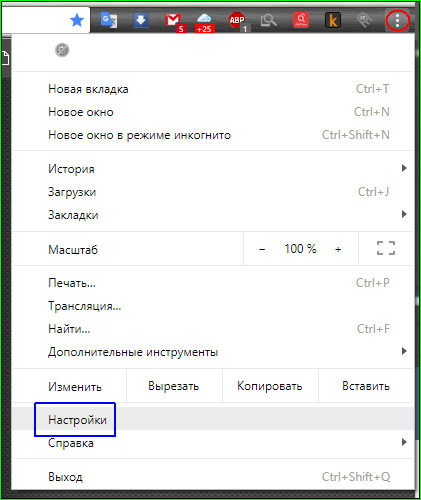
There - all the way down, look for the inscription "Additional" 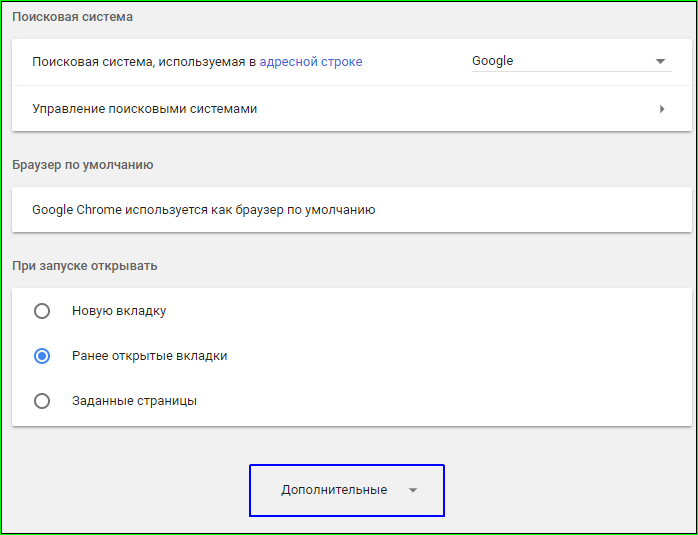
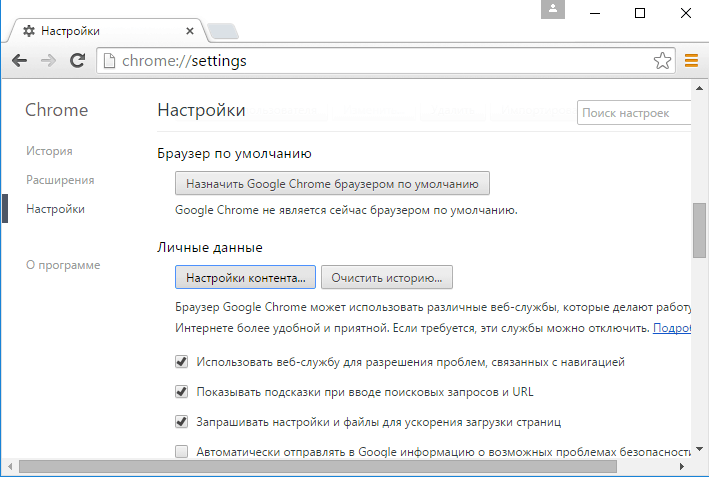
Then you need to find "Content Settings": 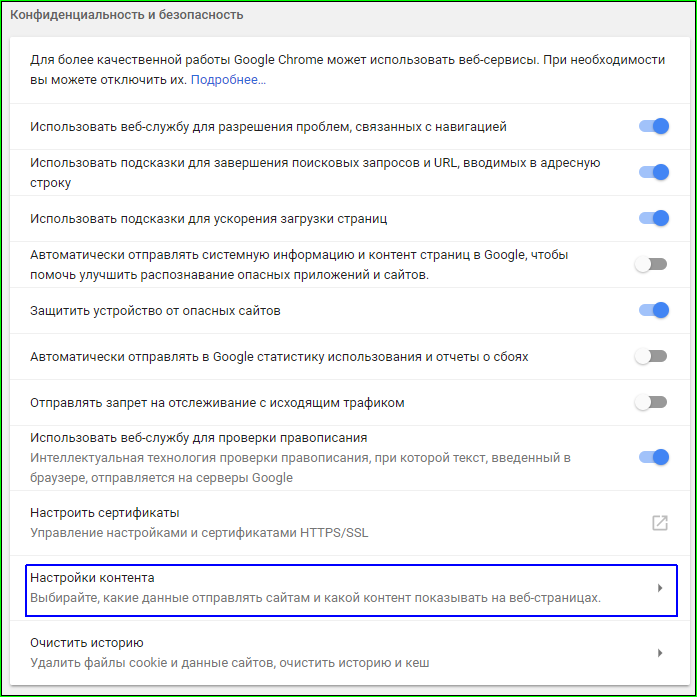
Find the "Flash" item there: 
And then do it like this:
All! Flash will work on all sites and no one will ask you anything about it.
Initially, the Google Chrome browser already has Flash Player built-in, but if you decide that it is outdated, we will tell you how to update it.
The first and, perhaps, the easiest way to update the Flash player in Chrome is to simply update the browser itself. You can read how to do this in the article – Updating the Google Chrome browser.
And now the second way to update the Flash player through the official Adobe website.
Step 1. Download Flash plugin for the Chrome browser from the official website (https://get.adobe.com/ru/flashplayer/). Go to the address and click the “Install Now” button. We wait until the browser starts downloading the file. We select a download location and wait for it to finish.
Step 2. Open the downloaded installer and disable or enable Flash Player auto-update.
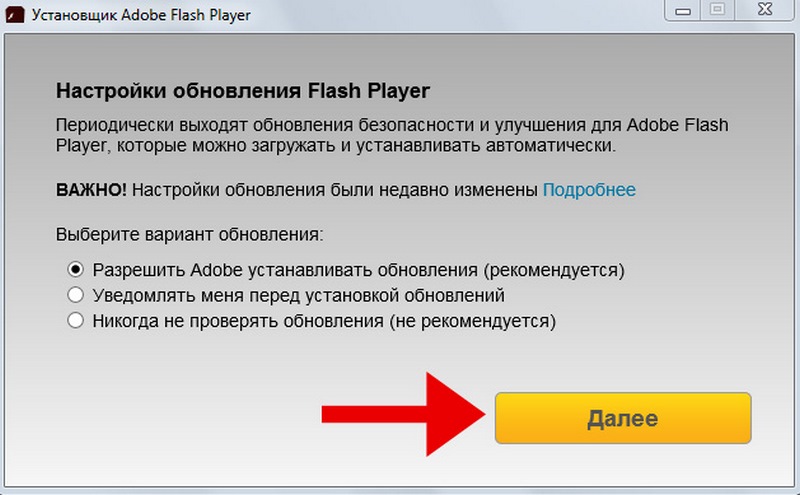
Step 3. Let's do it further instructions program and wait until the installation is completed.
That's it, the flash plugin is installed and will be used in Google Chrome and other browsers. Just remember that you must close all browsers before installation.
We present to you several options for solving problems associated with unstable operation of the Flash Player plugin in the Chrome browser.
TroubleshootingAppData
Go to Start à In the search, type in “%appdata%\Adobe” à Enter to find objects. In the search results we will find the “Adobe” folder. Go to it, look for a folder called “Flash Player” and delete it.

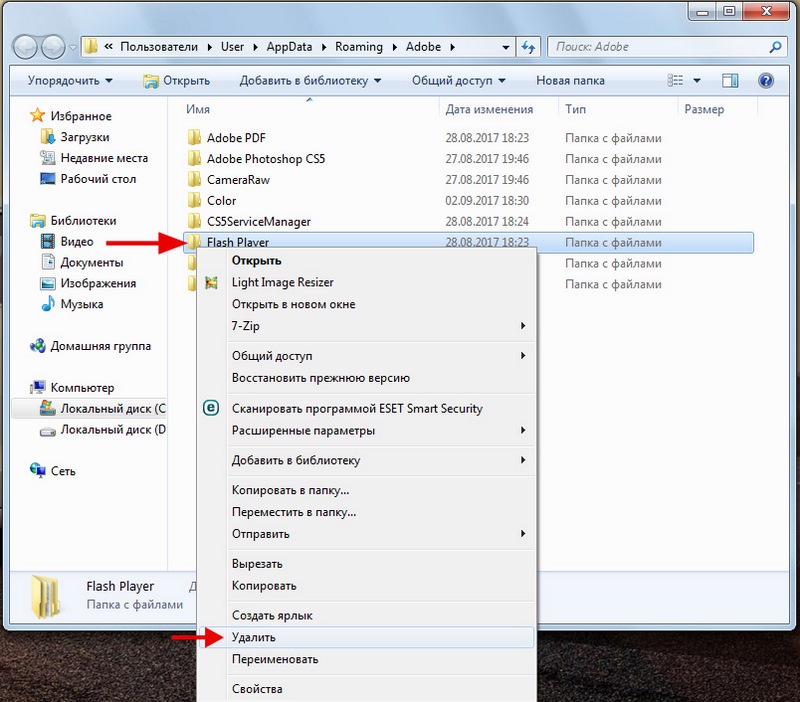
Now you need to use the same principle to find %appdata%\Macromedia in the search and also delete the “Flash Player” folder.
After the above steps, you need to launch the browser and check whether the Flash player is working or the problem is still there. If it doesn’t help, then we try other solutions.
Removing Flash Player data
Open the Start menu à Control Panel. At the top right, next to the View field, set “Large icons”. At the very top, select “Flash Player”.
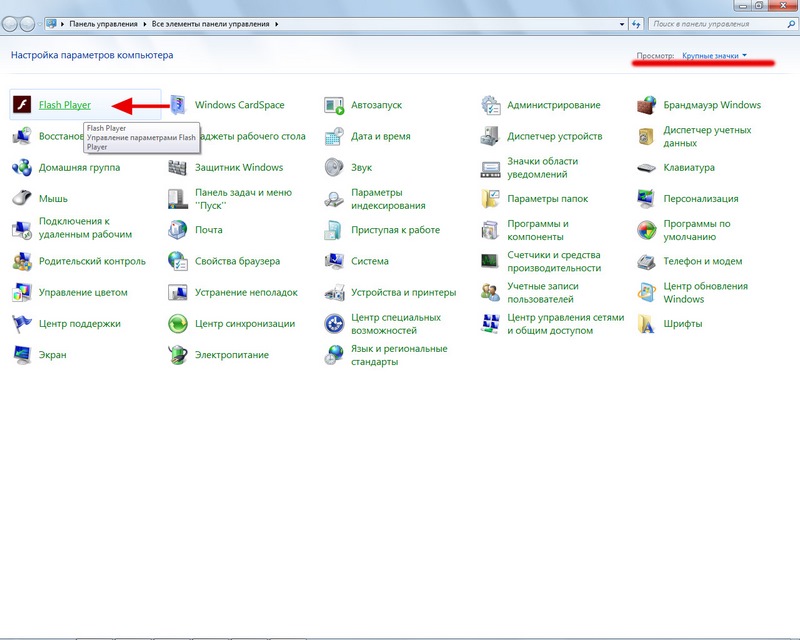
A settings window will open. We need to open the “Advanced” tab in this window and click the “Delete All” button.

Then check the box “Delete all data and site settings” and confirm your choice by clicking the “Delete data” button.
That's it, now the plugin should work without problems not only in the Google browser, but also in others.
Previously, in earlier versions, it was also possible to disable the external flash playback plugin, which is located in the System32 folder, by going to the chrome://plugins menu. This menu has now been removed.
Quite a few users daily encounter such a concept as "plugin". What is it and what is it for?
A plugin is a special module. It is different for each program. The plugin allows you to use certain additional features or special effects. In general, there are two types of plugins. Some are useful and help in the work, others act as spam, distributing unnecessary information to anyone everywhere. In this topic, we will look at how you can enable plugins in the Google Chrome browser.
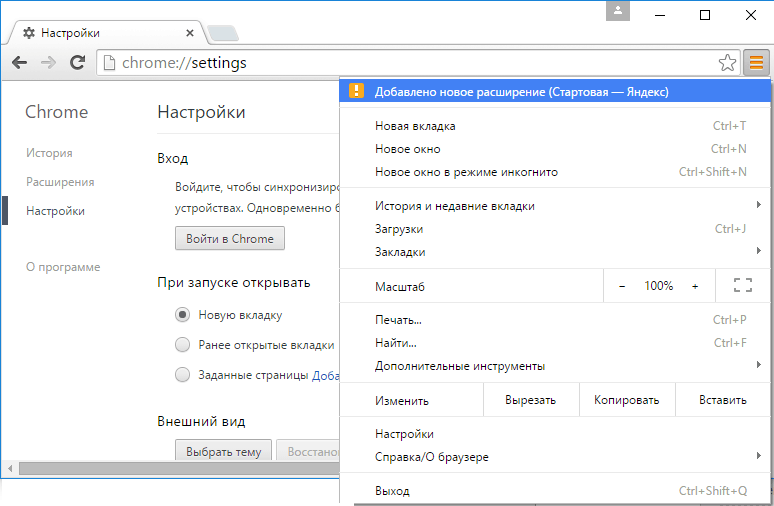
Enabling plugins is quite simple. Open the browser, find the icon In the opened "Menu" we look for and open them.

The first thing you can see there is personal data. And here there will be a point "Content Settings", click on this command.
The window that appears will indicate the item "Plugins". This is what we need. Just below is the point "Manage individual plugins", click on it.
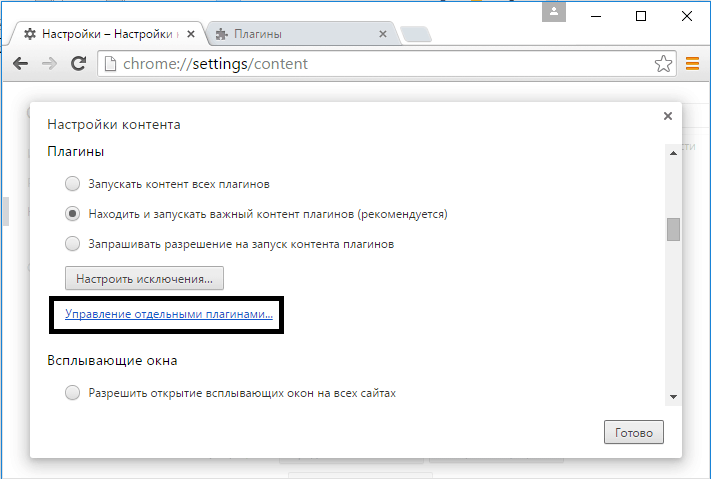
A list of all plugins should open in a new window. Select the ones we need, for example, Adobe Flash Player, and click "Turn on"

It's easier to get to the list of plugins for Google Chrome. Open your browser and type into the address bar chrome://plugins/. Next, select the plugins that you need to enable.
In addition to plugins, Google Chrome has extensions that can also be, and sometimes necessary, customized. How to do it:
Click on "Menu" browser

A list of extensions will appear with which you can perform all the necessary actions: enable, disable or delete.
Also, by clicking on "Menu" can be seen automatically installed extensions or plugins