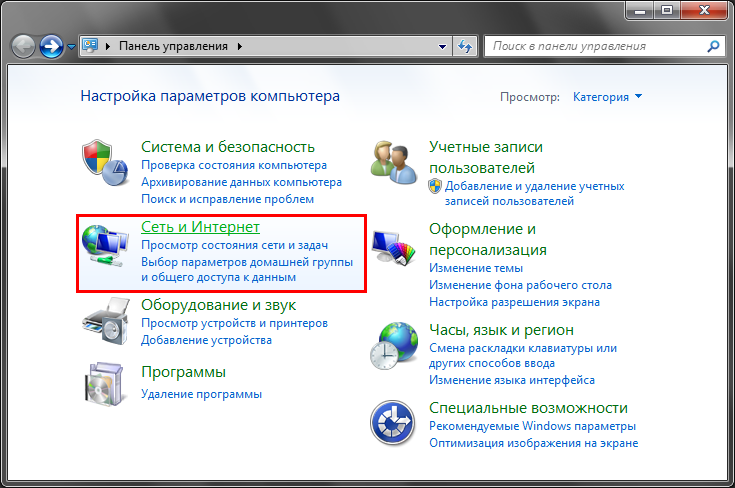
1. We enter Control Panel
2. Network and Internet
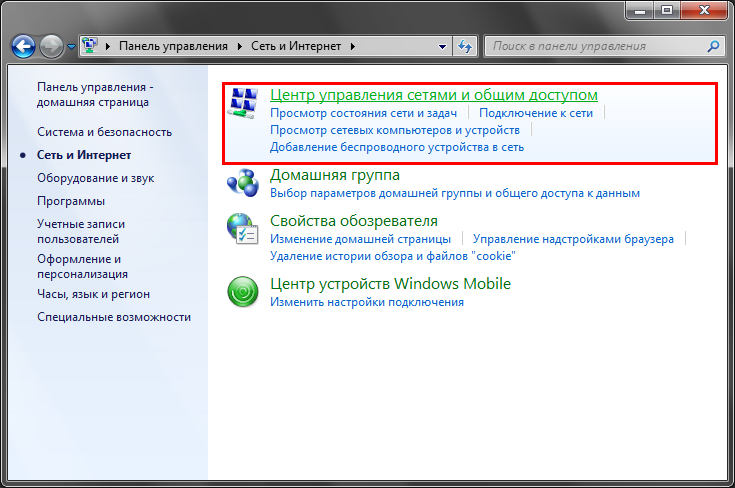
3. Network and Sharing Center
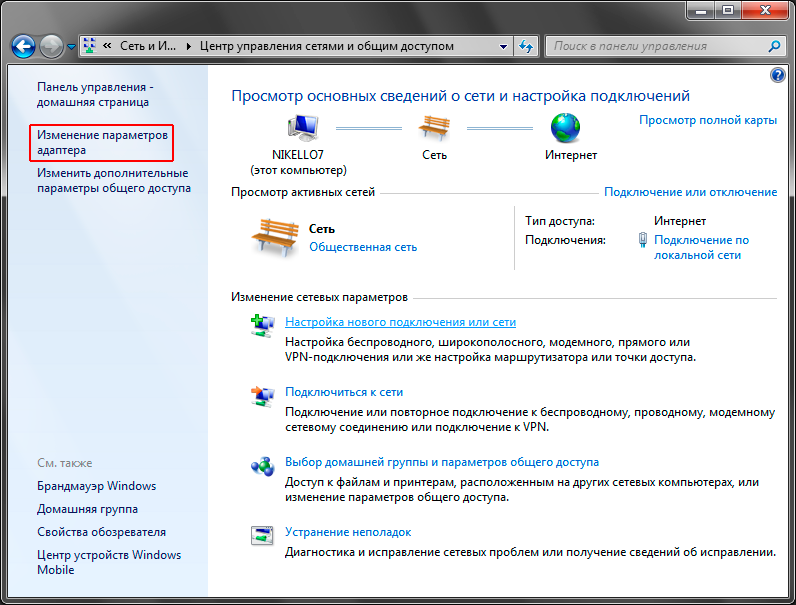
4. In the left panel, click on the itemChange adapter settings
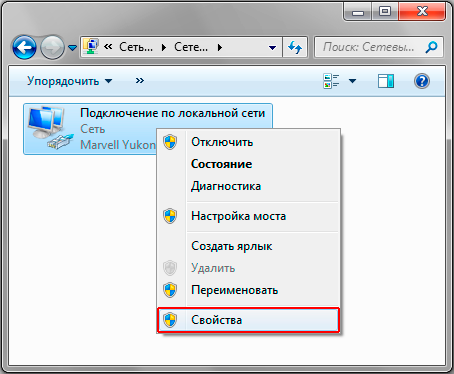
5. Right-click on the iconConnection via local network
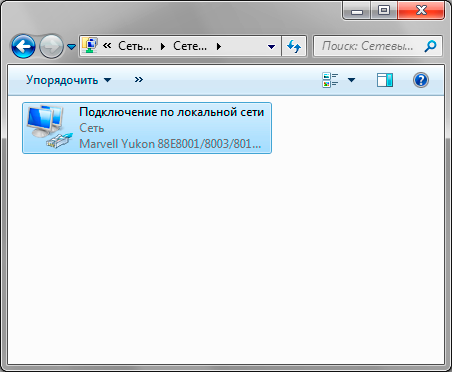
6. Select the item in the menu that appearsProperties
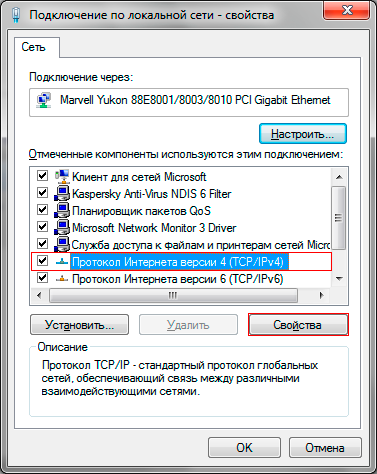
7. Select a componentInternet Protocol Version 4 (TCP/IPv4)
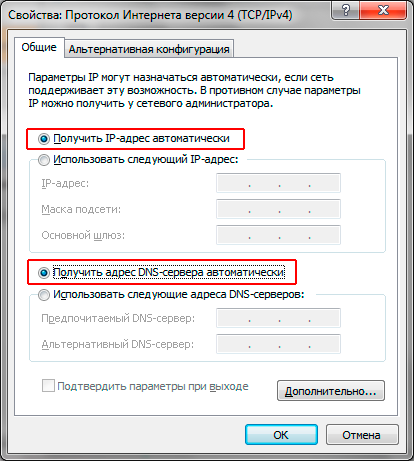
8. Celebrating Obtain an IP address automatically. We also note Get DNS server addresses automatically . Press the buttonOK
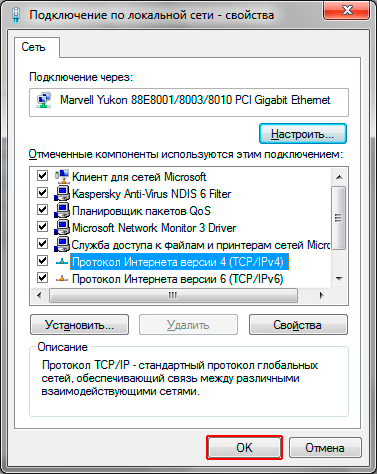
9. Press the buttonOK
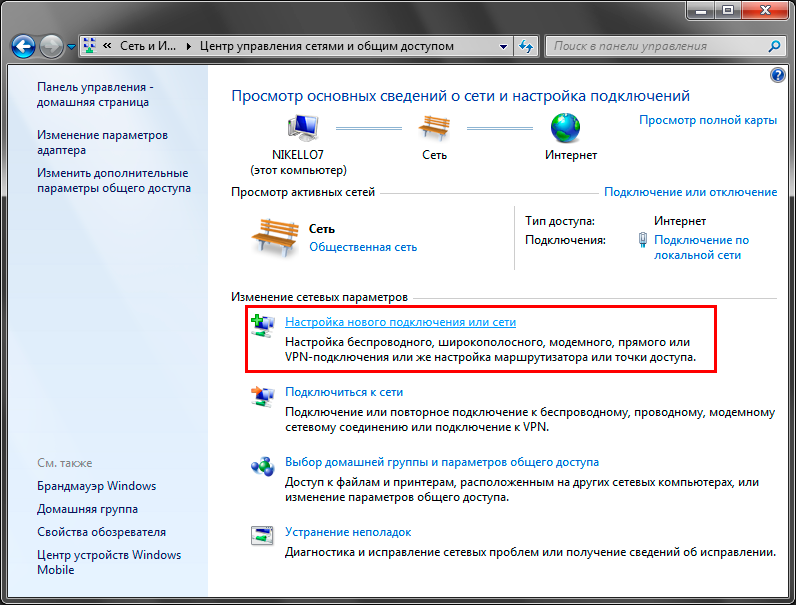
10. Setting up a new connection or network
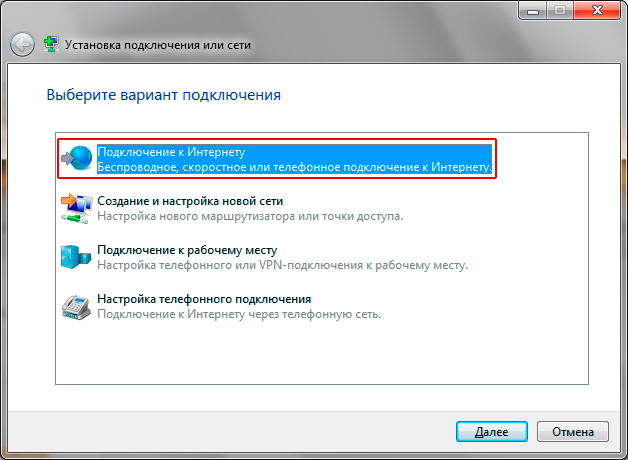
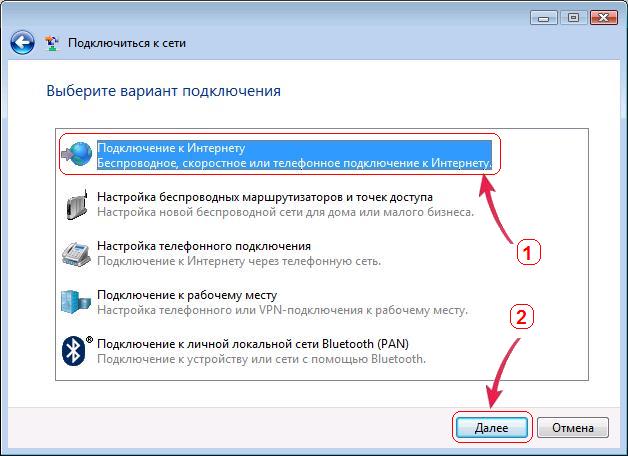
11 . In the window that appears, select the option Internet connection and press the button Further.
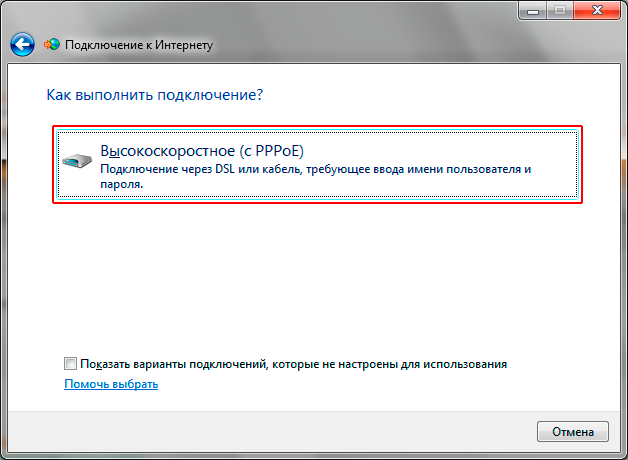
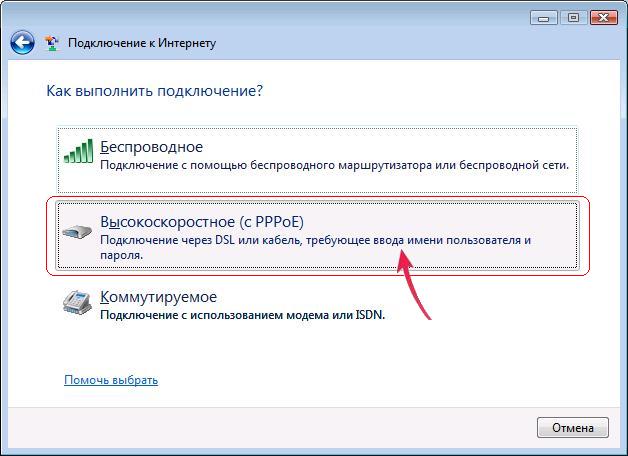
12 . Select connection type High speed (with PPPoE).
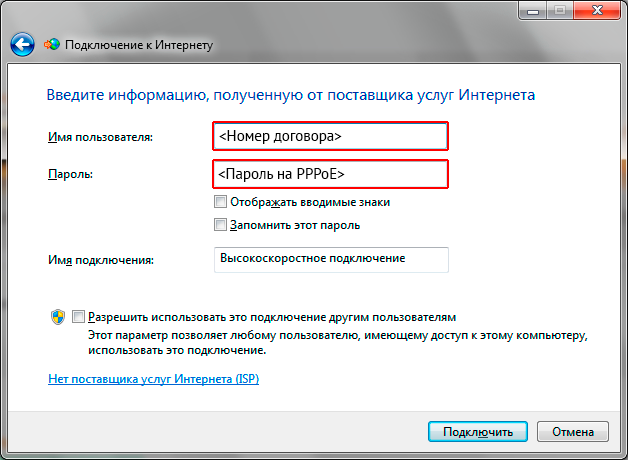
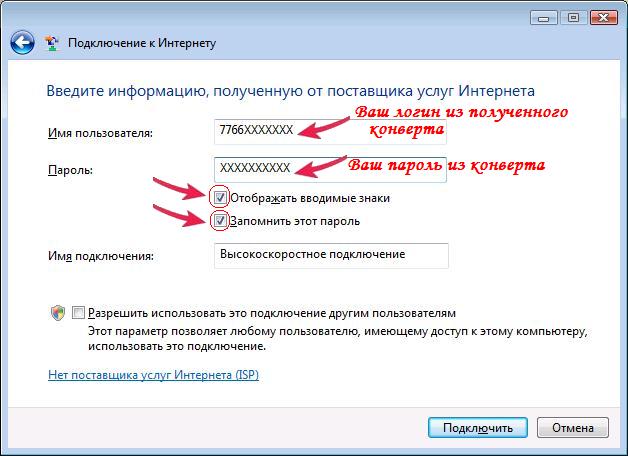
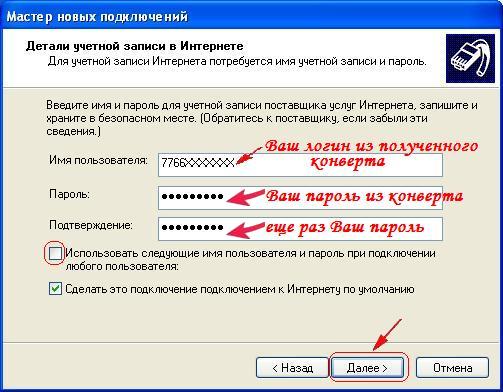
13 . A form for entering your username and password will open. If there are other users on the computer who need to be given Internet access under this account, check the Allow other users to use this connection checkbox. Enter the Username and Password given to you when concluding the agreement and click To plug.
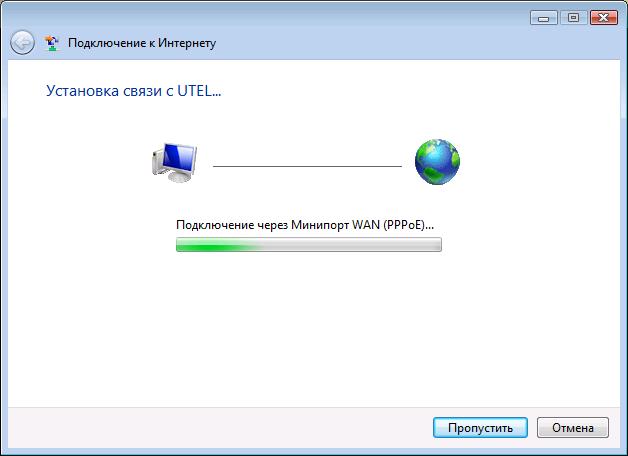
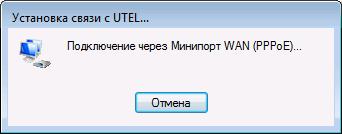
14 . We are waiting for the connection process

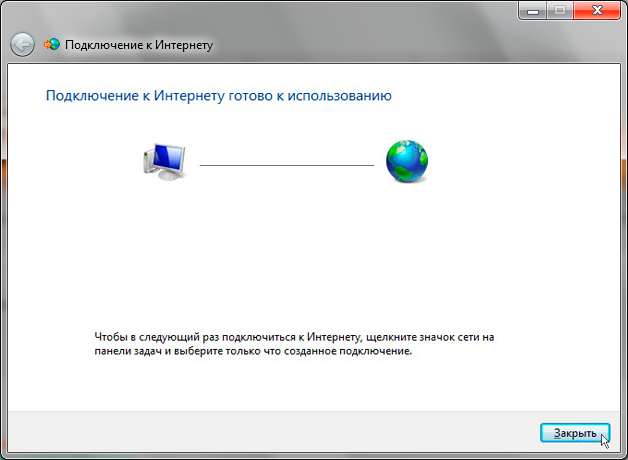
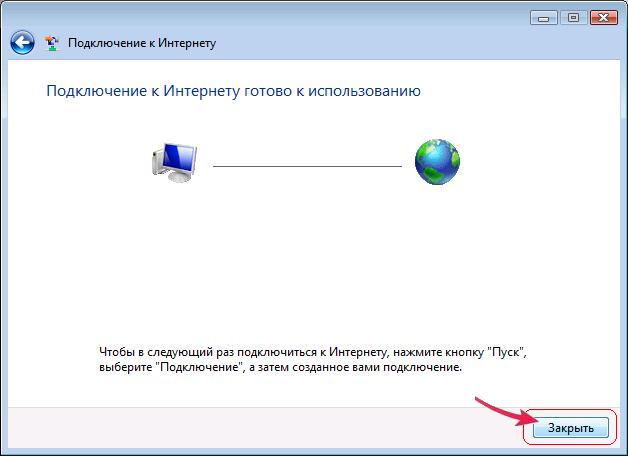
15 . The system will notify you that a new connection has been created. Now you can press the button Close.
We remind you that the administration is not responsible for your lost passwords. If you have lost your password, we advise you to immediately write a statement of loss to the office.
Date: 2013-06-20
Very often, in order to access the World Wide Web, the Internet from regular user you need to create or re-create an Internet connection on your computer. Some may ask the question - why do you need to create or be able to create, since it has already been created and works? And you need to be able to do this, first of all, so that if some kind of failure occurs in the system (and this happens quite often, take my word for it), then you would be able to recreate this connection and continue your work on the Internet.
Sometimes the connection to the Internet occurs through a high-speed connection (such an Internet connection is also called PPPoE). With such a connection, authorization ( authentication) of a user on the Internet occurs on the user’s computer itself. This connection method is most often used when connecting to the Internet via a regular ADSL modem, or where the means of communication is the most ordinary mobile phone or even a smartphone
By the way, if there was a failure in the system and the system stopped loading, then on the website in the article you can familiarize yourself with the independent and completely free recovery guide Windows systems after a crash.
Many Internet providers help create this connection through their technical service. Support, and in the case of a specialist visiting the subscriber, the connection setup service is provided on a paid basis. But if you look at it, there is nothing so grandiose in this action, everything is very simplified to the point of impossibility. There are all sorts of clues everywhere and the likelihood of getting something wrong is simply reduced to a minimum.
When concluding a contract, the Internet provider provides the user with unique Username And password. This data is strictly confidential, because... If they are lost, anyone can use this data, and therefore the Internet access service. When you create this connection and launch it, this very action attempts to connect to the server. Those. Username And password serve as a kind of pass to the Internet. The user "knocks" with these username And password to the server and if such data is acceptable on the server, then it allows access to the Internet. In this case, the user’s PC is issued and assigned a unique external IP address.
About high-speed connection or PPPoE connection
.
In another way, a high-speed connection is also called a PPPoE connection. An incomprehensible and mysterious abbreviation stands for Point-to-Point over Ethernet and is translated as Point to Point over Ethernet. Ethernet is an interface (technology) through which data is transmitted. Ethernet is also called twisted pair. If it’s already quite simple, then Ethernet ( twisted pair) this is a regular connecting cable network device(router or modem) and the user’s computer. In the review you can find out how do it yourself for free and find Additional information about the router and modem!
Creating a connection in Windows Vista/7
.
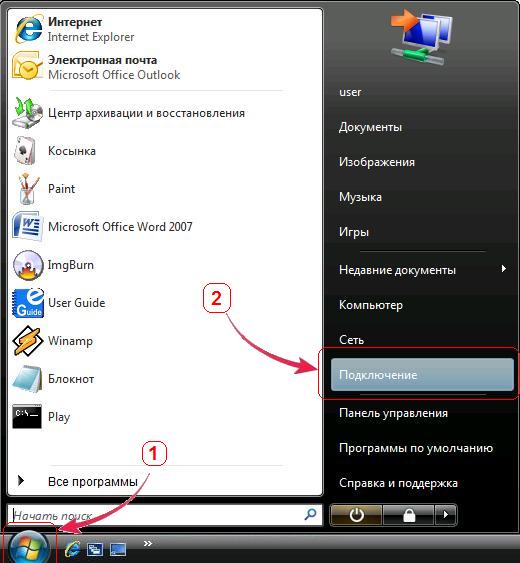
The screenshots below will show all the stages of creating an Internet connection. On the desktop, in the lower left corner, click the “Start” button. The taskbar and Start menu appear. On the right side of this panel, among all the elements, find and click on the “Connection” section.
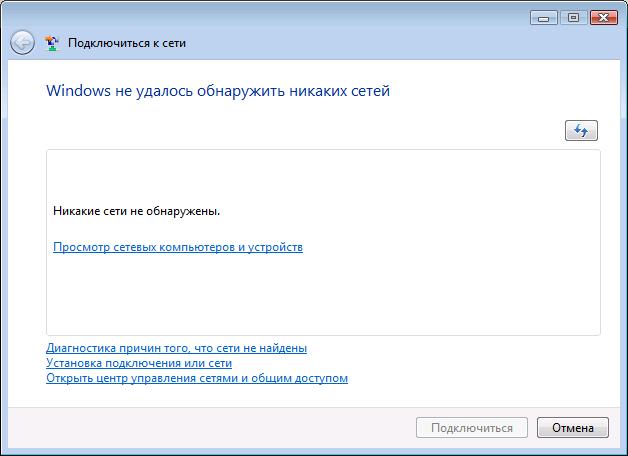
The “Connect to network” dialog box opens. At the bottom of this window, click on the link “Set up a connection or network.”
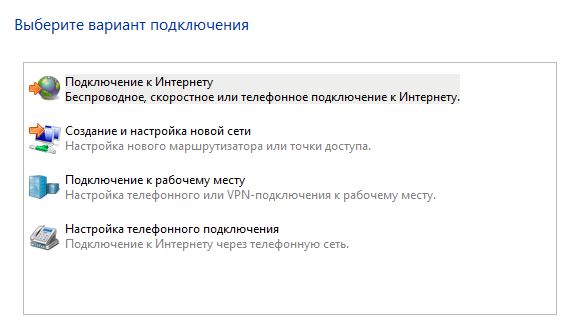
We proceed to the next stage of setting up the connection, at which you need to select the “Internet Connection” item and click on the “Next” button.
At the next stage of the dialogue, you need to indicate which connection you want to make; we indicate High-speed (with PPPoE).
In the appropriate fields on the dialog box, you must correctly and carefully enter the Username and Password - the information that was provided to you by your Internet provider. When entering this data, you need to be extremely careful and also to be more confident that the password is entered correctly, it is worth checking the “Display entered characters” checkbox.
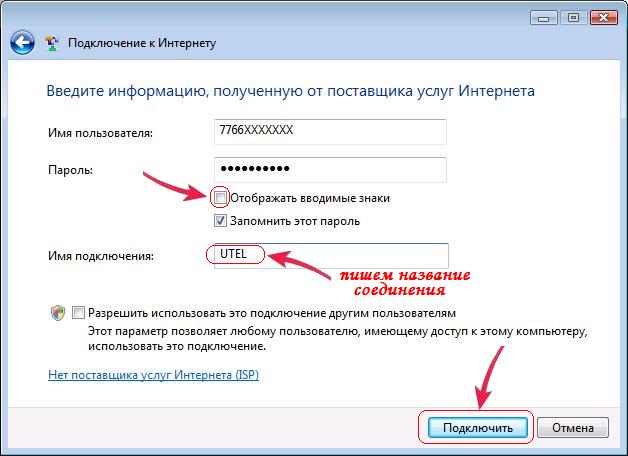
After entering and checking all the entered data, for greater security, it is necessary to uncheck the “Display entered characters” checkbox, and be sure to leave a checkmark on the “Remember this password” checkbox.

At the final stage, below, in the “Connection name” field, enter the name of the connection (any) and click “Connect”.
At the next stage, we observe the process of establishing communication.
If everything is done correctly, the connection will be created automatically. If any error occurs, the following window will appear (see below), but in despair, do not rush to close it - select the “Create this connection anyway” option:
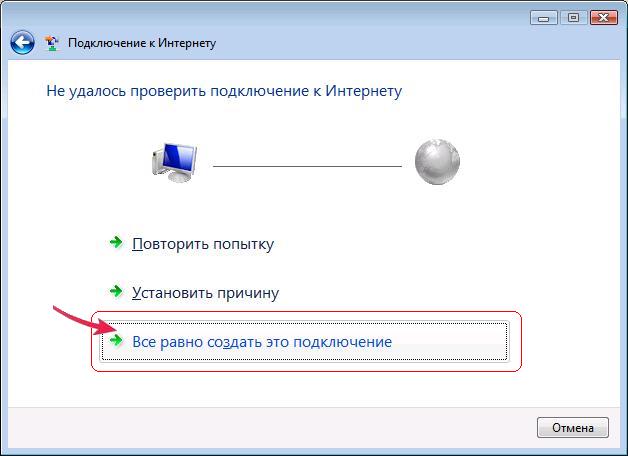
In this case, this connection (albeit with errors) will be created in the system. The window below provides information on how to start this connection the next time you try to access the Internet.
Internet setup and launch Windows connections Vista/7.
So, again we follow the path we know - on the desktop, in the lower left corner, click the “Start” button. The taskbar and Start menu appear. On the right side of this panel, among all the elements, find and click on the “Connection” section.
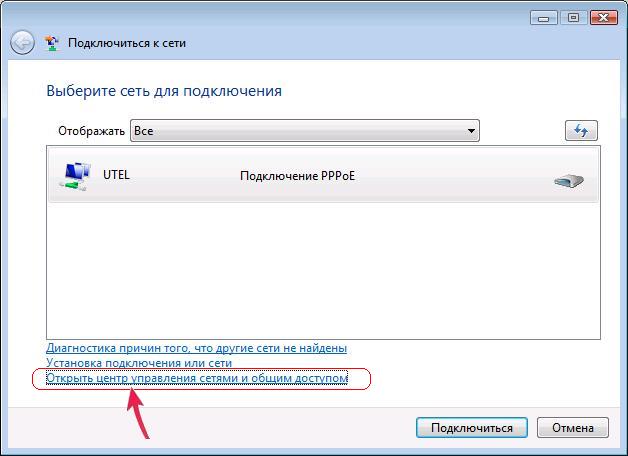
Now, to select a network to connect to, the window contains the connection we created. And if you want to connect to the Internet, then click “Connect”.
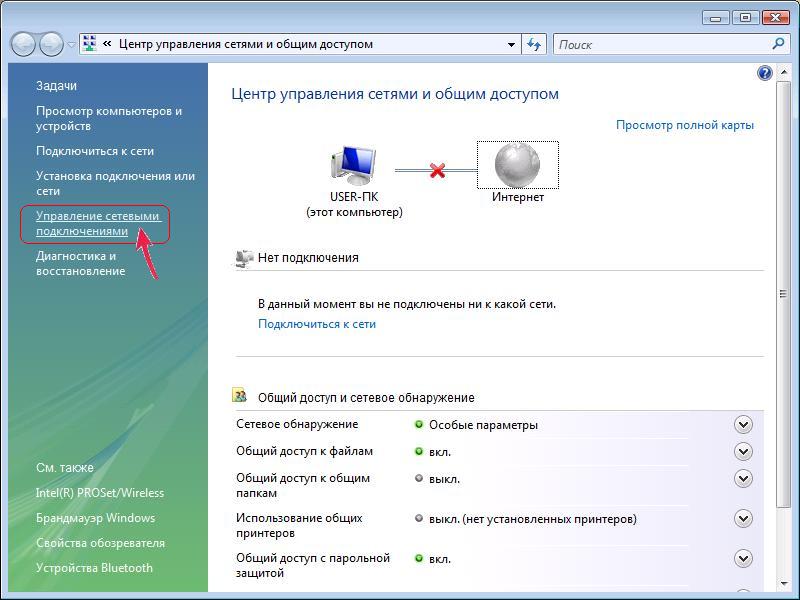
The connection has been created, but you must admit that it’s not entirely convenient to go in and select it from the taskbar and the Start menu every time. Now, in order to set up this connection for yourself and make it launch faster, let’s display a shortcut for this connection on the desktop. To do this At the very bottom of the open window, click on the link “Open Network and Sharing Center”
Then on the left side of the window, approximately in the middle, click on the “Manage network connections” link.
The window that opens shows all the created connections, including our Internet connection.
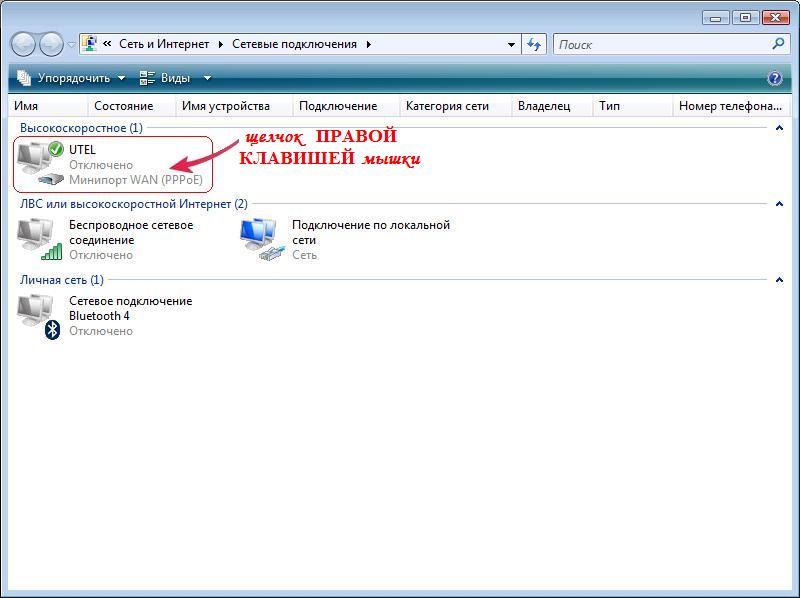
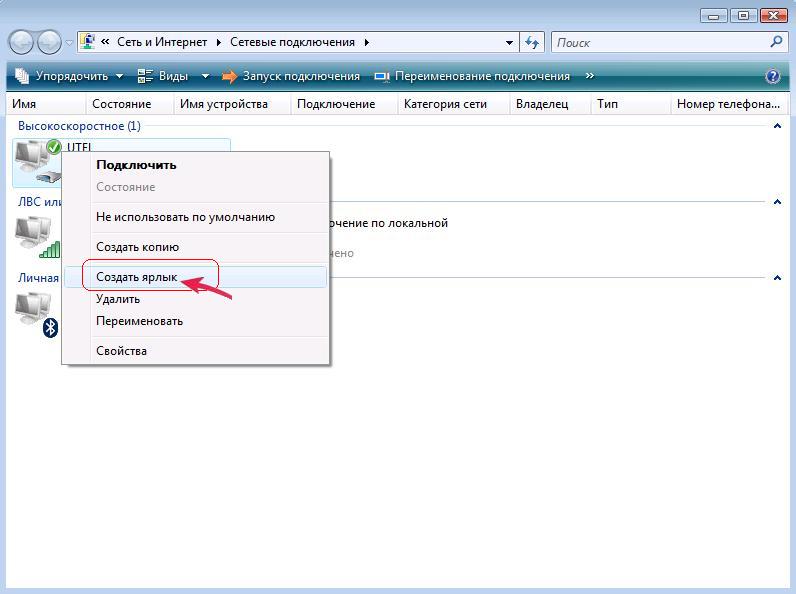
We highlight our high speed internet connection and press the right mouse button. In the appeared context menu select the “Create shortcut” item.
The following warning will appear:
We affirmatively agree with the proposal and click “Yes” in response! That's it now! The connection shortcut has been created on the desktop and to make sure of all this, close everything open windows and see the finished shortcut on the desktop.
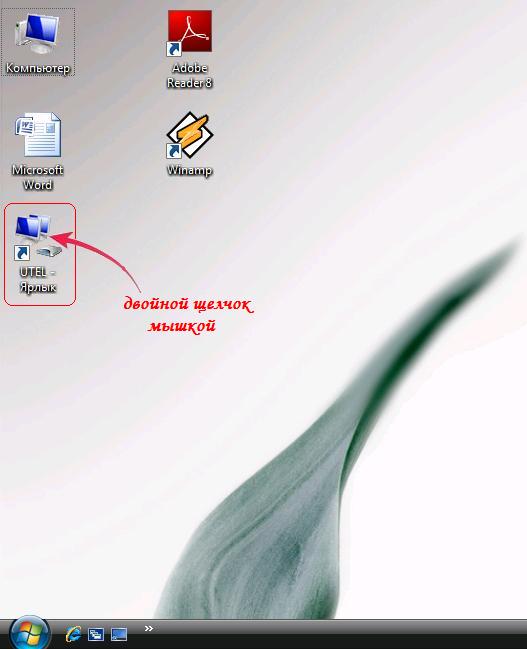
Double-click on the connection shortcut and the following window appears:
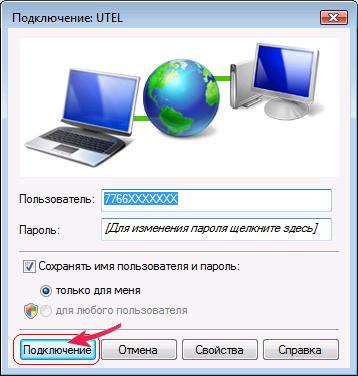
Click the “Connect” button, as a result of which a small window appears to establish an Internet connection like this:
Setting up a high-speed connection in Windows XP.
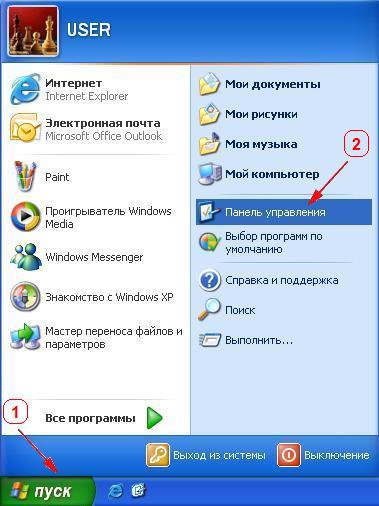
On the desktop, in the lower left corner, click the “Start” button. The taskbar and Start menu appear. On the right side of this panel, among all the elements, find and click on the “Control Panel” section.
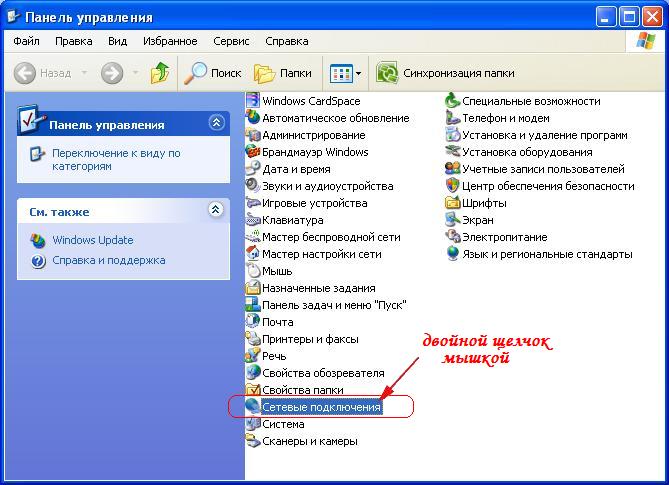
In the window that opens called “Control Panel”, find and open the “Network Connections” section. If you find this section is not working, then try switching to the classic view. You can do this by clicking on the link of the same name in the column on the left at the top.
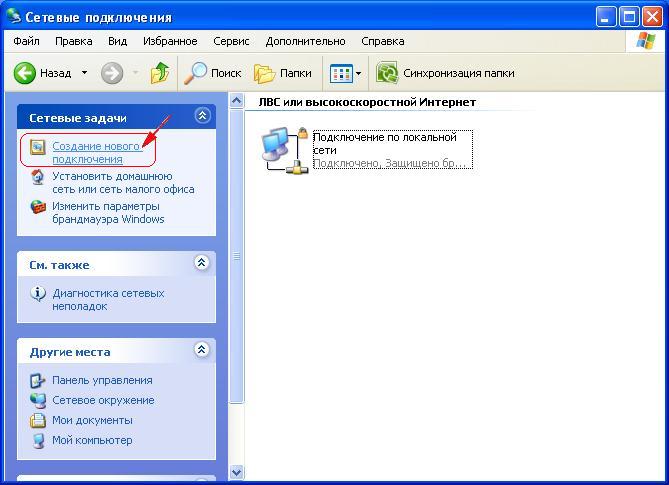
In the window that opens, in the column on the left, at the top, click on the “Create a new connection” link. If this link is missing, then at the very top, in the menu bar, select the “File” item and then here we find the “Create a new connection” submenu.
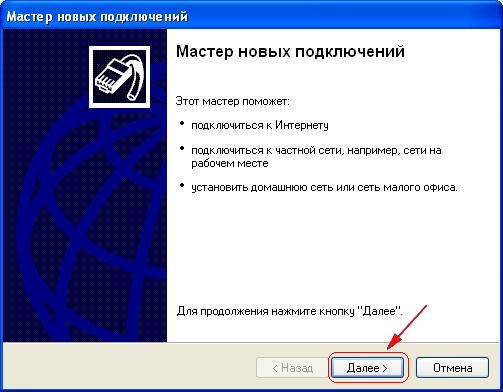
A window called “New Connection Wizard” opens, where we simply click the “Next” button.
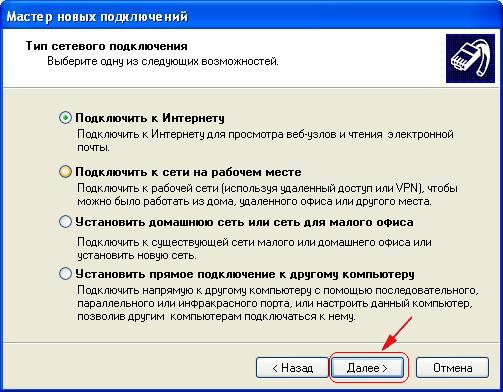
We move on to a new setup step and here you are asked to select the type of network connection. By default, the “Connect to the Internet” option is already selected. Make sure that this item is checked and click “Next”.
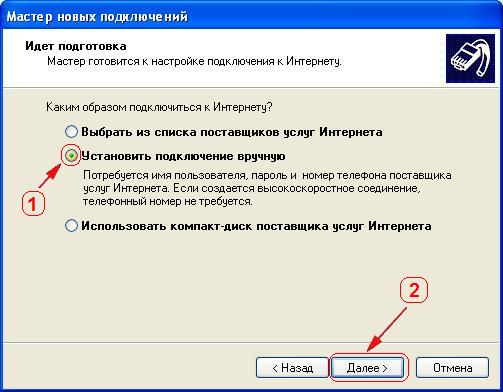
At the next stage, select “Set up a connection manually” and click the “Next” button.
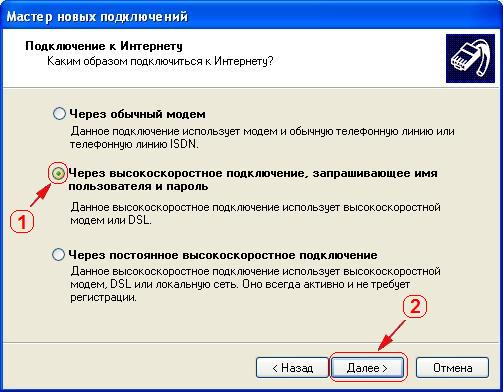
In the next step, check the box “Via a high-speed connection that requires a username and password” and click on “Next”.
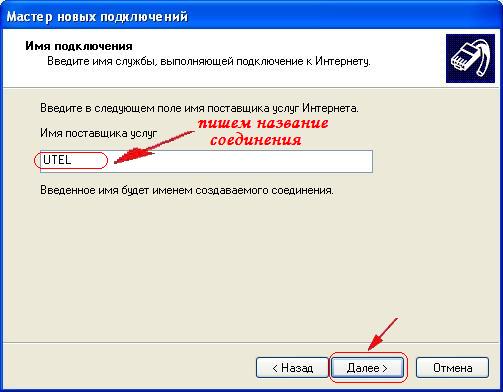
In the new window, specify absolutely any name for the connection and click the “Next” button.
At the next stage, fill in all the empty fields and go to “Next”.
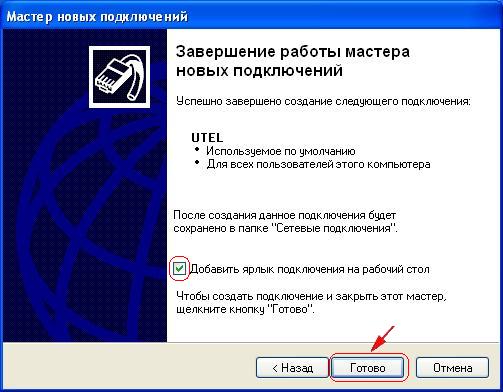
At the final stage, it is proposed to place a label for this creation of this connection to your desktop so you don’t have to go to the “Network Connections” section every time. This is what we will do, having first checked the item of the same name “Add a connection shortcut to the desktop”. Click the “Done” button. That's it, the connection is created!
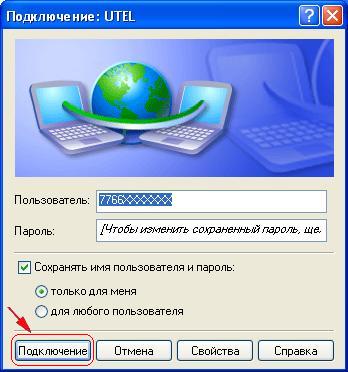
In the window that appears, click the “Connect” button. The following Internet connection establishment window appears:
You can access the World Wide Web! When trying to establish a connection, various errors may occur, but let's talk about this in another subsection.
Starting a connection and troubleshooting common errors.
By clicking the “Connect” button we wait for the result. The connection takes place in several stages. To put it simply, the connection is checked sequentially. This means that the communication equipment is first checked and whether it is connected correctly to the computer. At the first stage it is checked physical connection and if there are hardware errors, they are immediately detected by the system and the corresponding errors are generated. Then they are checked specified name user and password - and if they are entered incorrectly, then these are logical errors.
If these parameters are entered with even one typo, then the provider’s equipment cannot accept them in order to open access to the Internet. In this case, the corresponding connection error will be displayed. If any error is displayed, you need to look at its decoding and detailed description.
Improved connection settings.
Before clicking the “Connection” button, you must click on the “Properties” button. The Connection Name Properties window opens. At the top there are several tabs with changes to the properties of this connection. We go to the “Parameters” tab and here the most interesting parameters are “Number of repetitions between dialing” and “Interval between repetitions”.
By default, these parameters are set to 3 repetitions and an interval of 1 minute. You can set your own. For example, specify the number of repetitions as 10, and select the repetition interval as 5 seconds.
The review has already been viewed 5699 times!
There are an inspiring variety of modern technologies for accessing the World Wide Web - these include wireless networks, fiber optic cables, 3G and 4G modems. Each type of Internet access has positive and negative characteristics, such as cost, speed and stability. And the issue of connection complexity remains the same. Are additional specialist services necessary, or can everything be set up without assistants?
The local network

Required preparatory stage when setting up a VPN connection, PPPOE, L2TP or Wi-Fi installation router:
VPN connection, PPPOE, L2TP
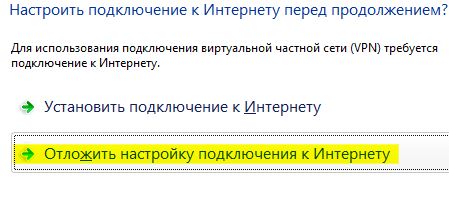
PPPoE
- In the next window, just enter the data sent by the provider into the name and password fields, check the “Remember” box and set a name for the future connection.
- To access the network, just click on the tray icon where the setup was done.
If, when configured correctly, errors 651 occur, then the problem is related to the blocking or deactivation of the computer’s MAC address. To resolve the issue, you will have to contact support, describe the error and give the physical address.
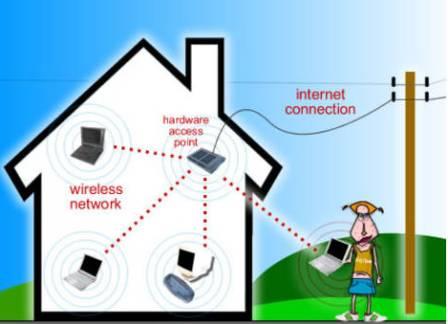
Installing a home router
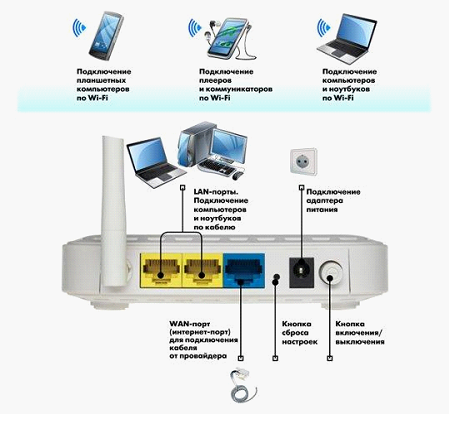
Is your home computer connected to the Internet via fiber optic cable directly? Is your recently purchased laptop completely cut off from the outside world? The ideal option is to purchase Wi-Fi router(router), independently configure the equipment and provide the entire apartment with wireless access to the network, including a laptop, phone and tablet. The Internet fee will not change, everything is according to the tariff!
- Finding a suitable location for the router. Locate the source of uninterruptible power Wifi is better in the center working area to ensure a stable signal. It is important to set the optimal height and location - a smart choice will increase the overall coverage.
- Equipment. The Wi-Fi router, first of all, should be powered from an outlet. Further connect to router laptop with a wire with two plugs (in any slot marked either with numbers or LAN names), hidden in the box with the purchased equipment. And then plug the cable provided by your provider into the WAN connector.
- Driver update. Any software must be installed in advance from the included disk.
- Setup. The method for resetting information in the TCP/IP v.4 protocol is described above, but in short, in the protocol properties you need to set the automatic method for obtaining information about IP and DNS servers.
Wi-Fi setup
- If the IP is automatic, then you won’t have to configure anything, just select the connection type in the main settings and correctly connect the router to the equipment.
- Connecting PPPoE requires entering a login and password, and at the same time setting DNS zones. All information is issued by the provider upon conclusion of the contract, so you should carefully consider all documents issued.
- Static IP. Copied from the local network settings and written to the WAN settings.
- L2TP. All information is provided and filled in the appropriate fields.
- An indicator in the panel will notify you of a correctly configured network. wireless access. But it’s too early to start using Wi-Fi; the connection needs to be secured with a password and restricted from unwanted guests. WPA will do the job just fine. So let's move on to home page router, “Security” tab. First, select the security type, then the password. Save the entered settings, reboot the router, done!
Connect to an available Wi-Fi hotspot

Get free access to wireless internet can be found in almost any modern cafe, restaurant or mall. Just activate the Wi-Fi module on your laptop, select free connection and start surfing the pages world wide web. But how do things work in practice?
More information about activating the Wi-Fi module on various laptops: 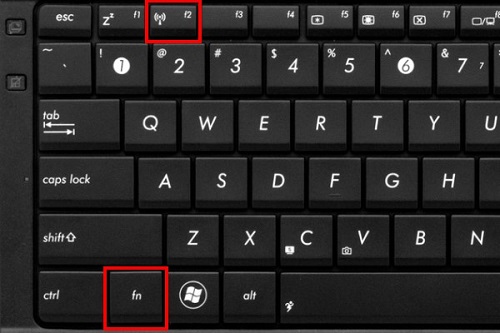
- HP. The F12 and Fn keys together enable the corresponding service. Wi-Fi icon on the keyboard will change color from featureless red to shining blue.
- ACER. The constant (regardless of the series) combination of Fn and F3 activates the connection menu and allows you to select the desired access point.
- ASUS. Activation by simultaneously pressing Fn and F. The icon lights up and information about the connection pops up.
- TOSHIBA. The buttons on the keyboard (Fn and F8) help; when the network is active, it opens access to the menu for selecting the future connection.
- SAMSUNG. A typical use of a combination of Fn and F. The control panel immediately opens.
If the function indicated in the list does not work, then you should first of all look at the keyboard. Find the key on the functional part that represents network connection. Press in combination with Fn. Sometimes the activation method through special software installed with the drivers helps.
The second option for problems is uninstalled drivers for network card, or per module WiFi. You will need to install the software from the disk included with the laptop, or using a modern utility DriverPack Solution, V automatic mode installing the missing drivers. Find necessary files You can also go to the manufacturer’s website through a search, the main thing is to know the full name of the laptop.
Connecting to an access point:
- Activating the Wi-Fi module on special equipment or a laptop to obtain a stable signal. The main problems arise at this stage, pay attention!
- Go to selection menu wireless network in the tray or in the quick access toolbar in the lower right corner of the screen.
- Determining the point available for connection, entering a password, saving settings for the next connection.
Mobile Internet 
All advertisements trumpet high-speed Internet access from anywhere in your home region - useful 3G and 4G USB modems are supplied in the form of a flash drive, take up minimal free space and do not require wires or specific knowledge to set up. Users can only choose a provider, connect the purchased device to a laptop and receive the paid service. However, sometimes difficulties arise, so it is better to dwell on each point in more detail, but in general terms.
- Unpack the modem, install the SIM card in the appropriate slot according to the attached instructions. Connect to the USB port of a laptop or router. In the latter case, you will have to choose a suitable location to transmit a stable signal over a wide area.
- After connecting, you should immediately proceed to installation. As a rule, modems purchased from a large provider are fully configured or require a small number of manipulations to obtain the desired result. It is enough to use a disk with drivers for the modem and special software, allowing you to track speed, traffic consumed, and the number of days remaining on the tariff.
- If the device comes with login information, for example, a connection number or password, then all information will have to be entered in the network or work profile settings in the appropriate input fields.