Updated: July 16, 2017
Hello, dear readers of the blog site. I’m slowly acquiring gadgets from Apple - I really liked their uncompromising approach to user convenience.

iTunes is installed exactly like any other application on your computer, and has support for the Russian language. In addition, you can immediately understand what exactly it will allow you to do and what opportunities it will provide:

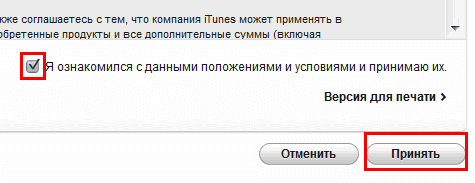
At one of the steps you will be asked to check the box to accept the terms of use agreement this software. When you first launch it, you will be asked to give Apple access to your media library so that photos of artists and disc covers can be uploaded to it. I don't need it, so I chose the cancel option.
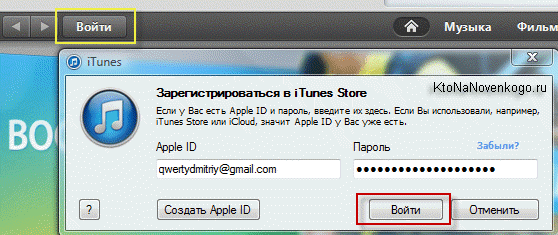
After downloading and installing iTunes programs on your computer, it makes sense to immediately click on the one located at the top left "Login" button and register in iTunes, i.e. create new account.
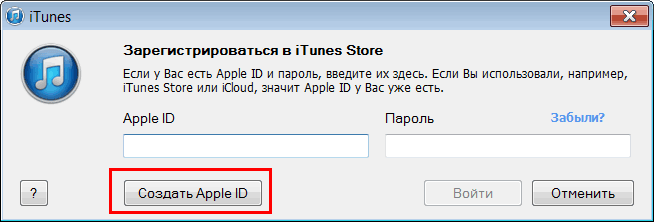
Press the button "Create an Apple ID". We continue and agree to the terms of registration.
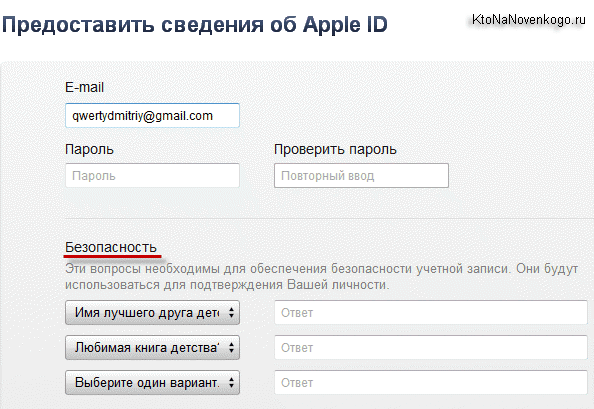
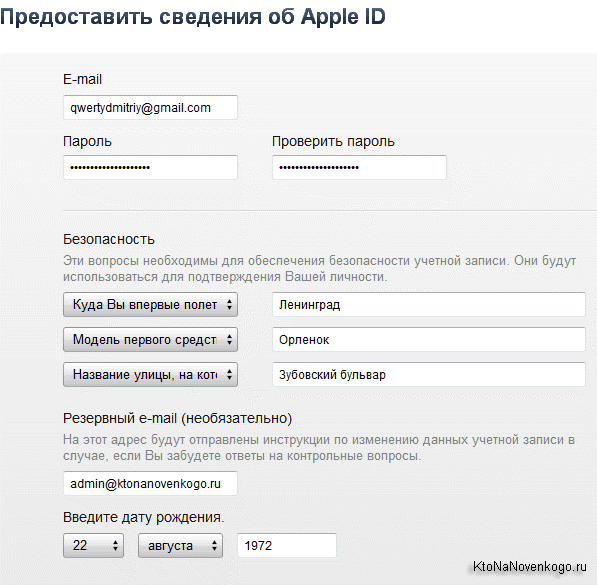
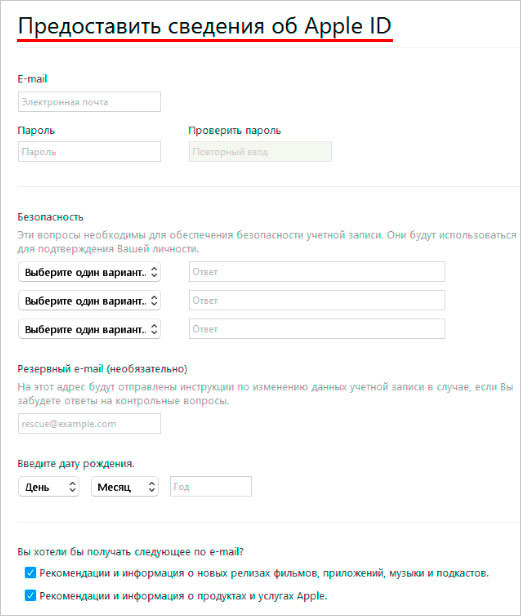
To secure your profile, it is better to answer the questions and enter another mailbox address. If one already exists, then it will be sent to it in the future. New Password. Next, enter your date of birth. If you are under 18 years old, I advise you to enter a different date, since many applications are only allowed to be downloaded by adults.
Then click on the “Continue” button, after which you will be prompted to immediately enter your data credit card, with which you can pay for the purchase of applications in App Store. Is it possible to create an Apple ID without a map?? Of course, you can, but you will have to start registering from the beginning.
And if you have a suitable credit card, then fill out all the required fields and click on the “Create Apple ID” button located below. After this, you should receive a letter - confirm your registration by following the instructions in it. Congratulations, you now have a personal Apple ID! You can get started with iTunes.
How to register an Apple ID without a credit card?
If it suddenly turns out that you do not have a suitable credit card or for some reason you do not want to use its data, that is alternative way registration, which is a little more confusing, but does not require entering your card details.
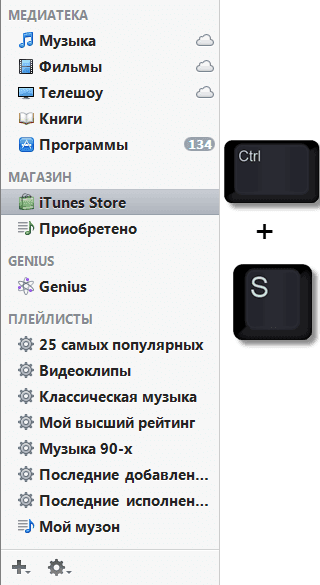
So, first go to the iTunes program and from the drop-down menu of the small arrow located on the left top corner, select items « iTunes Store» - "Homepage".

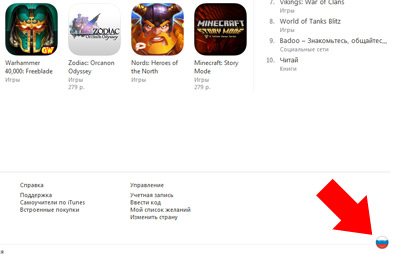
Scroll down to the end of the iTunes page that opens and in the lower right corner see whose flag is displayed in a circle. If it’s Russia or Ukraine, then everything is fine, but if it’s another country, then click on it with the mouse and select one of the powers mentioned above.

If you have figured this out, then scroll up the same page a little and find the block in the right column "Top free applications".

Click on its title and in the iTunes window that opens, press the button "For free", located under any of the applications available there (no matter which).
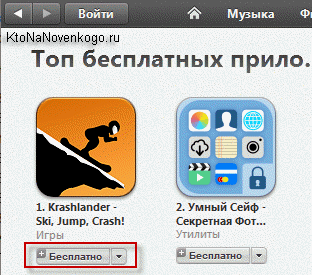
The already familiar “Register in iTunes” window will appear, where you will again need to click on the “Create Apple ID” button:

Next, as with regular registration described above, you indicate your Email, come up with a password, answer three questions and leave your backup Email, which will help resolve the situation with a lost password and other unpleasant things. Click the “Continue” button.
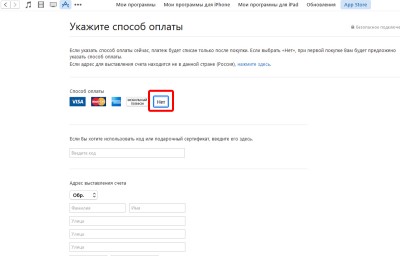
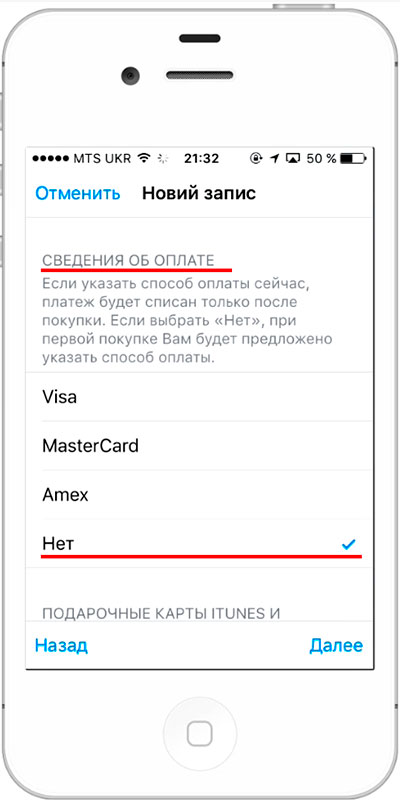
The most interesting thing awaits us in the second step, where you need to enter your credit card information. Now the default option is selected "No" in the "Payment Method" area.

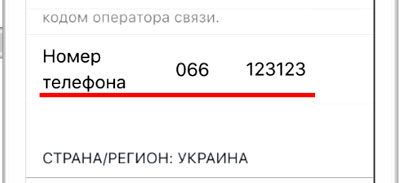
All you have to do is fill out the fields with your full name, address and phone number (probably, they don’t have to be real, but that’s up to you to decide). You don’t need to enter any data about the cards, so just click on the “Create Apple ID” button located below.
That's it, now go to your email program, find two letters from Apple there, sent to the primary and backup emails you specified. Click on the links in them to confirm the existence of the data mailboxes and enter your Apple ID, as well as the password you created for it.
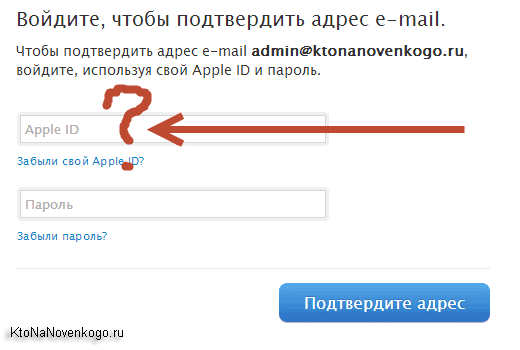
True, it was the first point that puzzled me, because no set of numbers that could be associated with the ID was sent to me in the letter. Everything turned out to be much simpler. Apple ID is that email address, which you specified during registration as the main one.

The backup email should also be confirmed, because... You may need it in the future to recover your password and replace security questions to which you have forgotten the answers.
How to use iTunes?
First, you will need to log in to iTunes, if this action did not happen automatically after registration. The “Login” button located at the top left serves this purpose. After clicking on it, you will see the familiar authorization window, where you will enter your Apple ID and the password you created.
The highest quality software and games are usually paid. Therefore, you need to register your card, and if you don’t have one, you can easily get one without a commission in Qiwi -.
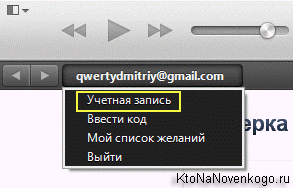
To add card details, in the upper left corner of the iTunes window, click on your Apple ID and select “Account”.
In the window that opens, find the item "Payment method" and click a little to the right on the “edit” link.

It's simple: enter the card number, security code and other data. When you register for the first time, one ruble will be withdrawn from your account in order to verify its authenticity.
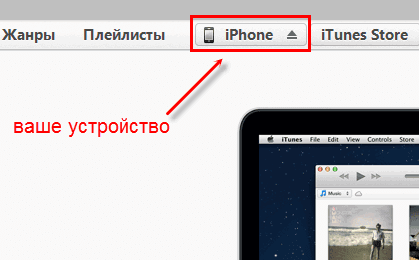
If you then connect it to a computer Ipad via USB when iTunes is turned off, this will cause it to launch and it will automatically detect the gadget connected to it, and will also display it in the form of a button like this:
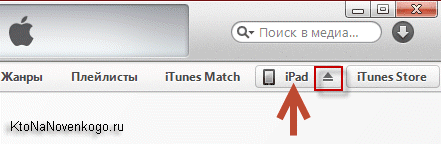
On the button on the right there will be an upward-pointing triangle (you might have seen something like this on CD players, where it was used to eject media). I accidentally clicked on it at first, expecting it to appear. context menu, but instead the button disappeared and my iPad disconnected from the computer.
I had to close and reopen iTunes to reconnect with my tablet. You need to click a little to the left and then all the diversity of the inner world of your gadget will open to you. On the first tab "Review" a page opens with its name and model, as well as with all other data. Battery charge, capacity, serial number.

You can update it right away software your gadget (check availability and download a new iOS version) or restore its condition to factory settings (the “Restore iPad” button), that is, erase all personal data and bring the device to the condition in which you purchased it (alas, this does not apply to scratches).
It turns out that from here you can control your “apple”, as well as create backups or recover from them. You can even encrypt them for greater reliability if they are stored on an iPhone or iPad data are confidential. By default, iTunes will create an image of your tablet or phone on your computer, but you can also save important data in the cloud, which Apple calls iCloud.
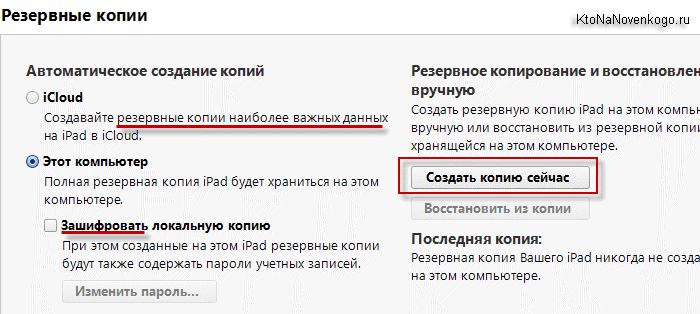
Create backups ( sync iPhone, iPod or iPad with iTunes) is very important, because if you lose data or purchase new version gadget, we can download all the programs again - in this case we won’t have to search and buy everything again.
Moreover, as shown in the screenshot located just below (the second), it will be possible set up automatic synchronization immediately when you connect the device (via USB), and you can also set up wi-fi synchronization between your computer with iTunes and your iPhone.
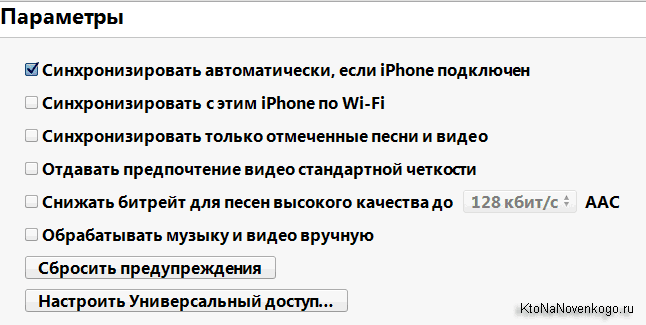
All this data can be saved not only on a computer, but also in cloud storage, the so-called iCloud.

With its help, you can download some data, for example, saves for games directly to the gadget without connecting to a computer via the Internet.
How to sync iPhone, iPod or iPad with iTunes?
Also at the bottom there is a very convenient and interesting panel, here we can clearly understand what exactly takes up space on internal memory and how many. You can also click the “Synchronize” button.

A what exactly will be synchronized between a computer and an iPhone, iPod or iPad? Well, this is up to you - just go through all the other tabs top menu and check the boxes in the right places.
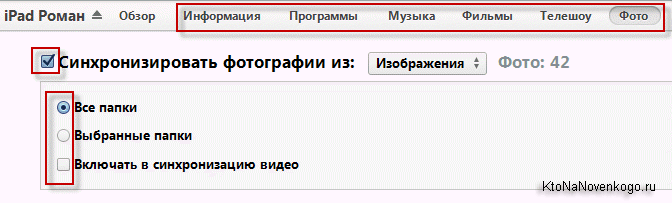
It turns out that here you can download music, video or photos from your computer to your device and back, but not only that. Moreover, there is an opportunity create your own music library(not from tracks purchased from the Apple store, but from our own tracks that live on your computer).
To do this, open the folder with your music in Explorer (or Total Commander), and in iTunes go to the “Music” tab.

After that, select all the necessary tracks in the explorer and drag them to the empty space in the program, as shown in the screenshot.

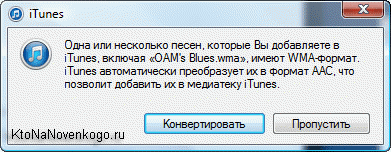
Some types of music iTunes files will offer to convert to a format convenient for this program:
You can edit this music and even listen to it directly in iTunes. Click on any music file icon right click mouse and select “Play” from the context menu. A player will appear on the top panel, where the bitten apple used to be.
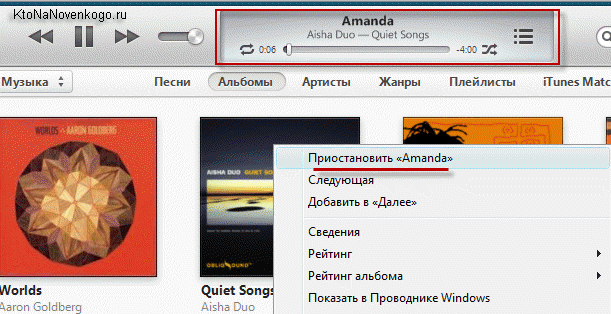
If you click on the arrow in this very player, a window will open where you can choose which music will be played for which. If you are not satisfied with these “gray notes” instead of the cover of your favorite band, then you can change it as well as the name.
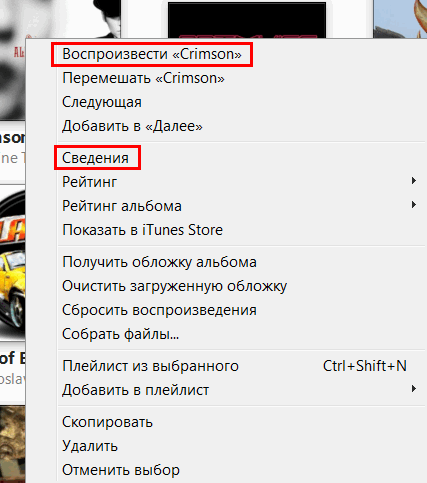
To do this, right-click on the icon again and select “Details”. A window will open, where you can write the title, album, etc. To change the cover, first copy the image you want, then go to the cover tab and click paste. Beauty.
To transfer this music to your device, click on the device button (Iphone or iPad) in the top right, and in the window that opens, go to the “Music” tab, where you can specify what exactly to copy. Well, to start synchronization, click on the button "Ready", located at the top right of the window.
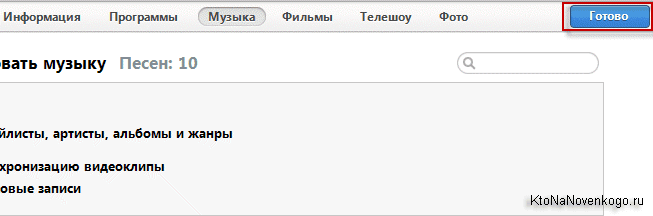
If everything worked out, then instead of the player a bar will appear showing the music loading.
Great, you have music on your iPhone or iPad. A You don’t want to sync movies via iTunes? The process of uploading video to the gadget is approximately the same as uploading music; in the upper left corner we find a button and select “Movies” there. In the same way as in the case of music, drag the video files into the program and click on the “Finish” button. You can download books in the same way.
iTunes and App Store
Movies, books, music - everything is there. But what else is needed for complete happiness? Of course, access to a store with millions of applications for every taste, which can be obtained both from a gadget and from a computer using iTunes.
Let's press the button "iTunes Store", which is in the upper right corner. A store opens before us where you can purchase movies, music and applications. We already have films with music, so click "App Store".
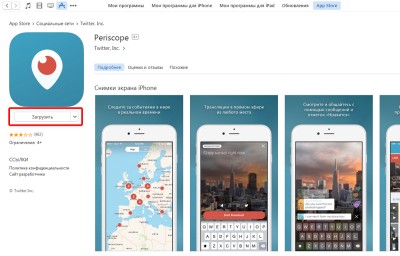
The large banners at the top are new and popular applications. On the right you can select a category or, going down a little lower, another section. If you wanted to fuck free application, then press "Download" or "Buy" button, in case it is paid. To install it, you will have to enter the password you created earlier when creating your Apple ID.

The downloaded or purchased program will live in your Apple account ID, and you can always install it on your gadget. To do this, connect it to your computer and go to the Applications tab in iTunes. Find there visually or using the search bar the application you just downloaded and click the “Install” button opposite it.
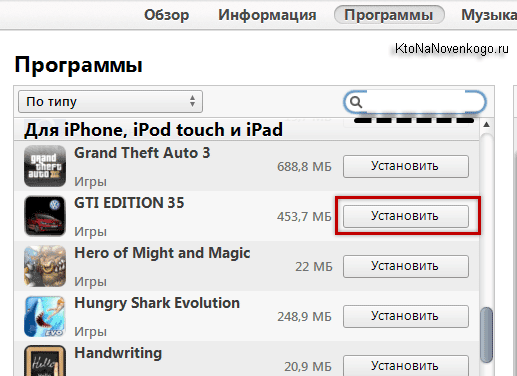
If you need to install any other applications or games from iTunes on your iPhone or iPad, then also click on the “Install” button opposite them. The text will change to “Will be installed.” Next, go down and click on the “Apply” button located there.

The synchronization process will begin, during which your new application will be successfully installed on your gadget.
In general, no one is stopping you from connecting to the Internet via Wi-Fi and browsing the App Store directly from your Apple gadget in search of the necessary software or games. However, the variety of options only adds to the convenience.
Improving the usability of iTunes and the App Store
Well, now you can use, at first glance, a very complex and sophisticated program, but in the end, convenient and functional. Perhaps this is all I wanted to tell you about the right hand of the owner of Apple products.
By the way, if you need to download pictures and videos taken on it from your iPhone or iPad to your computer, and you also have an account in Dropbox or Yandex Drive, then it will be enough to install the appropriate mobile app and it will allow you to do this automatically. Read more about that and.
Good luck to you! See you soon on the pages of the blog site
Send
Cool
Link
Stammer
An Apple ID is required for all owners of Apple devices. Without it, it is impossible to download an application or music, purchase a movie or book, or use the iCloud network service. In addition, with using Apple ID users can place orders for products at Apple retail stores. In this material we will look at two ways to create an Apple ID without a credit card, and also describe possible mistakes During registration…
It is worth noting that the process of creating a new identifier is quite simple. Users need to fill out a number of fields and come up with a password. Many people are confused by the need to enter payment card details when registering. This step is required to make purchases from the iTunes Store. But if desired, users may not fill out this item. To do this you need to use a little trick.
There are two ways to create an Apple ID: mobile device or with using iTunes. However, we would like to immediately highlight several key features:
When registering, be sure to indicate your existing E-mail. In the future, you will receive a link to complete registration.
Apple does not allow you to register an Apple ID under 13 years of age. In addition, some restrictions apply for users under 18 years of age.
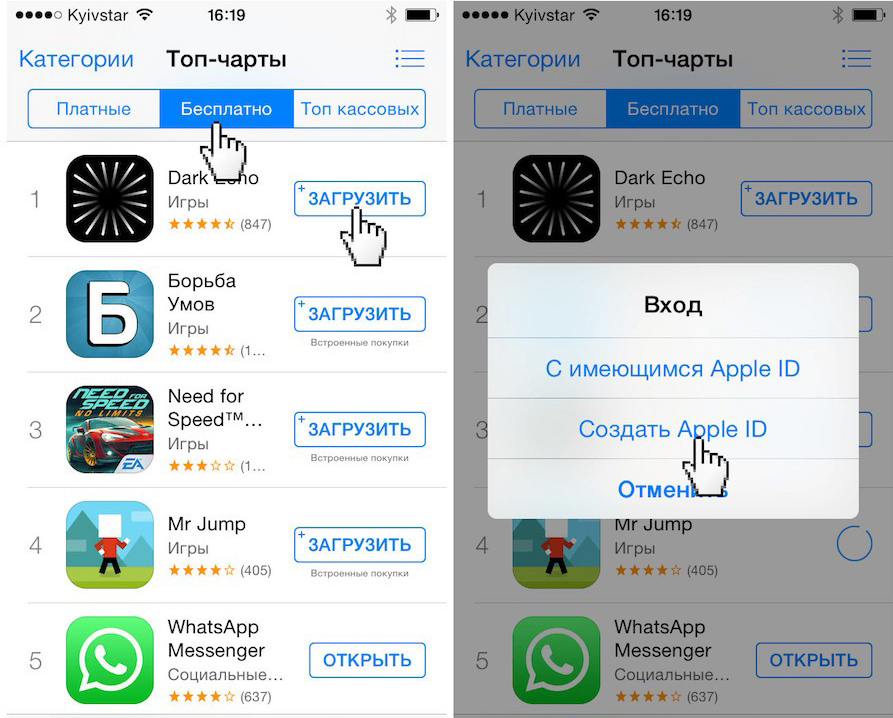
2. Launch the application and go to the App Store section.
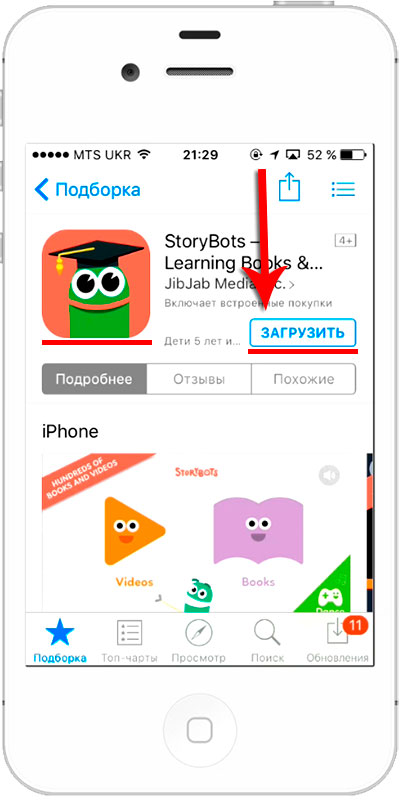
3. Select any free application.
4. Click the “Download” button.
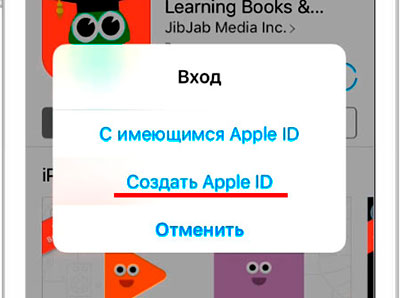
5. In the new window, click on Create Apple ID.

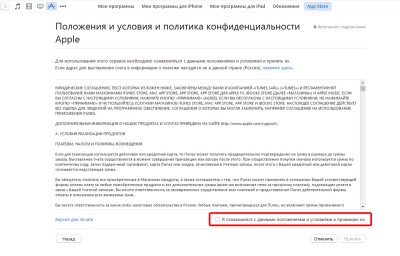
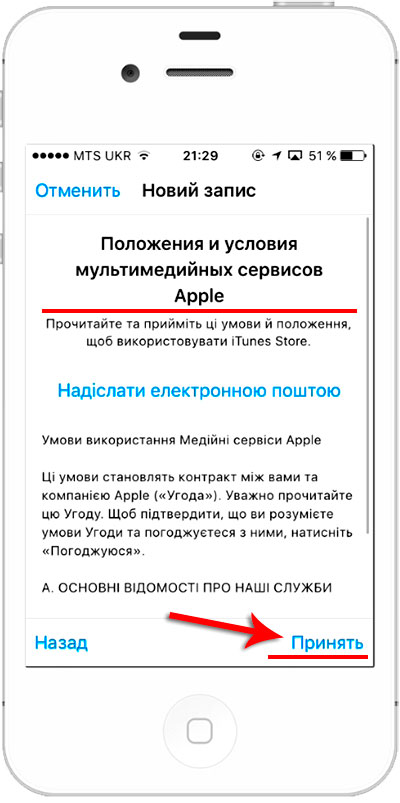
6. Check the box “I have read and accept these terms and conditions,” and then press the “Accept” button.
7. Here you need to fill in a number of fields. Among them are E-mail, password, date of birth, etc. It is worth noting that all fields in this section are required.
- The Apple ID password must contain at least 8 characters.
- The password must contain numbers (1,2,3,4,5,6,7,8,9)
- The password must contain small letters (lowercase)
- The password must contain capital letters (CAPITAL)

8. In payment methods, check “no”.
If the “no” option is not available, check your regional settings. If you indicate a Russian address, make sure that there is a Russian flag in the lower right corner of the program. By clicking on the flag icon you can change the region to the desired one.
9. Click on the Create Apple ID button.
10. After that, to the address Email, specified as an identifier, an email will be sent with a link to confirm registration.
It is noteworthy that you can make purchases in the iTumes Store not only using credit cards. Also available for sale special cards called Gift ID or Gift cards iTunes, in denominations from 500 to 3000 rubles. However, when purchasing them, you need to remember that there are Gift Cards for sale for different sections of the iTunes Store and cards for the RU region are not suitable for purchases in the US region and vice versa.
My name is Sergey and today I will show you how you can create an Apple ID on your iPhone and computer. That is, we will consider separately, first the option with an iPhone, and then with a computer.
There is nothing complicated here, but again the topic is relevant. I looked at the statistics and every month several thousand people They are looking online for information on how to create an Apple ID, in particular without a credit card.
So, let's go!
How to create an Apple ID on iPhone?
First of all, let's look at all this on the iPhone. So let’s pick up our smartphone and repeat after me. We find standard application App Store and launch it.

Here at the very beginning important point. You need to select a free application and go to the download page. Next I’ll tell you why we do this.
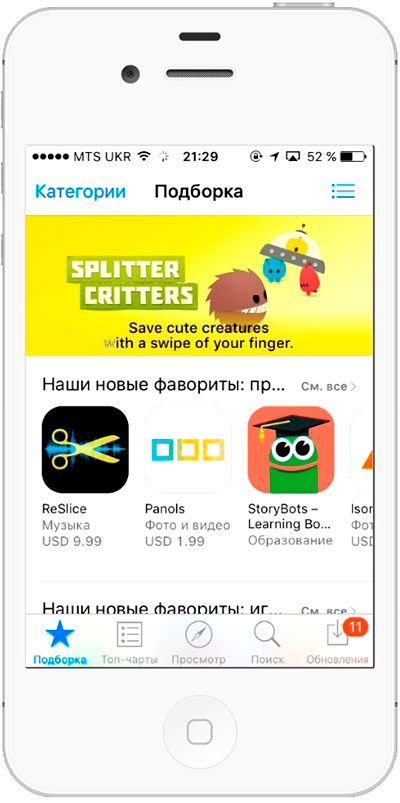
I chose this toy. Click Download and after a second, Install.

We are told that we need to sign in, or “Create an Apple ID.” Naturally, click on the second point.
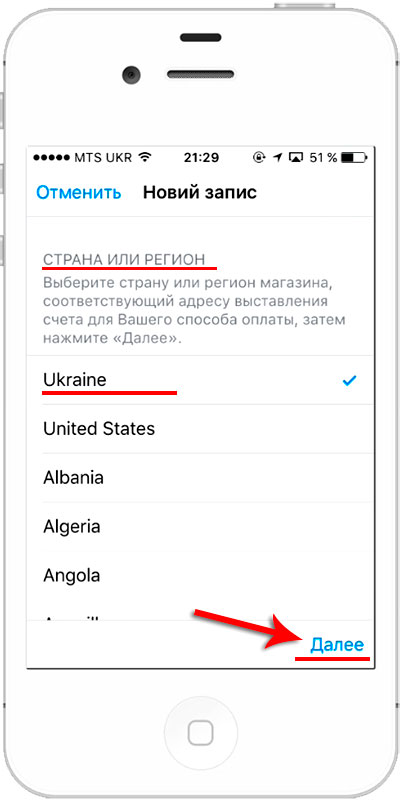
The registration process begins. The first thing you need to do is choose a country. I will choose Ukraine. If, for example, you need Russia, then it will most likely be substituted automatically, and if not, then scroll through the list and find the desired country. After making your selection, click Next.
We accept the terms of the agreement. Click Accept and Accept again.

Next you need to enter your real email address. I recommend using email from Gmail. We come up with a password. Please note here that the password must contain both letters and numbers and must have at least one capital letter, that is, a capital letter. For example, I created the password Testpass1234.

I go lower and here, to ensure safety, you need to select three different questions and answer them. This data will be needed if you suddenly lose access to your Apple ID, that is, if, for example, you forget your password or something like that.

Fill out the answers to the questions and go even lower. You can enter additional email here, but this is not required.

Below, enter your date of birth. Please note that if you are under 18 years old, you will not be allowed to register. Therefore, indicate the year so that you are 18 years old.


The next step in registration is adding a credit card for your Apple ID. Remember in the beginning we tried to download a free application. We did this so that there would be an opportunity here not to indicate your card. There is a No option here. Let's choose him!
We selected it, go down and enter your data. First name, last name, street, house number, city and zip code.

And below we are also asked to enter a mobile phone number. I'll try to introduce a not real one, I hope it will work. So, it looks like you don’t need to fill out anything else here. Click Next.
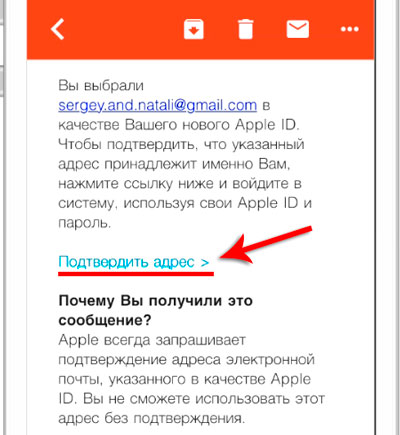
We are told that a verification email has been sent to our email. You need to follow the link there.

I immediately received a message in my email, I need to find a confirmation link there. Click "Confirm address".
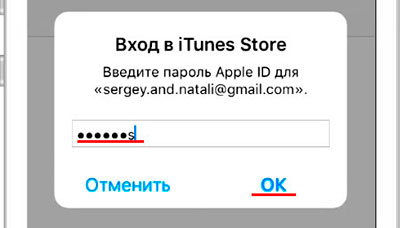
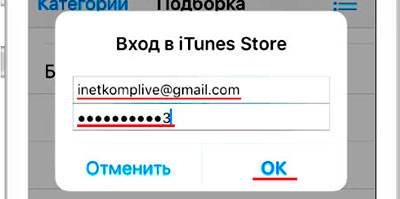
Enter the password you used during registration.
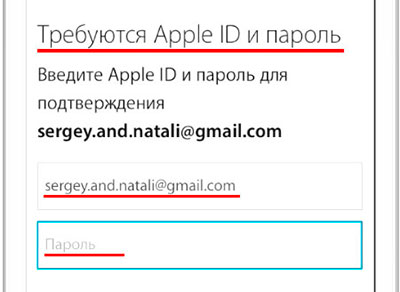

And the account is confirmed. It takes us back to the App Store and again asks us to enter a password, don’t be surprised, a password is always needed here. I sometimes wonder how long it takes to enter a password each time.
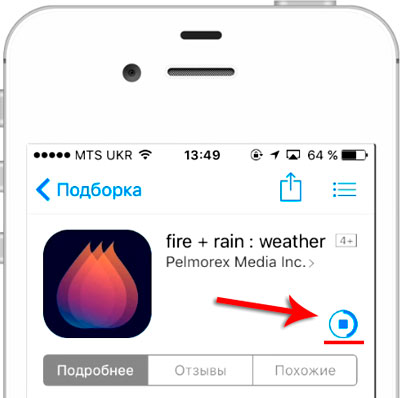
Now we try to Install and Download this toy again.

No, they're just kidding, you need to enter the password again. OK.
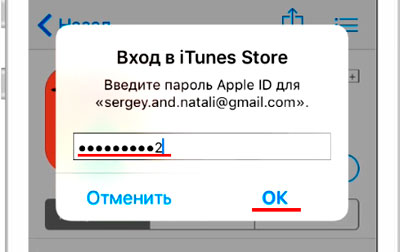
So, you can remember the password for 15 minutes. Oooh... for 15 whole minutes, I won't be asked for my password. Really. Fine.


Well, everything is ready, go to the last screen and here is our downloaded and installed game.

By the way, if we return to the first page of the App Store Selection and go down to the very bottom, we can make sure that we are now signed in to the Apple ID.

How to create an Apple ID from a computer?
If you encounter any errors when creating an Apple ID on your iPhone, or you simply are not comfortable entering all the data on your phone, you can create an Apple ID from your computer. It seems to me that this is made even easier!
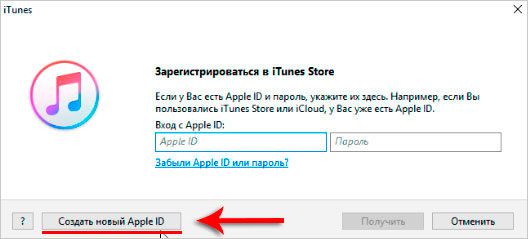
Go to the Apple website https://appleid.apple.com and find the Create Apple ID link. Let's press it.
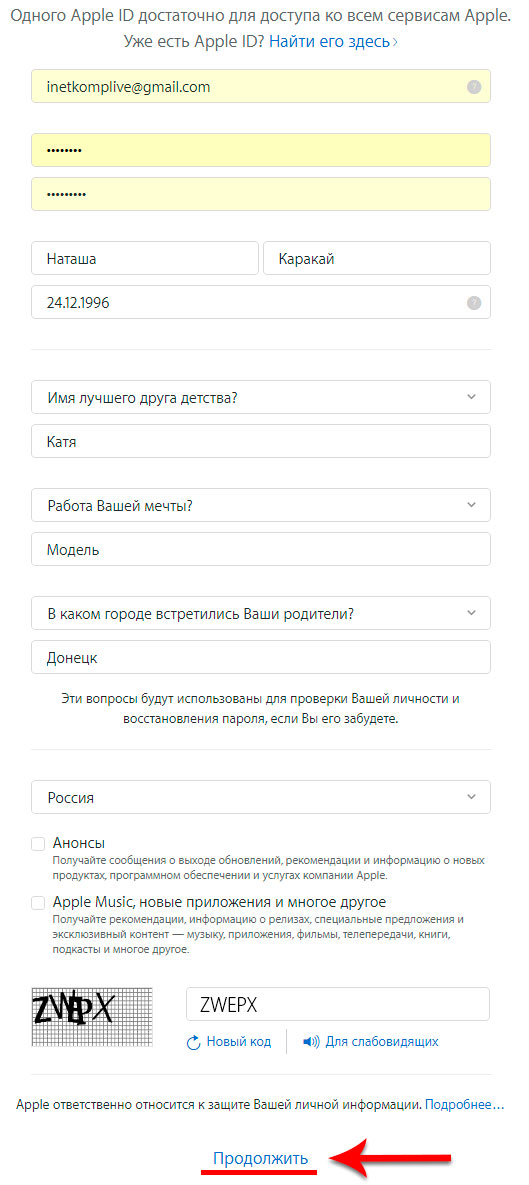
Just like with creating an Apple ID on the iPhone, we need to fill out a bunch of fields here. Email, password, answers to 3 security questions and security code. Fill it out and click Continue.
To confirm the address, you need to enter the code that was sent to me by email.
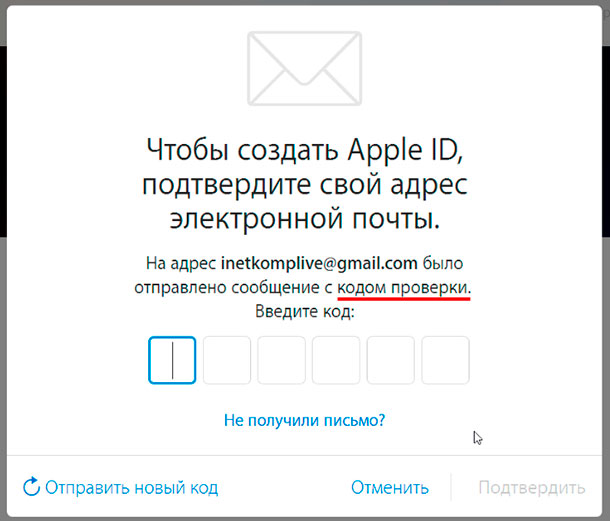
I found the code and it is 619221.
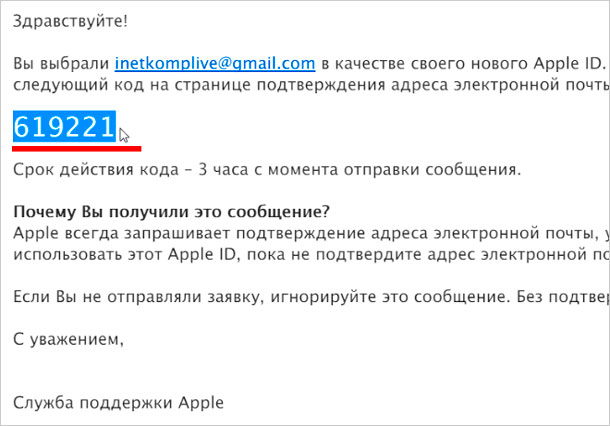
I go back and enter it into the form.

Well, that's it. Us in in this case They didn’t even ask me to provide my card details, name, address. Although there is this data to add.

Well, let's now go back to the iPhone and see if they will let us through with this username and password.
We launch the App Store again and go to the very bottom. Click Login and fill out.


We are told that this Apple ID has not yet been used in the iTunes Store and we need to click View.

Still, you have to select a country, accept the terms of the agreement and enter your data. That's because it won't let you through without them. You must at least indicate the country, enter the name, address and city.
After filling out all the fields, we are told that an account for the iTunes Store has now been created.

Now you can try to download something with this Apple ID.
Well, as you can see, you can register both on your iPhone and on your computer.
Registering for the iTunes Store in iTunes
There is another way to register. If we need to create an Apple ID so that later we don’t need to enter other data on the phone, then to do this we need to register on a computer through the iTunes program. I remembered the first time I registered to download applications, I did it through the iTunes program.
There you can also select a free application and try to download it; we will be prompted to either log in or create a new account. Naturally, we choose to create an account and fill out the fields that are already familiar to us.

Well friends, we have dealt with this issue and once again I will remind you that so that you are not asked for your card details at the registration stage, but there is a NO option, you need to remember to select a free application at the beginning.
That's all, creating an Apple ID on an iPhone or computer is very simple. See you in new lessons and articles. Bye!
Every Apple gadget user sooner or later encounters Apple ID. Registration of this account required to use company services. If you don’t have it, then you won’t be able to download even a free application from the AppStore. The first step after activating the device can be considered creating an account ID.
Creating an Apple ID via computer
You can create an account in several ways: using a computer and directly from your device. When registering, you can indicate bank card to make purchases, or you can register without linking a card. In order to create an Apple ID from your computer you will need: a valid email, PC with installed current version iTunes programs, Internet access with good speed, time to register.
Find and install latest version iTunes. You can find it on the company's official website. It is distributed free of charge. Launch it on PC. In the work area, there is a panel in the upper left corner. Click on the “AppStore” icon. Browse the proposed selection of free applications and click “download” next to the one you want.
A functional menu will appear in which you need to click “create...”. After clicking, the store will offer to read its terms of use. Read the information, check the box next to “read” and click “accept.” Now the registration stage: enter a valid e-mail address, invent complex password. Secret code must contain at least 8 characters. There should not be three identical symbols in a row. It must not match the login. Must contain numbers. Uppercase and lowercase letters must be used.
Enter your personal information. When you indicate your date of birth, please note that you can only register an Apple ID if you are 13 years old or older. In the future, when using services, depending on your age, there will be a presence or absence of age limit. Registration at age 13 requires the consent of a parent or guardian. From the age of 18 such consent is not required.
Read the user agreement and click “I accept”. Then select your secret questions and answer them. It is better to write down answers to questions on physical media and put them in a safe place. This information may be useful in restoring access in the future. After clicking “continue” you must indicate the form of payment. If you want to link a bank card, please provide its details. If you want to register for free, click “no” and click on the button at the bottom of the working window “create...”.
A letter with instructions will be sent to the specified email address (login ID). If you specified an additional e-mail, then the same letter will also be sent to it. Open the email and follow the link to complete registration. You will be notified that your Apple ID has been successfully activated.
How to create an Apple ID from your phone?
You can register an account directly using your smartphone. You will need: Apple iPhone, mailing address, internet connection and patience. On your phone's desktop, click on the "AppStore" icon. Find any free application and start downloading it. When the function menu appears, select “create new” from the list. Next, enter your email (the one you use) and enter a new password.
The password requirements are described above, please take them into account. Next, provide your personal information as instructed. Read Terms of use and accept it by clicking “I accept”. After that, give answers to security questions that you choose. It is better to write down the answers on paper and put them in a safe place. You may need this information if you forget your password to recover it. Next, enter your bank card. If you do not plan to use it, then click “no” and “continue”.
A letter will be sent to your email address. In this email you must follow the link to complete the registration process. Now you can use the company's services and fully enjoy the capabilities of your phone.
Every iOS user needs an Apple ID, without which the user will not be able to install the program on his gadget, make a purchase in the App Store, or communicate via iMessage. In short, without a unique Apple account, not a single service of the American company will be available to the user. In this article we will tell you how to create, find out and change an ID on an iPhone.
ID creation
You can create an Apple ID using iTunes on your computer or directly from your device. Let's look at both methods.
Create an ID via iTunes
- Download iTunes from the official Apple website and install it following the prompts of the installation wizard.
- Open iTunes, in the store menu (iTunes Store) select “Create an account” (Create an Apple ID).
- Click “Continue” twice, the first click confirms the desire to create an ID, the second click accepts the user agreement.
- In the window that appears, indicate the necessary data - e-mail, password (password), security question and answer (security Info), additional e-mai (optional rescue e-mail), date of birth (enter your date of birth). In the “Would you like to receive the following via email?” field, check the box if you would like to receive company news.
- Confirm the settings by clicking "Continue".
- In the next window you must provide payment information. This data will be used to pay for purchases in the App Store and other Apple services.
- We check the entered data and click the “Create Apple ID” button. All! It is done!
Create an ID via iPhone
- Go to "Settings", then "iTunes Store, App Store", select "Create new Apple ID".
- In the subsequent windows, indicate the country of registration and confirm the user agreement, click “Next” and “Agree”, respectively.
- In the following windows, enter the data similarly to points 4 and 6 of the previous instructions.
Advice! If you want to create an id without specifying payment card details, in the “Payment method” field, select “None”. - We check the data and click “Next”. All! ID has been created.
How to find out ID?
Decide this task very simple: you just need to go to the “Settings” of the gadget and select “iTunes Store, App Store”. In the window that appears, the Apple ID will be written in the top field.
How to change ID?
Go to the “Settings/iTunes Store, App Store” path, select the Apple ID field, and select “Sign Out” from the drop-down menu. The "iTunes Store, App Store" window will be updated, in it you will be asked to log in under a different ID or create a new one (see the first instructions).
In general, creating an Apple ID and further manipulating it are not so difficult tasks; perhaps any user can cope with them. Read more about working with in the articles in our section.