Mail is the most important means of communication between work colleagues, distant acquaintances, relatives, friends and other people with whom you would like to maintain relationships. Some people still prefer to write letters the old fashioned way, on paper, but this:
- uncomfortable;
- expensive;
- interferes with the preservation of the environment and ecology.
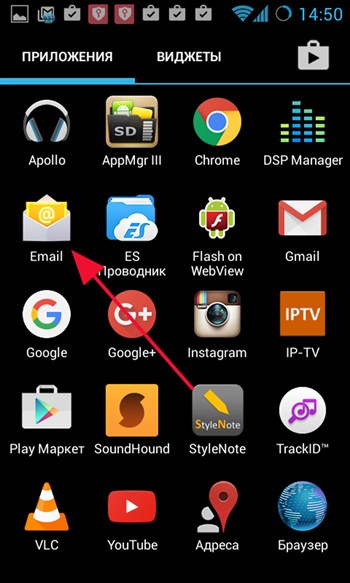
Using email on a mobile phone is no less simple than on a computer, and today we have prepared for you a detailed manual on how to do it setting up mail on Android in the Gmail email application.
On Google's mobile OS there are 2 applications with which you can simply and easily exchange by email both between users of the Gmail service and those available by default. The first is the Email program. It is simple, has an absolutely uncomplicated interface and allows you to connect boxes of any services.
Perhaps soon we will prepare a review of this pleasant application that certainly deserves its rightful place in the hearts of users. But today we will talk about a proprietary utility from Google - the program Gmail. Unlike Email, it has much more advanced settings and allows you to fine-tune synchronization parameters to suit your needs, has support for push notifications, and contains a flexible system for sorting and filtering correspondence. For the application itself Gmail Android fits perfectly, since it was here that the developers managed to fully reveal their potential and capabilities. This will be discussed further.
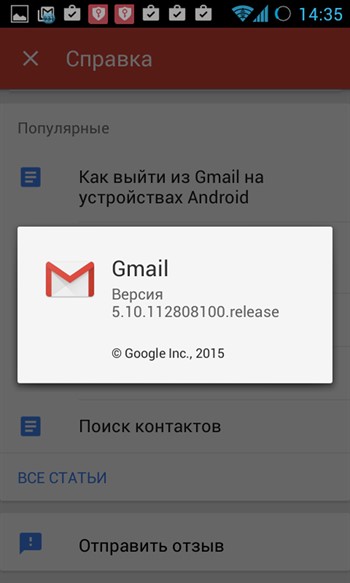
We would like to warn you right away that in the presented material we will talk about the version of Gmail for Android with the number 5.10.1128x. If you have a newer version, all the operations described below will probably be available to you.
The latest versions of Gmail for Android have much more extensive functionality (for example, only in the updated package can you connect Outlook mailboxes, yandex.ru and other mail services). So it's worth upgrading.
How to find out the version of the Gmail app available on your smartphone before updating?
— launch Gmail;
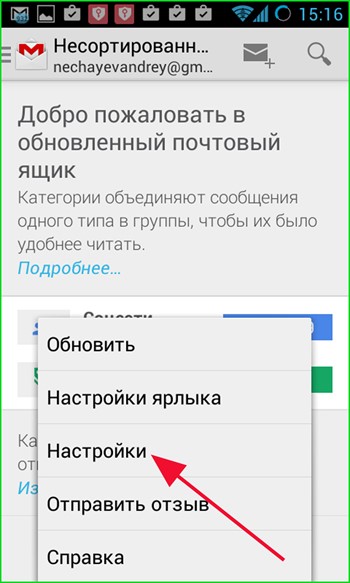
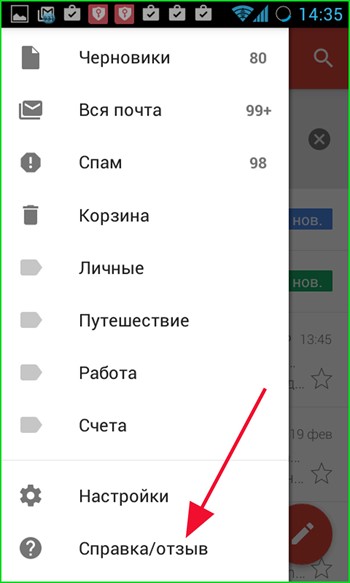
- press the call button context menu on the smartphone, located on the left. A menu should appear additional options. Select the “Settings” item. This menu item contains all the main aspects of setting up mail on Android;
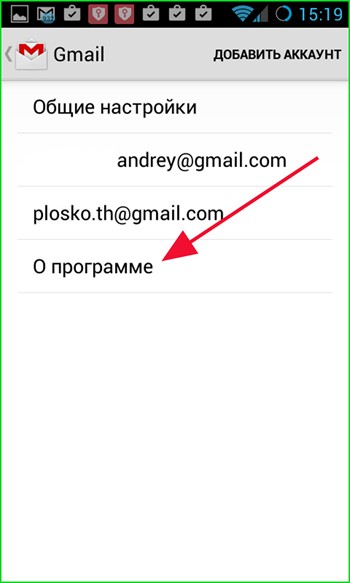
— a mini-form will appear showing the number of the active version of Gmail.

How to find out the Gmail version after updating?
IN new version The email program's interface has been completely redesigned, so here the method for determining the version is different:
— in the running utility, press the button with three horizontal lines on the left top corner;
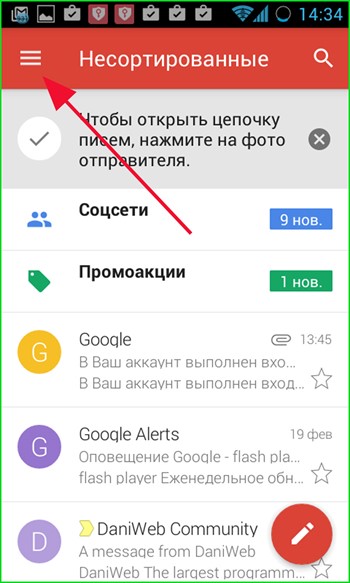
— select the last field “Help/feedback”;
![]()

Gmail app update procedure
We launch the OS and wait until an icon appears in the notification panel notifying about available new versions of programs. This requires a reliable network (Wi-Fi or fast mobile). This usually happens a minute or two after loading Android (possibly earlier). So please be patient.
Sometimes such an icon is not among the notifications at all, but the update is still available.
How to check for an update if there is no push notification?
- let's go to Play Store. Click on the button with three horizontal lines;
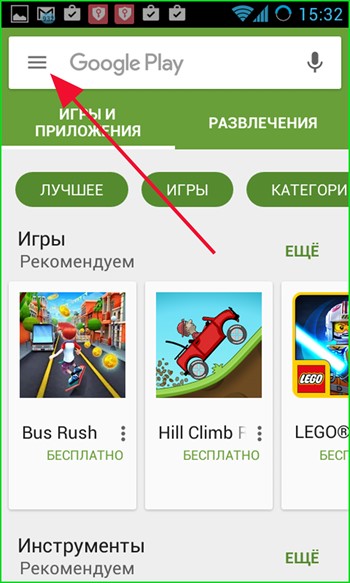
— select the item “My applications and games” in the menu that opens;

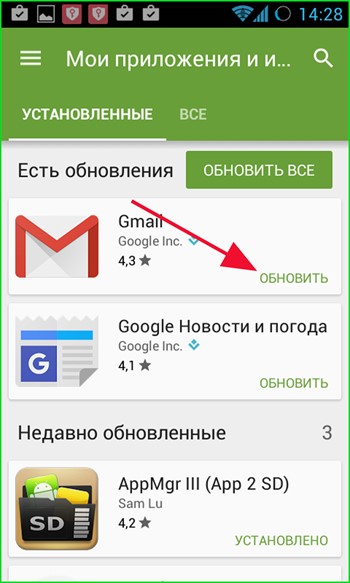
- here we see that there is an update. New versions of available applications in this menu are displayed above the list of already installed programs. If you know that there is a new version in the Play Store, but it still does not appear in the list, you have probably already updated Gmail to the maximum available version, or your operating system requires an update. Consider upgrading to official firmware new version, if it is on the server, or you should install custom firmware for your smartphone model (CyanogenMod, MIUI, Paranoid Android).
So, the update is in the list, and you want to install it.
— click on the “Update” button, and “Update” again on the update profile page;

— confirm the appropriate permissions and click “Accept”;

— after downloading the package, the program is ready for use.
So that's it preliminary preparations finished, and we can start working with the program.
The very first thing we would like to tell you about is the basic principles of setting up mail on Android, namely adding mailbox. You can add not only Google mailboxes to Gmail, but also any other accounts that support POP3/IMAP for receiving and SMTP protocols for sending letters.
How to add a service mailbox from Google (Gmail)?
To attach a Gmail email account, you only need to do a few things: simple steps:
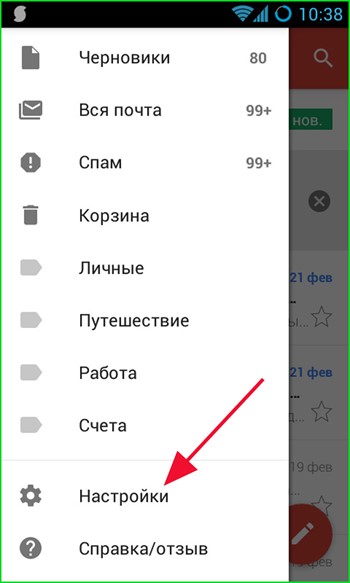
- V running application in the main menu (again, called up by clicking the button with three horizontal lines in the upper left corner) select the “Settings” field;
— on the new form, select the “Google – Gmail or Google Apps” option and click on “Next”;


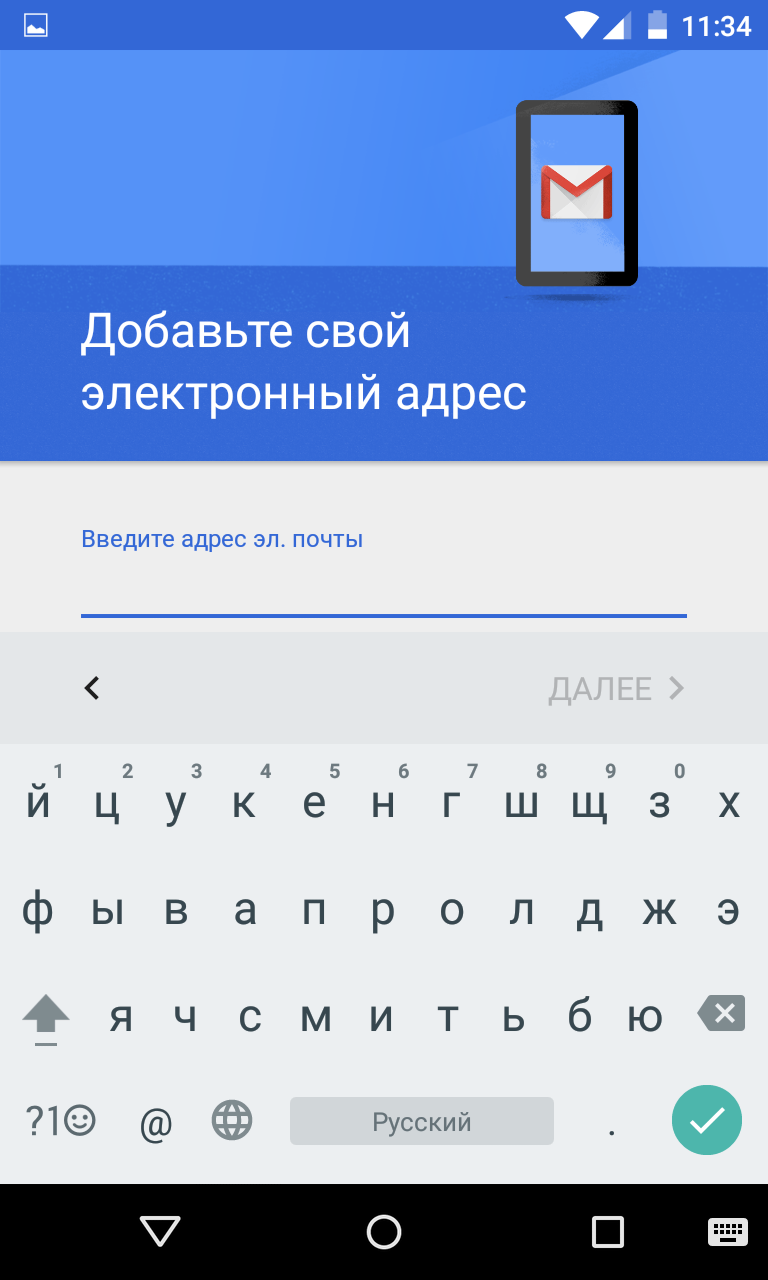
— enter the name of the email account and the password for it;

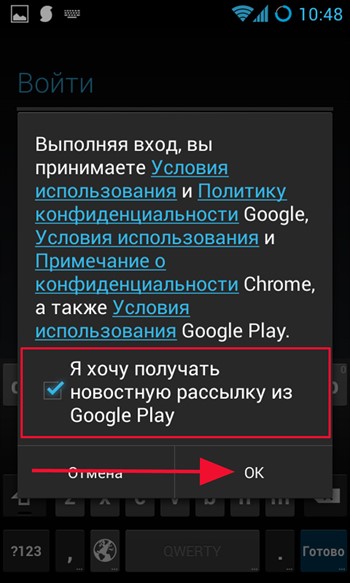
— when you first log in, mark whether you want to receive newsletters about new programs and updates from the Play Market;
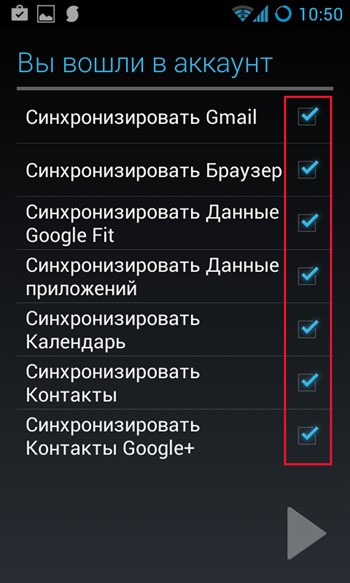
— if everything went well, a message appears about logging into your account and a proposal to synchronize its various components. We tick the boxes we need and go into your account;
— the new mailbox appears in the list of connected email addresses, which confirms the success of our actions.

Setting up mail on Android - how to add a personal mailbox from another web service (all except Google)?
Gmail is a fairly flexible program, and in addition to mailboxes from Google (which, by the way, have the same domain name as the name of the presented mobile program, - Gmail. Don’t let this confuse you, you can add email accounts of any other mail services here. How to do it?
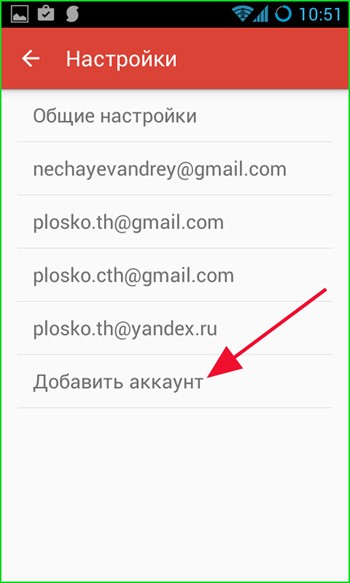
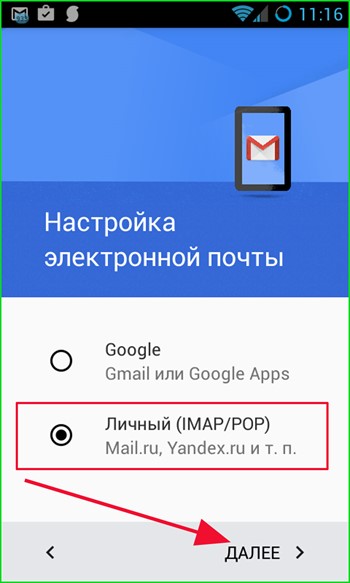
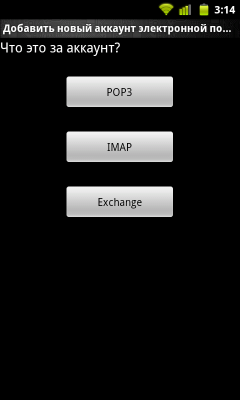
— in the “Settings” menu, select the “Add account” field. Check the “Personal (IMAP/POP)” option;
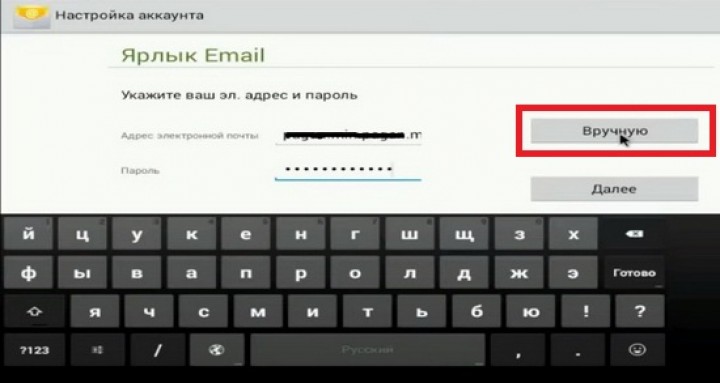
— enter the email address (necessarily with the domain name);

— select the type of account that will be used to receive messages.
Used on different web services different accounts. To find out which one you need, use search engine. For example, for the email service yandex.ru the settings will be as follows: link.
The addresses of the POP3/IMAP and SMTP servers and the numbers of the ports used are also indicated here, so this information is vital for connecting such a box.

— enter the password for the mailbox;

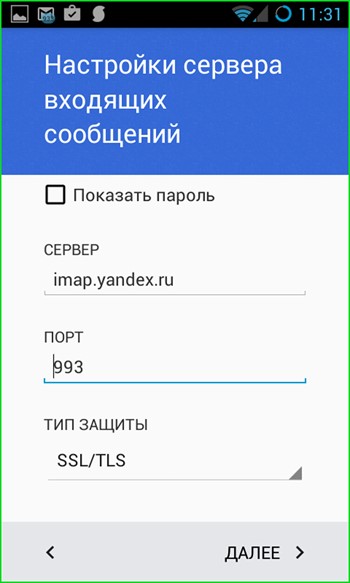
— in the next form, enter the name of the server for receiving letters, port number and type of protection. If you also connect a mailbox from Yandex, all these parameters can be viewed at the link above;
Setting up IMAP is painless for the operating environment and quick for the user, so there is no need to be afraid of new terminology and conventions.
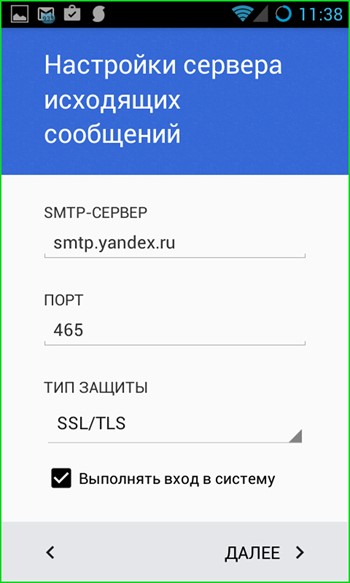
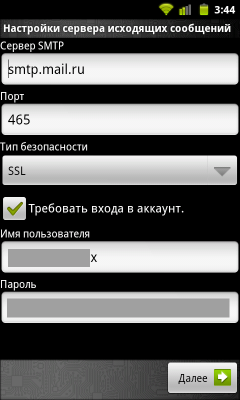
— if the settings are entered correctly, we do the same for the SMTP server, namely for outgoing messages;
— finally, in the final phase we are asked to configure several parameters.
Clock frequency– this is the period after which the phone account will be synchronized with the Google server, as a result of which all new letters will arrive on your smartphone.
Notify about new emails– a function for configuring the appearance of push notifications at the top of the working window about the receipt of new correspondence.
Sync email from this account– will there be mail for this account synchronize with a remote Google web server.
Download attached files if available Wi-Fi connections – if a reliable and fast Wi-Fi connection, then when a connection is established, attached attachments will be copied to the phone along with the letters.

– final phase – entering an optional abbreviated name accounting service and your name, which will appear on sent emails.
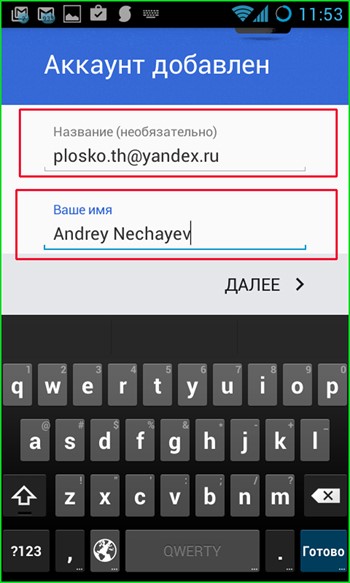
Finally, everything is ready - the account is added and ready to go.
Results
In the article presented to your attention, we described only initial settings to operate the Gmail mobile application for Android. Next week, our editors will prepare for you a guide with more in-depth techniques for customizing this flexible and incredibly functional software tool (the article " " has already been published), after which you will be convinced that setting up mail on Android is a fun and interesting activity.
Modern smartphones running the Android operating system can perform various tasks on which the user could spend his time. Using email is one of the basic needs of most people, and accessing it from your smartphone is often not just a convenience, but a necessity.
The Android OS integrates the ability to configure email. Setting up mail on Android does not require special knowledge or time and is completed in a few minutes. You can configure mail on your device in two ways: using built-in tools or downloadable applications.
Using built-in tools
If the user already has Email Gmail, then the issue can be resolved by adding the appropriate account in the device settings. After this, you need to synchronize your account, which will result in all emails being downloaded to the device. Under the configured account, you can both send and receive letters.
If the user has an account from other email services, then you need to open standard application“Mail”, where the system will prompt you to enter your email address and password in the appropriate fields. After this, you need to select the account type. In most cases, this is POP3, but before setting it up, it is advisable to clarify this point with your provider. Next, you need to follow the instructions and eventually the email client will be configured to receive and send letters.
Some users may have a question - how to set up mail on Android with your domain name, and not from Gmail or other common services? Setting up mail with your own domain follows exactly the same procedure as described above and when correct setting the mail client will work with any mail.

Setting up Yandex mail requires special attention, since the company insists on using a separate application. In order to set up an email client, you first need to log into your email account through the website. Next, in the settings, you need to select “Mail programs”, where you need to check the necessary boxes. After this, you need to create an account using the above method.
If an error message appears when setting up your mail client, then you need to visit the mail service website, where you specify the data for setting up mail on Android.
Setting up mail using the application
Setting up mail on Android using specialized applications is the easiest and fastest way. Depending on which email service your account belongs to, you can download from Google Play corresponding application. Many email services such as Yandex, Gmail, Rambler offer their own free and reliable applications for working with letters.

In addition to individual applications, there are many third-party email clients, such as MailDroid or K-9 Mail, which also allow you to fine-tune the reception and sending of letters from any email address.
Without email, it is difficult to imagine the full use of a smartphone. And on the Internet, without it, certain functions of many sites will not be available to you. Often, creating an account on most web portals involves entering your email address. Therefore, you definitely need to know how to set up mail on Android and how to create an email account.
Nowadays there are many large sites on the Internet that allow you to register your email. But we cannot say that they are all equally reliable. Some are functioning intermittently, while others are suspected of reading personal information contained in letters. That's why we recommend paying attention only to the following services:
- Gmail;
- "Yandex";
- "Rambler";
- Mail.ru;
- Outlook;
- Yahoo!.
To register your email, you can go to the main page of any of these sites. But on a phone, for these purposes, the easiest way is to use the proprietary application of the selected “mailer”. Let's look at each of them in a little more detail.
Price: Free
One of the most famous Russian postal services. Its creators could do their best to attract the user to them. But, surprisingly, mobile app allows you to add an account from other popular “mail providers”. If you have several email addresses, then the Mail.ru program unites them all!
As for the application interface, absolutely anyone should understand it. It is made in signature blue and white colors. If the sender has an avatar, it will be displayed in the program. The client also boasts a combined address book, so you can find the recipient very quickly. Everything is fine here with Push notifications, thanks to which you will definitely not miss the next letter you receive! At night, the sound of notifications disappears - this way the client will not disturb your sleep. The creators should also be thanked for introducing PIN code protection. Of course, if you only use the device at home, then such protection can be disabled.
Price: Free
Another very convenient mail for Android. The application is pre-installed on many budget smartphones, supplied to Russia. The program works stably, automatic push notifications allow you to instantly know when a letter has been received. Also, this application is ideal for those people who work very actively with mail. Even if your account contains several hundred emails, smart search will allow you to quickly find what you need.
The Yandex service allows you to assign different labels to letters. The most commonly used label is “Important”. This allows the letter to stand out from all other messages. It also supports grouping emails by topic. And Yandex is almost better than all other services at identifying spam, second only to Gmail in this parameter.
Price: Free
In the mid-2000s, the Rambler mail service was extremely popular. This cannot be said now. However, this does not prevent the service from working stably and doing an excellent job of blocking emails containing spam. The mobile client for Android has been around for several years now. this moment it has been downloaded approximately 300 thousand times. It should be noted that this application is capable of working not only with Rambler mail, but also with letters from other electronic mailboxes.
Like other programs of this kind, Rambler/mail has clear interface and support for Push notifications. At the same time, developers are always ready to meet users halfway. If you have an interesting idea that can be implemented within an email client, then just write to the creators of the utility at a special address. As for the shortcomings, the application also has them. The most important of them is the display of advertising - this was introduced into the program with the autumn update.
Yahoo Mail
Price: Free +
It's hard to believe, but Yahoo! has been around longer Google search engine. Therefore, you can install a branded client, at least for the sake of curiosity. With its help, you can read letters received not only on your native Yahoo, but also on Gmail, Outlook, AOL and some other services. At the same time, the search part is well implemented here - you can find the desired letter in just a couple of clicks.
Yahoo! provides 1 TB of cloud space. In this regard, you don’t have to worry about the fact that attachments in letters weigh a lot - there will definitely be enough space for them. Those who like to customize should also like the application. The client already supports many color schemes, and there will be even more in the future. Another nice addition is the ability to send GIF animation.
Microsoft Outlook
Previously, the word Outlook meant a special computer program, which collects letters from various web services. It still exists today. But along the way, Microsoft decided to rename its own email service to Outlook. Users note that it has a good fight against spam. As for the proprietary client created for Android, you can also enter data from other email accounts created on other services. There is also third party support here cloud storage, where you can move existing attachments.
Gradually the client learns to recognize the most important letters. If any are present, they will be moved to the very top of the list. In short, the application relies on smart filters, as well as comfortable work with a calendar. It's a pity that the program has Microsoft Outlook and disadvantages. Among them, it should be noted that there is no possibility to add email from Yandex or any other Russian services. But the utility competently interacts with attachments in the form of presentations, tables or text files V Word format. This should not be surprising, since it was Microsoft that invented such documents at one time.
Gmail
Price: Free
95% of our readers already have Gmail installed. But tell about it mail client still necessary. As you might guess, it was created by Google. First of all, it is designed to interact with one’s own postal service, in which almost every person familiar with operating system Android. But you can also enter data here from other “mail providers” that use the POP and IMAP protocols.
The American company provides each user with 15 GB of cloud space. For small investments in the form of documents, this is quite enough. It also has excellent spam protection. The program also has automatic mail sorting - all kinds of notifications from social networks will be placed in separate folders that you can read only from time to time. Everything is fine here and with the search.
Mail settings
If you decide to download one of the applications discussed above, you will definitely not encounter any difficulties in setting up. You will only need to enter your username and password, after which you can start reading mail. Setting up mail on Android causes certain problems only if you want to use the built-in client. Often it is used as Gmail, which is not as intuitive as we would like.
Step 1: Launch Gmail. You can use another built-in client, but our example will be based on a Google product.

Step 2. If you already have Google account, then your email is registered in Gmail. Accordingly, you can already read incoming letters.

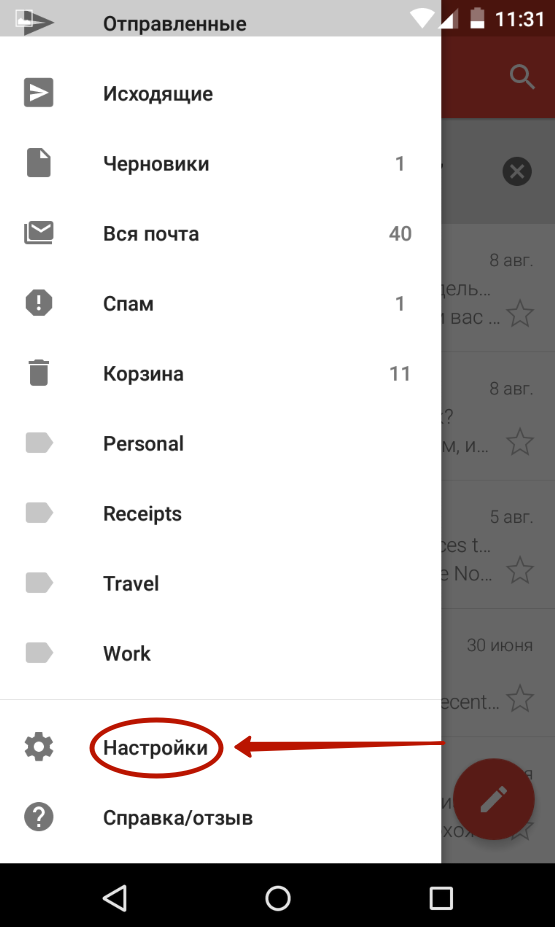
Step 3. To connect an account from another mail service, you need to pull out the curtain on the left edge and click on the “ Settings».
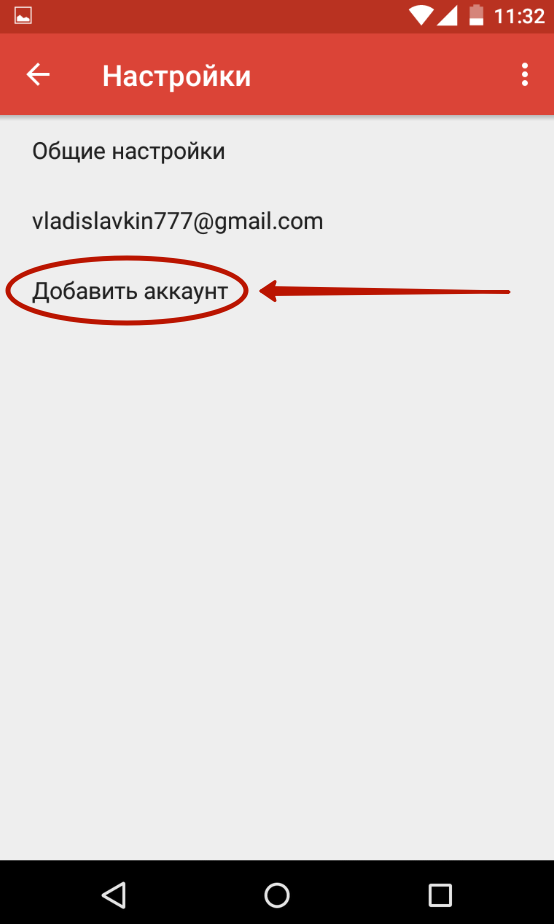
Step 4: Here click on the button Add account».
Step 5. This will take you to the section where you can select the email service you are using. Select the one you registered with. For example, if your email address - [email protected], then you should be interested in the item “ Yandex" If your service is not in the list, then select " Another».
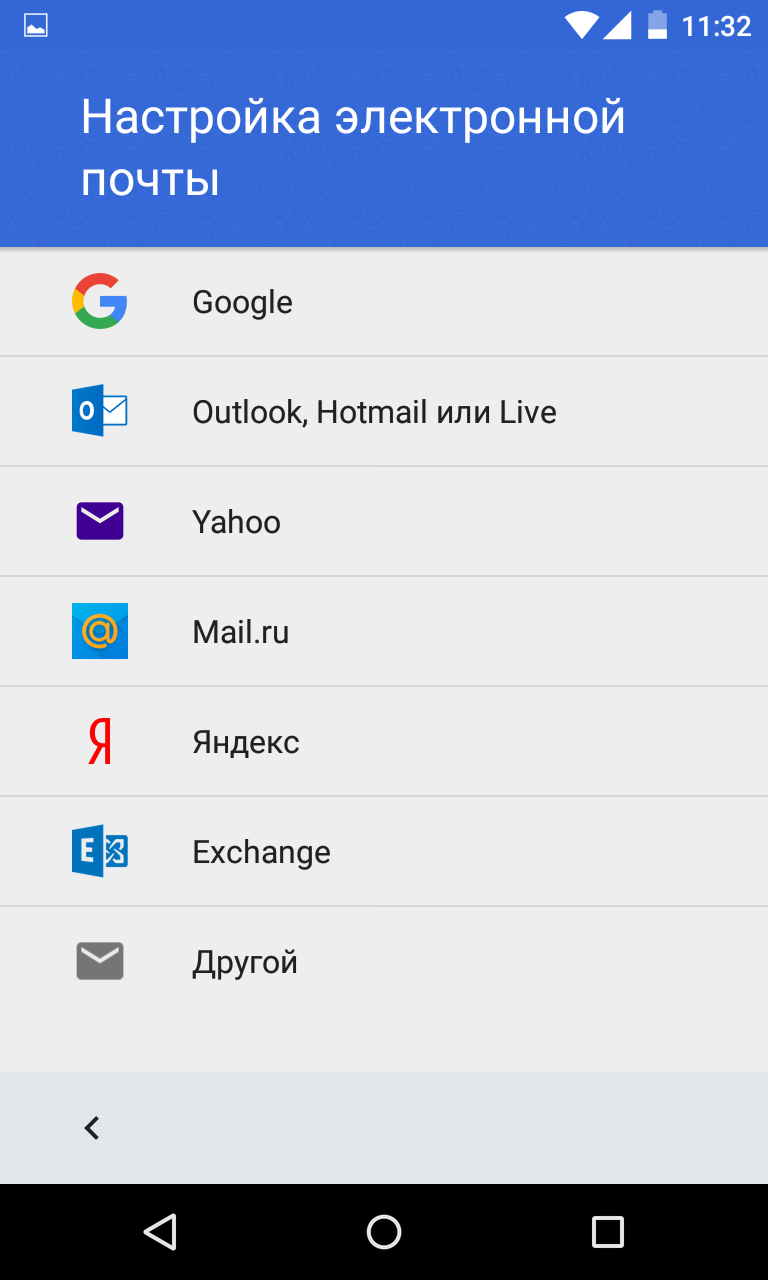
Step 6. Now all that remains is to enter your email address and click the " Further", enter a password and confirm your actions.
This is how easy it is to set up email on Android. Don't forget that you can adjust the client to your own rhythm of life. The same Gmail allows you to select actions performed after clicking the “ Delete", enable automatic navigation through email chains and use many other options. You'll soon be surprised at how convenient email can be!
Despite the widespread various services for communication, email continues to occupy an important place in communication between people. Therefore, it is important to know how to set up your Android device so that you can receive emails on it.
Account creation
Gmail is used as the main email service on Android. An account is created in several steps directly on your mobile device:
After this, the application automatically synchronizes with postal service Gmail, and you will get access to your email account.
Setting up other services
Not all users use Google's email service. Services from Mail.ru and Yandex are widely used. Fortunately, Google specialists also understand this, and therefore provide owners of Android devices with the opportunity to independently configure the email they need on their gadget.
Mail.ru
- Find the Mail icon in the list of applications and launch it.
- Select mail operator mail.ru
- Enter your personal account details on mail.ru - address and password. Click Next.
Now you need to configure your incoming mail:
The following window will appear in which you need to configure outgoing mail:
The account name does not matter. After selecting it, click “Finish” - mail.ru mail is installed.
Yandex Mail
You can configure your Yandex mailbox in a similar way. In fact, only the connection servers change. For Yandex mail, the incoming server will be pop.yandex.ru, the outgoing server will be smtp.yandex.ru. Otherwise the process is completely identical.
Note: Yandex supports the IMAP protocol. Unlike POP, it completely synchronizes the mobile client and mail server. This allows you to control all the functions of your mailbox from your phone. But if you accidentally delete something in the mobile client, it will automatically disappear from the server.
You don’t have to perform these steps to set up your mailbox, but simply download special application. The Yandex company is actively promoting it and in every possible way contributes to the emergence of new users. With the installation of this application, all questions about synchronizing and managing your mail with mobile device become irrelevant.