Digitization studio "World of Digital" provides professional digitization services for photographic films, slides and negatives, and photo scanning in Moscow! Promotions and discounts apply! Wide range of scanning options: for digitizing films from 1200dpi to 4000dpi, for scanning photographs from 300dpi to 4000dpi. Individual selection of resolution is possible.


Advantages of digitization in the “World of Digital” studio
- Technologies for removing scratches and dust, electronic retouching;
- Additional processing in Photoshop: color correction, cropping, positioning;
- A choice of scanning resolutions from 300dpi to 4000dpi;
- Professional scanners for digitizing film and slides, scanning photographs;
- Record on any media;
- Quantity discounts: 5-20%.
Digitization of photographic films and slides (negatives, transparencies)
Included in cost:
- Technologies Digital ICE, GEM, ROC - removal of scratches and dust, hardware color correction;
- Post-processing: manual correction, cropping, rotating the image to the correct position Promotion! ;
Digitization of photographic films and slides price: |
||||
| Service | up to 6 films / 200 frames | up to 15 films / 500 frames | up to 30 films / 1000 frames | more than 30 films / 1000 frames |
| Scanning 4000dpi | ||||
| 420 rub/film | 400 rub/film | 380 rub/film | 340 rub/film | |
| Slides, personnel |
18 rub/frame | 17 rub/frame | 16 rub/frame | 14 rub/frame |
| Scanning 3200dpi | ||||
| Film roll (24 or more frames) | 380 rub/film | 360 rub/film | 340 rub/film | 300 rub/film |
| Slides, personnel |
16 rub/frame | 15 rub/frame | 14 rub/frame | 12.5 rub/frame |
| Scanning 2400dpi | ||||
| Film roll (24 or more frames) | 330 rub/film | 310 rub/film | 290 RUR/film | 260 rub/film |
| Slides, personnel |
14 rub/frame | 13 rub/frame | 12.5 rub/frame | 11 rub/frame |
| Scanning 1200dpi | ||||
| Film roll (24 or more frames) | 240 rub/film | 230 rub/film | 215 RUR/film | 190 rub/film |
| Slides, personnel |
10 rub/frame | 9.5 rub/frame | 9 rub/frame | 8 rub/frame |
Digitization of large-format photographic films and slides (4×5, 5×5, 5×6, 6×9) |
|
| 1200dpi | 30rub/frame |
| 2400dpi | 50rub/frame |
| 4000dpi | 60rub/frame |
Notes:
- The minimum order for scanning slides and films is 500 rubles;
- Films with less than 24 frames, as well as cut films, are calculated frame by frame;
- Do not remove slides from the frame, scanning slides taken out of the frame +50% to the price list.
Example of negative digitization
on the left, enhancement technologies are disabled, on the right, hardware enhancements are applied (relevant for color films)

P.S. Visit our Digitization Gallery to view the works.
P.P.S. Examples of framing and digitizing slides and negatives.
Scanning photos
Included in cost:
- Elimination of scratches, dust (digital ICE);
- Frame trimming, reversal Promotion! ;
- Automatic color correction, plus manual finishing in Photoshop Promotion! ;
- Recording to CD/DVD, cloud, customer's media.
Digitization of documents, digitization of photographs price: |
||
| Scan Resolution / Service | Photo size | |
| up to 10x15 | starting from 10x15 to A4 | |
| 300dpi (document scanning, text digitization) | 5 RUR/photo | 10 RUR/photo |
| 600dpi (book digitization) | 10 RUR/photo | 20 RUR/photo |
| 1200dpi (for creating slideshows) | 15 RUR/photo | 25 RUR/photo |
| 2400dpi (for subsequent retouching) | 18 RUR/photo | 35 RUR/photo |
| 4000dpi (for small size photos) | 22 RUR/photo | 40 RUR/photo |
| Text recognising | 20 rub/page | |
Discounts on photo digitization: |
||
| 100-199 photos | 200-499 photos | more than 500 photos |
 |
 |
 |
Notes: .
Scanning film and negatives
Digitization is carried out on a film scanner, which allows you to scan photographic film with a resolution of 4000 dpi. This is a professional device for high resolution film digitization and high productivity. An example of scanning a negative without improvement and with improvement (elimination of scratches and dust, electronic retouching - color restoration, sharpening) You can see just above “digitalICE and digitalGEM Technologies”. Please note that these technologies do not work when digitizing old black and white negatives; when scanning photographic film in color, the technologies are relevant. Scanning film - the result exceeds your wildest expectations! Call!
We offer slide digitization and negative film scanning at 1200dpi, 2400dpi and 4000dpi. Example.
Scanning old photos
Additional services after digitization: frame trimming, photo reversal and color correction. When scanning film and digitizing old photographs, a frame is always formed around the digital copy, since the scanning area is always larger than the original photograph. Also, when scanning, the image may appear upside down. After digitizing photographs, color correction is important, since photographs are scanned with slight light exposure - a minus of all flatbed scanners. All these shortcomings can be eliminated! Examples.
Digitization of slides and negatives
You can easily find a studio that will scan photographs and digitize film, as well as scan slides. If there are large volumes of photographic materials in the studio, scanning will be done much faster and better than what you can do, and you will probably receive a discount for the volume. What you should pay attention to:
- Prices must be justified; the larger the volume, the cheaper it should be to digitize film and scan photographs.
- Deadlines – the studio should keep you informed about deadlines, and it is also possible to pick up finished materials in parts.
- Quality - contact a studio with professional equipment, and also pay attention to the list of digitization services, the more of them, the better the studio works.
Digitizing photographic films at home
While a studio can digitize your films professionally and save you time, you can try scanning your films yourself. Advantages of digitizing slides and negatives at home:
- The ability to choose which frames you need. Digitization of photographic films in the studio involves all the resulting frames.
- Personal photos if you don’t want anyone else to see them.
Buy a scanner to scan slides and film. The more expensive the scanner, the better the quality of digitization of photographic films and slides. You can purchase a flatbed scanner with a slide module, the price varies between 3,000-10,000 rubles. You can also purchase a professional film scanner with electronic retouching, scratch and dust removal technologies. Such a device will cost 45,000 rubles and more. What you should pay attention to:
- Speed. Some scanners digitize films at breakneck speed. Be prepared that this may affect the quality of film scanning.
- Quality. It is advisable that the scanner supports a slide scanning resolution of 4000 dots per inch (dpi). This installation allows you to digitize a negative in 32x48 quality.
- Compatibility. Professional scanners connect using the 1394 protocol, make sure your computer has one.
Flatbed scanner. You can digitize photographic film using a conventional scanner for digitizing text and scanning books. Minuses this method consist in the small resolution of scanning the slide, the scanner has limitations in brightness, the film is digitized through glass, there are no special “tricks” to improve the image. With this method it is impossible to achieve the same quality of digitization of slides and photographic films as in specialized studios.
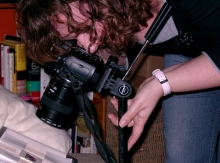
Photographing the slide. What you need: screen, overhead projector and camera stand. Take a photo of the screen image using digital camera, achieve optimal sharpness. Next, you need to process the photo in Photoshop.
Summarize. The cost of digitizing photographic films in a studio and subsequent photo processing is quite adequate today. But the result may pleasantly surprise you! Think about what is best for you: trust professionals to digitize photographic films and scan slides, or conduct experiments at home. Pay attention to which studio you are going to entrust digitization to. Some companies may lose materials or damage them, and the saddest thing is that they are not responsible for this. 73 votes, rating: 4,96
out of 5)
I digitized my photo archive (about 3000 frames). I am satisfied with the purchase. Whether you need it, decide for yourself. Samples of digitized frames and description are under the cut.
I purchased my first digital camera in 1994-2004. By that time, a considerable amount of photographic films had accumulated, prints from which were made and placed in photo albums. I didn’t have a clear idea of why I should keep old photographic films, and from time to time, during the next general cleaning, the non-illusory threat of being thrown away hung over them. When I met Chinese online stores, then I paid attention to the so-called film scanners, but in fact devices for digitizing them. But the reviews about the quality of their work were unflattering, so I didn’t dare buy them. And then by chance, on the Amazon website, I came across another such scanner with an obscenely low price - about 35 dollars. Reviews on the same site about his work were quite good. On Amazon, delivery to Ukraine is either not available at all, or it is expensive, and I began to look for this product somewhere else. And I found a website. The website looked very suspicious. Judge for yourself - the site is a year old, no contact information, not even Email. You can write to them only through the form on the website. No customer reviews. It is unclear in which country the seller is located. I found online that the site is registered to a domain name registrar company. And then I discovered that the seller himself was in Hong Kong. The only reassuring thing was paying through PayPal. That is, the risk is small. And I made up my mind. After payment, 5 days passed, and the status of my purchase remained as it was - paid. I wrote to them through the website, and received a response that my parcel had already been sent 2 days ago, and a tracking number was provided.
Delivery took as usual - about 3 weeks. The packaging is good. 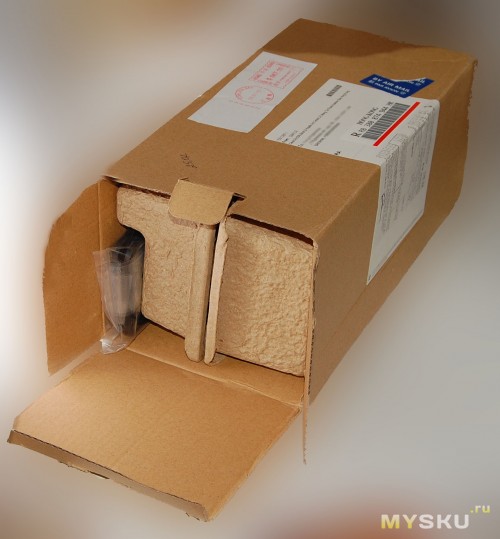
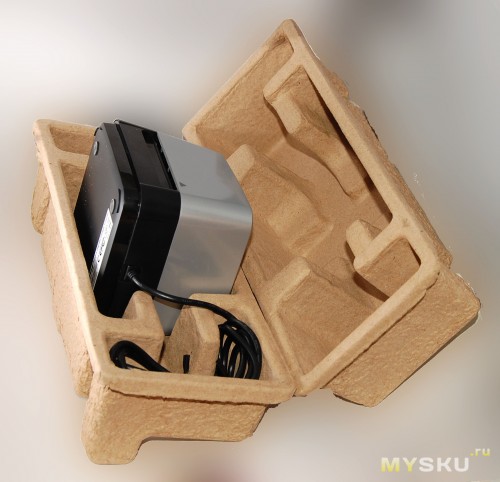
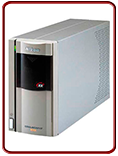
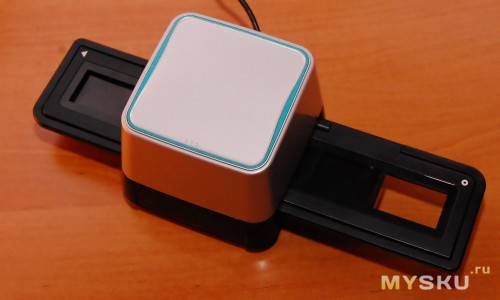
The scanner itself is inside the package. 
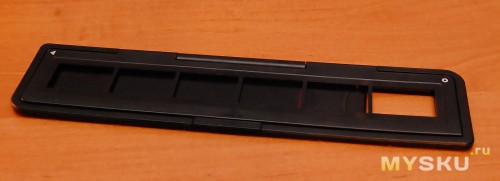
35mm film holder 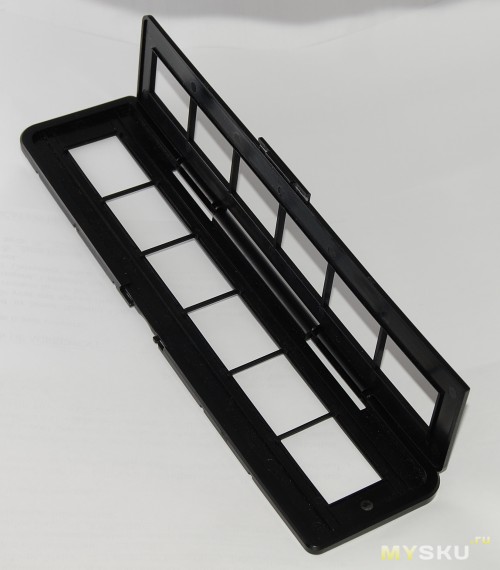
slide holder 
software disk 
and a brush for cleaning the lens of the device 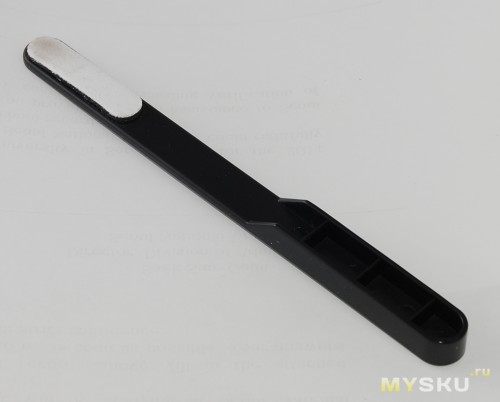
The disk automatically starts and offers to install the ImageImpression program, with the help of which the digitization actually takes place. I used it under Windows XP.
The program has a Russian interface. The result can be saved in TIFF or JPG formats, and for the latter there are several gradations of compression ratio.
The stated resolution is 1800 dpi. 3600 dpi is already interpolation. 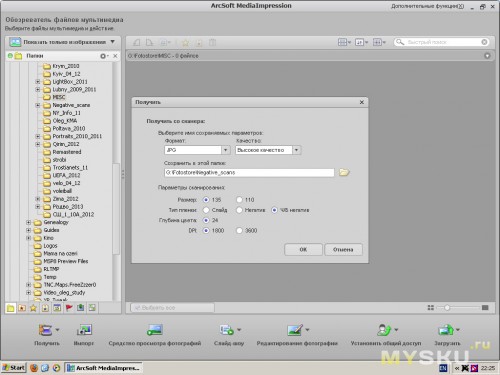
The actual digitization occurs as follows. A piece of film (up to 6 frames) is placed in the holder, and then the whole thing is inserted into the side opening of the device. 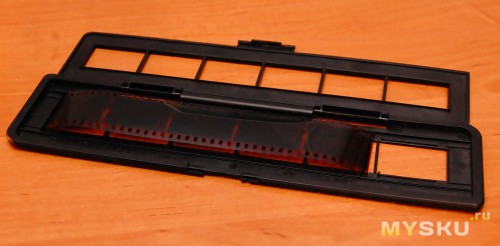
The program analyzes the color and brightness balance of the frame and sets it according to its own understanding optimal settings. None manual settings No. 
Click on the “Capture” button and move the holder to the next frame.
Examples of digitized frames. 

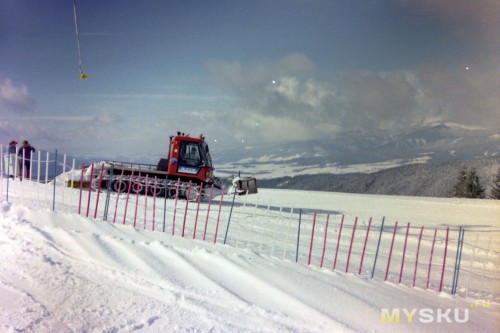

The quality, as you can see, is so-so. Suitable for viewing on a monitor screen, but unlikely for printing.
However, I'm happy with the purchase. She completely met my expectations. You can't ask for anything else from a device of this class. She solved the problem I set - to digitize an old photo archive. Considering that he was filmed mainly on point-and-shoot cameras, and that the films were scratched in places, best quality I didn’t really need it.
By the way, the ImageImpression program has two useful one-button enhancements, one of which visually improves lighting, and the second one removes noise.
I consider the advantages of the device:
-price
- speed of work. For me it was 3 frames per minute.
On the downside:
- lack of possibility of manual digitization settings.
- lack of equipment for scanning uncut film.
You have to cut 6 frames each. The vast majority of my films were already cut in photo labs. I adapted to cutting the rest using a “device” I invented myself, which I share with you free of charge. Select a book of the appropriate size so that the pages are approximately the same height as 6 frames of film. Then insert the film between the pages and cut. Now you don’t have to count 6 frames, and the cut fragments will lie neatly between the pages of the book. 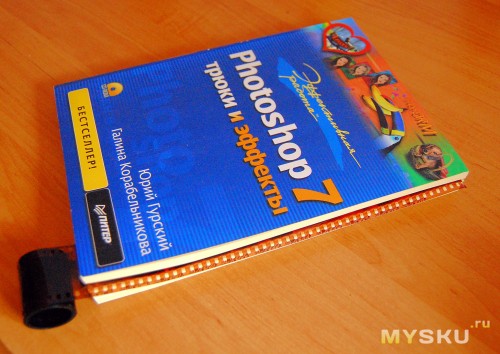
Device characteristics declared by the seller:
Sensor: 1/3.2" inch 5.15 megapixel CMOS
Optics: Fix Focus Lens F/NO= 2.8/f= 4.76mm
Color Balance: Automatic
Brightness: Automatic
Resolution: 1800dpi 2592 x 1728 pixels(3:2)
Interface: USB 2.0
Power: from USB port
Light source: 3 LEDs
Operating Systems: Support Microsoft Windows XP/Vista/Windows 7/Mac10.5 above
Dimensions: 8.1x10.6x10 cm
For your information. The process of digitizing photographic film using a digital camera is called reshooting.
The essence of reshooting is to photograph the film on a white background and correct the resulting digital image, using special programs.
For such digitization, many models of photographic equipment today are sold with a special lens attachment, which already has a white background.
If your camera does not have such an attachment, you can make it yourself using available materials. To do this, you will need a cylinder with a cavity inside, which is slightly larger than the diameter of the lens (for example, a cylindrical can of fish food, tea, or another). You need to attach a platform (a piece of thick cardboard or plastic) to the cylinder on one side, having previously cut a hole on it for the frame.
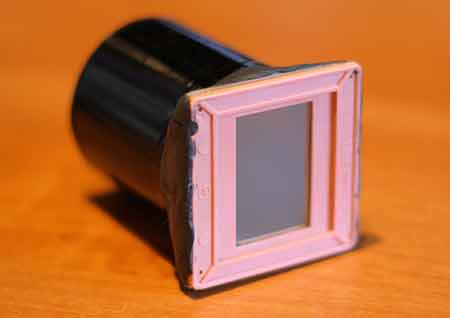
With the other side we put our cylinder on the camera lens.
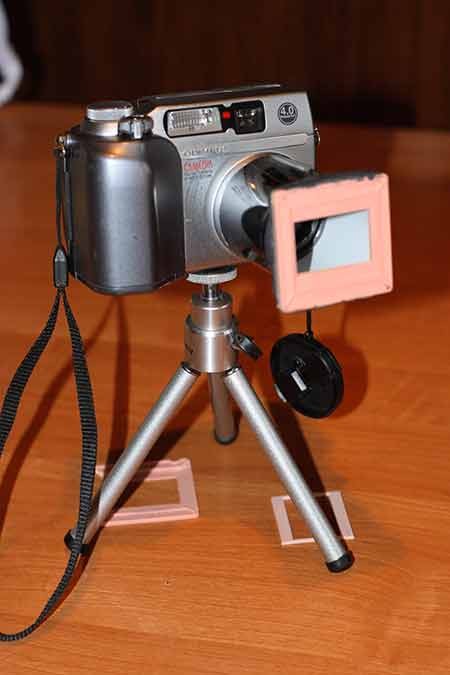
The camera on a tripod with a homemade attachment must be placed in front of the light source. The best option- This is a liquid crystal monitor of a computer or laptop. White background is created by opening a new document in Adobe Photoshop and expanding it to full screen.
IMPORTANT. It is better to reshoot film in complete darkness, turning off all additional light sources except the main one - the monitor.
The photographic film must be installed at a certain distance from the monitor (up to 15 cm) so that a wave-like glow does not appear from the screen, but at the same time the brightness of the screen does not weaken. Next, turn off the light and re-shoot the film with a digital camera.
Digitizing film without an attachment
Complete digitization of photographic film with your own hands is possible without purchasing a special attachment for the camera lens.
To do this, we will need a camera, tripods and a computer monitor. We fix the camera on one tripod, and on the other - a device with which we fix the film or slide. You can use frames from photo enlargers or projectors for this.
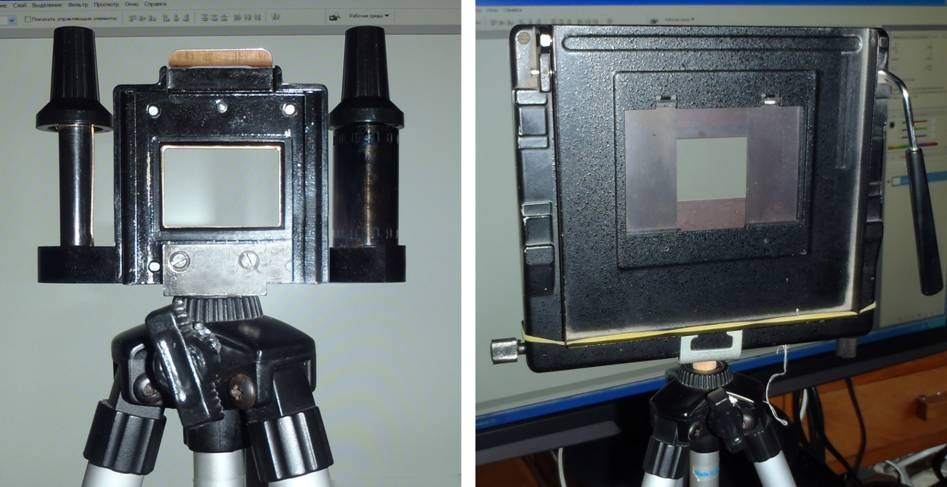
If they are not available, then you can make the following design.
We take two glasses from photo frames and cover their edges with white self-adhesive tape to protect them from sharp corners and thicken the structure. We apply two glasses to each other, and glue them together with tape on top and bottom. We insert the film into the resulting gap between the glasses. Next, we place this structure parallel to the monitor, you can secure it with available materials, for example, stacks of books on both sides, turn off the light and start filming.
The resulting image is processed using inversion (Ctrl + i), adjustment layers, channels (blue, green, red Ctrl + m) and manual correction using Adobe Photoshop or another graphic editor.
As you can see, this method of transferring a film image to a digital one is also quite affordable and doable at home, so it’s up to you to decide how to digitize photographic film. Scanning, camera or darkroom - the choice is yours. The main thing is that the result meets expectations and brings pleasure from the images received and viewed.
Slides that depict various important events in the life of a family and household members are one of the most exciting opportunities to remember many years of joy and pleasant pastime. But viewing black and white footage is not always possible due to the lack of a special projector or if its use is prohibited (for example, a breakdown). That is why we change the format and translate it into more acceptable modern views slides become the most tempting solution.
It is quite expensive to use the services of specialized companies, and therefore it is possible to carry out all the required procedures using practically improvised means. All of them can be borrowed from friends or, in extreme cases, rented. The sequence of work is not so complicated and any owner can complete the task.
First, you should familiarize yourself with the existing processing options. After that, choose the most suitable one and then proceed to the passage of the plan.
Using the Scanning Device
The attractiveness of this work lies in the conditions of using simple instruments. That is, even if the owner of the film does not have a scanner at home, this device can be used at a party, with friends, or at the workplace.
However, its cost is not so high and you can even purchase a device for permanent use for your personal purposes.
But there are also special scanners that ideally meet the requirements. In particular, these are flatbed scanners that are equipped with a single-color lamp and they also have lighting on the lid, which is unusual compared to cheaper ubiquitous analogues.
The only problem is that to purchase such equipment you will need to buy it at a significant cost, but this factor will not solve all possible problems.
First of all, you need to pay attention that when using low-quality equipment, the following unpleasant phenomena may occur:
The size of the captured slides will vary high quality Images. Accordingly, even its subsequent processing will not give a positive result.
When shooting, frames may remain so small that subsequent processing will result in reduced clarity or changes in parameters.
Before purchasing an expensive device, you should also check whether it can truly fully meet the assigned tasks. To do this, you need to familiarize yourself with the parameters of the purchased model.
Most important characteristic the density of translucency will become. If it is possible to adjust a parameter directly in the utility menu of the program that connects the scanner, then you can make the settings in accordance with your wishes. But if this indicator cannot be changed and changing the parameters of the operation will not affect the final result, then you should think about the advisability of purchasing this device.
The scanning process is familiar, but not acceptable in the case where there are too many slides. Firstly, it tires the performer himself and you can end up with a not entirely correct, inconsistent or low-quality shooting. Secondly, the time spent on carrying out such a procedure is many times greater than when using the second digitization method. Don't forget that there is an even simpler and more "pleasant" process for converting outdated slides and films into modern formats.
Using a digital device
There are quite a few options for considering working with a digital device. If desired, you can prepare an entire studio if processing is required for a large number of materials.
First of all, you need to familiarize yourself with the principles of operation of this method and determine by what parameters you should select a camera.
It must be remembered that the shooting will be done macro; accordingly, the device used must not only be equipped with this functional module, but at the same time fulfill all the assigned requests exactly. In particular, this relates rather to the quality of shooting and resolution. Since slides and old films often have very low clarity, you should select a device that can completely copy the image. During subsequent processing, achieve the desired type will not be difficult, but initially necessary, and transfer it to digital world in the required quality.
The brightness of the lighting plays a very important role when using a digital camera. For example, if there is insufficient lighting, the following problems may occur:
Also read:
How to make slides on a computer?
Poor visibility of one of the edges.
This will entail receiving a low-definition picture, which will not only be obtained in full, but only partially. If the light spreads poorly, then the photo itself will be transmitted rather poorly.
Lighting up one of the corners.
Also quite an important problem, which can entail approximately the same picture as described above, but at the same time one of the corners (in a critical case, even several) will be too bright or even just light, translucent. No amount of processing can sufficiently correct the resulting image, and therefore special attention should be paid to this factor initially.
Insufficient lighting.
Will result in poor image quality. With subsequent processing in a specialized program, the problem can only be partially solved. The maximum addition of contrast and color, however, in some special cases can change the fall of shadows and the appearance of the image in general. This should be avoided at the initial stage of preparation for frame-by-frame reshoots.
The whole trick of the digitization method in question lies in the frame-by-frame transfer of the film to a computer and its subsequent compilation in reverse order after processing. This will allow you to get fairly good images.
Choosing the appropriate camera also plays an important role. There is no need to purchase such a device separately. Cheap devices do not produce such indicative clarity of photographs during macro photography, which will only lead to waste Money without obtaining an appropriate quality result.
If you purchase an expensive, high-end device, there are also some problems. First of all, it is worth remembering that if the device is subsequently not used (in particular for professional photography), such a purchase can simply be called unnecessary and irrational. But if the buyer is a professional photographer and in the future this device will become his main working tool, there are no complaints.
Also read:
How to choose a digital camera?
If you don’t have a decent camera available, and you don’t want to take pictures with the first one that comes to hand, it’s best to turn to a rental service or ask for help from loved ones. Thus, the cost of do-it-yourself digitization during rental is much more profitable than turning to specialized companies for similar services. But in in this case It is worth remembering to use the device carefully and to return the device in a timely manner.
Once the camera has been selected, you can proceed to the next stage of work - drawing up the correct layout of the components.
The circuit consists of the following components:
1. Lighting device.
2. Film.
3. Camera.
Before connecting a lighting fixture, you can consider both expensive and budget options. The use of special lamps, of course, will provide the opportunity for correct and uniform lighting. But a budget one will save a sufficient amount of money.
In the form of an economical lighting fixture An LCD monitor from a computer can appear. You need to go to some Text Document or a browser window that will be completely white without inscriptions, patterns or other elements.
The film fixer is also a particularly important consideration because it is what will allow you to get the shots positioned the way you want. For example, it could be some special design that holds the film and allows you to take a good and even photograph. But this option is suitable only when the volume of shooting is small enough and you don’t have to constantly move slides or film. If the work is carried out with a large volume of materials, then it is necessary to use a design that allows you to perform actions more or less automatically. For example, this could be either a film holder from a strictly machine, or a similar component structure.
This will allow you to gradually move frames that have already been filmed, are being filmed and are “waiting” for their turn. This approach is optimal.
You can also purchase a special stand used for old film cameras, but searching for it may take too much precious time. Therefore, it would be best to limit yourself to the materials available and start working immediately.
When arranging lighting fixtures, film, and camera, it is necessary to take into account some simple rules. The first of these is the location of the lighting device at a distance of approximately 20-25 cm from the film. If you increase it, the illumination will be insufficient. When reduced, the clarity decreases and the image may be overexposed.
The second rule is to position the camera at a distance of 2 to 5 cm from the film for high-quality shooting. Since the focusing of different devices is different, you need to rely on samples in your calculations. Unfortunately, the exact distance cannot be calculated immediately, because this parameter There are too many factors involved.
And lastly: when rewinding the film, you must carefully monitor the distance. Otherwise, each frame will have different clarity and size, which will reduce the quality of the final selection.
Once all the film has been shot, you can move on to processing the frames. In particular, special programs for working with images will help you obtain the optimal solution.
It must be remembered that increasing brightness and contrast are the most important processing parameters, since it is thanks to them that clear and beautiful photographs are obtained.
If the photo is slightly skewed, this nuance can be corrected using special tools in the program set. But it is worth remembering: this must be done very carefully, because even a minor change can distort the image.
When enlarging a photo, it is necessary to take into account the proportionality of the change in parameters. They will allow you to get high quality.
The difference between scanning and reshooting digitization capabilities
After both methods have been considered, it is worth paying special attention to their differences and the advantages of both options.
If the owner of the “vintage” film preferred the first option considered, then it is worth noting the following nuances. First of all, this is the duration of the work. As stated earlier, scanning is a monotonous and lengthy process. It is ideal in cases where a small amount of materials needs to be processed. If more than 1 day is spent on processing (with small quantities of processed material), then this method can hardly be called optimal.
The second is the cost and possibility of renting or “temporarily” the main working apparatus. Specialized scanners are quite a rare thing in households. best friend or a friend, finding one is quite difficult. But the problem of finding a high-quality digital camera is solved quickly, and you can get a truly amazing device.
When choosing among the methods described above, it is necessary to take into account all factors. But the most important thing is the ability to process on a computer. In particular, translating an image from a package of documents from a scanner is quite difficult (if you are working with it for the first time). Yes, and it takes too much time. But sending photos from a camera for processing is much easier: you need to create an appropriate folder or copy the one on the memory card. And then, selecting individual pictures from it, process the resulting images frame by frame. In addition, the volume of the map can be so large that work with a large volume of materials, without sending it to a PC, can be completed entirely in one reshoot session.
From the translator: This article continues a series of publications by different authors dedicated to film photography. The previous article was called “Film: Tips, Cameras and First Instructions” and is available at .
This tutorial will show you how to "scan" your film using a Digital SLR. The reason for using a digital camera instead of a slide scanner for this operation is to save money and ensure the safety of the films. A good film scanner is expensive, so you should only buy one if you need to scan a lot of film. Another option would be to scan the films in specialized darkrooms that have professional scanners, but many people are put off by the prospect of sending films by mail.
First of all, it is necessary to recognize that the method proposed in the lesson will not give the same results as a professional scanner. However, this is a fantastic idea and great way digitize your films at home.
Preparing for work
Before you start, make sure you have everything you need:
- Digital SLR camera.
- A piece of glass on supports, such as a glass table, picture frame glass, mounted on 2 stacks of books or boxes to create a "table".
- A piece of glossy photo paper with no writing on the back. Most brands produce this type of paper.
- Flash with wireless control or a powerful table lamp.
- Tripod.
- A macro lens is recommended but not required.
- Photoshop or other image editing program.
Step 1
First, you will need a glass surface to shoot on. I used a glass table, but a photo frame would work just as well. To use a photo frame, just remove the backdrop and photo from it - what remains is the glass with the frame. Next, you will need to find something to use as a glass coaster. Try using stacks of books or several boxes. A structure height of 30 cm is quite enough.
Step 2
Now that we have our stage, it's time to set up the camera and tripod. The lens you use determines how close to the glass you can shoot. No matter what lens you may be using, try to fill as much of the lens's field of view as possible with the film frame.
The most important thing in setting up a tripod is to set the camera sensor plane parallel to the glass plane. The best way To do this, lengthen the back leg of the tripod more than the two front legs, so that the camera is directly above the glass. Remember that if you overextend the tripod leg, it may become unstable and may eventually fall over!

Step 3
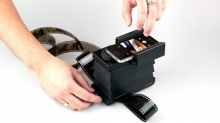
Now you need a piece of clean photo paper without any extraneous writing. A large piece is not needed - 10*15 cm is quite enough. Place photo paper on the glass below the camera.
Then place the film on photo paper. You'll probably need something to hold the film down - two film containers will do. When installing them, be careful, try not to move them along the film to avoid scratches and damage.
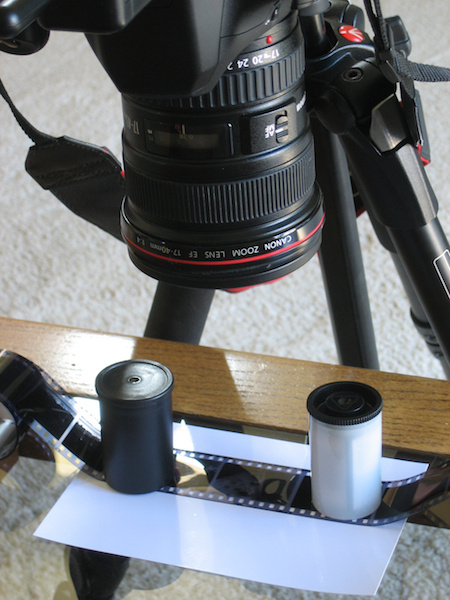
Step 4
At this stage, you can use a remote-controlled flash, or a bright table lamp. Be careful when using a lamp with constant light as it creates a large number of heat, which may damage the film. Place the light source under the glass and point it directly at the film. If you're using a flash, you'll have to do some testing to find out correct settings. The purpose of the settings is to produce slightly overexposed photo paper. I used a Canon 430 EX flash at half power at a distance of about 30 cm.