When asking how to increase memory on Android, you probably meant how to free up memory on android. Many people still do not know that at any modern device Memory can be random access (short-term RAM) or long-term memory (ROM), which stores your data. And those who ask about how to increase RAM on Android most likely do not understand this.
RAM on a tablet or smartphone cannot be increased, it can only be cleared from programs that are on this moment are not used. A more complex problem is the lack of space specifically in long-term memory (ROM), when your smartphone screams at you about the lack of disk space and you cannot install any more programs.
And this happens because when buying, we save money and buy budget models, where all resources are scarce. In the store, such a smartphone works very vigorously, but then, when you load it with your programs, this problem begins with a lack of memory and you start typing in Yandex - help, how to increase internal memory on android?
So the first piece of advice is to buy normal smartphones, it’s better to pay an extra thousand rubles and then save a LOT of nerves! By the way, as I noticed, it is very profitable to buy from M-Video:
I compared it myself recently when I wanted to buy a laptop, at the moment M-Video and Ulmart are still the most best stores by price.
How to increase memory on Android?
There are several ways to solve the problem, I’ll start with the simple ones and end with the most effective.
Remove unnecessary/unused programs. This is banal, but even this does not reach everyone. Delete not necessary programs and space will immediately become available!
Install a cleaning program. There are a lot of such programs, I advise you to install 360 Security Lite, it has an antivirus, a RAM cleaner and a garbage cleaner. Unlike others, this is a very lightweight application created for phones with RAM less than 1 gigabyte.

The program is made with high quality, it is made by the same Chinese who made it, which I myself use on Windows and recommend to everyone.
But this does not always help, since after removing the garbage it immediately accumulates again, and these cleaning programs themselves sometimes weigh a lot. Therefore, let's move on to more radical methods.
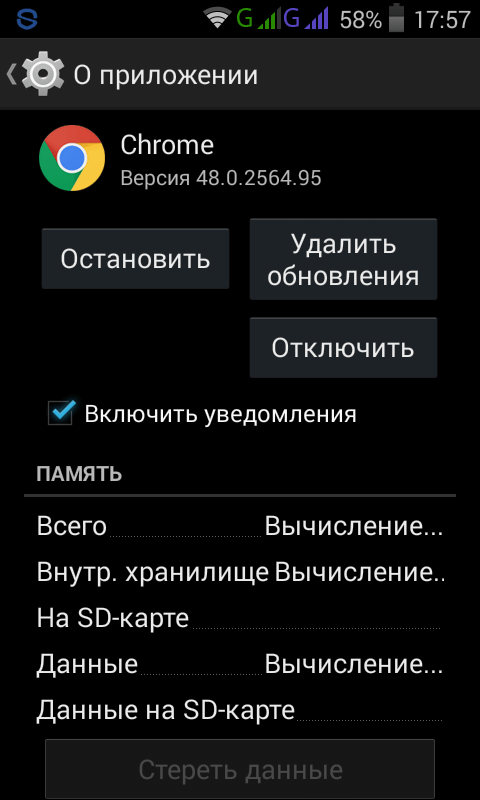
Removing updates. It's probably enabled on your smartphone automatic update programs. There are programs that simply need to be updated, for example, . Most programs, especially those that you do not use, are better not to update. When updating, they download a lot of megabytes and clog up the memory on the phone. What should be done?
Need to go to Google Play in SETTINGS and disable automatic software updates. Now you need to open Android settings, go to APPLICATIONS and go through the programs that you do not use. There will be a button at the top right - REMOVE UPDATES.
Yes, this will already free up a lot of space for you. But that's not all, there's one more good method, how to increase memory on your phone - transfer applications (some, all will not work) to an SD card.
Transferring apps to SD. For these purposes, you can use one of many programs, for example, AppMgr III (App 2 SD).
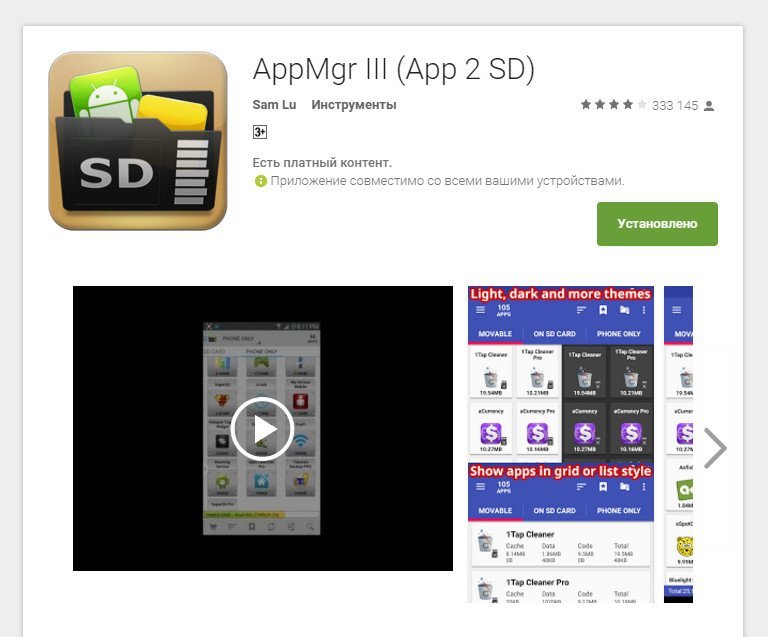
After installation, the program will show you which applications can be moved. Click on the application, a frame appears, select the MOVE APP item, you are transferred to the program settings, there is a button (just below) - MOVE TO SD.
In addition to this, there are a lot of other similar programs, choose according to your taste, which one is more convenient for you, this one may not be the best.
But even all these actions did not help me, my smartphone was sorely short of space, and then I took extreme measures - transferring system applications!
Transferring system applications to SD. The thing is that many programs do not want to move to SD of their own free will, and they themselves and their cache take up a lot of space. Here's a look at how much space I had before the operation:
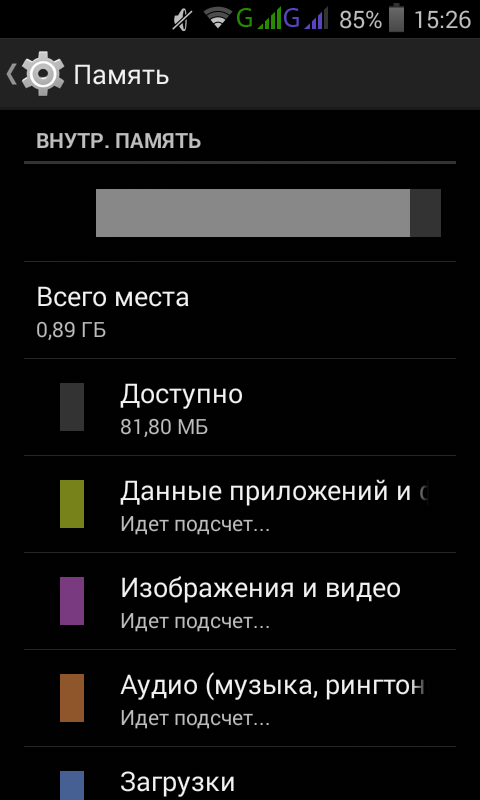
Only 81 megabytes, and I just cleared the entire cache and even deleted the necessary programs. How to free up space on Android and transfer to a memory card even what you don’t want to transfer?
First you need to get root rights, . The procedure is not complicated, and if suddenly the first program does not work, then try the one to which I gave a link in the comments. If anything, here is a link to this program in Russian - baudi root.

Now download the program (if you have Windows) EaseUS Partition Master and install on your computer. If you have Linux, then you probably have the GParted program, if not, then install:
Sudo apt-get gparted
Now remove the SD card from your phone or tablet and connect it to your computer using the card reader. Your task is to shrink the existing partition and create a new one, fat32, by about 4 gigabytes.
Now we insert the card back into the phone and reboot it so that the new partition is automatically mounted (this may not be necessary, but it’s more reliable)
After you get root, you need to install the Link2SD program - here is the link to full version , although it’s old, it’s working, more a new version I didn’t want to work.
Launch the program and select “Recreate mount script” in the program menu. After this, the following frame will appear:
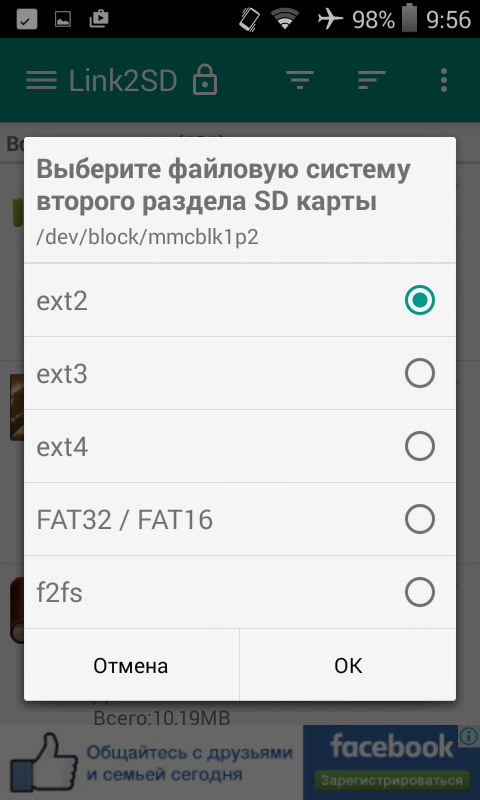
We choose FAT32, although you can try others, but something didn’t work out for me with ext2. If everything went well, the following window will appear:

Click restart and then open the program again. All our applications will be in front of us. Near those that are green -Odex- You can't move it, but everything else can.
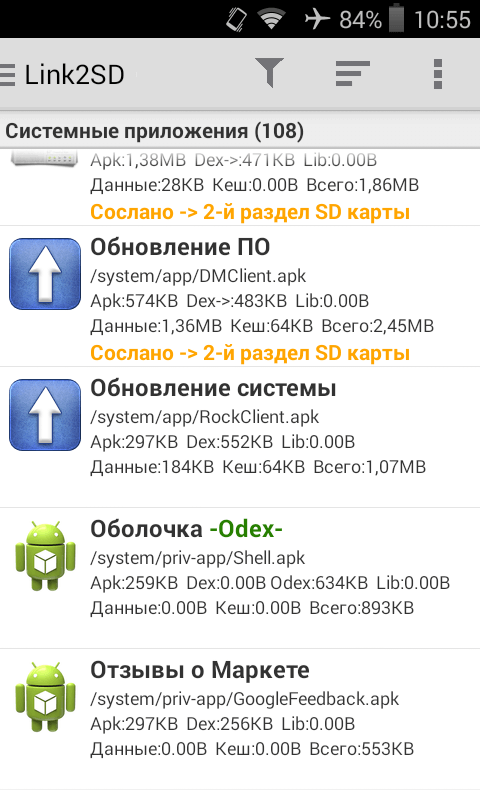
We click on the program and we are redirected to a page where there is a button at the bottom - REFER. Click it and move the program (or part of it) to the new partition we just created on SD.

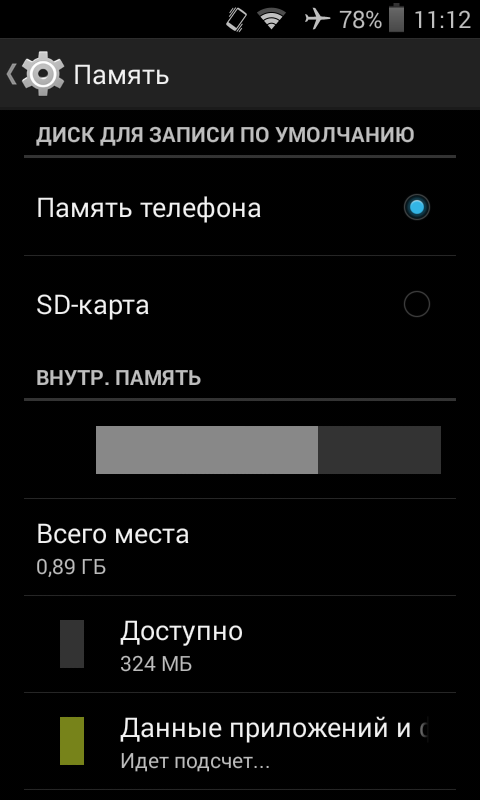
As you can see, now I have 324 megabytes free, and, as you remember, there were 81 megabytes. This way I freed up 240 megabytes, which is not bad for a phone.
Along the way, I want to explain to you why there are problems with space, because on the smartphone itself there is usually more than enough space? The thing is that a fixed place is allocated for programs, look here:
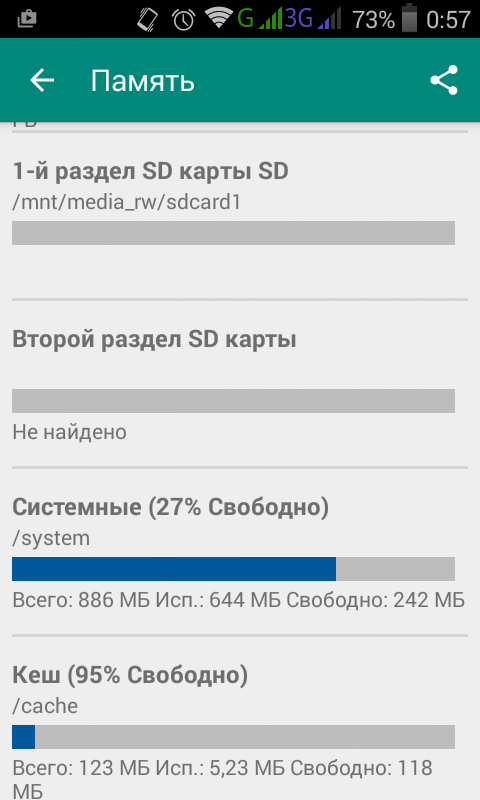
You see, on system partition Only 886 megabytes are allocated, although the smartphone itself has several gigabytes. It’s just that the rest are left for data, because you buy an SD card only later and the phone should somehow work without it?
So it turns out that the system partition is full of applications and nothing can be done; photos, videos and all other files that you download to your phone have nothing to do with it.
Here's the best way to increase memory on your Android phone. Although the first methods are worthy of life, this last one REALLY AND CARDINALLY solves the problem!
How did you manage to solve this problem? Are there other ways?
Published 15 Feb 2016 18:10 © Simply Linux | Everything about Linux, Android and Windows.
In budget or outdated Android devices today, there is a serious problem with internal memory, or rather its lack, and even though the device may have a memory card of several gigabytes, it still cannot be loaded with many programs. The function built into Android allows you to transfer some applications to a memory card, but, as experience shows, it is not enough.
I tested different applications to expand the internal android memory-devices: App2SD, Link2SD, FolderMount. Personal experience has shown that, after all, the best solution There is an application Link2SD. The application (like other similar programs) requires a rooted Android device, but if everything is done correctly, you can forget about the issue of lack of internal memory for a long time.
Walkthrough
To expand the memory of your Android device using the Link2SD app, you need to follow these steps:
- Make sure that the device has a working root installed;
- Prepare a memory card;
- Install and configure the Link2SD application.
Rooting a device
Despite the many so-called "universal" apps for rooting Android devices, personal experience shows that rooting is a unique process for each device. Search the Internet for a rooting application (method) specifically for your device model. Working with one of these "universal" applications for rooting Android devices is described.
Preparing the memory card
Preparation consists of creating an additional Ext partition on the SD memory card, to which application files will then be transferred from internal storage, thus freeing up the internal memory of the device.
There are many different ways creating partitions, but for our task I recommend using one of the following:
Attention! Before performing the operation of partitioning a memory card, save all data on the memory card to a computer or other device, because During the partition creation process they will be deleted! After creating the partitions, return all data back to the memory card.
If for some reason you later decide to return the memory card to the initial state use or instructions.
Setting up Link2SD
If you have successfully completed the previous two steps, it’s time to take the last step: install and configure the Link2SD application.
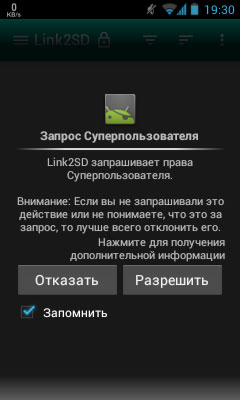
When you first launch the program, it will ask for superuser rights; allow it to obtain such rights by clicking on the “Allow” button.
Next, a dialog will appear for selecting the file system of the 2nd partition of the SD memory card. If such a dialog does not appear or you need to open it again, click on the menu button in the application and select the "Recreate mount script" option. Select the appropriate item file system second section of your memory card and click "OK". If you receive an error message, open the dialog again and select some other item (for me the script worked successfully on the “ext2” item, although the second partition of the memory card was formatted in “ext3”). You should receive a message indicating that the partition was mounted successfully. After that, restart your device by clicking on the "Restart device" button.

Go back to the program, wait until the list of applications loads, select the application you want to move, and click on the “Send” button. In the next dialog, select what application data you want to transfer (I usually transfer everything that is possible). IN free version Link2SD can transfer everything except application data, but even this will have a noticeable effect.

Dear readers, today we will learn how to increase memory on Android using a microSD memory card. But before we start doing anything, let's dive into a little theory. This is necessary so that you can use the information storage on your device more efficiently in the future, since microSD will not always be able to help you out. A little later you will understand why.
Memory mapping on Android
Almost all gadgets running the Android operating system from Google have the ability to expand internal memory using third-party cards. Users really like this, especially owners of devices with a memory of no more than eight gigabytes. But there are no ideal systems in the world: let's find out how the combination of two types of memory works.
So, let’s assume that you have a smartphone running Android with an internal memory of eight gigabytes (most budget models have this amount). As you know, some part is occupied by the operating system itself, as well as preinstalled programs and utilities, a good half of which cannot be removed. And now, to the delight of the user, only about five or six gigabytes remain. If this was ten years ago, you would have squealed with delight! But it’s 2016, where this amount of memory is considered negligible: a few photos and videos, a dozen simple applications and that’s it - then your device will glitch, constantly remind you of a lack of resources, and so on.
But the manufacturer decided to meet halfway: your gadget allows you to expand memory using microSD cards. Naturally, you are at the peak of bliss and it seems that you can now do whatever your heart desires with the information. But don’t rush to rejoice - there are pitfalls here, which we will talk about later.
We use microSD
By what means can you increase the system memory on your gadget? Let's look at two ways to do this:
- First, you can transfer all your media files to an external storage device.
- Secondly, some applications and programs allow you to store part of your information (this could be cache files, downloads, etc.) on a flash drive.
The first part is clear to almost everyone: just insert a USB flash drive into your phone, then connect it to a computer or laptop via USB and, using simple copying, transfer files from one folder to another. If you do not have a computer or laptop, then you can download some file manager from the GooglePlay application store and carry out the same manipulations in this program. In addition, you can set up automatic saving of pictures and videos to microSD. Go to the camera settings and specify a new save path. Now consider the second case, about transferring application data:
- Paste removable media into a special slot on your device.
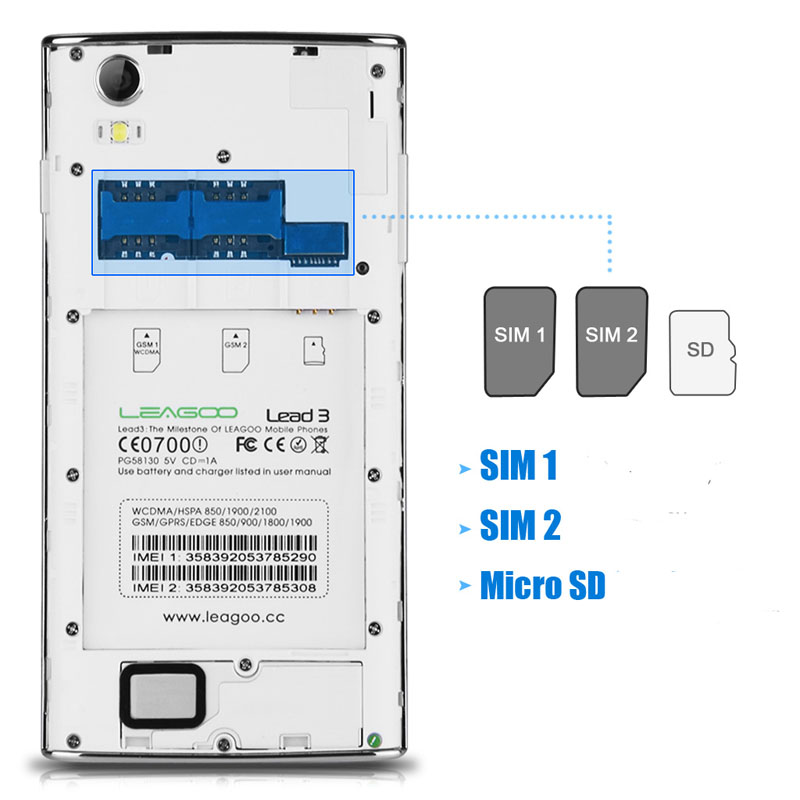
- Wait until it detects your smartphone or tablet running the Android operating system.
- Go to your device settings. Select the “Applications” tab or their manager.
- Next, select some program or game and stomp on it.
- In the window that appears, click on the “Memory” item and change the storage location of the information to a memory card. Ready! Repeat this procedure with all desired applications.
- Please note that if a program or utility does not have this option, then you will not be able to transfer anything, since there is no support for this function. It is also worth noting that some abilities of the utility with which you performed these manipulations may stop working when you remove the memory card. Therefore, take care of this moment in advance.
FolderMount program
The FolderMount app also allows you to transfer data from system memory to microSD even when this is not possible standard means. That is, your device will think that all these files, as before, are located in the internal memory of the smartphone or tablet. Naturally, this utility requires root rights to operate. It cannot be installed in the usual way via the GooglePlay app store.

The operating principle of FolderMount is based on the fact that the program creates a bunch of folders on external map memory and the own memory of a smartphone or tablet. That is, data transfer will not harm the operation of the system. Thus, it will be possible to copy any type of data to microSD.
Without using memory cards
- You can simply delete unnecessary information from your device: music, movies and more.
- Clear the cache of some games and programs (both third-party and system). To do this, go to the application settings in the same way as the third and fourth paragraphs of the previous instructions. On the utility page, find the button to clear the cache and click on it.
- Remove preinstalled software in the same application settings. If there is no Delete button, then you will need superuser rights to delete. Uninstall applications very carefully: some of them may have a direct impact on the operation of the system.
Conclusion
Dear friends, today we learned how to use internal memory on Android using a microSD card. We also learned ways to increase the volume without using a flash drive. Let's summarize everything we covered today:
- You can transfer multimedia data to a flash drive or part of applications;
- Can be deleted junk files and cache of programs or utilities from the device;
- If you have superuser rights, you can use the FolderMount program or remove standard applications.
We hope that everything worked out for you. Tell us in the comments how much you were able to increase your memory