Starting with CentoOS 7, a new tool has appeared to configure traffic filtering rules firewalld. It is recommended to use it to manage iptables rules. In CentOS 8, instead of the standard iptables filtering package, the nftables framework is now used, and when you configure firewall rules through firewalld, you are actually configuring nftables. In this article, we will look at installing, basic concepts and configuring firewalld on a server running CentOS 8 (CentOS 7 is the same).
FirewallD– a firewall to protect the server from unwanted traffic with support for dynamic rule management (without restarting) and the implementation of permanent firewall rules. Works as an interface for and nftables. FirewallD can be used on almost all Linux distributions.
Basic firewalld concepts, zones and rules
Before you begin installation and configuration firewalld, we'll introduce the concept of zones, which are used to define the level of trust for various connections. For different zones firewalld You can apply various filtering rules, specify active firewall options in the form of predefined services, protocols and ports, port forwarding and rich-rules.
Firewalld filters incoming traffic by zone depending on the rules applied to the zone. If IP- the address of the request sender matches the rules of a certain zone, then the packet will be sent through this zone. If the address does not match any of the zones configured on the server, the packet will be processed by the default zone. When installing firewalld the default zone is called public.
Firewalld has zones that are pre-configured with permissions for various services. You can use these settings or create your own zones. List of default zones that are created when installing firewalld (stored in the /usr/lib/firewalld/zones/ directory):
| drop | minimum level of trust. All incoming connections are blocked without response, only outgoing connections are allowed; |
| block | the zone is similar to the previous one, but when incoming requests are rejected, the message icmp-host-prohibited for Ipv4 or icmp6-adm-prohibited for Ipv6 is sent; |
| public | represents public, untrusted networks. You can allow selected incoming connections on an individual basis; |
| external | external networks when using a firewall as a gateway. It's configured for NAT masquerading so your internal network remains private but accessible; |
| internal | antonym of external zone. The host has a sufficient level of trust, a number of additional services are available; |
| dmz | used for computers located in a DMZ (isolated computers without access to the rest of the network). Only certain incoming connections are allowed; |
| work | zone for work machines (most computers on the network are trusted); |
| home | zone home network. Most PCs can be trusted, but only certain incoming connections are supported; |
| trusted | trust all machines on the network. The most open of all available options, it requires conscious use. |
IN firewalld two sets of rules are used - permanent and temporary. Temporary rules work until the server is rebooted. By default, when adding rules to firewalld, the rules are considered temporary ( runtime). To add a rule on a permanent basis, you need to use the flag - permanent. Such rules will be applied after the server is rebooted.
Installing and enabling firewalld on CentOS
In CentOS 7/8, firewalld is installed by default with the OS. If you have removed it and want to install firewalld, you can use the standard /dnf manager:
# yum install firewalld -y - for Centos 7
# dnf install firewalld -y - for Centos 8
To the demon firewalld started automatically when the server started, you need to add it to:
# systemctl enable firewalld
And run:
# systemctl start firewalld
Check service status:
# systemctl status firewalld
● firewalld.service - firewalld - dynamic firewall daemon Loaded: loaded (/usr/lib/systemd/system/firewalld.service; enabled; vendor preset: enabled) Active: active (running) since Mon 2019-10-14 14:54 :40 +06; 22s ago Docs: man:firewalld(1) Main PID: 13646 (firewalld) CGroup: /system.slice/firewalld.service └─13646 /usr/bin/python2 -Es /usr/sbin/firewalld --nofork --nopid Oct 14 14:54:40 server.vpn.ru systemd: Starting firewalld - dynamic firewall daemon... Oct 14 14:54:40 server.vpn.ru systemd: Started firewalld - dynamic firewall daemon.
Or with the command:
# firewall-cmd --state
The firewall-cmd command is a firewalld frontend to nftables/iptables.
# firewall-cmd --state
Working with firewalld rules
Default rules:
Before setting up firewalld rules, you need to check which zone is used by default:
# firewall-cmd --get-default-zone
Since we just installed firewalld and haven’t configured it yet, we have a default zone public.
Let's check the active zone. There is also one - public:
# firewall-cmd --get-active-zones
Public interfaces: eth0
As you can see, the eth0 network interface is controlled by the zone public.
To view the core rules, enter:
# firewall-cmd --list-all
Public (active) target: default icmp-block-inversion: no interfaces: eth0 sources: services: dhcpv6-client ssh ports: protocols: masquerade: no forward-ports: source-ports: icmp-blocks: rich rules:
From the listing you can see that the usual operations related to the DHCP client and ssh have been added to this zone.
Available zones
To view a list of all zones, you need to run the command:
# firewall-cmd --get-zones
I got the following list:
Block dmz drop external home internal public trusted work
To check the rules of a specific zone, you need to add the flag - zone.
# firewall-cmd --zone=home --list-all
Home target: default icmp-block-inversion: no interfaces: sources: services: dhcpv6-client mdns samba-client ssh ports: protocols: masquerade: no forward-ports: source-ports: icmp-blocks: rich rules:
The rules of all zones can be viewed with the command:
# firewall-cmd --list-all-zones
The listing will be quite large, since there can be many zones.
Change the default zone.
By default, all network interfaces are located in the zone public, but they can be transferred to any of the zones with the command:
# firewall-cmd --zone=home -change-interface=eth0
After the parameter --zone= indicate the desired zone.
To change the default zone, you need to use the command:
# firewall-cmd --set-default-zone=home
Adding application rules
To open a port for an application, you can add a service to the exceptions. Display a list of available services:

The output will contain a large number of services. Detailed information about the service is contained in its xml file. These files are located in the directory /usr/lib/firewalld/services.
For example:
# cd /usr/lib/firewalld/services
The XML file contains a description of the service, protocol and port number that will be opened in firewalld.

When adding rules, you can use the parameter --add-service to open access to a specific service:
# firewall-cmd --zone=public --add-service=http
# firewall-cmd --zone=public --add-service=https
After adding rules, you can check whether services have been added to the specified zone:
# firewall-cmd --zone=public --list-services
Dhcpv6-client http https ssh
If you want to make these rules permanent, you need to add the parameter when adding —permanent.
To remove a service from a zone:
# firewall-cmd --permanent --zone=public --remove-service=http
Dhcpv6-client https ssh test
If you want to add your service to exceptions, you can create a file xml yourself and fill it out. You can copy data from any service, change the name, description and port number.
Let's copy the file smtp.xml to the directory for working with user services:
# cp /usr/lib/firewalld/services/smtp.xml /etc/firewalld/services
Change the service description in the file.

The xml file itself also needs to be renamed according to the name of your service. After that, you need to restart firewalld and check if our service is in the list:
I called the service test and it appeared in the list:
Syslog-tls telnet test tftp
Now you can add the created service to any zone:
# firewall-cmd --zone=public --add-service=test --permanent
# firewall-cmd --zone=public --permanent --list-services
Dhcpv6-client http https ssh test
If you haven't found the service you need in the list, you can open the required port on firewalld with the command:
# firewall-cmd --zone=public -add-port=77/tcp - open port 77 tcp
# firewall-cmd --zone=public -add-port=77/udp - open port 77 udp
# firewall-cmd --zone=public -add-port=77-88/udp - open port range 77-88 udp
# firewall-cmd --zone=public -list-ports - check the list of allowed ports
Block/allow ICMP replies:
# firewall-cmd --zone=public --add-icmp-block=echo-reply
# firewall-cmd --zone= public --remove-icmp-block=echo-reply
Remove added port:
# firewall-cmd --zone=public -remove-port=77/udp - remove temporary rule 77 udp
# firewall-cmd --permanent --zone=public -remove-port=77/udp - remove permanent rule

Adding your own zones
You can create your own zone (I'll call it our):
# firewall-cmd --permanent --new-zone=our
After creating a new zone, as well as after creating a service, a reboot is required firewalld:
# firewall-cmd --reload
# firewall-cmd --get-zones
Block dmz drop external home internal our public trusted work
Zone our available. You can add services to it or open specific ports.
Firewalld: blocking IP addresses, creating exceptions
You can add trusted IP addresses to firewalld exceptions or block unwanted ones.
To add a specific IP address (for example 8.8.8.8) to your server via firewalld, use the command:
# firewall-cmd --zone=public --add-rich-rule="rule family="ipv4" source address="8.8.8.8" accept"
Check the area and make sure IP added to exceptions in rich rules:
Public (active) target: default icmp-block-inversion: no interfaces: eth0 sources: services: dhcpv6-client http https ssh test ports: protocols: masquerade: no forward-ports: source-ports: icmp-blocks: rich rules: rule family="ipv4" source address="8.8.8.8" accept
To block IP, need to replace accept on reject:
# firewall-cmd --zone=public --add-rich-rule="rule family="ipv4" source address="8.8.4.4" reject"
# firewall-cmd --zone=public --list-all
Public (active) target: default icmp-block-inversion: no interfaces: eth0 sources: services: dhcpv6-client http https ssh test ports: protocols: masquerade: no forward-ports: source-ports: icmp-blocks: rich rules: rule family="ipv4" source address="8.8.8.8" accept rule family="ipv4" source address="8.8.4.4" reject
You can allow a specific service only for requests from a specific IP address:
#firewall-cmd --permanent --add-rich-rule "rule family="ipv4" source address="10.10.1.0/24" service name="https" accept"
If you urgently need to block all requests to the server, use the panic command:
# firewall-cmd --panic-on
You can disable panic mode either with the command:
# firewall-cmd --panic-off
Or by rebooting the server.
You can block the firewalld configuration so that local services with root rights could not change the firewall rules you created:
# firewall-cmd --lockdown-on
Disable blocking mode:
# firewall-cmd --lockdown-off
Port forwarding in firewalld
You can create a port forwarding rule in firewalld. To forward port 443 to 9090:
# firewall-cmd --zone=public --add-forward-port=port=443:proto=tcp:toport=9090 --permanent
To remove a port forwarding rule:
# firewall-cmd --zone=public --remove-forward-port=port=443:proto=tcp:toport=9090
FirewallD is a firewall management tool available by default on CentOS 7 servers. It is basically a wrapper around IPTables and comes with a graphical configuration tool, firewall-config, and a command line tool, firewall-cmd. With the IPtables service, every change requires deleting old rules and creating new rules in the file ` /etc/sysconfig/iptables`, and with firewalld only the differences are applied.
FirewallD zones
FirewallD uses services and zones instead of rules and chains in Iptables. By default, the following zones are available:
- drop– Drop all incoming network packets without response, only outgoing ones network connections available.
- block– Reject all incoming network packets with the message icmp-host-prohibited, only outgoing network connections are allowed.
- public– only selected incoming connections are accepted, for use in public areas
- external– For external networks with masquerading, only selected incoming connections are accepted.
- dmz– demilitarized zone DMZ, publicly accessible with limited access to the internal network, only selected incoming connections are accepted.
- work
- home– For computers in the home zone, only selected incoming connections are accepted.
- internal– For computers on your internal network, only selected incoming connections are accepted.
- trusted– All network connections are accepted.
To get a list of all available zones:
# firewall-cmd --get-zones work drop internal external trusted home dmz public block
To view a list of default zones:
# firewall-cmd --get-default-zone public
To change the default zone:
Firewall Services
FirewallD services are XML configuration files containing service entry information for firewalld. To get a list of all available services:
# firewall-cmd --get-services amanda-client amanda-k5-client bacula bacula-client ceph ceph-mon dhcp dhcpv6 dhcpv6-client dns docker-registry dropbox-lansync freeipa-ldap freeipa-ldaps freeipa-replication ftp high-availability http https imap imaps ipp ipp-client ipsec iscsi-target kadmin kerberos kpasswd ldap ldaps libvirt libvirt-tls mdns mosh mountd ms-wbt mysql nfs ntp openvpn pmcd pmproxy pmwebapi pmwebapis pop3 pop3s postgresql privoxy proxy-dhcp ptp pulseaudio puppetmaster radius rpc-bind rsyncd samba samba-client sane smtp smtps snmp snmptrap squid ssh synergy syslog syslog-tls telnet tftp tftp-client tinc tor-socks transmission-client vdsm vnc-server wbem-https xmpp-bosh xmpp-client xmpp-local xmpp-server
Configuration XML files stored in directories /usr/lib/firewalld/services/ And /etc/firewalld/services/.
Setting up a firewall with FirewallD
As an example, here's how you can configure a firewall with FirewallD if you're running a web server, SSH on port 7022, and a mail server.
First we will set the default zone for DMZ.
# firewall-cmd --set-default-zone=dmz # firewall-cmd --get-default-zone dmz
To add persistent service rules for HTTP and HTTPS in the DMZ, run the following command:
# firewall-cmd --zone=dmz --add-service=http --permanent # firewall-cmd --zone=dmz --add-service=https --permanent
Open port 25 (SMTP) and port 465 (SMTPS):
Firewall-cmd --zone=dmz --add-service=smtp --permanent firewall-cmd --zone=dmz --add-service=smtps --permanent
Open, IMAP, IMAPS, POP3 and POP3S ports:
Firewall-cmd --zone=dmz --add-service=imap --permanent firewall-cmd --zone=dmz --add-service=imaps --permanent firewall-cmd --zone=dmz --add-service= pop3 --permanent firewall-cmd --zone=dmz --add-service=pop3s --permanent
Since the SSH port is changed to 7022, we will remove the SSH service (port 22) and open port 7022
Firewall-cmd --remove-service=ssh --permanent firewall-cmd --add-port=7022/tcp --permanent
To implement the changes we need to restart the firewall:
Firewall-cmd --reload
Finally, you can list the rules.
We'll show you step-by-step setup Firewalld firewall in CentOS 7
What is Firewalld? This is a full-fledged firewall that is available by default in CentOS 7. We will show you how to configure it on the server and also introduce the firewall-cmd tool.
1. What are the basic concepts of a firewall?
Zones
Firewalld is able to manage groups of rules through zones. It is a set of instructions for managing traffic based on trust in networks. A zone can be assigned to a network interface to control the behavior of the firewall. This may be necessary because laptops can often connect to different networks. Computers can use zones to change their set of rules depending on their environment. For example, if you connect to Wi-Fi in a café, you may need to apply stricter guidelines. But at home the rules may be more loyal.
Firewalld has the following zones:
Drop has the lowest degree of trust on the network. In this case, only outgoing connections are supported, and incoming traffic is dropped without response;
Block differs from drop in that when an incoming request is dropped, the message icmp-host-prohibited or icmp6-adm-prohibited is issued;
The public zone is a public network that supports incoming requests on an individual basis. However, she cannot be trusted;
External is an external network zone that supports NAT masquerading to keep the internal network private. However, it can be accessed;
The flip side of external is internal. Computers in this zone can be trusted, so additional services will be available;
The dmz zone is in demand for isolated computers that do not have access to the rest of the network. In this case, you will be able to configure selected incoming connections;
The work network zone is work. In it you can trust the environment, but not all incoming connections are supported, but only those defined by the user;
In the trusted zone, you can trust all computers on the network.
Saving rules
In Firewalld they are temporary or permanent. It happens that a rule changes or appears in the set that affects the behavior of the firewall. Changes will be lost after reboot, so you need to save them. The firewall-cmd commands use the -permanent flag to persist rules. After this, you will be able to use them on an ongoing basis.
2. How to enable Firewalld?
You should start by running a daemon program in the background. The systemd unit file is called firewalld.service. to enable the daemon program you need to command line dial:
Sudo systemctl start firewalld.service
We need to make sure that the service has started. For this you will need:
Firewall-cmd --state running
The firewall has started and is operating according to the default instructions. Keep in mind that the service is enabled, but will not automatically start with the server. To do this, you will need to configure autorun. In addition, make a set of rules so that you won’t be blocked on your own server.
3. Default firewall rules
How can I view them?
To view the default zone, type:
Firewall-cmd --get-default-zone public
We see that Firewalld did not receive instructions regarding other zones. Public is used by default and is the only active zone, because no interface was bound to the others. If you want to see a list of all available domain zones, then enter in the console:
Firewall-cmd --get-active-zones public interfaces: eth0 eth1
We see two network interfaces bound to the public zone. They work according to the rules specified for this zone. You can see the default rules by doing:
Firewall-cmd --list-all public (default, active) interfaces: eth0 eth1 sources: services: dhcpv6-client ssh ports: masquerade: no forward-ports: icmp-blocks: rich rules:
Let's summarize:
The default and only active zone is public;
Two interfaces are assigned to this zone: eth0 and eth1;
Public supports remote SSH administration as well as DHSP IP address assignment.
Other firewall zones
Let's see what other zones the firewall has. To see a list of all available ones, type in the console:
You can also get the parameters for each specific zone by adding the -zone= flag:
Firewall-cmd --zone=home --list-all home interfaces: sources: services: dhcpv6-client ipp-client mdns samba-client ssh ports: masquerade: no forward-ports: icmp-blocks: rich rules:
If you need to list definitions of all available zones, use the --list-all-zones option. Let's send the output to the pager to make it easier to view the output:
Firewall-cmd --list-all-zones | less
4. How to configure interface zones?
All network interfaces are initially bound to the default zone.
Changing the interface zone for only one session
For this purpose, we will need two options: --change-interface= and --zone=. To transfer to the home eth0 zone, dial:
Sudo firewall-cmd --zone=home --change-interface=eth0 success
Please be aware that this may affect the functionality of certain services. For example, SSH is supported in the home zone, i.e. connections will not be reset. However, this can happen in other zones, which will lead to blocking access to your own server. We need to make sure that the interface is bound to the new zone. Type in the command line:
When the firewall is rebooted, the interface will re-bind to the default zone.
Sudo systemctl restart firewalld.service firewall-cmd --get-active-zones public interfaces: eth0 eth1
Changing the interface zone on a permanent basis
After restarting the firewall, the interface will be reassigned to the default zone if no other zone is specified in the interface settings. Configurations in CentOS are located in files of the ifcfg-interface format in the /etc/sysconfig/network-scripts directory. To define an interface zone, you need to open its configuration file:
Sudo nano /etc/sysconfig/network-scripts/ifcfg-eth0
Let's add the ZONE= variable to the end of the file. Let's set another zone as a value:
DNS1=2001:4860:4860::8844 DNS2=2001:4860:4860::8888 DNS3=8.8.8.8 ZONE=home
Now let's save the changes, after which the file can be closed. To update the settings, you will need to restart the network service, as well as the firewall:
Sudo systemctl restart network.service sudo systemctl restart firewalld.service
After this, the eth0 interface will be assigned to the home zone.
Firewall-cmd --get-active-zones home interfaces: eth0 public interfaces: eth1
Setting Default Zones
Another default zone can also be set. The --set-default-zone= option will help us with this, as it binds all network interfaces to another zone.
Sudo firewall-cmd --set-default-zone=home home interfaces: eth0 eth1
5. How to make rules for applications?
Adding to a service area
This is easiest to do on the port used by the firewall. To see all available services, type at the command line:
Firewall-cmd --get-services RH-Satellite-6 amanda-client bacula bacula-client dhcp dhcpv6 dhcpv6-client dns ftp high-availability http https imaps ipp ipp-client ipsec kerberos kpasswd ldap ldaps libvirt libvirt-tls mdns mountd ms- wbt mysql nfs ntp openvpn pmcd pmproxy pmwebapi pmwebapis pop3s postgresql proxy-dhcp radius rpc-bind samba samba-client smtp ssh telnet tftp tftp-client transmission-client vnc-server wbem-https
Remember that the .xml files in the /usr/lib/firewalld/services directory store all the information about each service. Information about SSH can be found in /usr/lib/firewalld/services/ssh.xml. They look like this:
To enable support for services in zones, you need the -add-service= flag, but the -zone option is useful for specifying the target zone. Please remember that such changes will only be valid for one session. If you need to save changes for later use, use the -permanent flag. Let's see how it works. Let's start a web server so that it can serve HTTP traffic. Let's enable support for one session in the public zone. Type in the console:
Sudo firewall-cmd --zone=public --add-service=http
Do not use the -zone= option if you are adding the service to the default zone. Let's check if everything worked:
Firewall-cmd --zone=public --list-services dhcpv6-client http ssh
Now we need to test the firewall and the service itself. If you see that everything is in order, you can safely change the permanent set of rules. To add a support rule for a new service, you need to specify in the console:
Sudo firewall-cmd --zone=public --permanent --add-service=http
If you need to see the entire list of rules that are in effect on an ongoing basis, then:
Sudo firewall-cmd --zone=public --permanent --list-services dhcpv6-client http ssh
As a result, the public zone will support port 80 and HTTP. If your server is capable of serving SSL/TLS traffic, you can add the HTTPS service:
Sudo firewall-cmd --zone=public --add-service=https sudo firewall-cmd --zone=public --permanent --add-service=https
6. What if the service is unavailable?
By default, Firewalld includes many popular services. But it happens that programs need other services that are not included in the firewall. This problem can be solved in a couple of ways.
Method #1: Defining a service
Adding a port to a zone is fairly easy. However, if there are quite a lot of applications, it will be difficult to understand which port is using what. In such situation good solution there will be a definition of services instead of ports. Essentially, a service is a group of ports that have been given a name and description. With their help, it will be easier to manage the settings. But the service is somewhat more complicated than the port.
Let's start by copying an existing script from the /usr/lib/firewalld/services folder, from which the firewall takes non-standard settings in /etc/firewalld/services. Let's copy the SSH service definition to use it as an example conditional service definition. Don't forget that the script name must match the name of the service, and also have a .xml file extension. Type in the console:
Sudo cp /usr/lib/firewalld/services/service.xml /etc/firewalld/services/example.xml
Now you need to make changes to the compiled file:
Sudo nano /etc/firewalld/services/example.xml
Inside is the SSH definition:
SSH Secure Shell (SSH) is a protocol for logging into and executing commands on remote machines. It provides secure encrypted communications. If you plan on accessing your machine remotely via SSH over a firewalled interface, enable this option. You need the openssh-server package installed for this option to be useful.
Now let's save the changes and close the file. After this you will need to restart the firewall using:
Sudo firewall-cmd --reload
Ours will appear in the list of available services:
Firewall-cmd --get-services RH-Satellite-6 amanda-client bacula bacula-client dhcp dhcpv6 dhcpv6-client dns example ftp high-availability http https imaps ipp ipp-client ipsec kerberos kpasswd ldap ldaps libvirt libvirt-tls mdns mountd ms -wbt mysql nfs ntp openvpn pmcd pmproxy pmwebapi pmwebapis pop3s postgresql proxy-dhcp radius rpc-bind samba samba-client smtp ssh telnet tftp tftp-client transmission-client vnc-server wbem-https
Method No. 2: Creating a port
Let's open the application port in the desired firewall zone and specify it, as well as the protocol. Let's imagine a situation where you need to add a program using the TCP protocol and port 5000 to the public zone. To activate application support for one session, you will need the -add-port= option. In addition, you must indicate tcp protocol or udp:
Sudo firewall-cmd --zone=public --add-port=5000/tcp
Let's make sure everything worked:
Firewall-cmd --list-ports 5000/tcp
In addition, it is possible to specify a range of ports using a dash. For example, if a program uses ports 4990-4999, then you can add them to the public zone by:
Sudo firewall-cmd --zone=public --add-port=4990-4999/udp
If everything works fine, add instructions to the firewall settings:
Sudo firewall-cmd --zone=public --permanent --add-port=5000/tcp sudo firewall-cmd --zone=public --permanent --add-port=4990-4999/udp sudo firewall-cmd -- zone=public --permanent --list-ports success success 4990-4999/udp 5000/tcp
7. How to create a zone?
The firewall is capable of providing various predefined zones, which are usually enough for work, but sometimes you need to create your own custom zone. For example, a DNS server needs a privateDNS zone, and a web server needs a publicweb zone. After creating zones, you need to add it to your firewall settings. Let's create the publicweb and privateDNS zones by typing in the console:
Sudo firewall-cmd --permanent --new-zone=publicweb sudo firewall-cmd --permanent --new-zone=privateDNS
Let's check if everything worked:
Sudo firewall-cmd --permanent --get-zones block dmz drop external home internal privateDNS public publicweb trusted work
Firewall-cmd --get-zones block dmz drop external home internal public trusted work
However, new zones will not be available in the current session:
Firewall-cmd --get-zones block dmz drop external home internal public trusted work
Let's restart the firewall to gain access to new zones:
Sudo firewall-cmd --reload firewall-cmd --get-zones block dmz drop external home internal privateDNS public publicweb trusted work
Now it will be possible for new zones to define ports and services. Let's say there is a need to add SSH, HTTP and HTTPS to the publicweb zone:
Sudo firewall-cmd --zone=publicweb --add-service=ssh sudo firewall-cmd --zone=publicweb --add-service=http sudo firewall-cmd --zone=publicweb --add-service=https firewall- cmd --zone=publicweb --list-all publicweb interfaces: sources: services: http https ssh ports: masquerade: no forward-ports: icmp-blocks: rich rules:
In addition, you can add DNS to the privateDNS zone using:
Sudo firewall-cmd --zone=privateDNS --add-service=dns firewall-cmd --zone=privateDNS --list-all privateDNS interfaces: sources: services: dns ports: masquerade: no forward-ports: icmp-blocks: rich rules:
After this, you can safely assign network interfaces to new zones:
Sudo firewall-cmd --zone=publicweb --change-interface=eth0 sudo firewall-cmd --zone=privateDNS --change-interface=eth1
Check that the settings work. If everything is ok, add them to the permanent rules:
Sudo firewall-cmd --zone=publicweb --permanent --add-service=ssh sudo firewall-cmd --zone=publicweb --permanent --add-service=http sudo firewall-cmd --zone=publicweb --permanent --add-service=https sudo firewall-cmd --zone=privateDNS --permanent --add-service=dns
Now let's move on to setting up network interfaces. This is necessary in order to carry out automatic connection to the desired zone. Let's say that you need to bind to publicweb eth0, then:
Sudo nano /etc/sysconfig/network-scripts/ifcfg-eth0 . . . IPV6_AUTOCONF=no DNS1=2001:4860:4860::8844 DNS2=2001:4860:4860::8888 DNS3=8.8.8.8 ZONE=publicweb
Let's also bind eht1 to privateDNS using:
Sudo nano /etc/sysconfig/network-scripts/ifcfg-eth1 . . . NETMASK=255.255.0.0 DEFROUTE="no" NM_CONTROLLED="yes" ZONE=privateDNS
For the changes to take effect, you will need to restart the firewall and network services:
Sudo systemctl restart network sudo systemctl restart firewalld
You need to check the zones to make sure that the services are registered:
Firewall-cmd --get-active-zones privateDNS interfaces: eth1 publicweb interfaces: eth0
Now we need to check if they work:
Firewall-cmd --zone=publicweb --list-services http htpps ssh firewall-cmd --zone=privateDNS --list-services dns
As we can see, the user zones are completely ready for work. Any of them can be assigned as default. For example:
Sudo firewall-cmd --set-default-zone=publicweb
8. How can I make the firewall start automatically?
After checking the rules and all settings, we’ll configure autorun using:
Sudo systemctl enable firewalld
This will make it possible to enable the firewall immediately after starting the server.
As a conclusion, it is worth noting that the Firewalld firewall is a fairly flexible tool in terms of settings. And you can change the policy of its operation using zones.
The first step to protecting the server from external threats is a firewall, which filters incoming and outgoing traffic. In this article I want to discuss setting up iptables, a special case of a firewall on CentOS, and also talk about installing and disabling it. My guide will not be exhaustive; I will only consider those aspects that I consider the most important and that I myself use in my work.
This article is part of a single series of articles about the server.
Introduction
Iptables is currently the de facto standard among modern Linux distributions. I can’t even remember right off the bat what else is used as a firewall. So any Linux administrator has to deal with setting up this firewall in their work.
There are different connections to this firewall that are used for more “convenient” configuration. Ubuntu has ufw, in centos - firewalld, I don’t know the others. Personally, I don't see any convenience in using these tools. I'm used to setting up a Linux firewall the old fashioned way, as I learned at the very beginning of my work. I think this is the simplest and most convenient way, which I will share with you. Its essence boils down to the fact that a script is created with firewall rules. This script can be easily edited to suit your needs and transferred from server to server.
Disabling firewalld
I have already touched on the issue of disabling firewalld in the topic on . First of all, let's disable firewalld, which is present in centos 7 by default immediately after installation:
# systemctl stop firewalld
Now let’s remove it from startup so that it doesn’t turn on again after a restart:
# systemctl disable firewalld
After this, the firewall settings on the server become completely open. You can view iptables rules with the command:
Installing iptables
In fact, we already have a firewall on our server and it’s working, there are simply no rules, everything is open. We will need to install additional management utilities, without which it is impossible to configure iptables. For example, it will not be possible to restart the firewall:
# systemctl restart iptables.service Failed to issue method call: Unit iptables.service failed to load: No such file or directory.
Or you won’t be able to add it to autorun:
# systemctl enable iptables.service Failed to issue method call: No such file or directory
To avoid such errors, install the necessary package with utilities:
# yum -y install iptables-services
Now you can add iptables to startup and run:
# systemctl enable iptables.service # systemctl start iptables.service
Setting up a firewall
I use a script to manage firewall rules. Let's create it:
# mcedit /etc/iptables.sh
Next we will fill it with the necessary rules. I will parse all the significant parts of the script, and I will provide it in full as a text file at the end of the article. The rules are made in the form of pictures to prohibit copying and pasting. This can lead to errors in the operation of the rules, which I myself encountered while preparing the article.
We will consider a situation where the server is a gateway to the Internet for a local network.
First of all, let's set all the variables that we will use in the script. This is not necessary, but is recommended because it is convenient to transfer settings from server to server. It will be enough to simply reassign the variables.

Before applying the new rules, we clear all chains:

We block all traffic that does not match any of the rules:
Allow all localhost and local traffic:
We allow ping:
If you don't need this, then don't add allowing rules for icmp.
We open Internet access to the server itself:
If you want to open all incoming server connections, then add the following rule:
Now let's add protection against the most common network attacks. First, let's discard all packets that have no status:
Blocking null packets:
Protecting yourself from syn-flood attacks:
If you do not set restrictions on access from the local network, then we allow everyone to access the Internet:
Next we prohibit access from the Internet to the local network:
In order for our local network to use the Internet, we enable nat:
In order not to lose access to the server, after applying the rules, we allow connections via ssh:
And at the end we write down the rules so that they apply after a reboot:
We have compiled a simple config that blocks all incoming connections except ssh and allows access from the local network to the Internet. At the same time, we protected ourselves from some network attacks.
Save the script, make it executable and run:
# chmod 0740 /etc/iptables.sh # /etc/iptables.sh
Let's review the rules and check if all the rules are in place:
# iptables -L -v -n
Please note that you only need to apply the rules if you have access to the server console. If there is an error in the settings, you may lose access. Make sure that in an emergency you can disable the firewall and adjust the settings.
Opening ports
Now let’s expand our configuration a little and open ports in iptables for some services. Let's say we have a web server running and we need to open access to it from the Internet. Add rules for web traffic:
Permission has been added for incoming connections on ports 80 and 443, which the web server uses in its work.
If you have a mail server installed, you need to allow incoming connections to it on all used ports:

For the DNS server to work correctly, you need to open UDP port 53
Port forwarding
Let's consider a situation when it is necessary to forward ports from an external interface to some computer on the local network. Let's say you need to get rdp access to computer 10.1.3.50 from the Internet. We forward TCP port 3389:
If you do not want to expose a known port from the outside, you can redirect from a non-standard port to the rdp port of the target computer:
If you forward a port from outside to the local network, be sure to comment out the rule that blocks access from the external network to the internal one. In my example this rule is: $IPT -A FORWARD -i $WAN -o $LAN1 -j REJECT
Or before this rule, create an allowing rule for external access to the internal service, for example like this:
$IPT -A FORWARD -i $WAN -d 10.1.3.50 -p tcp -m tcp --dport 3389 -j ACCEPT
Enabling logs
During setup, it is useful to enable logs to monitor blocked packages and find out why there is no access to the necessary services that we seem to have already opened. I send all blocked packets to separate chains (block_in, block_out, block_fw) corresponding to the direction of traffic and mark each direction in the logs. This makes it more convenient to do debriefing. Add the following rules to the very end of the script, before saving the settings:

You can track all blocked packages in the /var/log/messages file.
After you finish setting up, comment out these lines and disable logging. It’s definitely worth doing this, as the logs grow very quickly. I personally don’t see any practical sense in storing such information.
How to disable iptables
If you suddenly decide that you no longer need the firewall, you can disable it as follows:
# systemctl stop iptables.service
This command stops the firewall. And the following removes it from startup:
# systemctl disable iptables.service
By disabling the firewall, we allowed all connections.
Conclusion
As promised, I am posting a finished script with the basic set of rules that we have considered
I would like to point out once again that when setting up iptables you need to be extremely careful. Do not start this business if you do not have access to the server console. Even while writing this article, I lost access to the server due to a ridiculous error in the rules. This error arose due to copying and the loss of a double dash - it was replaced by a single one.
online course “Linux Administrator” at OTUS. The course is not for beginners; to enroll you need basic knowledge of networks and installing Linux on a virtual machine. The training lasts 5 months, after which successful course graduates will be able to undergo interviews with partners. What this course will give you:
- Knowledge of Linux architecture.
- Mastering modern methods and tools for data analysis and processing.
- Ability to select a configuration for the required tasks, manage processes and ensure system security.
- Proficient in the basic working tools of a system administrator.
- Understanding of the specifics of deploying, configuring and maintaining networks built on Linux.
- The ability to quickly solve emerging problems and ensure stable and uninterrupted operation of the system.
Today I will introduce you to my vision of the initial configuration of a universal server on a popular OS. I will talk about how to do the basic setup of a centos server immediately after installation to use it in any capacity at your discretion. The given practical tips increase the security and convenience of working with the server. The article will be relevant for the two latest Centos releases - 7 and 8.
- List the initial centos settings that I perform on a freshly installed server.
- Show examples of configurations I use in a typical setup.
- Give advice on setting up centos based on your experience with the system.
- Provide a list of typical programs and utilities that help administer the server.
This article is part of a single series of articles about the server.
Introduction
After the release of the new Centos 8 release, it became difficult to describe in a single article initial setup both servers, but I didn't want to split the article because it has a lot of incoming links from different places. It’s more convenient to maintain general material on both releases, which is what I’ll do. At the same time, the differences between the two versions will be clearly visible; for a couple of years after the release of centos 8, both will be relevant and you will have to use both versions, depending on the situation.
Centos 7 uses a package manager yum, and in Centos 8 - dnf. At the same time, they left a symbolic link from yum to dnf, so you can write both the first name and the second. For consistency, I will use yum throughout, but I warn you, just so you understand why I do it this way. In fact, CentOS 8 uses dnf, this is another, more modern package manager that allows you to work with different versions the same software. For this purpose, separate repositories that appeared for centos 8 are used.
Initial setup of CentOS
Personally, I start any system setup, be it centos or another, after installation by completely updating the system. If the installation image was fresh, or the installation was carried out over the network, then most likely there will be no updates. Most often they exist, since installation images are not always updated regularly.
Updating the system
# yum update
For ease of administration, I always install Midnight Commander, or just mc:
# yum install mc
And immediately for it I turn on syntax highlighting for all files that are not explicitly designated in the file /usr/share/mc/syntax/Syntax syntax for sh and bash scripts. This universal syntax is fine for configuration files that you most often need to work with on the server. Overwriting the file unknown.syntax. This is the pattern that will be applied to .conf and .cf files, since there is no explicit syntax attached to them.
# cp /usr/share/mc/syntax/sh.syntax /usr/share/mc/syntax/unknown.syntax
Network utilities will come in handy next. Depending on the set of initial packages that you select when installing the system, you will have one or another set of network utilities. Here is a list of those that I personally am used to - ifconfig, netstat, nslookup and some others. If you need it, just like me, then I suggest installing them separately if they are not already installed. If you don't particularly need them and don't use them, you can skip installing them. Let's check what we have in the system at the moment
# ifconfig
If you see the answer:
Bash: ifconfig: command not found
This means the utility is not installed. Instead of ifconfig in CentOS there is now a utility ip. This applies not only to centos. This is the picture in almost all popular modern Linux distributions. I've been used to ifconfig for a long time, although I haven't used it much lately. I always liked that in different Linux distributions everything is approximately the same. Using ifconfig you can configure the network not only in Linux, but also in freebsd. It's comfortable. And when each distribution has its own tool, this is not convenient. Although now this is no longer very relevant, since I no longer work with Freebsd, and the ip utility is available in all Linux distributions. However, if you need ifconfig, you can install the package net-tools, which includes:
# yum install net-tools
In order for the nslookup or, for example, host commands to work, we need to install the package bind-utils. If this is not done, then use the command:
#nslookup
The output will be:
Bash: nslookup: command not found
So let's install bind-utils:
# yum install bind-utils
Disable SELinux
Disable SELinux. Its use and configuration is a separate matter. I won't do this now. So let's turn it off:
# mcedit /etc/sysconfig/selinux
change the value
SELINUX=disabled
You can reboot for the changes to take effect:
# reboot
And if you want to disable SELinux without rebooting, then run the command:
#setenforce 0I constantly receive a lot of criticism about disabling SELinux. I know how it works, I know how to configure it. It's really not very complicated and not difficult to master. This is my conscious choice, although sometimes I tweak it. The way I work with the system is such that I most often do not need SELinux, so I don’t waste time on it and disable centos in the basic setup. System security is a complex endeavor, especially in modern world web development, where microservices and containers rule the roost. SELinux is a niche tool that is not needed always and not everywhere. Therefore, it has no place in this article. Those who need it will separately enable SELinux and configure it.
Specifying network parameters
We continue with the basic setup of centos after installation. Now we will do it if for some reason we did not do this during installation, or if you need to change them. IN general case, the network in Centos is configured using NetworkManager and him console utility nmtui. It comes with the basic installation of the system. There is a simple and clear graphical interface, so there is nothing to tell. I'm more used to setting up a network via configuration files network-scripts. In centos version 7 they are present out of the box, in version 8 they were removed. To use them to configure the network, you must separately install the package network-scripts.
# yum install network-scripts
Now you can configure the network. To do this, open the file /etc/sysconfig/network-scripts/ifcfg-eth0
# mcedit /etc/sysconfig/network-scripts/ifcfg-eth0
If you receive network settings via dhcp, then the minimum set of settings in the configuration file will be as follows.
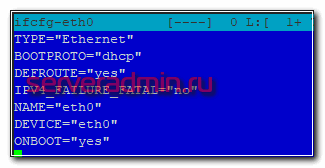
TYPE="Ethernet" BOOTPROTO="dhcp" DEFROUTE="yes" IPV4_FAILURE_FATAL="no" NAME="eth0" DEVICE="eth0" ONBOOT="yes"
To configure a static IP address, the settings will be as follows.
TYPE="Ethernet" BOOTPROTO="none" DEFROUTE="yes" IPV4_FAILURE_FATAL="no" NAME="eth0" DEVICE="eth0" ONBOOT="yes" IPADDR=192.168.167.117 DNS1=192.168.167.113 PREFIX=28 GATEWAY= 192.168.167.113
In the IPADDR field we enter your address, in PREFIX the network mask, in GATEWAY the gateway, DNS address of the dns server. Save the file and restart the network to apply the settings:
# systemctl restart network
Setting up a firewall
Adding repositories
When setting up Centos, you often need software that is not included in the standard turnip. To install additional packages you need. The most popular is EPEL. There used to be rpmforge, but it has been closed for several years. Everyone forgot about him. We connect the EPEL repository. Everything is simple with it, it is added from the standard turnip:
# yum install epel-release
Also for CentOS 7, the REMI repository is extremely useful, which allows you to install more recent versions of php, unlike those in the standard repository. Let me remind you that this is version PHP 5.4, which is no longer any good and has been removed from support.
# rpm -Uhv http://rpms.remirepo.net/enterprise/remi-release-7.rpm
For Centos 8 remi is not yet relevant, but I think it is temporary. In principle, these two repositories in centos are usually enough for me in the general case. Others are connected for specific needs for installing various software.
Setting up history storage in bash_history
Let's move on to setting up the centos system on the server. It will be useful to make some changes to the standard mechanism for saving command history. It often helps out when you need to remember one of the previously entered commands. The standard settings have some limitations that are inconvenient. Here is their list:
- By default, only the last 1000 commands are saved. If there are more of them, the older ones will be deleted and replaced with new ones.
- There are no execution dates for the commands, just a list of them in order of execution.
- The command list file is updated after the session ends. During parallel sessions, some commands may be lost.
- Absolutely all commands are saved, although there is no point in storing some.
The list of recently executed commands is stored in the user's home directory in the file .bash_history(dot at the beginning). You can open it with any editor and view it. To display the list more conveniently, you can enter the command in the console:
#history
and see a numbered list. You can quickly find a specific command by filtering only the necessary lines, for example like this:
#history | grep yum
This way we will see all the options for running the yum command, which are stored in history. We will correct the listed shortcomings standard settings storing command history in CentOS. To do this you need to edit the file .bashrc, which is located in the same directory as the history file. Add the following lines to it:
Export HISTSIZE=10000 export HISTTIMEFORMAT="%h %d %H:%M:%S " PROMPT_COMMAND="history -a" export HISTIGNORE="ls:ll:history:w:htop"
The first option increases the file size to 10,000 lines. You can make more, although this size is usually enough. The second parameter specifies that the date and time the command was executed should be stored. The third line forces immediately after executing the command to save it to history. In the last line we create a list of exceptions for those commands that do not need to be recorded in history. I gave an example of the simplest list. You can add it at your discretion.
To apply the changes, you need to log out and connect again or run the command:
# source ~/.bashrc
That's all about setting up command history storage. There are a lot of interesting things you can configure in the .bashrc file. At one time I got carried away and experimented, but then I abandoned everything because it didn’t make sense. When working with customer servers, I most often see the default bash, so it’s better to get used to it and work in it. And individual settings and decorations are the lot personal computers and servers. Not workers. So I don’t configure anything else according to the standard in the centos server in this regard.
Automatic system update
To maintain server security at the proper level, it is necessary to at least update it in a timely manner - like the kernel itself with system utilities, as well as other packages. You can do this manually, but for more efficient work it is better to configure automatic execution. It is not necessary to install updates automatically, but at least check for their availability. I usually follow this strategy.
Yum-cron
To automatically check for updates in Centos 7, the utility will help us yum-cron. It is installed traditionally via yum from the standard repository.
# yum install yum-cron
After installation, yum-cron is created automatic task to execute the utility in /etc/cron.daily And /etc/cron.hourly. By default, the utility downloads found updates, but does not apply them. Instead, the administrator on local Mailbox notification of updates is sent to root. Then you are already in manual mode come in and decide whether to install updates or not at a time convenient for you. I find this mode of operation the most convenient, so I do not change these settings.
You can configure yum-cron through the configuration files, which are located at /etc/yum/yum-cron.conf And yum-cron-hourly.conf. They are well commented on, so they don’t need detailed explanations. I draw your attention to the section , where you can specify parameters for sending messages. By default, mail is sent via local host. You can change the settings here and send messages through a third-party mail server. But instead, I personally prefer to globally configure the entire server to forward local root mail to an external mailbox through authorization on another smtp server.
Dnf-automatic
As I said earlier, Centos 8 uses a different package manager - dnf. Configuring package updates there is done through the utility dnf-automatic. Let's install it and configure it.
# yum install dnf-automatic
It is no longer cron that manages scheduled launches, but systemd with its built-in scheduler. View timers automatic start you can use the command:
# systemctl list-timers *dnf-*
If there are no tasks there, then you can add a timer manually:
# systemctl enable --now dnf-automatic.timer
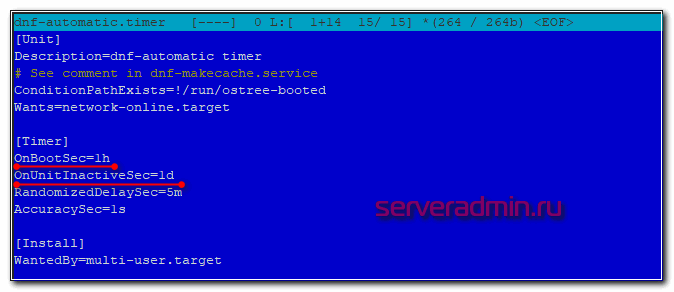
The default timer is set to start dnf-automatic an hour after the server boots and repeats daily. The timer config lives here - /etc/systemd/system/multi-user.target.wants/dnf-automatic.timer.
The config for dnf-automatic lives in /etc/dnf/automatic.conf. By default, it only downloads updates, but does not apply them. The config is well commented, so you can customize it as you wish. No special explanation is required. Configure updating system packages at your discretion. As I already said, I just download them automatically. I always keep the installation under control with manual control.
Disable message flooding in /var/log/messages
Continuing to configure centos, we will correct one small inconvenience. In the default installation of the 7th version of the system, your entire system log /var/log/messages After some time the server will be clogged with the following records.
Oct 16 14:01:01 xs-files systemd: Created slice user-0.slice. Oct 16 14:01:01 xs-files systemd: Starting user-0.slice. Oct 16 14:01:01 xs-files systemd: Started Session 14440 of user root. Oct 16 14:01:01 xs-files systemd: Starting Session 14440 of user root. Oct 16 14:01:01 xs-files systemd: Removed slice user-0.slice. Oct 16 14:01:01 xs-files systemd: Stopping user-0.slice. Oct 16 15:01:01 xs-files systemd: Created slice user-0.slice. Oct 16 15:01:01 xs-files systemd: Starting user-0.slice. Oct 16 15:01:01 xs-files systemd: Started Session 14441 of user root. Oct 16 15:01:01 xs-files systemd: Starting Session 14441 of user root. Oct 16 15:01:01 xs-files systemd: Started Session 14442 of user root. Oct 16 15:01:01 xs-files systemd: Starting Session 14442 of user root. Oct 16 15:01:01 xs-files systemd: Removed slice user-0.slice. Oct 16 15:01:01 xs-files systemd: Stopping user-0.slice. Oct 16 16:01:01 xs-files systemd: Created slice user-0.slice. Oct 16 16:01:01 xs-files systemd: Starting user-0.slice. Oct 16 16:01:01 xs-files systemd: Started Session 14443 of user root. Oct 16 16:01:01 xs-files systemd: Starting Session 14443 of user root. Oct 16 16:01:01 xs-files systemd: Removed slice user-0.slice.
I didn't notice them in Centos 8, so I don't need to do anything there. The messages do not provide any practical benefit, so we will turn them off. To do this, we will create a separate rule for rsyslog, where we will list all the message templates that we will cut. Let's place this rule in separate file /etc/rsyslog.d/ignore-systemd-session-slice.conf.
# cd /etc/rsyslog.d && mcedit ignore-systemd-session-slice.conf if $programname == "systemd" and ($msg contains "Starting Session" or $msg contains "Started Session" or $msg contains "Created slice" or $msg contains "Starting user-" or $msg contains "Starting User Slice of" or $msg contains "Removed session" or $msg contains "Removed slice User Slice of" or $msg contains "Stopping User Slice of" ) then stop
Save the file and restart rsyslog to apply the settings.
# systemctl restart rsyslog
It is necessary to understand that in this case we disable flooding in the log file only for local server. If you store logs on , then this rule will need to be configured on it.
Installing iftop, atop, htop, lsof on CentOS
And finally, to complete the setup, we’ll add a few useful utilities that may come in handy during the operation of the server.
iftop shows the loading of the network interface in real time, can be launched with various keys, I will not dwell on this in detail, there is information on this topic on the Internet. We put:
# yum install iftop
And two interesting task managers, I most often use htop, but sometimes atop comes in handy. Let's install both, see for yourself, figure out what you like best, what suits you:
# yum install htop # yum install atop
To display information about which files are used by which processes, I advise you to install the utility lsof. It will most likely come in handy sooner or later when you diagnose the server.
# yum install wget bzip2 traceroute gdisk
That's all for me. Basic setup CentOS is finished, you can start installing and configuring the main functionality.
Setting up system mail
To finish setting up the CentOS server, let's make sure that mail addressed to the local root is sent through an external mail server to the selected mailbox. If this is not done, then it will be locally compiled into a file /var/spool/mail/root. And there may be important and useful information. Let's configure it to be sent to the system administrator's mailbox.
I talked about this in detail in a separate article -. Here are just the commands and quick setup. Install the necessary packages:
# yum install mailx cyrus-sasl cyrus-sasl-lib cyrus-sasl-plain postfix
Let's draw something like this config for postfix.
Cat /etc/postfix/main.cf ## DEFAULT CONFIG BEGIN ###################### queue_directory = /var/spool/postfix command_directory = /usr/sbin daemon_directory = /usr/libexec/postfix data_directory = /var/lib/postfix mail_owner = postfix inet_interfaces = localhost inet_protocols = all unknown_local_recipient_reject_code = 550 alias_maps = hash:/etc/aliases alias_database = hash:/etc/aliases debug_peer_level = 2 debugg er_command = PATH =/bin:/usr/bin:/usr/local/bin:/usr/X11R6/bin ddd $daemon_directory/$process_name $process_id & sleep 5 sendmail_path = /usr/sbin/sendmail.postfix newaliases_path = /usr/bin/ newaliases.postfix mailq_path = /usr/bin/mailq.postfix setgid_group = postdrop html_directory = no manpage_directory = /usr/share/man sample_directory = /usr/share/doc/postfix-2.10.1/samples readme_directory = /usr/share/ doc/postfix-2.10.1/README_FILES ## DEFAULT CONFIG END ###################### # Server name as output by the command hostname myhostname = centos-test. xs.local # Here, logically, you need to leave only the domain, but in this case it is better to leave the full name of the server so that the sender field # contains the full name of the server, this makes it more convenient to parse service messages mydomain = centos-test.xs.local mydestination = $myhostname myorigin = $mydomain # Server address through which we will send mail relayhost = mailsrv.mymail.ru:25 smtp_use_tls = yes smtp_sasl_auth_enable = yes smtp_sasl_password_maps = hash:/etc/postfix/sasl_passwd smtp_sasl_security_options = noanonymous smtp _tls_security_level = may
We create a file with information about the username and password for authorization.
# mcedit /etc/postfix/sasl_passwd mailsrv.mymail.ru:25 [email protected]:password
Create a db file.
# postmap /etc/postfix/sasl_passwd
Now you can restart postfix and check if it works.
# systemctl restart postfix
To the standard alias for root in /etc/aliases, add an external address where mail addressed to root will be duplicated. To do this we edit specified file, changing the last line.
#root: marc
Root: root, [email protected]
Updating the certificate database:
#newaliases
Let's send a letter via the console to the local root:
# df -h | mail -s "Disk usage" root
The letter should go to an external mailbox. If you use a mailbox from Yandex, you will most likely receive an error in the mail server log and the letter will not be sent.
Relay=smtp.yandex.ru:25, delay=0.25, delays=0/0/0.24/0.01, dsn=5.7.1, status=bounced (host smtp.yandex.ru said: 553 5.7.1 Sender address rejected: not owned by auth user. (in reply to MAIL FROM command))
This error means that your mail sender is not the same mailbox that you use for authorization. I tell you how to fix this in a separate article -. With other mail systems where there is no such check, everything should be fine as is.
This completes the local mail setup. Now all letters addressed to the local root, for example, reports from cron, will be duplicated to an external mailbox, and sent through a full-fledged mail server. So the letters will be delivered normally, without ending up in spam (although not necessarily, there are also heuristic filters).
Conclusion
We've gone through some initial steps to set up a CentOS server, which is what I usually do when preparing a server right after installation. I don’t pretend to be the absolute truth; I may be missing something or doing something that’s not entirely correct. I will be glad to have reasonable and meaningful comments and suggestions.
..