Let's assume you bought a Wi-Fi router and adapter, if you don't have mobile devices with adapters already built inside. First, you need to unpack the equipment and connect the router to the network.
In order to go to the router settings, it must be connected via a patch cord ( network cable, usually included in the package with the router) to the computer - one end to the LAN port of the router (yellow port in the picture), the other to the corresponding port on the computer. You need to connect your Internet provider cable to the WAN port (blue port). Ports on routers from other companies are usually signed; it will be extremely difficult to make a mistake.
Make sure you are connected to your Wi-Fi router— the tray icon should light up. Go to Start menu - Control Panel - Network and Internet - Network connections. Here you will see a new connection. Click on it right click mouse and call Properties. Next, select “Internet Protocol Version 4” and click “Properties”.
Next, in the properties of this connection, set the following settings:
- IP address: 192.168.0.2
- Subnet mask: 255.255.255.0
- Default Gateway: 192.168.0.1
- DNS: 192.168.0.1
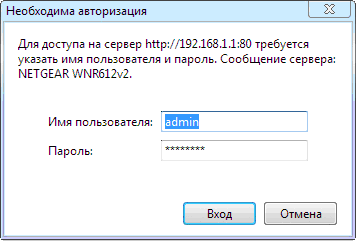
The router installation manual should tell you how to access the router's management interface. If you don't find this, open your browser and enter address bar“192.168.1.0” or “192.168.1.1” (different routers have different values). A login window should open. Enter login admin password - password or admin.
You are in the configuration interface of your router. It may look different from ours, however, you will find all the basic concepts and settings that interest us without any problems.
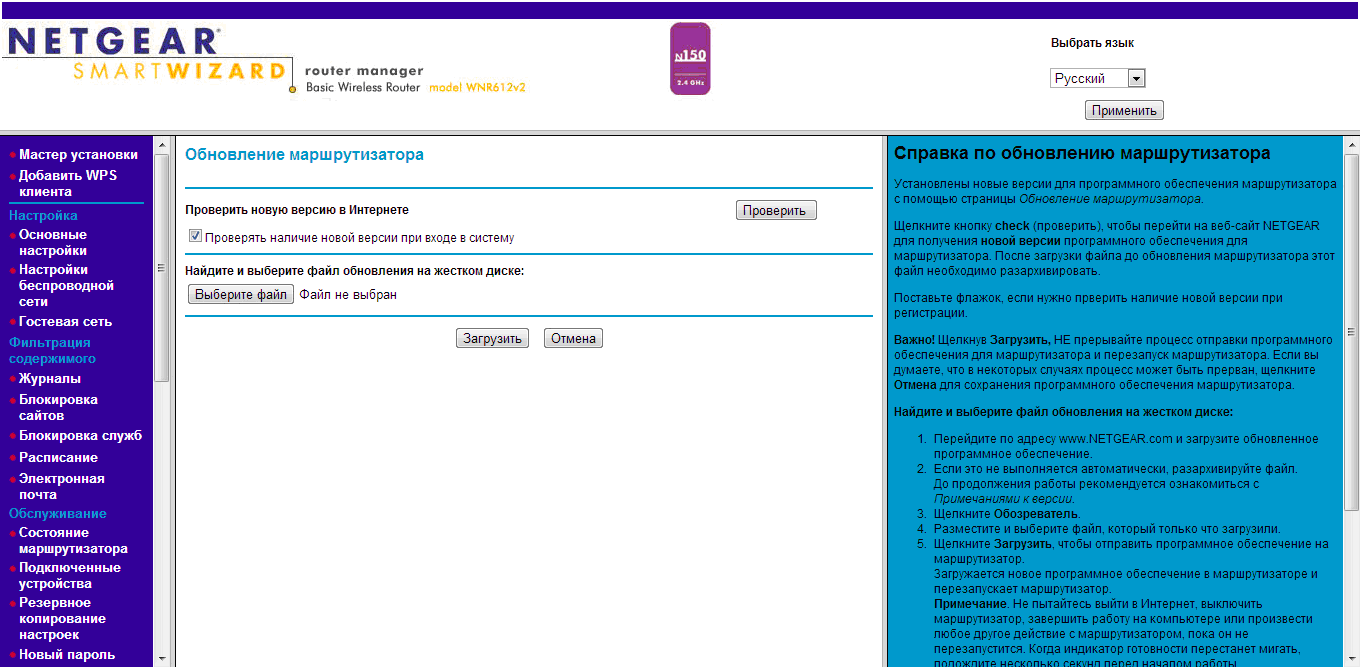
When you first enter the interface, the router usually looks for a new software. If you find one, install it - almost all devices work more stable with new firmware versions.
Go to the main settings menu. We need to connect our router to the Internet so that it can switch it.
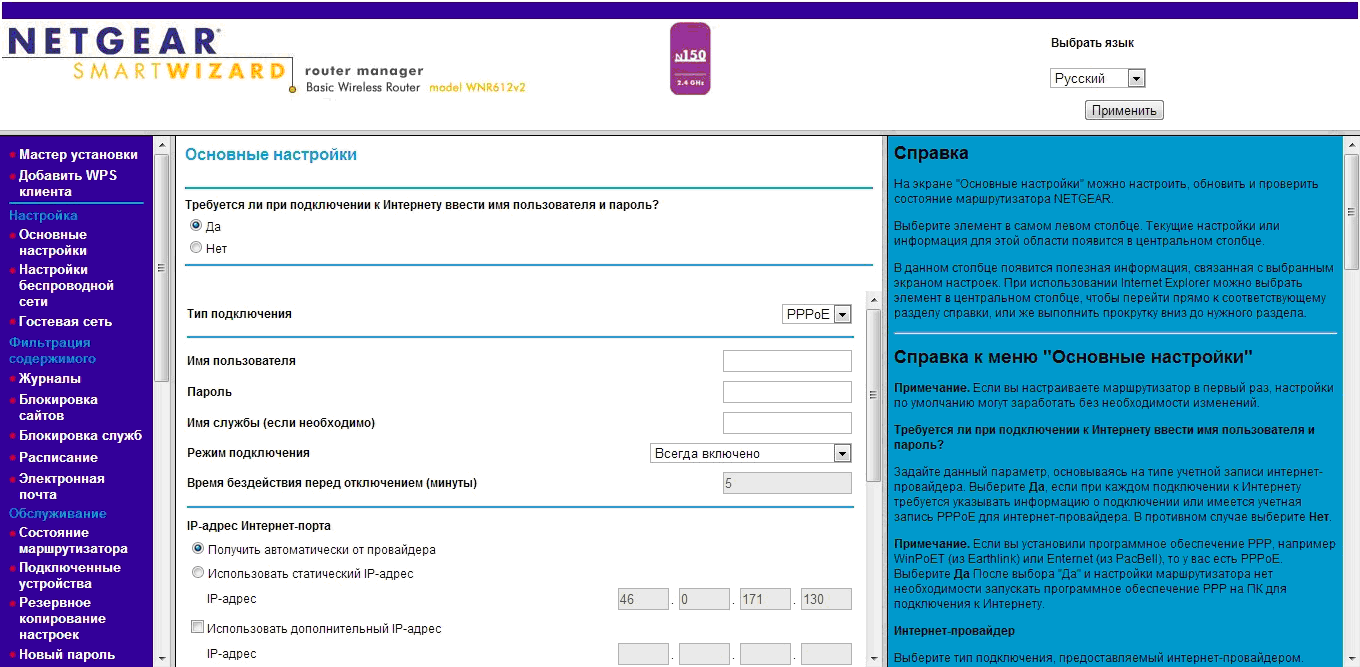
In the username and password fields, enter the data received when connecting to the Internet from your provider. Leave the remaining values unchanged.
![]()
In the SSID input field, enter the name of the network that will be displayed when it is discovered. Region - Russia.
There are a lot of recommendations for choosing a working frequency channel number; you need to take into account many factors, the main one of which is the fact of radio congestion in a given area. We recommend that you initially select channel 6, since it is the middle frequency range will provide maximum power at the transmitter output.
For a more meaningful choice of channel, it is recommended to analyze the networks in a given area in order to identify interfering networks and the frequencies on which they operate, and select the most “free” channel. The program will help you for these purposes WI-FI Analyzer , running in the Android environment. You can also use its analogues.
Select 150 Mbps mode or higher if your router allows it. If the drop-down menu offers standards, select 802.11n.
In the security settings, select WPA-PSK (TKIP) or WPA2-PSK or a combination of both.
In the key or passphrase field, enter the password that you will need to connect to the new network.
Be sure to save the entered data. Wait a few minutes until everything changes made will be accepted. That's it for setting up your wireless network finished.
Discovering and connecting to a network
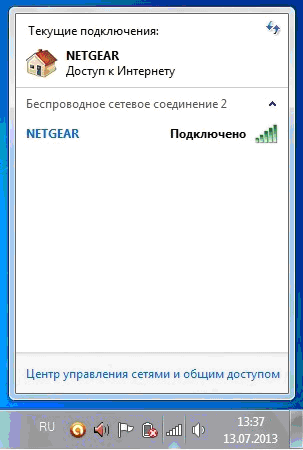
In an operating room environment Windows systems Click on the network icon in the tray and discover networks. Your network should show up with the name you specified in the router settings. Just click on this button, enter the network key, which you also registered yourself, and the connection will be established.
To access local files, we recommend setting up home network. The first time you connect to a wireless network, you will be automatically prompted to create a homegroup. If this does not happen, this option can be found in the Control Panel. All you need to do is create a password for your homegroup and use it on different computers. Next, click on the files or folders that need local access and select "Sharing - HomeGroup." This way, these files and folders will be accessible from other computers in this homegroup.
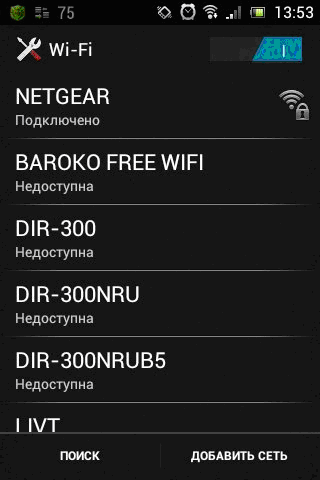
On mobile devices on Android based and iOS everything is also quite simple. IN Wi-Fi settings You need to discover your network and connect to it using the network key.
P.S.
Setting up a wireless network on your own is very easy and quick. This will save you money, get rid of unnecessary wires and give you the opportunity to access the Internet from several devices at once. It should be remembered that the overall network speed will be divided by the number of devices simultaneously connected to this network. In conclusion, it is worth saying that the router itself is best placed in the center of the planned radio coverage area at a height of just above 1-1.5 meters.
Creating a secure wi-fi network
At first glance, creating a reliably protected Wi-Fi network is very difficult. It is necessary to purchase the “correct” equipment, set up an authentication server, take care of recording Internet traffic and protecting against external attacks through a firewall.
All this can take a lot of time and Money. In this article I will talk about one of the cheapest and simple ways creating a secure wireless network with a shared Internet connection.
Part 1. A little about security
The reason for the vulnerability of wireless networks lies in the principle of their operation: intercepting data transmitted over a radio channel is much easier than with normal cable connection. This does not require expensive equipment and can be done using a regular laptop, a pair hacker utilities(such as airodump and aircrack) and good instructions for hacking wi-fi(like here for example). Therefore, the wireless network must be maximally protected from various types of attacks: unauthorized connections, interception and eavesdropping of traffic, theft important information, "false" access points, etc.
Today, the WPA (Wi-Fi Protected Access) security standard is recognized as the most reliable for wireless networks. Initial protection of a wi-fi network can be ensured using the WPA-PSK (Pre-Shared Key) mode, when a communication session key - Pre-Shared Key, reminiscent of a regular password, is manually entered on the access point and on the user's computer. Potential vulnerability WPA-PSK arises because in real networks the passphrase rarely changes and is the same for all users on the network. If you have time and powerful computer choosing such a password will not be difficult.
More reliable network security is achieved when using WPA Enterprise mode, when an authentication server (RADIUS server) is installed on the network, which checks user access rights. In this case, the wireless access point will block all connections to the wireless network until the username and password entered by the user are verified by the authentication server. If the user is not in the RADIUS server database, then he will not be able to connect to the Wi-Fi network.
Maximum wireless network security is ensured by the use of digital certificates and the EAP-TLS (Extensible Authentication Protocol - Transport Level Security) authentication method. In this case, the user’s computer and the RADIUS server verify each other using pre-generated digital certificates, which is guaranteed to protect your network from unauthorized connections, and users from “false” access points introduced by hackers.
For even more reliable protection of transmitted data, you can create an external protective shell of a wireless network using VPN (Virtual Private Network) technology over WPA, which will add a second level of traffic encryption.
And finally, you can protect yourself from unauthorized access points that your employees secretly install using special network equipment that can detect such devices and generate appropriate reports.
Few people can build such a wireless network security system: you need, at a minimum, to correctly configure a wireless access point and a RADIUS authorization server, create a User Database, develop a management system for this database and digital certificates, and most importantly, combine all these components into a single network .
But, despite the apparent complexity, creating the most secure Wi-Fi network is quite easy. To do this, you don’t have to be an information security guru and wireless standards. Everything can be done in an hour and a half, having:
- separate computer;
- a wireless access point that supports WPA, WPA2 and authorization on a RADIUS server (these characteristics of the access point can be found in its documentation or from consultants at a computer store);
- Esomo program, which will play the role of a RADIUS server, as well as a public Internet access server. Official website of the program developer: www.esomoline.com. To protect the wireless network, Esomo uses the EAP-TLS protocol, which provides user authentication on the built-in RADIUS server and mutual authentication between the Esomo RADIUS server and user computers using digital certificates.
Part 2. An example of creating a secure wireless network
Now let's look at an example of an organization local wi-fi networks based on Esomo. The network includes 11 computers, a Linksys wireless access point and is connected to the Internet via an ADSL modem.
First of all, download Esomo from the developer’s website (distribution size 135 MB) and install the server part of the program on a separate computer with two network cards. This will be our RADIUS server and also VPN server and an Internet access server that allows you to limit user traffic, view statistics on access and traffic costs. Esomo does not require an operating system to operate, because... The program already includes the freely distributed FreeBSD OS. Step by step instructions installation instructions for Esomo can be found here.
After installing the program, connect the computer with Esomo and the wireless access point to the network switch. Through the second network interface we connect the Esomo server to the ADSL modem (or to the cable if you have a dedicated line). On any Windows computer local network(also connected to the network switch) launch Esomo Workstation and connect to the Esomo server.
You can create a secure wireless network based on Esomo in 4 simple steps. First, we'll set up Esomo to work with a wireless network. Then we will configure the wireless access point and user computers. And finally, let's connect to the Wi-Fi network and establish a VPN connection with the Esomo server to create a second level of protection for wireless traffic. After this, you can safely work on Wi-Fi networks and the Internet. So let's get started.
Step 1: Setting up the Esomo server
First of all, we will issue a permanent IP address to the wireless access point to work in our network. To do this, add the access point to the static DHCP list (the MAC address of the access point is usually indicated on the sticker on it). Let's apply the settings.
Now let’s add a wireless access point to the list of access points on the Esomo server and specify a secret key (password) for it. This is necessary for the organization secure connection between the access point and Esomo. Let's apply the settings.
In order for network users to access the Internet, and for Esomo to take into account their traffic, it is necessary to create a tariff that determines the cost of 1 MB of traffic or 1 minute of Internet connection. To do this, in the “Tariffs” section we will add new tariff, determining the cost of 1 MB of incoming traffic, for example, 1 ruble.
Since at the time of writing Esomo allows Internet access only to users who have a tariff and funds on an individual account, let’s go to the “Users” section and double-click on the testuser user, assign him the previously created tariff and add 500 rubles to his account.
This completes the Esomo server setup. Leave the Esomo AWP window open and proceed to configuration wireless point access.
Step 2: Setting up a wireless access point
You can access the wireless network only after successful authorization on the Esomo server, so you must first configure the wireless access point to work with the RADIUS server. To do this, connect to the access point through a web browser using the IP address that we previously assigned to it through Esomo Workstation on the “DHCP” tab. We will specify WPA-Enterprise as the operating mode of the access point, TKIP as the encryption protocol, and the IP address of the computer with Esomo as the RADIUS server. We will also check that the secret key specified in the settings of the access point (Shared Secret) matches the key specified for the access point in Esomo Workstation (section "Wi-Fi", tab "Access Points").
Below is a screenshot of the Linksys access point settings.
Step 3: Setting up the user's computer
For two-way authentication between the user's computer and the Esomo server, digital certificates must be installed on the user's PC and configured wireless adapter to work using the EAP-TLS protocol.
User authorization on the Esomo server occurs with the participation of two digital certificates: root and user. These certificates must be obtained through Esomo AWS and installed on your computer. To do this, go to the “Wi-Fi” section on the “Certificates” tab and save the root certificate and the testuser user certificate to our computer.
Now let's install the received digital certificates. To do this, just double-click on the certificate and follow the instructions of the Certificate Import Wizard.
With installation root certificate There shouldn't be any difficulties: leave all the default settings and just click the "Next" and "Finish" buttons. But during the installation of a certificate for the testuser user, you will need to enter the testuser password that protects this certificate.
The Esomo server already contains ready-made certificates, so there is no need to install anything there.
Next, let's configure the wireless network adapter our PC to work with the Esomo RADIUS server using the EAP-TLS protocol. To do this, in the settings of the wireless adapter, we will specify to use TKIP encryption and WPA authentication using digital certificates.
From the list of trusted root certification authorities, select the root certificate previously installed on our computer.
So, all settings are completed and the wireless network is ready to work. We disconnect our computer from the network switch and try to connect to the wi-fi network. After searching available networks the wireless adapter will detect our secure network. After successful authentication using digital certificates and verification on the RADIUS server, our computer will connect to the wi-fi network. It remains to take the last step towards super-protection of our wireless network.
Step 4. Creating a second level of protection - VPN installation connections with traffic encryption
Maximum protection of wireless traffic on a network with Esomo is achieved through the use of VPN technology on top of the already installed wireless connection via the WPA protocol, which adds a second level of traffic encryption. The VPN connection between the user's computer and the Esomo server is created automatically. You just need to open a web browser and type the address of any existing site, for example, www.google.ru. On the Esomo login page, enter testuser in both fields of the form and click the “Connect” button.
After successfully checking the login and password, the connection between our PC and the Esomo server will be established VPN connection. Now you can surf the Internet safely. All transmitted traffic will be encrypted not only by WPA, but also by VPN. And through Esomo AWS, you can view the statistics of “pumped up” traffic at any time and import it into MS Excel in a couple of clicks.
After checking that everything works, we will connect the remaining computers to the wireless network and provide users with Internet access. To do this, we will create new users through Esomo AWS and assign them the previously added tariff. Then we will create digital certificates for these users and install a root certificate and their own user certificate on each user’s computer. Also, do not forget to configure the wireless adapter on each user’s computer to work with the RADIUS server using the EAP-TLS protocol.
This completes setting up a wireless network with shared access the Internet is completely completed. It took me less than two hours to do everything. Agree that using other means it would be problematic to organize a well-protected Wi-Fi network with such minimal costs time and effort. At the same time, Esomo works perfectly as a RADIUS server and Internet access server not only in wi-fi networks, but also in wired and mixed LANs, when some network segments are connected using cable, and others using wi-fi.
What is it for?
This solution is ideal for those who plan to connect to the Internet at home mobile gadget or any other device (for example, TV, game console, etc.).
What do we need for this?:
1. Personal computer/laptop equipped with a Wifi module and connected to the Internet;
2. operating system Windows;
3. Straight arms!
So let's get started!
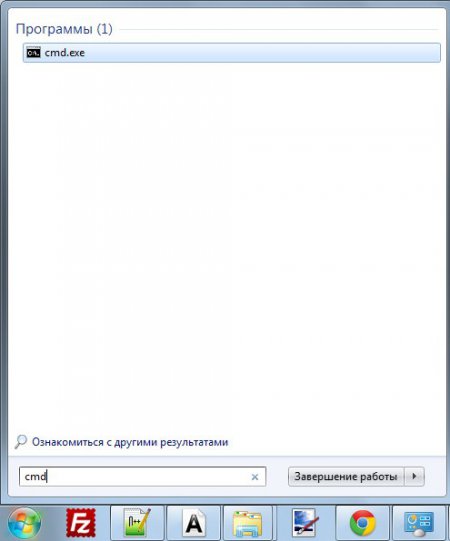
Open the command line file cmd.exe with any in an accessible way. For example, you can type cmd into the search bar located in the Start menu:
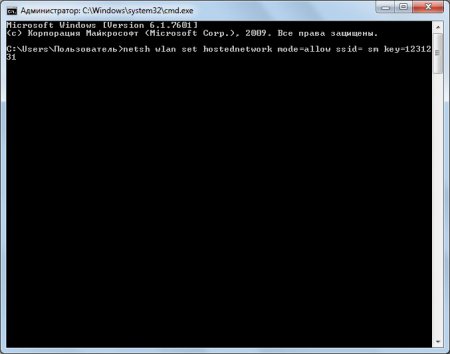
Now let's create our access point. IN command line copy the code: netsh wlan set hostednetwork mode=allow ssid=access point name key=access password (right-click in the cmd window field and select the “Paste” function).
Attention! You must replace the “access point name” and “access password” with your data.
For example, let's create an access point with the name sm and password 1231231. To do this, we will need to enter the command into the command line:
netsh wlan set hostednetwork mode=allow ssid= sm key=1231231
That's it, the Wifi access point has been created! All that remains is to launch it.
To do this, enter the command on the command line netsh wlan start hostednetwork . This procedure will need to be performed every time you restart the computer.
Let's automate this operation a little. To do this, create a regular text file and copy the text netsh wlan start hostednetwork into it. Save and close the file. Now we rename its resolution to *.bat (instead of *, enter any name). This file you can add it to the startup list and then the Wifi access point will start automatically (or you can independently launch the *.bat file every time you need to connect your gadget to the Internet).
Attention! In order to change the file permission, you must perform the following operation:
1. While in the folder where you created Text Document with the content netsh wlan start hostednetwork, click on the alt button. A menu list appears below the folder address bar.
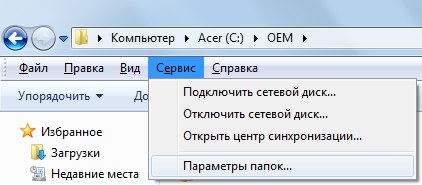
2. Select “Tools -> Folder Options”.
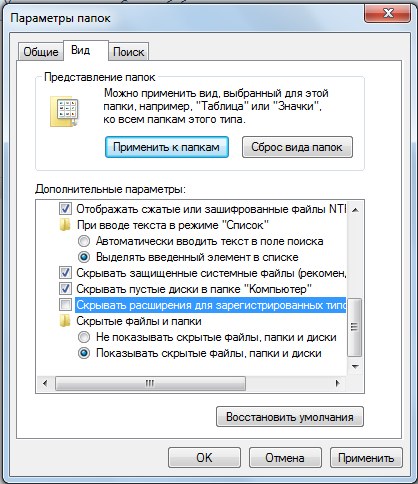
3. In the window that opens, go to the “View” tab and uncheck the “Hide extensions for registered file types” checkbox.
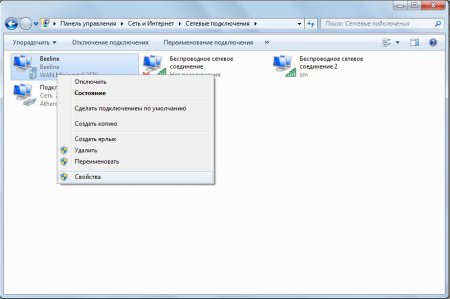
And the last step! It is necessary to share the access of the main connection to our access point. To do this, go to “Control Panel -> Network and Sharing Center -> Change adapter settings.” Next, right-click on the main connection (in my case it’s Beeline) and select “Properties”.
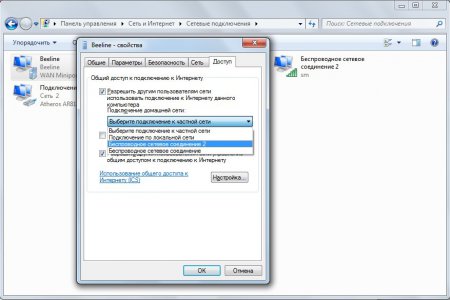
In the window that opens, go to the “Access” tab, check the box next to “Allow other network users to use the Internet connection” of this computer" and in the drop-down list select the access point we created (in my case it is Wireless network connection 2 with the name sm).
So, the access point has been created, but after connecting to it, you discovered that the Internet does not work? In this case, I have only one recommendation: disable all firewalls (like standard Windows, and antivirus). If after this the Internet works, then enter this connection to firewall exceptions.
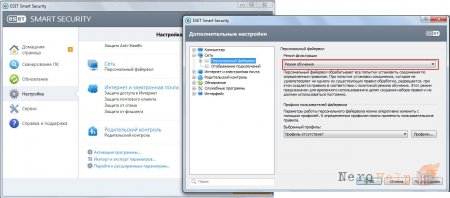
In the case of NOD, everything is very simple! Go to “advanced settings” and set “Filtering mode” to training.
If, after all the steps taken, the client device cannot connect to the access point you created, then your Internet-distributing laptop/computer does not have a DHCP server that provides IP addresses. In this case, you will have to assign IP addresses yourself. There is nothing complicated about this, just follow these instructions exactly.
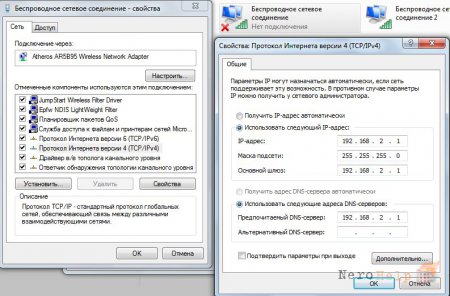
Go to " Network environments" and right-click on "Wireless network connection" (not the one we created, but the one that was originally) -> Properties -> Internet Protocol version 4 (TCP/IPv4) -> enter the following values:
IP address: 192.168.2.1
Subnet mask: 255.255.255.0
Default Gateway: 192.168.2.1
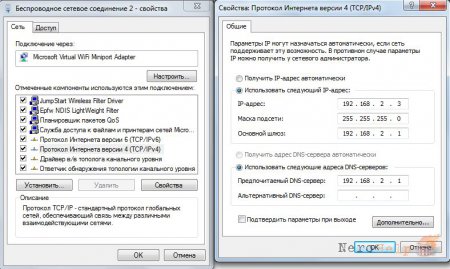
Now go to the properties of the virtual access point we created (“Wireless network connection”) -> Internet Protocol version 4 (TCP/IPv4) -> enter the following values:
IP address: 192.168.2.3
Subnet mask: 255.255.255.0
Default Gateway: 192.168.2.1
Preferred DNS Server: 192.168.2.1
And at the end of the article, a couple of useful commands:
netsh wlan show profiles- view the names of all previously created points;
netsh wlan delete profile name="ProfileName"- deleting a previously created wireless access point profile (instead of ProfileName, of course, you need to put the name of your access point);
netsh wlan show profile name="ProfileName" key=clear- shows the security key of the specified access point;