The computer hard drive is small device, located inside system unit or laptop case. But, despite its integrity, in the Windows operating system it can be displayed as several disks, each of which is assigned its own letter of the English alphabet. This is convenient for the user, as it allows you to logically divide the information stored on the computer, quickly access it and search.
But when you buy a computer or a new hard drive, you get an information storage device that appears as one solid logical drive in Windows. At this point, the task often arises of splitting one disk partition into several partitions, usually two or three. For example, the first (disk C) is where the operating system is installed, and the second is where personal documents, photos, music and videos are stored. This is convenient from the point of view of safety of information and access to it in case of failure of the operating system, because you can reinstall Windows. Even if you format the C drive, your personal files stored on other logical drives (D, E, etc.) will remain intact.
Attention: before partitioning the disk, close all running programs!
Partitioning using Windows 7
Windows 7 has its own management capabilities sections of hard disk: creating a partition, compression (shrinking a partition), deleting a partition, changing a letter. In Windows XP you cannot do this.
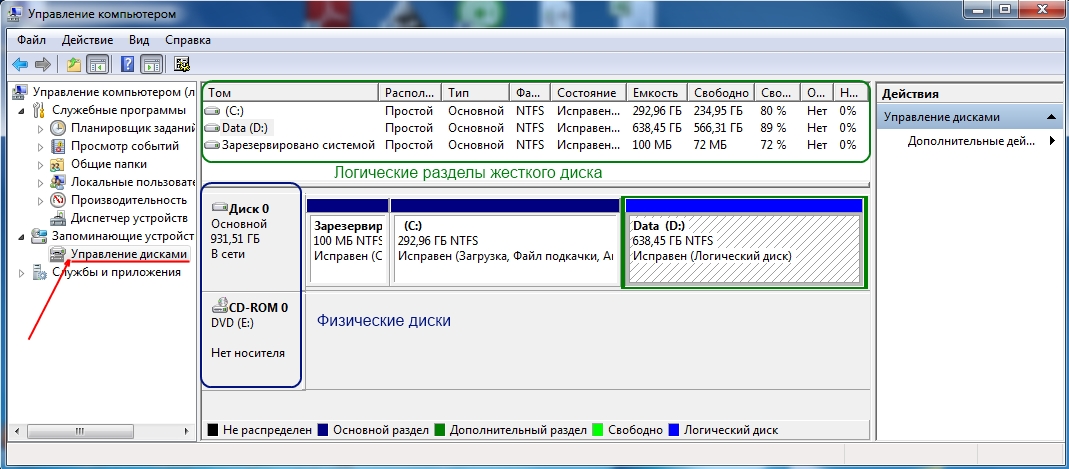
Right-click the Computer icon on your desktop or Start menu and select Manage. You will need system administrator rights.
In the Computer Management window that opens, go to Disk Management. In the central part of the window you will see lists of physical disks, logical partitions and their parameters.
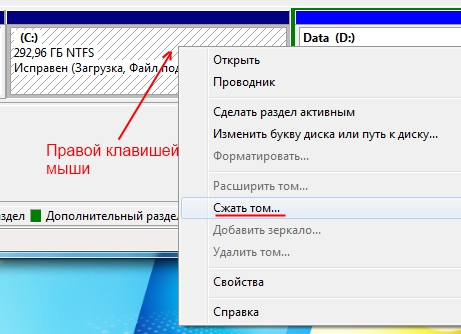
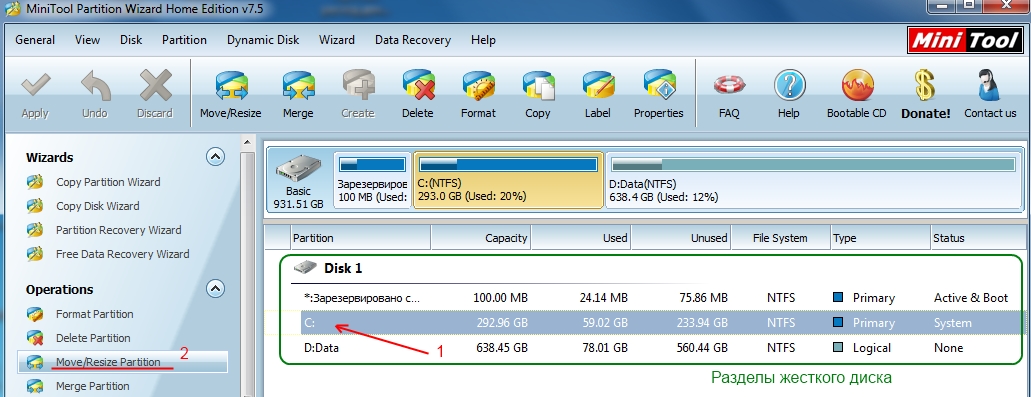
Let's consider the most popular task - breaking logical drive C into two sections. To do this, you first need to separate some of the free information from drive C, and then create a separate partition from the free space. Right-click on drive C and context menu select the item “Compress volume...”. So we will reduce the size of the C drive by freeing up free space.
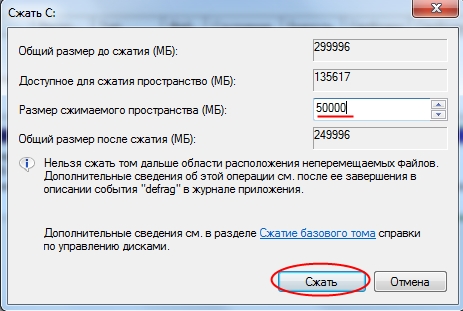
You will have to wait a bit, Windows will analyze the C drive being partitioned and display a window with partition options. Set the size of the compressed space (i.e. the amount of free space that needs to be taken from the disk) and click on the “Compress” button.
Wait while Windows splits the specified disk into two parts. The process takes a few minutes.
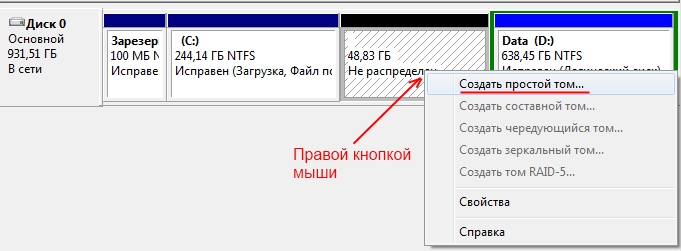
After compression of drive C is completed, you will see another one appear among the partitions, marked as “Not distributed”. Next on this free space you need to create a new partition. Right-click on the unallocated partition and select “Create simple volume...” from the menu.
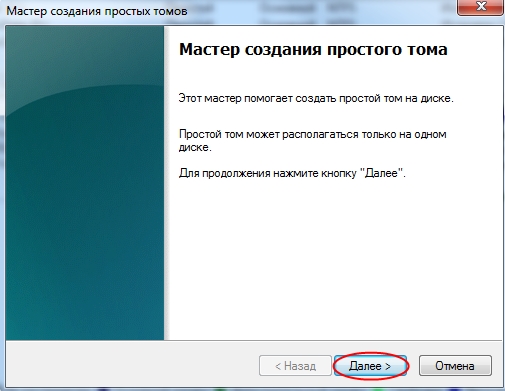
The Create Simple Volume (Share) Wizard window will open. Click "Next".
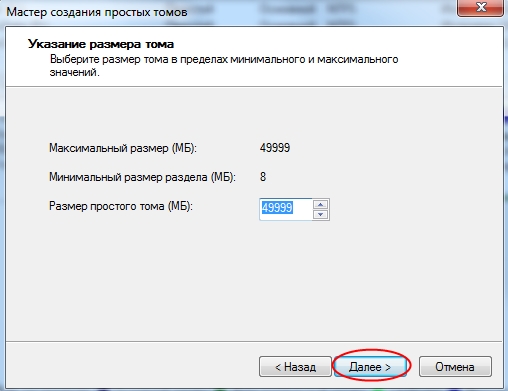
The wizard will ask you to specify the size of the partition to be created. The window will indicate the minimum and maximum sizes, and by default the created partition will be the largest possible size. In most cases, you won't need to change anything here, so click Next.
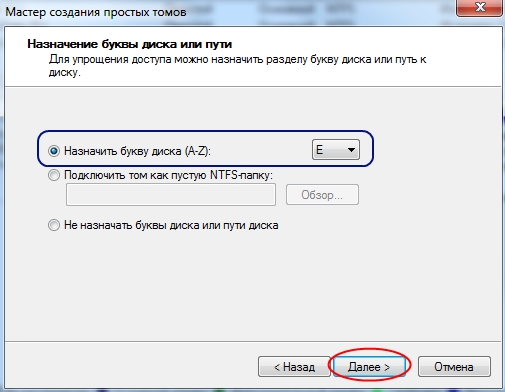
In the next step, you will be asked to assign a letter of the English alphabet to the new section, or skip this action. It is convenient to assign a letter right now. Leave Assign Drive Letter (A-Z) selected and you can change the default drive letter if you wish. Click "Next".
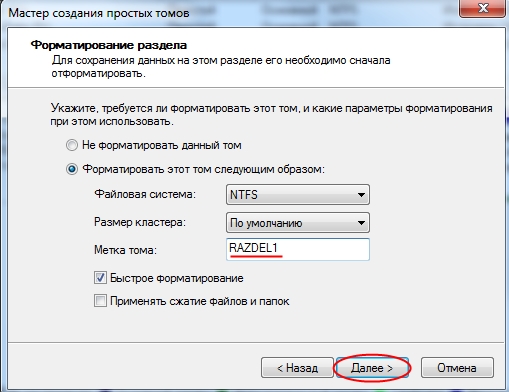
At the fourth step of the wizard, you need to specify formatting parameters for the new disk partition. This is necessary so that data can be saved to the newly created partition. Initially set parameters ( File system NTFS and quick format) leave unchanged. Fill in only the “Volume Label” field, come up with a name for it, and click “Next”.
At the last step of the volume creation wizard, you can view all the selected parameters for creating a new disk partition and confirm them by clicking the “Finish” button.
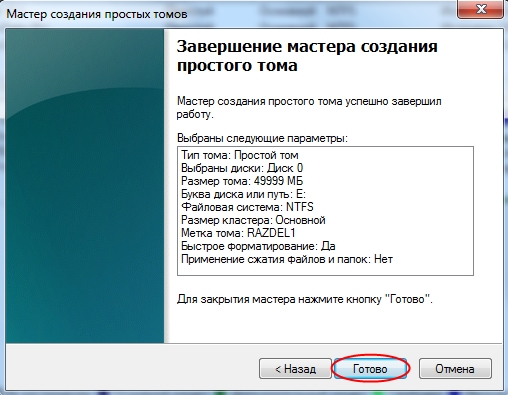
Creating a partition will take a few seconds and a new one will appear among the list of volumes in the Computer Management window.

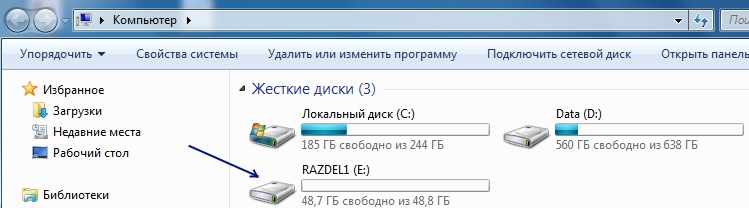
The new drive should also appear among the drives in the Computer window. You can use it.
Partitioning using MiniTool Partition Wizard
If you have another Windows version, other than Windows 7, such as Windows XP, then to break HDD for sections, you will need a special program. Well-known programs in this area are: Partition Magic and Acronis Disk Director. But you have to pay to use them. Therefore, below the text suggests a way to partition a hard drive based on the free MiniTool Partition Wizard Home Edition program.
The task remains the same - to split the C drive into two drives.
| Like |
Without data loss, provided that there is one partition converted to the main volume with the letter (C:), the operating system is installed on it and nothing should happen to it, how do you like the problem?
- Note: If you have a new operating system installed, you can divide your hard drive into partitions using the operating system itself, without resorting to third-party programs, here is the article, if something doesn’t work, use the universal one and free program in Russian.
- If you are on Windows 7, read here. If you have new laptop then you need this article.
Such problems are very easy to solve special programs for disk management, for example: Acronis Disk Director, Paragon, I have to work with all of them. The fact is that when working with such programs it is easy to damage the partition table hard drive, then the computer will not be able to determine, among the new volumes created by you, the location of the main partition with the operating system, what then? That's right, you simply won't be able to boot into Windows. Acronis, also working with boot disk, sometimes confuses the letters of sections.
- Therefore, before working with Acronis program Disk Director needs to insure itself as much as possible and create a backup of all partitions of your hard drive. Every user should be able to create a backup of the operating system and, if necessary, deploy it back.
I do not want to intimidate you in any way, but simply warn you to be very careful when working with software for working with computers. hard disk partitions. I remember in the old days, when everything was just beginning, I always had several floppy disks in my pocket with the Partition Magic program in bourgeois language, yes, floppy disks, it worked from them, you insert it into the floppy and you always don’t know how it will end, but I will say Honestly, I only let you down a few times. And then I met Acronis and have not left since then, although now I carry a large suitcase with me and there are always several boot disks with this program. Well, it's time to get down to business, otherwise you'll run away from the site and won't partition your hard drive.
As I said, we have an operating room Windows system XP, but everything that will be said below can also be applied to Windows 7. The operating system has one system partition-disk (C:) with a capacity of 111.8 GB, which we will use divide into two sections, as a result we will have another drive (D:), don’t worry about your files on drive (C:) nothing will happen. Here it is our drive (C:), all alone.
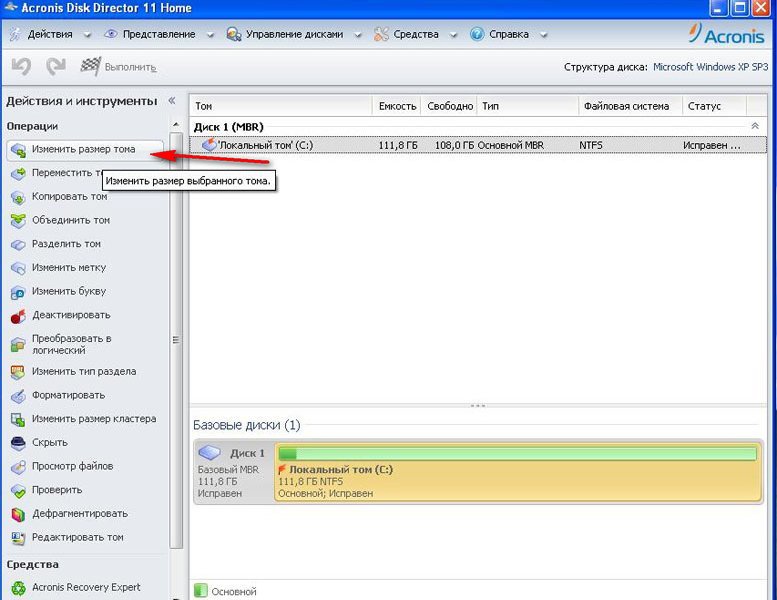
Let's launch our program
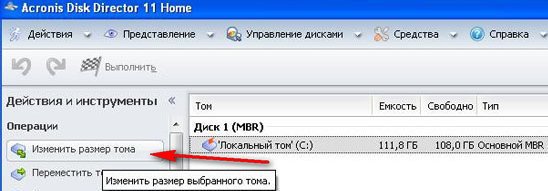
In the main window of the program, our hard drive is visible as one partition-disk (C), with a capacity of 111.8 GB. Let's go with you to Actions and tools, and then Resize volume
change the size of a volume of 111.8 GB, for example, to 55.8 GB, so we will have a logical volume (D)

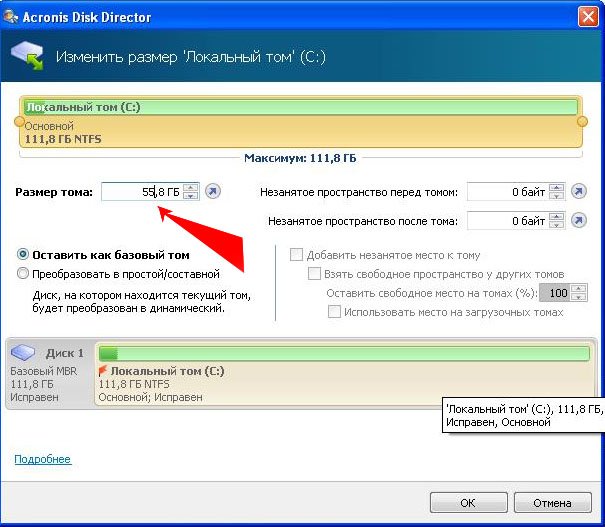
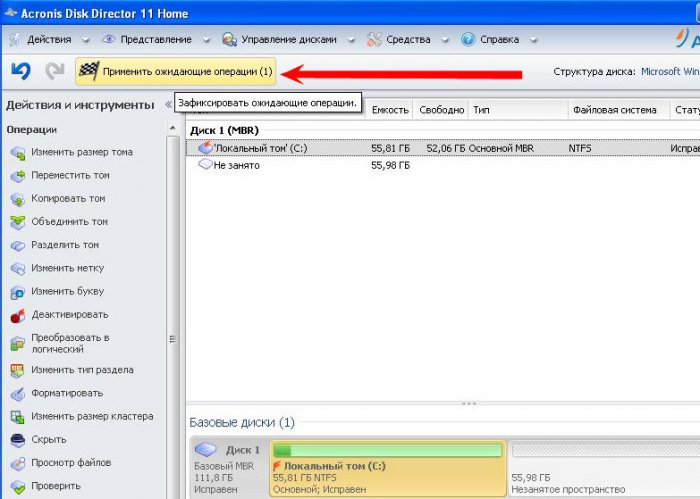
We have some unallocated space and we will convert it later into a logical volume (D)
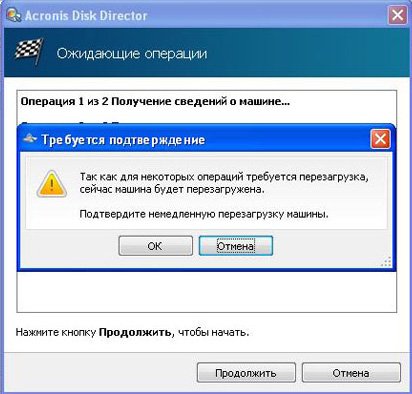
Apply pending operations
Friends, now you can create the second partition you need, right in the operating system, go to Computer->Manage->Disk Management, right-click on the unallocated space and select Create Partition from the menu. Or you can use our program again.
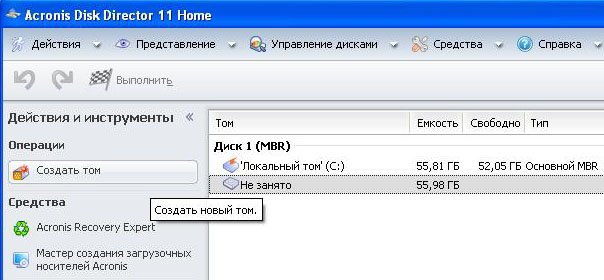
We run our program again, select unallocated space with the mouse and click Create Volume
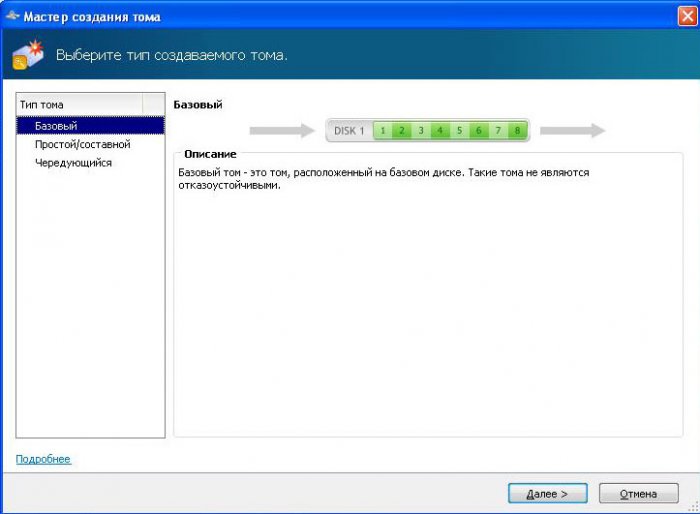
Select the type of volume to be created: Basic
Specify unallocated space
operating systems"data-essbishovercontainer="">After purchasing a computer or during installation of the operating system, users can split the hard drive into several partitions or leave it unchanged.
Thanks to this, you can conveniently sort all information and files without the risk of losing them in the event of a virus attack or operating system failure.
Additionally, we will figure out how to do this on MAC OS X and Linux (using Ubuntu as an example).
Why do you need to partition your hard drive?
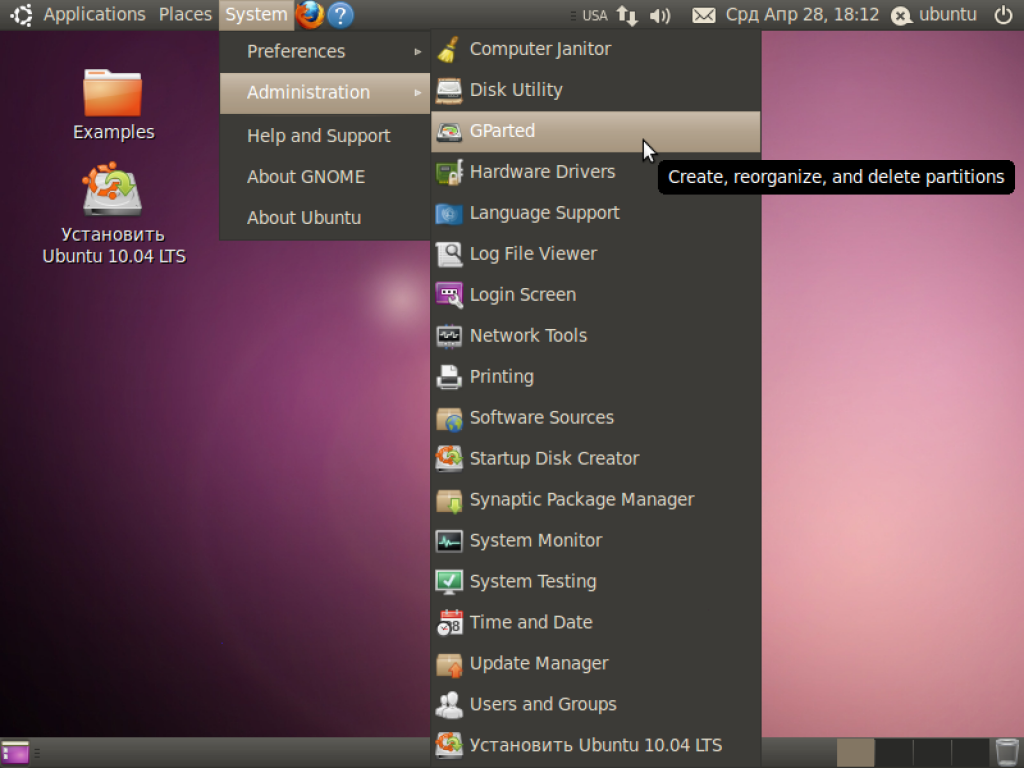
1 Open the System menu - "Administration"- "GParted".
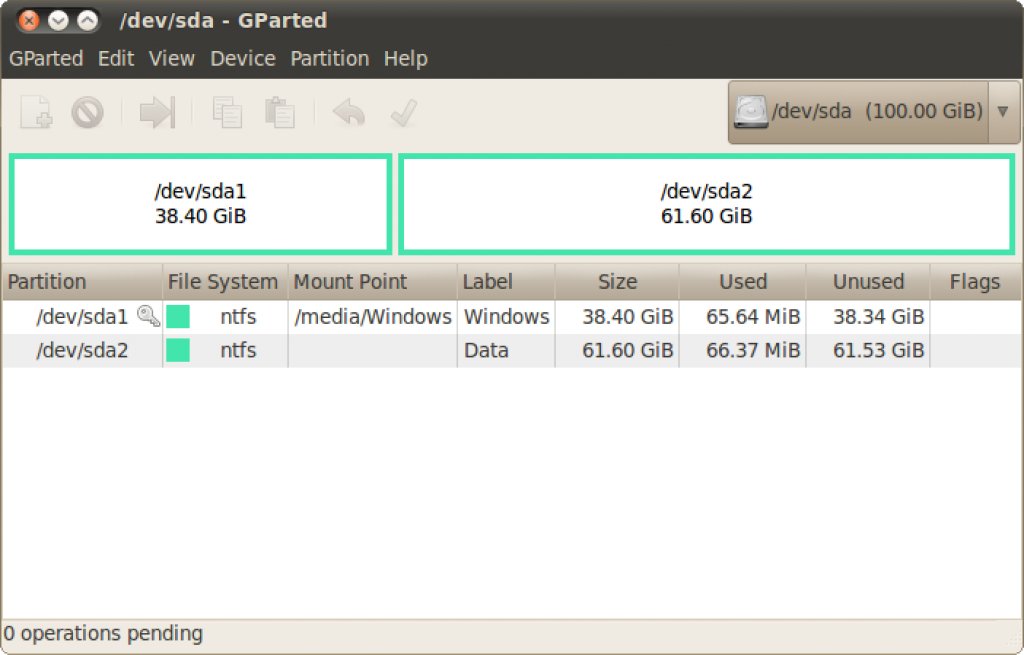
2 After launching the application, you will see a list of disks and partitions available for work, and brief information about them.
3 Select the desired section that you plan to change. If there is a key icon next to it, then it is protected. To make it available for editing, click right click mouse and select “Unmount” from the context menu. Now you can do whatever you want with it.

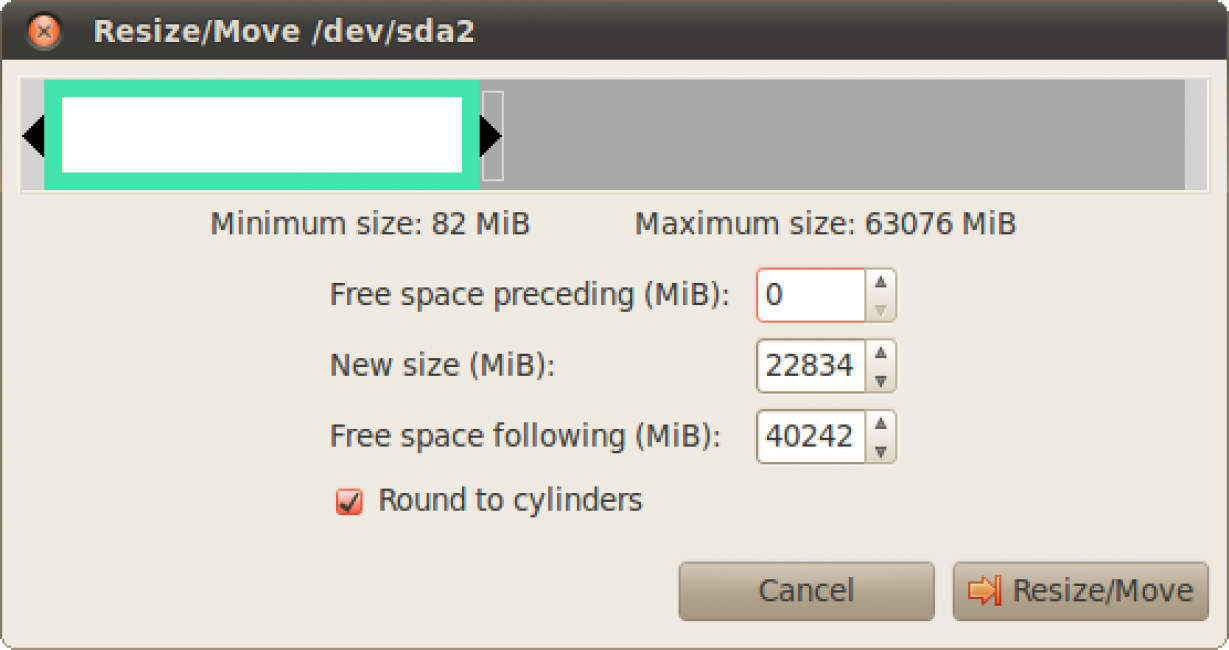
4 Click to the desired disk(for example, /dev/sda1/ or /dev/sda2/) and then select “Resize/Move” to resize or move it. Make all necessary changes and confirm changes made.
5 After closing the window, a free disk space(unallocated), which can be allocated to a new partition. To do this, right-click on it and select “New” from the menu that opens. Select "Extended partition". Specify the desired capacity for the new volume, then confirm the changes by pressing the “Add” key.
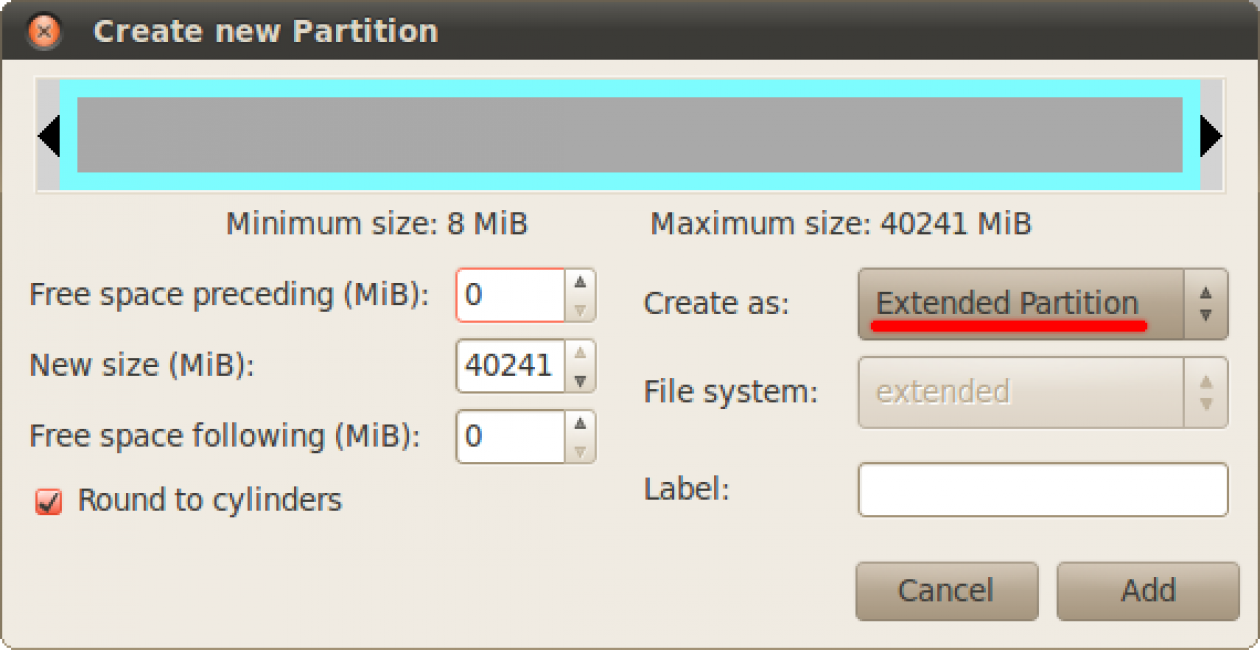
But don’t rush to close the program right away. To confirm the creation of the disk and any other actions in the GParted program, you must click on the green “checkmark” on the toolbar at the top (Apply All Operations) and only after that a new partition will be created.

conclusions
It's best to create multiple disks during OS installation.
But if for some reason this was not done or an error occurred during the operation, then the situation can be corrected later. Anytime.
You can partition a hard drive either using built-in tools in any operating system or using third-party programs.
Each method has its own advantages and disadvantages.
Therefore, for those who are new to the computer and its features, we recommend using the basic tools of Windows or any other OS.
Advanced users can use third party software. With it, you can make additional changes, compress volumes more efficiently, and create partitions.