There are many in various ways transferring pictures from iPhone or iPad to computer. You can transfer using a USB cable, via iTunes, using cloud storage, through third parties file managers etc. However, none of the previously known methods compares in convenience to the method described in these instructions for downloading photos from an iPhone or iPad to a computer.
Note: Using this method assumes that iCloud Photo Library is activated on your iPhone or iPad. If necessary, you can enable it in the Settings → Photos → iCloud Photo Library menu.
Step 1. From your computer, go to the website iCloud.com.
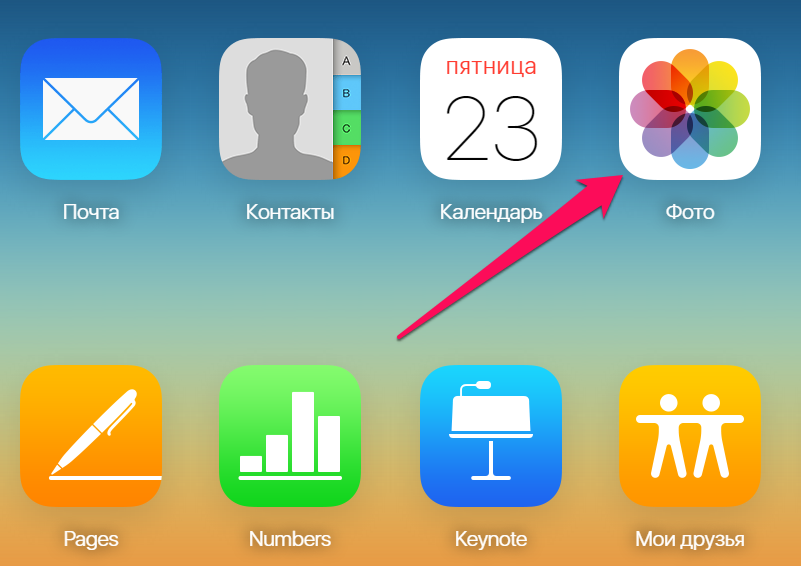
Step 3: Select the application " Photo" All photos and videos that are in your “ iCloud Photo Library». In simple words, you will see all the media files from your iPhone or iPad.
 Step 4: Hold the key Ctrl and left-click on all the photos you want to download to your computer. Selected pictures will be marked with a blue frame.
 Step 5. Click on the button Download» to download photos to your computer. Please note that the browser may ask for permission to download multiple files at the same time. The request must be answered in the affirmative.
![]() Ready! All the pictures you select will be immediately downloaded to your computer in the folder where the browser downloads by default. Note that the selection of images does not disappear after loading. This allows you to immediately delete pictures from mobile device, thereby freeing up valuable memory space.
Ready! All the pictures you select will be immediately downloaded to your computer in the folder where the browser downloads by default. Note that the selection of images does not disappear after loading. This allows you to immediately delete pictures from mobile device, thereby freeing up valuable memory space.
See also:
Please rate:
In iPhones starting from fourth generation a built-in camera is installed, which allows you to take photos and shoot videos very good quality. It is extremely convenient to use. Any interesting event will no longer elude you just because you didn’t have a video camera at an unexpected time and in an unexpected place. Now all you need is an iPhone.
Some difficulties may arise when you try to transfer the captured video from your iPhone to your computer. And the point here is that standard means The operating system of the phone, for some incomprehensible idea of the developers, does not imply saving video from the phone to the computer via a USB cable.
If for small photos and videos you can somehow get out of the situation and send them to yourself by email, then this will not work with large video files, since there is a limit on the size of the transferred data.
Users of iPhones that have been jailbroken do not encounter this problem. But what should owners of unlocked phones do, who do not have an urgent need to interfere with the operation of the phone by installing an unofficial software and losing the Apple warranty?
Fortunately, there is a very elegant way out of this situation. This is an installation of various file managers for the iOS platform.
The best free file manager, in our opinion, is the iFunBox program, which exists in both a version for the operating system Windows system, and for Mac OS X. Without jailbreaking, iFunBox allows you to:
- exercise full control of the iPhone file system, including the ability to copy files from and to the phone;
- manipulate files in a way familiar to users, including Drag & Drop technology (drag and drop);
- download wallpaper to your phone;
- download to phone;
- exchange data between your phone and computer using a USB cable at high speed - 5 Mb/s;
- install and uninstall applications.

After installation, the program starts immediately (if you did not clear the Run iFunBox checkbox). Another advantage is that the program has a Russified interface.

After connecting the phone to the computer, after a while it will be identified by the file manager and its main window will take the following form.

After this, you need to select the “Camera” menu item on the left, as a result of which thumbnails of photos from the camera and icons of its videos will be shown in the main program window.

Next, you can copy and delete video from your phone camera in any way familiar to you. You can also view videos directly in the file manager, but since the video is recorded in .MOV format for Quick Time player, you can view it in Windows Media Player will need to install additional video codecs, or a third-party video player.
There are also many other file managers for iPhone, both free and requiring payment. If for some reason iFunBox is not suitable for you, then you can easily find them on the Internet and the question of how to transfer videos from iPhone to computer will be successfully closed for you.
Your iPhone has accumulated a large number of photos that need to be transferred to a computer? By default this process occurs with using iTunes, but it usually takes a long time, which stops some users. If you have never transferred photos from your iPhone to your PC, then you will need a USB cable, these instructions and a few free minutes.
Connect your iPhone to your computer using a USB cable. Do not disconnect the cable while photos are being saved. Immediately after connection, an autorun window will appear on the monitor. You must select the menu item “Open device to view files.”

Now you can select the photos you want to transfer from your iPhone. You can drag them into a pre-created or existing folder on your computer.
Today, more videos are shot with smartphones than with professional cameras. However, most have a completely understandable and natural desire to preserve creativity on laptops, desktop computers, burn to discs. There are a variety of reasons - from the need to clear your memory to the desire to watch a video on big screen. And just save it for yourself.
The standard application for iOS 7, called “Photos,” can work not only with pictures, but also with videos. That's why saving a collection of various video files has become much easier. The iPhone can be directly connected directly to the computer. The program will start on its own, automatically. Right in the interface, you can click on the “import all” button to save media format files or select the import option. After completing the procedure, you will be asked to delete everything from the device. Decide for yourself here.
Image Capture allows you to upload videos to Mac. It starts automatically. But if for some reason this does not happen, which is frankly rare, you can simply go to the program folder and open it manually. There you can specify the location for the import. Next, find the “Options” item and enter this tab. There you can set a parameter that will allow you to delete all files after downloading. Of course, this is worth doing if it’s more important to you free space on the device.

After you exit the options, you need to click on the “Download All” button to reset both photos and videos from your iPhone to your PC. Resetting video on Windows 8 is interesting. Several ways to do this are presented here, but in practice only one has proven itself so far. You need to connect the device to the laptop, for example, go to the computer folder, and select the device there. Next, go to the Internal Storage folder, select DCIM in it, and from there - 100APPLE (in modern iPhones it may be called differently, and there may also be more than one folder, but only one of them contains photos and videos from the camera). This is where all the files that interest you are located.

You need to further select those files that are of interest, copy them to the desired folder on your PC. This is far from the most easy way Moreover, it does not guarantee that all information will be automatically cleared from the iPhone. However, alternatives often lead to the loss of some files when saving from iPhone to computer.
What to do if we are dealing with Seven or Vista? Again, connect the iPhone directly to the PC. When the autorun window appears, you need to click on the button to import images and videos. In all other cases, it is best to launch manually. To do this, go to the “Computer” folder. There you will see the icon of the connected device. You need to click on it and select an item from the menu that opens that allows you to import. And in the import options, you can quite easily select the folder into which photos and (or) videos from the iPhone are transferred. Throw it away. Ready.

Apple phones are famous for their cameras.
It is not surprising that their owners constantly take thousands of photographs. It is physically impossible to store them all on the device, so you have to copy them to HDD computer.
Due to the nature of Apple products, this procedure is not so obvious. This material will provide instructions on how to transfer photos from iPhone to computer. The features of copying photos on OS X, Windows and using the iPhoto program will also be covered.
How to Transfer Photos from iPhone to Mac
OS iOS and OS X are different high degree integration. However, the connected device does not appear as a physical storage medium. For those who do not want to use the iPhoto service, the opportunity will come to the rescue "Image Capture".
This utility is built into OS X and allows you to move photos and other images from your phone, both to a specific directory and to the required application. Find using search SpotLight. To do this, just start typing the name in the search bar.
The program will show all the photos and actions available on the device. It is possible to configure automatic actions when the device is connected (copying to the hard drive and deleting originals, for example). Otherwise, this is actually a regular folder with which you can do all the same actions.
How to transfer photos from iPhone to computer Windows 8, 7 and XP
To computer by Windows control freely installable iTunes. However, you can copy photos without synchronization, because this OS is able to recognize the phone as a physical medium.
We connect the device to the computer using our USB cable. The system will offer a quick method in automatic mode.
In the startup menu, just select "Import images and videos". The illustration shows actions from the iPad; transferring pictures from the iPhone is no different.
In my opinion, it’s easier to open the device after detection as soon as you see Windows window Explorer, which will offer you a series of actions that you can do. For this we choose "Open device to view files".
However, the message may not appear or the user may automatically close it.
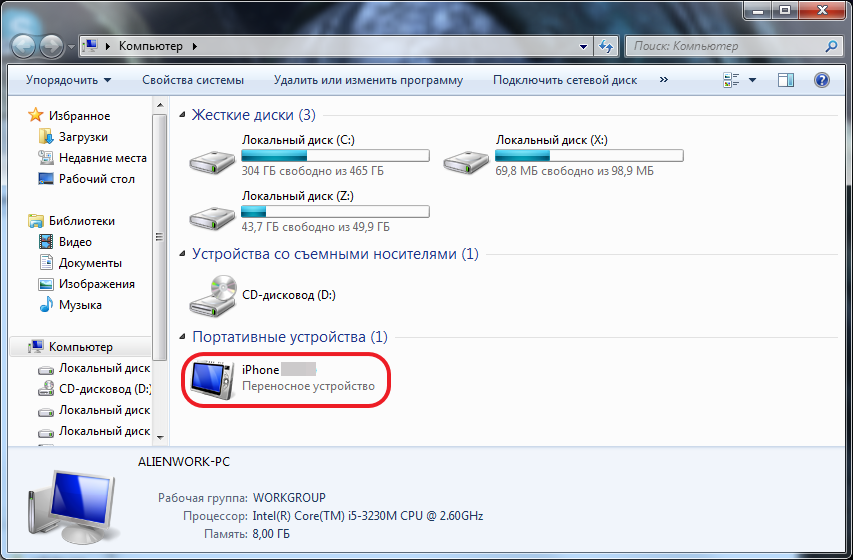
In this case, you can use Windows Explorer. First you need to open "Computer» and double-click on the icon of the connected device.
In addition, when the computer “sees” your iPhone, then in the “My Computer” section, in the left column under the list of your displayed hard drives, your device will be displayed by the name that you assigned to the iPhone when setting up in iTunes. It will appear as a media device, with its inherent camera icon. If for some reason you did not open the device in the step above, you can do it now by clicking on it.
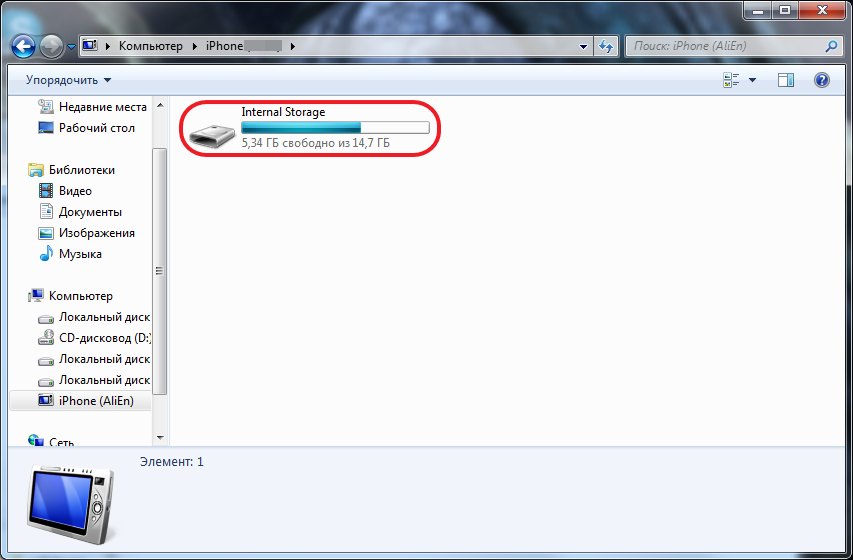
This will open access to the built-in data storage (Internal storage).
It will contain the root directory of the DCIM device and then to a folder specific to each name (for me it is “860OKMZO”, in which the images will be stored.
You can treat these files just like any other. Copy to disk, send by email, or delete.
How to Transfer Photos from iPhone to Computer Using iTunes
iTunes itself does not allow you to work with photos. Usually, for such purposes, they use the programs built into OS X - iPhoto. The program opens automatically after connecting to the PC. You can also open it using the dock panel. In the main window, just select the photos you need to import and click "Import selected."
You can import one or all photos at once. After the transfer, the program will offer to save or delete photos from the device.
Deleting original images will free up space on your device and speed up the creation of backup copy. All photos in iPhoto are sorted by date added, albums, and devices.
How to transfer photos from iPhone to computer via Wi-Fi
In addition to connecting via wire, transferring photos can also be done via wireless connection. The process of transferring photos when Wi-Fi assistance is not fundamentally different from other methods. That is, the same thing happens. Just before starting the transfer you will need to synchronize via Wi-Fi. This is done as follows.
First you need to connect your device using a cable and open iTunes. On the left side of the window, in the block "Devices" You must select an iPhone or iPad to sync. In the tab "Review" in the block "Options» you will need to put a checkbox opposite "Sync. devices via Wi-Fi."
Now the gadget will automatically synchronize when it is on the same network with a computer on which iTunes is installed. From your phone, synchronization can be started through the device settings. To do this in the menu "Basic" you will need to select an item "Sync with iTunes over Wi-Fi".
Data synchronization will occur automatically if certain conditions are met:
- The computer and iPhone are connected to the same Internet network
- iPhone is on and the battery is charged or connected to charger
- iTunes launched on PC
The presence of synchronization is indicated by an icon in the phone tray.
The device now appears as connected. Consequently, all actions on it can be performed in the same way as when connected using a regular cable - twisted pair.
Note! If you have any problems with the connection, then you should first restart the computer and then the device itself. If no progress is detected, then the reason may even lie in the router itself. To do this you will need to reboot it.
How to transfer photos from iPhone to computer via e-mail
If your iPhone is configured Email, then the photos can be sent via e-mail, and then transferred to a computer.