Instructions
Find out the diagonal of your monitor. If it does not exceed 22 inches, you can easily turn the screen into a touch screen using the Duo Digital gadget specially developed in Korea. This device is a scanner that attaches to the top of a laptop monitor. It is he who tracks movements on the device and sends a signal to the computer. The second device of the Duo Digital system is a pen, which acts as a manipulator and at the same time fully replaces the functions of a mouse, since it has two buttons similar to those present on standard devices.
Order a Duo Digital device. Its price now fluctuates around $50 for one set, it does not depend on the diagonal of your monitor. The device can be used not only for laptops, but also for regular monitor screens, however, simultaneous use of it for a computer and a monitor is in some cases impossible due to inconsistencies in screen diagonal sizes and proportions.
Purchase this product only from reputable online stores and do not buy from sellers with a dubious reputation. Since this is a fairly new product segment, it has not yet become widespread, so finding it in stores in your city may be problematic.
After you purchase Duo Digital, fix the position of the scanner on the top edge of the monitor using a special mount (these are usually found in webcams). It is advisable to install it right in the middle of the width of the monitor. Turn it on, install it software to your computer (comes standard), make initial setup according to the attached instructions.
note that this type The product is not yet on the market with a Russian interface option, therefore, select another language more or less known to you from those offered by the installer. Pair your devices.
Touch monitors are convenient substitutes for standard pointers. These can be made from ordinary monitors using special devices that are already commercially available.
You will need
- - touch receiver.
Instructions
Order a special device from the online store that turns the screen of a computer monitor or laptop into a touch screen panel. The device is mounted on top of the monitor body, connected to the USB connector of the computer and then becomes ready for use. When enabled, a certain area of the screen will respond to touches with your hands or a special pointing device and will recognize it as a pointing device. The kit also includes a special pen that acts as a mouse and a stylus at the same time - it has buttons on the sides for performing control functions, so it can fully replace your pointing device.
When ordering such a device in an online store, please note that they are sold specifically for a specific monitor diagonal. Also, devices for monitors over 22 inches diagonal are often unavailable.
You can find such devices in computer stores in your city; the price for them depends on what diagonal your monitor is. Your monitor can only function as a touch surface if the device is connected to a USB port.
Also, conflicts may arise when used simultaneously with a mouse, so disable one of the devices when working or configure their default selection in the Control Panel. If you have a wireless device model, do not forget to periodically charge the batteries to use the monitor as a tablet.
To use touch panel on different monitors, make sure the diagonal dimensions and aspect ratio are consistent. If the size does not match, the display of the pointer movement on the monitor will also not be fully displayed; here you are better off purchasing a set of two devices.
Video on the topic
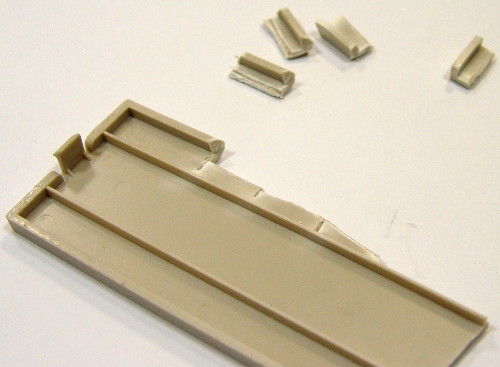
Buy touch monitors and tablets separately.
Make a device with similar functionality laptop, you can do it at home. Such a laptop computer will only be able to work from the network; it will be somewhat heavier, but it can still be carried in a regular briefcase.
Instructions
Buy a 15-inch LCD monitor. In electronics stores they have long given way to 19-inch ones, so you will have to go to the market where they sell used computer equipment. It will cost you about 1,500 rubles. When you bring the monitor home, remove the stand from it.
Choose the right suitcase-diplomat, which will serve as the basis for the design. The main requirement for it is hardness. It must also be deep enough so that the components located in it do not crush the monitor.
Mount the extension cord vertically on the cover on the left, and on the right – a monitor with cables pre-inserted into it. To mount the monitor, use the holes where the stand was previously attached. If necessary, make an adapter bracket. Drill a hole in the bottom of the cover to allow the extension cable to come out. Insert the plugs into the extension cord in advance, and then cover the monitor and extension cord with a common sheet of plexiglass. Make stands for this sheet (they must be the same length) using a hacksaw from fountain pens. Drill holes in the sheet to access the monitor control buttons. To attach any structural elements to the lid and bottom, place the screws so that the head faces the outside.
At the bottom of the suitcase, place a special power supply that has a reduced thickness, as well as motherboard VIA EPIA or similar. If the bottom of the suitcase is soft, secure it through a sheet of any hard dielectric material. Be sure to lift it slightly using dielectric ring washers about 4 mm thick. Connect these buttons to the connectors intended for connecting the "Power" and "Reset" buttons. Connect to one USB connector of this board, which will serve as a boot device. Ordinary HDD And optical drive do not install as there is not enough space in the case. Connect a USB hub to another USB connector on the board. If desired, connect a 3G modem or WiFi module to the remaining connectors.
Connect a monitor, mouse and keyboard to the motherboard, as well as temporarily an optical drive. Install the OS on a USB flash drive, then turn off the computer's power and remove the optical drive.
Cover the power supply and motherboard with a second sheet of plexiglass, onto which you previously install the buttons and USB hub. Route the mouse and keyboard cables outside. Make sure there is enough space between the first and second sheets of plexiglass when you close the lid to permanently store them, then secure the second sheet in the same way as the first.
Provide the bottom of the suitcase with legs high enough to prevent protruding screw heads from scratching the table.
Once upon a time touch buttons in the equipment were a tribute to fashion. The very fact that you don’t need to press the button, but just touch it, delighted users. Today, such buttons have become so commonplace that hardware developers use them even less often than in the past.
This article is about how to make a real touch screen monitor.
I made a touchscreen monitor from a regular LCD 15 and, in fact, the touchscreen itself.
So we have:
15" monitor (I had Proview)
crazy desire to get a touch screen
Let's get started
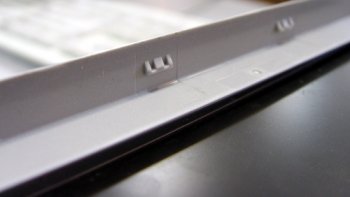
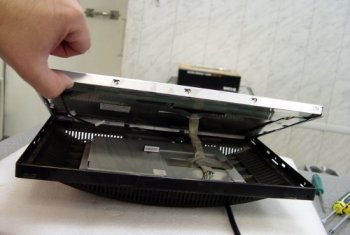
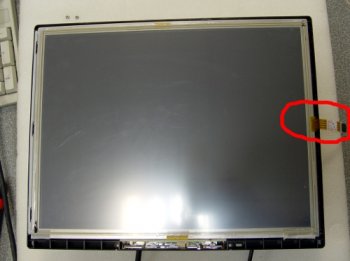
First you need to take everything apart and see what's inside. To do this, unscrew the bolts. In my case there are only two, if the monitor is different, then there may be fewer or more bolts, but it’s easy to unscrew them.
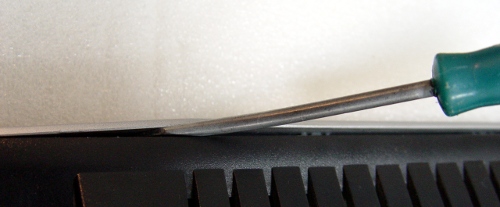
After unscrewing, very often the front panel of the monitor still does not want to come off. This means you need to unlatch the latches. I can do this well with a screwdriver:

All. The cover was removed. Looked at the latches :)
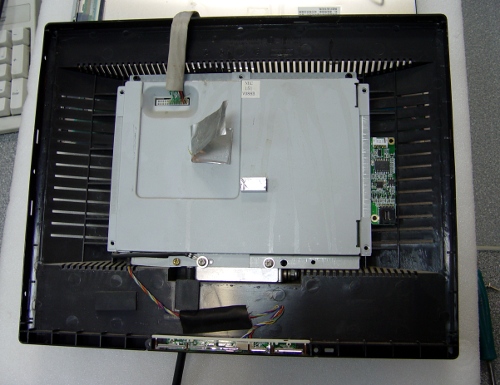
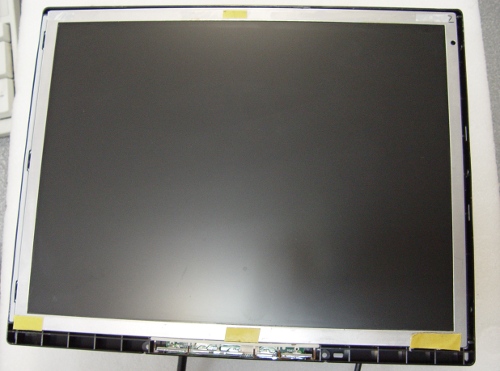
Now we have a bare screen:
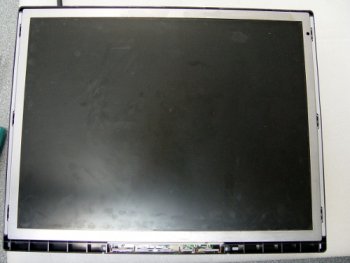
We pick it out of the case (don’t ask why, you’ll see for yourself right now)
They picked it out. We look, looking for empty spaces.
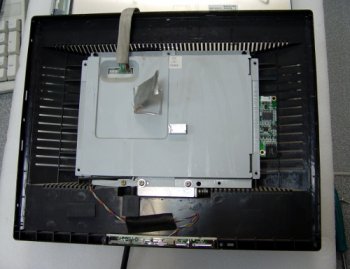
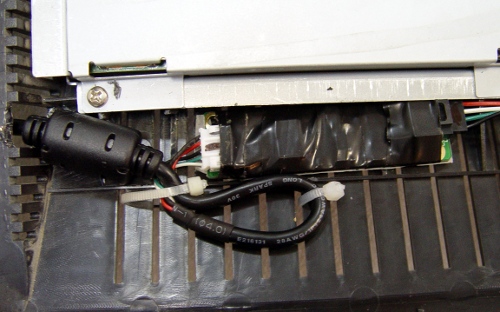
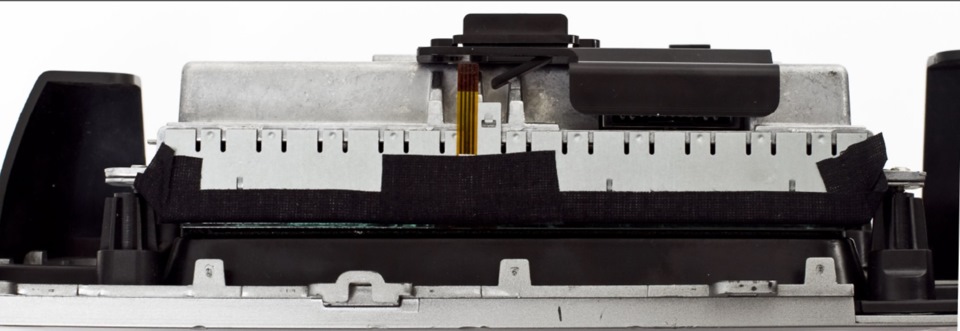
But now I’ll tell you why. At the very beginning of the article I said that we would install a touch screen. So, the touchscreen that I installed consists of the touchscreen itself (glass with a film glued to it) and a USB controller, which I also decided to stuff inside.
Here is the controller itself:
Quite small. A little more than 10cm in length, about 4-5mm in height.
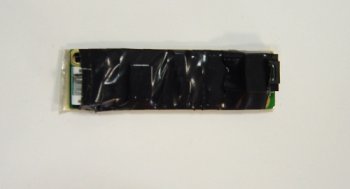
The controller does not heat up, so I wrapped it with electrical tape just in case.

I glued it to the back with 2-sided tape. This tape will glue the controller to the case. Such fastening will be sufficient, since no force will be created on the touch-screen controller, so there is no need to fence anything extra.
Glue it to the body. It is advisable to glue it so that it does not stick out from behind the metal cover, but is level with it, since we still have to put the screen back :)
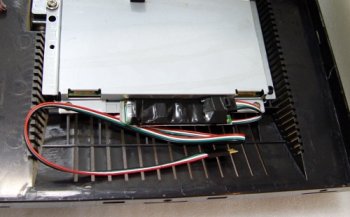
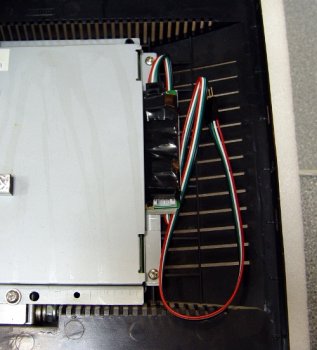
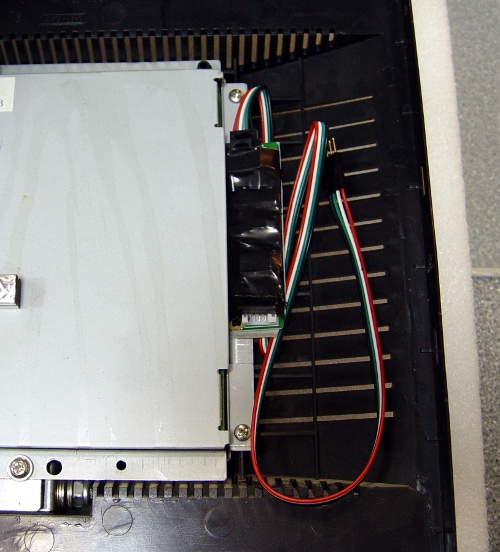
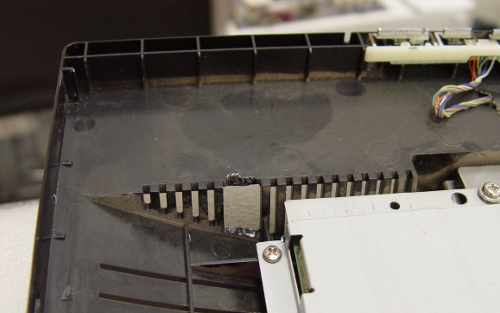
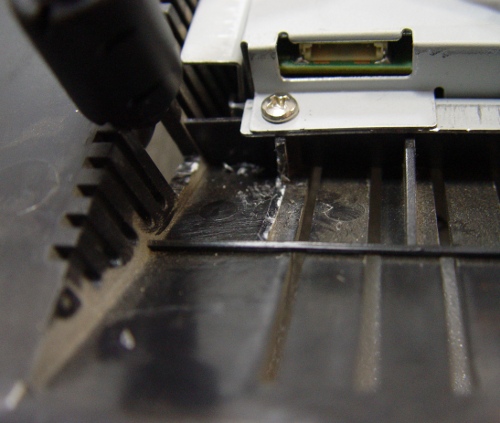
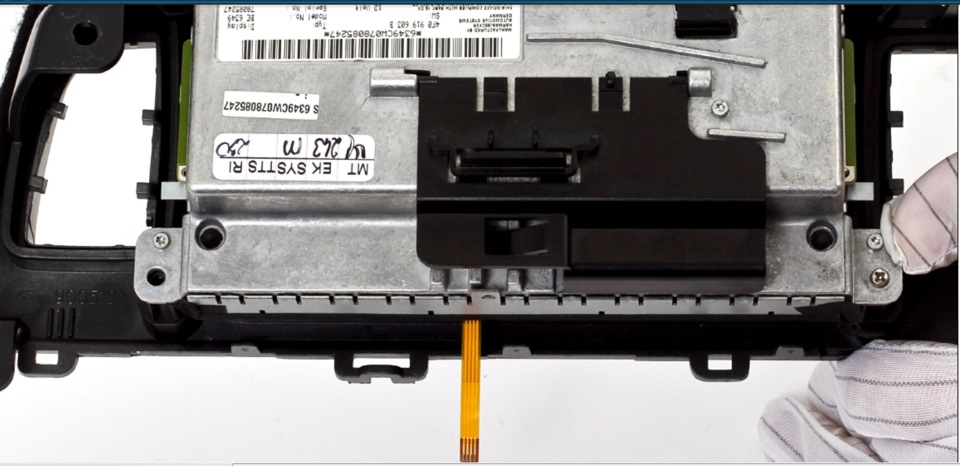
We remove the extra “ventilation grill ribs” from the bottom of the monitor in order to bring the controller’s USB cable out. I did this with a regular soldering iron and scalpel.

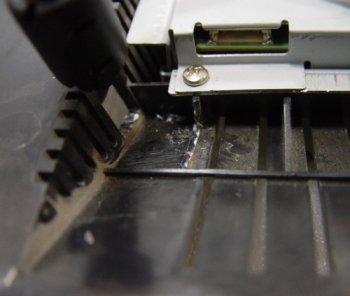
We pass the cable. Since the kit includes a cable with filters (barrels), I had to cut off a few more plastic stiffeners.
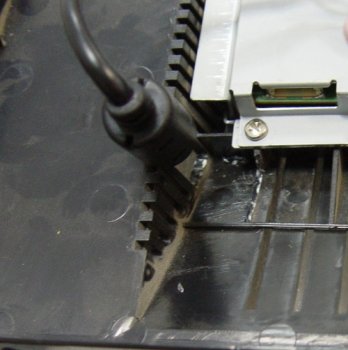
To ensure that all this does not dangle during the installation process and to ensure that the cable is not accidentally pulled out of the connector when using our future touch panel, we secure the cable with plastic ties.
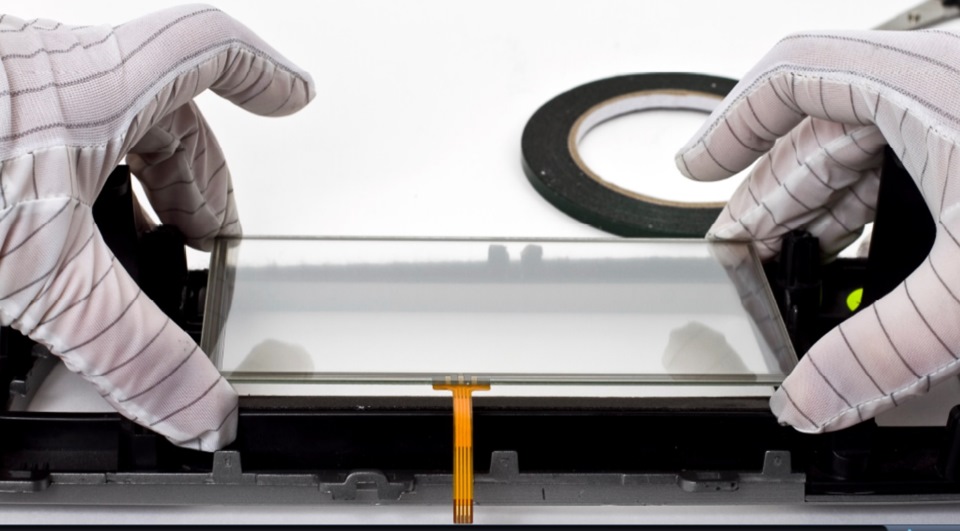
Now we proceed to installing the glass itself with the touchscreen. First, wash the monitor screen (which shows the picture) very carefully, because if you don’t wash it, it will be difficult to get to it, and we don’t need stains “inside” the monitor! :)

After this, we glue double-sided tape (thin automotive tape) onto the steel frame of the monitor screen.
We glue the glass with the touch screen onto this tape. At first I had a desire to glue the glass over the entire surface, but after thinking about it, I abandoned this desire - it won’t fall out anyway (and there’s also a frame on top), but if you have to disassemble this structure, it will be very difficult to remove it from the car tape.
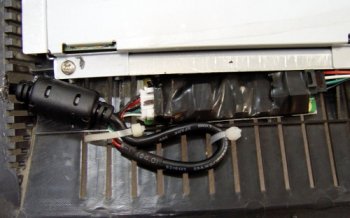
All that remains now is to connect the touch screen and the USB controller. A cable with a connector is used for connection. The cable is thin, so it can be “wrapped” around the screen and the base of the screen. So that it would not dangle, I also glued it.

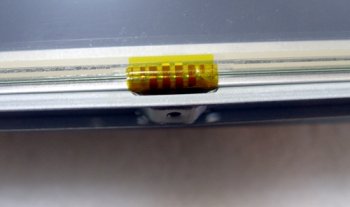
It was very lucky that there was a fastening recess in the place where the touch screen cable goes. Now you don’t have to worry about the cable being pinched or anything else happening to it.
Let's get started.
First you need to take everything apart and see what's inside. To do this, unscrew the bolts. In my case there are only two, if the monitor is different, then there may be fewer or more bolts, but it’s easy to unscrew them.

After unscrewing, very often the front panel of the monitor still does not want to come off. This means you need to unlatch the latches. I can do this well with a screwdriver:
All. The cover was removed. Looked at the latches :)

Now we have a bare screen:

We pick it out of the case (don’t ask why, you’ll see for yourself right now)

They picked it out. We look, looking for empty spaces.
But now I’ll tell you why. At the very beginning of the article I said that we would install a touch screen. So, the touchscreen that I installed consists of the touchscreen itself (glass with a film glued to it) and a USB controller, which I also decided to stuff inside.
Here is the controller itself:

Quite small. A little more than 10cm in length, about 4-5mm in height.

The controller does not heat up, so I wrapped it with electrical tape just in case.
I glued it to the back with 2-sided tape. This tape will glue the controller to the case. Such fastening will be sufficient, since no force will be created on the touch-screen controller, so there is no need to fence anything extra.
Glue it to the body. It is advisable to glue it so that it does not stick out from behind the metal cover, but is level with it, since we still have to put the screen back :)

We remove the extra “ventilation grill ribs” from the bottom of the monitor in order to bring the controller’s USB cable out. I did this with a regular soldering iron and scalpel.
We pass the cable. Since the kit includes a cable with filters (barrels), I had to cut off a few more plastic stiffeners.

To ensure that all this does not dangle during the installation process and to ensure that the cable is not accidentally pulled out of the connector when using our future touch panel, we secure the cable with plastic ties.
Now we proceed to installing the glass itself with the touchscreen. First, wash the monitor screen (which shows the picture) very carefully, because if you don’t wash it, it will be difficult to get to it, and we don’t need stains “inside” the monitor! :)
After this, we glue double-sided tape (thin automotive tape) onto the steel frame of the monitor screen.

We glue the glass with the touch screen onto this tape. At first I had a desire to glue the glass over the entire surface, but after thinking about it, I abandoned this desire - it won’t fall out anyway (and there’s also a frame on top), but if you have to disassemble this structure, it will be very difficult to remove it from the car tape.

All that remains now is to connect the touch screen and the USB controller. A cable with a connector is used for connection. The cable is thin, so it can be “wrapped” around the screen and the base of the screen. So that it would not dangle, I also glued it.
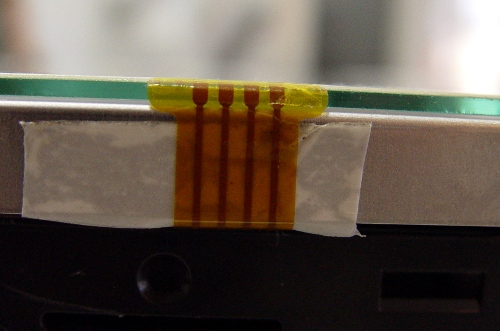

It was very lucky that there was a fastening recess in the place where the touch screen cable goes. Now you don’t have to worry about the cable being pinched or anything else happening to it.


First test drive:
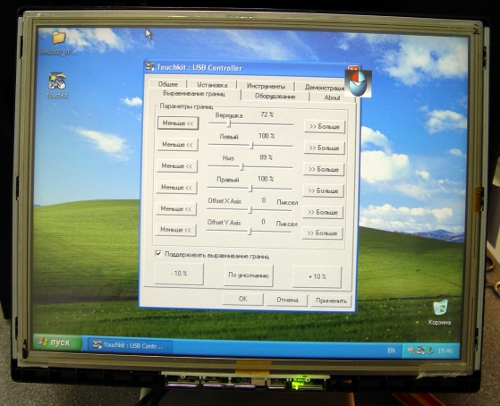
After I tried to put the front panel of the monitor back, it turned out that this panel presses on the touchscreen, thereby interfering with calibration.
I had to come up with this hack:

Well, I think the idea is clear - we make small protrusions so that the touch screen does not touch the front muzzle.
That's all. Finally, a video with the result of my work today:

As you can see in the video, I don’t have any problems with positioning at all and I don’t press the screen too hard either. Overall it works great.
P.S. Xeon will come soon and tell you exactly what kind of screen it is, where he got it and how much money it cost :) I really don’t know.
Example of touch screen installation
glass on a car monitor:
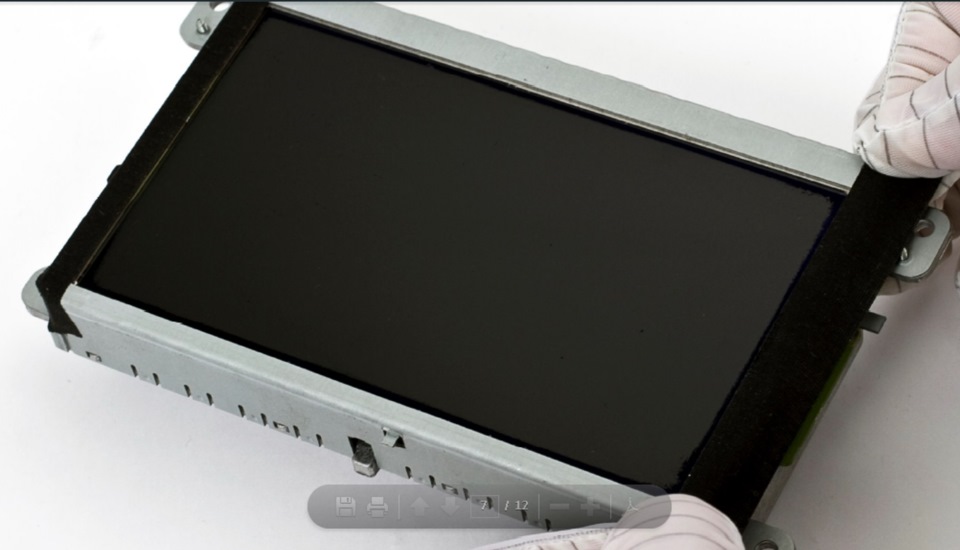
And so, there is a car and a standard monitor. Task: install a touch glass on top of the display to control a non-standard navigation system or car PC.
1. Measure the width and height of the visible area of the display with a ruler or caliper. The visible area of the display is the area not covered by the plastic frame.

2. Select the touch glass according to the dimensions obtained. When selecting, you should pay attention to the dimensions of the touch glass “Active area (Active zone)”; the dimensions of this area should not exceed the dimensions of the “Visible display area”, otherwise during installation, the plastic frame will press the active area, which will be considered pinching a finger (stylus) at a certain point - the glass will not respond to other presses. As a result of the selection, we settled on a 7” touch glass.
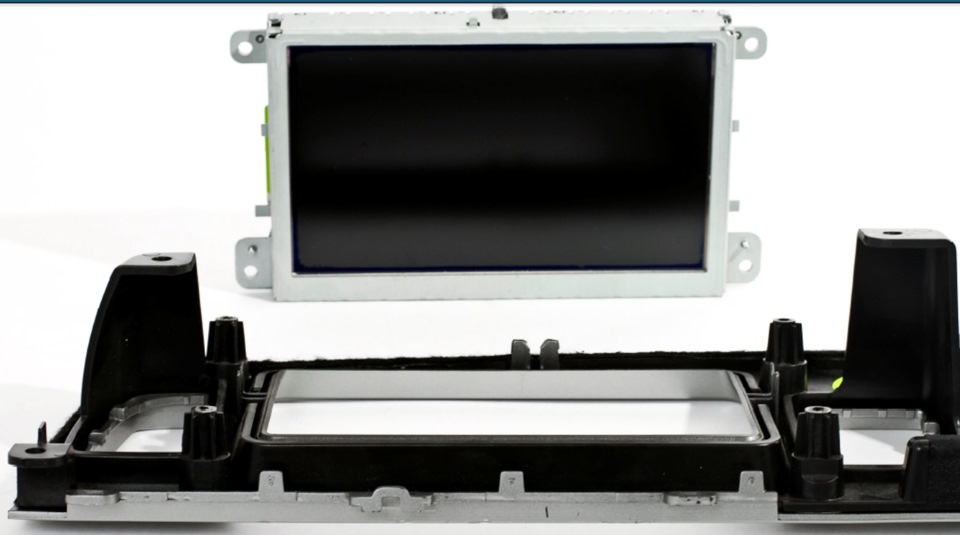
3. Dismantle the dashboard on which the standard display is attached.
4. Remove the display from the dashboard
5. We carry out a visual assessment, and the possibility of installing the touch glass on the display or on a plastic frame. IN in this case, we decided to install the touch glass on a plastic frame using a narrow double-sided adhesive tape on a foam base. Before applying adhesive tape, the surface should be degreased.

6. We prepare the metal frame of the display - we cover the edges with thick rag tape. This processing is required to avoid dust and other small particles from getting into the space between the display and the touch glass, as well as to prevent damage to the glass lining of the touch glass by the metal frame of the display during installation.
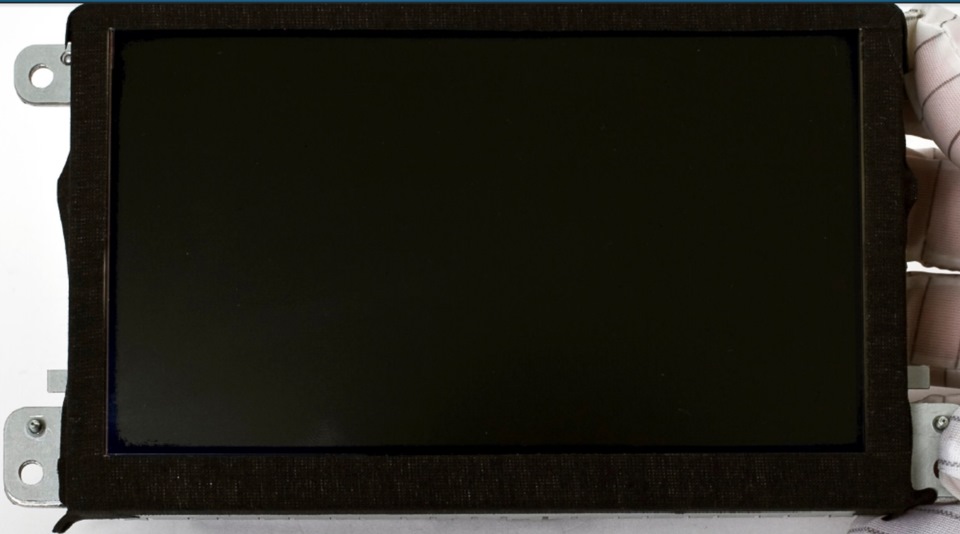
7. Filming protective film from the touch glass (do everything carefully, without leaving your fingers on the surface of the glass, which will be located on the display side) and mount the touch glass on adhesive tape. The touch glass can be installed in any position, that is, with the cable up or down (in some touch glasses the cable may not be at the bottom, but on the side), during calibration everything will fall into place.
The glass lining of the touch glass should be on the display side, the active membrane on the side of the plastic display frame!

8. Gently wipe the surface of the display, wash off fingerprints and blow away dust particles,
It is advisable to do this with a special spray and (or) wipes designed for cleaning monitors. Under no circumstances should you clean the monitor with liquids containing ammonia or ammonia (window cleaners). Otherwise, you will simply damage the anti-reflective coating of the display and you will have to explain for a long time to the client that this is what happened. A clear example is shown in the figure.

9. Mount the display in its place.
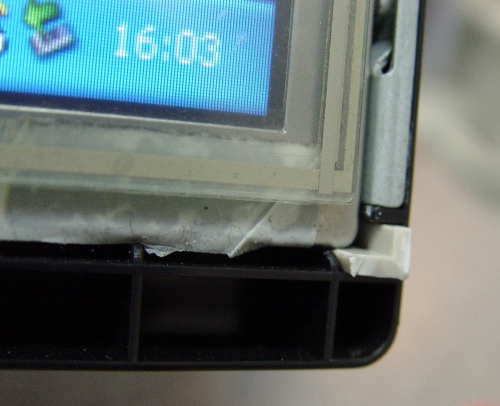
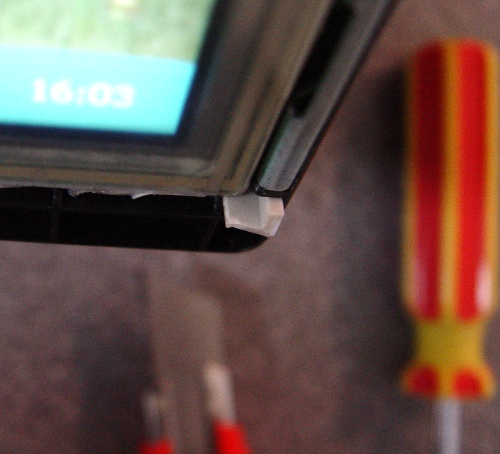
10. When mounting the display to a plastic frame, you should place a set of washers in the gap formed between the metal frame of the display and the mounting lugs of the plastic frame to avoid pinching or damaging the touch glass. After installation, secure the cable from the touch glass to the display body using rag tape
11. Result of the work done:

So you got a touch monitor from a standard car screen, now the scope of its use will become much wider. Prices for touch glasses are quite reasonable and vary depending on the size and shape from 25-50 USD.
Resistive touch glass consists of a glass backing and a flexible (transparent) plastic membrane. A transparent resistive coating is applied to the glass lining and membrane. The space between the glass and the membrane is filled with a grid of micro-insulators, which are evenly distributed over the active area of the glass and reliably insulate the conductive surfaces. There are also touch glasses in which the lining is not glass, but a flexible membrane. The advantage of these touch panels is their thickness, which often plays an important role during installation. For example, the thickness of the touch glass with glass lining is 1.2-2.1 mm, the thickness of the flexible touch panel is 0.4-07 mm. When the membrane is pressed, the pad and membrane are closed, and the controller, using an analog-to-digital converter, registers the change in resistance and converts it into touch coordinates (X and Y). In general terms, the reading algorithm is as follows:
1. A voltage of +5V is applied to the upper electrode (Uy4 Fig. 1), the lower one (Uy3) is grounded.
Voltage readings are taken from the left and right electrodes (Ux1, Ux2). This
the voltage corresponds to the Y-coordinate.
2. Similarly, +5V and ground are supplied to the left and right electrodes, and the X-coordinate is read from the top and bottom (Uy4, Uy3).
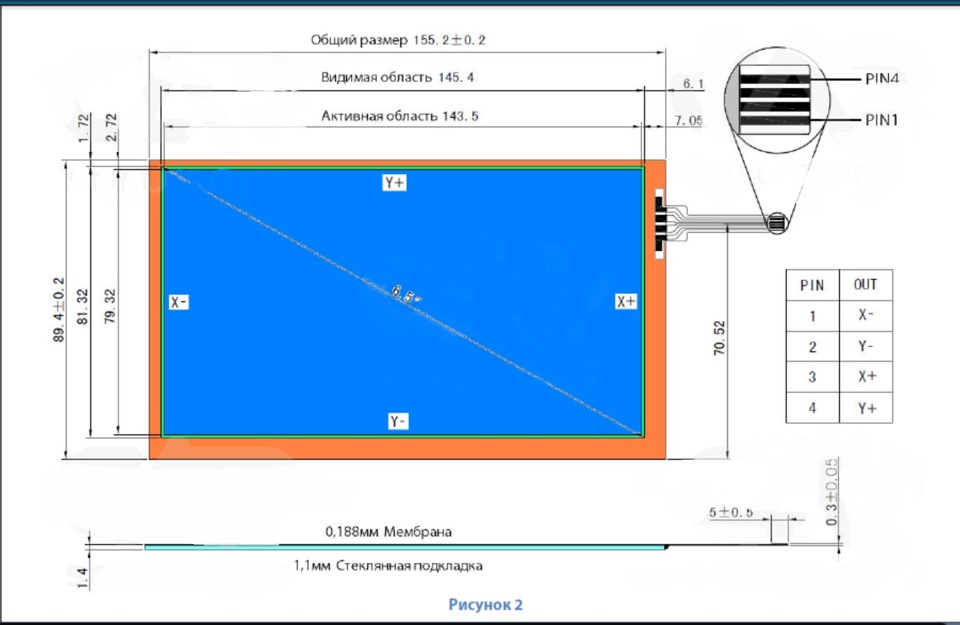
The orange area is an inactive area, along the perimeter of which there are conductive tracks connected to the resistive coating on each of the four sides of the touch glass. The sides of the touch glass are designated X+, X-, Y+, Y- (similar to a regular vector graphic). During installation, the inactive area should be out of sight, that is, under the plastic frame framing the display. The inactive area must not be pinched to avoid damage to the conductive paths or glass lining!
The green area is the visible inactive area. This area is intermediate for ease of installation; it can be located either under the plastic frame or outside it.
The blue area is the active area, the active surface, when touched, the coordinates of the touch are read. In no case should the plastic frame of the display be pressed against the active area of the touch glass, otherwise the touch glass simply will not respond to pressing in a certain area, that is, the coordinates in the clamped area will be constantly read by the plastic frame!
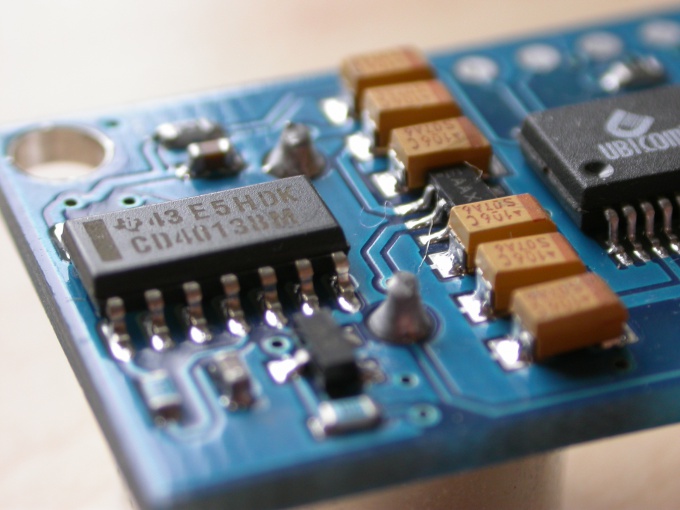
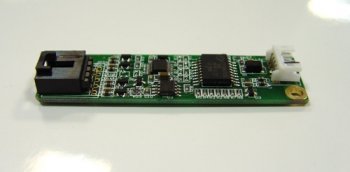
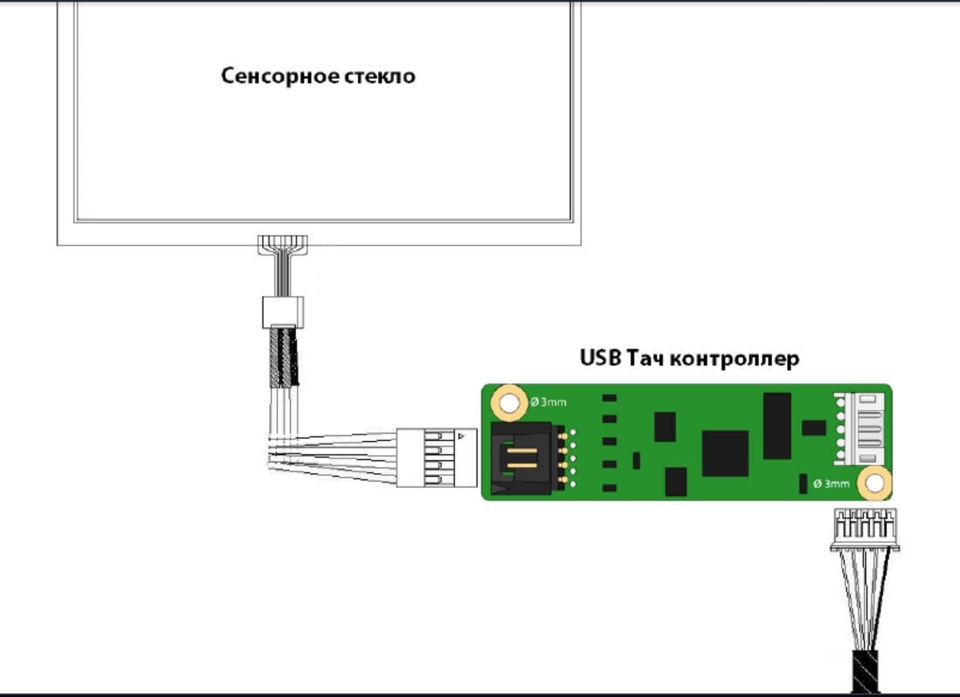
USB touch controller design
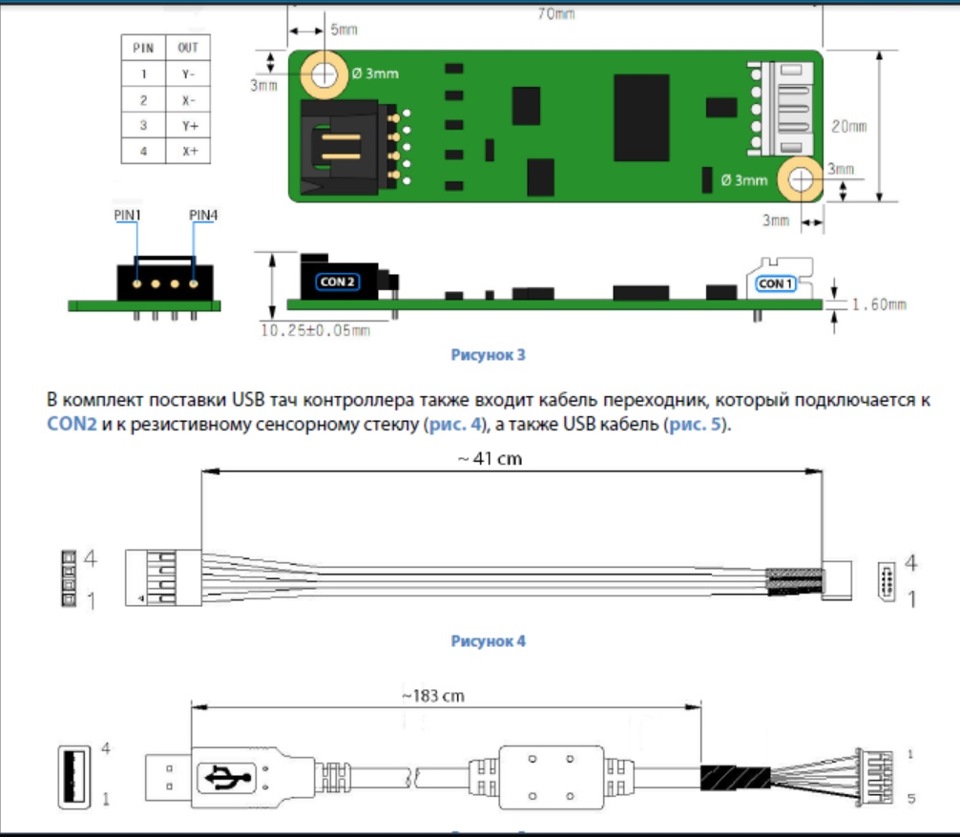
USB touch controller is designed to convert analog signal, read from the resistive touch glass, into the control protocol for navigation block(or computer). This protocol emulates a mouse manipulator: double click – emulates double-clicking the left button of a mouse manipulator; pressing for 2-3 seconds – emulation of pressing the right mouse button (in some applications appears context menu). Below is appearance USB touch controller, as well as the pinout of the CON2 socket on the left side of the figure.
We would like to draw your attention to the importance of the pinout of the CON2 socket, as well as the pinout of the resistive touch glass cable - they must match, if they do not match, simply re-pin the adapter cable that connects to CON2 and touch glass!
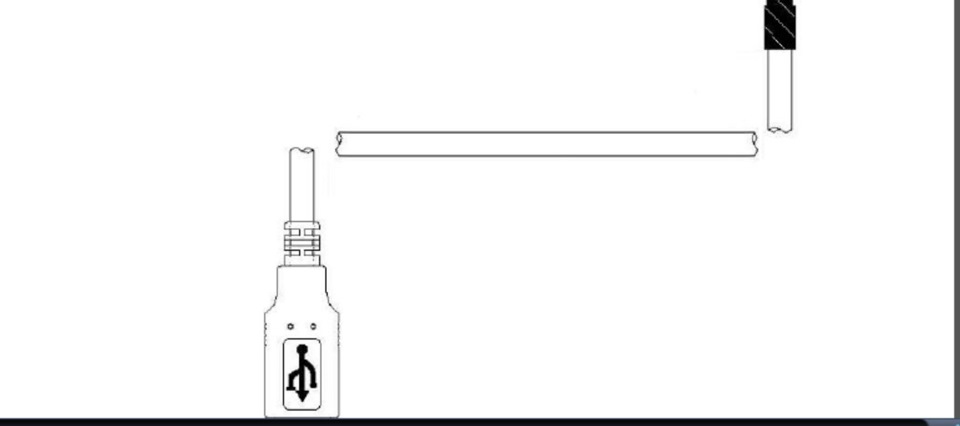
The USB touch controller is also supplied with an adapter cable that connects to CON2 and the resistive touch glass, as well as a USB cable.

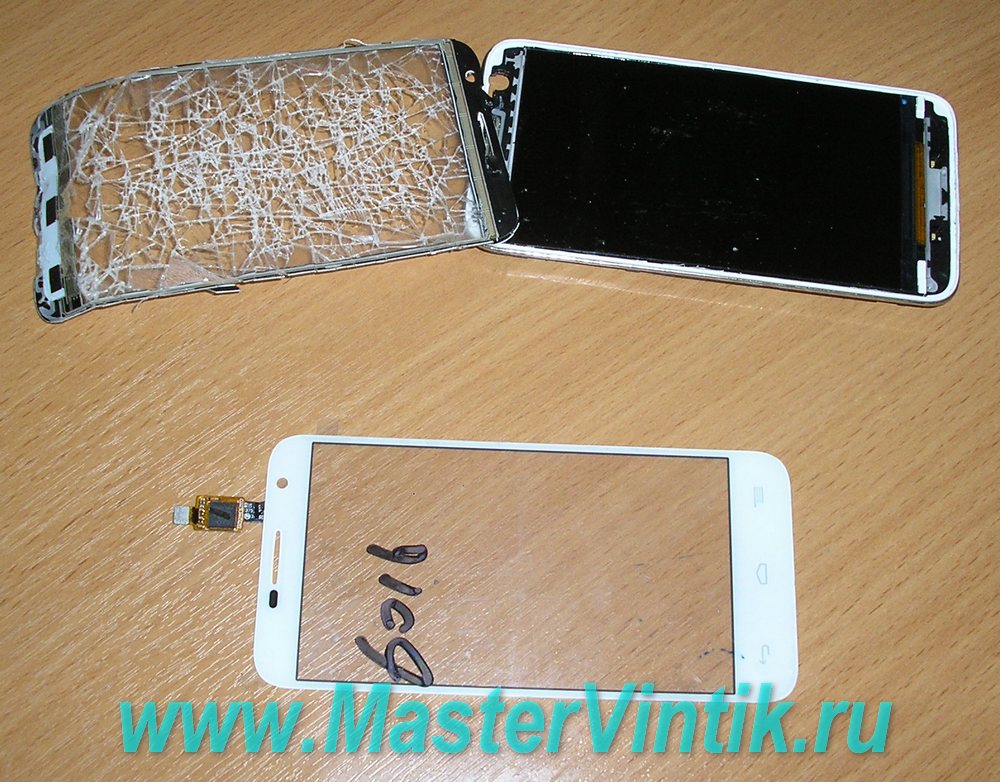
Is the sensor on your phone or tablet not working or not working properly? One of the common malfunctions of modern touch devices— damage to the touch screen. It is also called a “touchscreen”, simply “touch” or “sensor”. Don't despair - you can replace it yourself. Such a panel is not expensive, much cheaper than buying a new phone.
Replacing a sensor is not as difficult as many people think; you just need to have the desire, accuracy and basic skills.
In the article below I will briefly describe the repair technology touch screens phones or tablets.
It is now easy to buy a sensor for a phone or other device in any store or online store.
![]()
Step 1. First, let's disassemble the phone. Detailed description disassembly of any model is easy to find on the Internet or on our website:
For this we need a set of small clock screwdrivers.
Step 2. Open the cable clamp and pull it out of the phone body. The cable must be carefully pulled out from the connector.
Step 3. Using a thin blade, a utility knife or a screwdriver, you need to disconnect the damaged sensor from the case and display. To make this easier, I warmed it up a little with a hairdryer. There is no need to heat it too much either, so as not to damage the screen. In some devices, the touchpad is glued using double-sided tape.

Step 4. We clean up traces of old glue. We wipe the screen and grooves of the case with alcohol or vodka.