When the free 5 GB provided by Apple in iCloud cloud storage runs out, we have to decide whether to purchase a subscription to the right tariff plan With big amount gigabyte or refuse to store photos in the cloud. Therefore, the way out for the majority is reserve copies of iTunes, but we will tell you how to extract a photo from them in this material.
Why would you need to extract photos from backup iTunes? For example, you rolled back from the new current firmware to the previous generation of iOS. In this case, you will not be able to restore from the backup (thanks to Apple!). Or in case of loss of the gadget until the acquisition of a new one, and so on. There can be quite a few options.
Using the standard means of OS X or Windows, extracting a photo will not work, and that is why you will have to turn to third party developers, and to be more precise - their creations.
- iCloud backup and iCloud Drive, what is the difference?
iBackup Viewer
A utility from the iMacTools studio, which is distributed free of charge, but with limited functionality, although it will work fine for extracting photos. The program is compatible with both OS X and Windows PC computers.
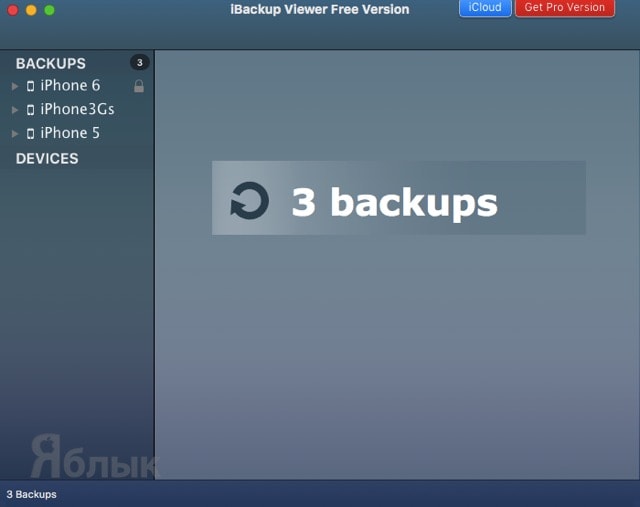
After installation and launch, the application will immediately display the number of backups found and connected iOS devices.
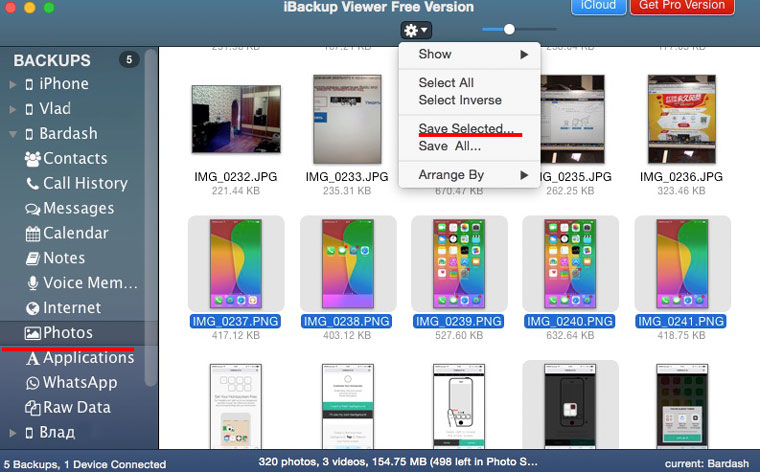
In the left side menu, just select and expand the backup, as the list of categories is displayed, we are interested in " Photos».
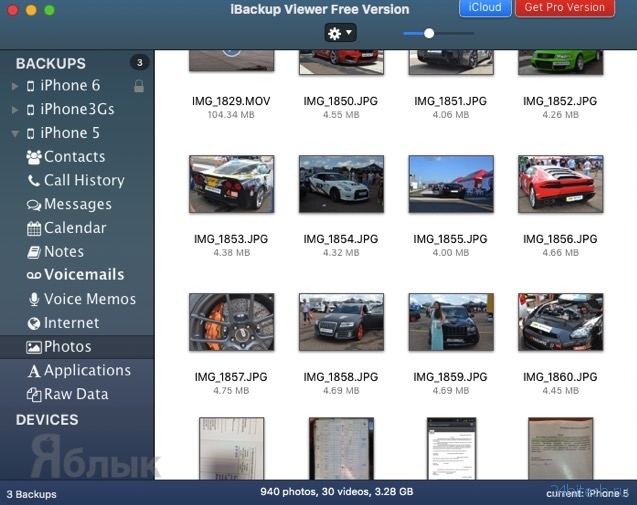
In the main window, select the images of interest, and then click on the gear at the top and tap " Save selected..." to save the selected photos, or " Save all..." to save all images.
Ultimately, all that remains is to specify the directory and wait for the files to be exported (it will take about 6 minutes to extract a 10 GB media library, of course, adjusted for the power of the hardware).

The main disadvantage iBackup Viewer is the inability to access password-protected backups, even if you know the unlock code. There is simply no entry window.

The free version does not have access to albums or images in the photo stream. You can also work with contacts, call history, messages, calendar events, audio and text notes, and so on.
iPhone Backup Extractor
And this is a representative of a purely free camp. True, one of the main drawbacks will be the lack of a Windows version.
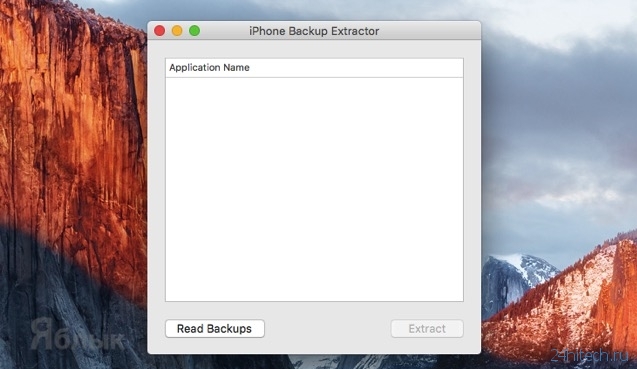
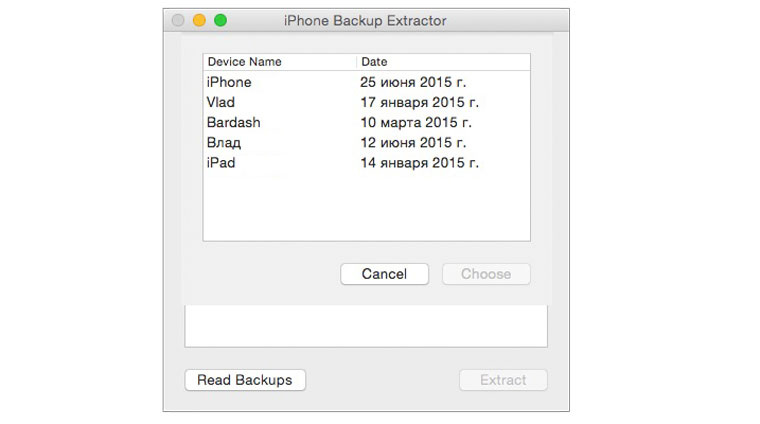
The program does not require installation. After starting, press the button Read Backups».
A list of available Mac backup copies. Select the one you want and click the "Choose" button.

Scroll through the impressive list of files until you see " iOS Files". Highlight the line and click " Extract».

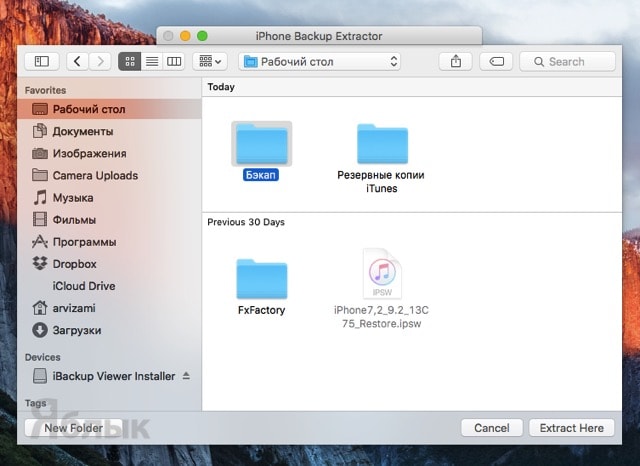
Specify a location for unpacking and wait for the copy process to finish.

In the resulting "iOS Files" directory, follow the path /Media/DCIM/100APPLE/ where all images will be located. Images from the photostream can be found in the directory /Media/PhotoStreamsData.

The most interesting thing is that you do not need to enter an unlock code to extract files from password-protected backups. Oh how!
According to yablyk
Dry up, we have to decide - to purchase a subscription to a suitable tariff plan with a large number of gigabytes, or to refuse to store photos in the cloud. Therefore, the solution for most is iTunes backups, but we will tell you how to extract photos from them in this material.
In contact with
Why would you need to extract photos from an iTunes backup? For example, you rolled back from the new current firmware to the previous generation of iOS. In this case, you will not be able to restore from the backup (thanks to Apple!). Or in case of loss of the gadget until the acquisition of a new one, and so on. There can be quite a few options.
Using the standard means of OS X or Windows, extracting a photo will not work, and that is why you will have to turn to third-party developers for help, or, to be more precise, their creations.
- On this topic: .
iBackup Viewer
A utility from the iMacTools studio, which is distributed free of charge, but with limited functionality, although it will work fine for extracting photos. The program is compatible with both OS X and Windows PC computers.
After installation and launch, the application will immediately display the number of backups found and connected iOS devices.
In the left side menu, just select and expand the backup, as the list of categories is displayed, we are interested in " Photos».
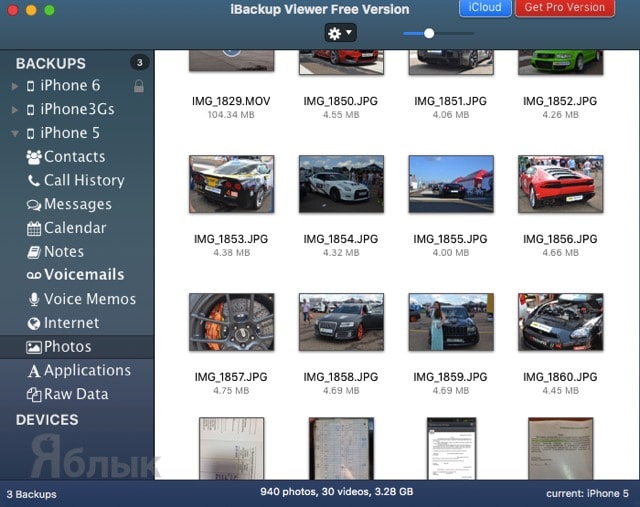
In the main window, select the images of interest, and then click on the gear at the top and tap " Save selected..." to save the selected photos, or " Save all..." to save all images.
Ultimately, all that remains is to specify the directory and wait for the files to be exported (it will take about 6 minutes to extract a 10 GB media library, of course, adjusted for the power of the hardware).

The main disadvantage iBackup Viewer is the inability to access password-protected backups, even if you know the unlock code. There is simply no entry window.

The free version does not have access to albums or images in the photo stream. You can also work with contacts, call history, messages, calendar events, audio and text notes, and so on.
iPhone Backup Extractor
And this is a representative of a purely free camp. True, one of the main drawbacks will be the lack of a Windows version.
The program does not require installation. After starting, press the button Read Backups».

A list of backups available on your Mac will be displayed. Select the one you want and click the "Choose" button.

Scroll through the impressive list of files until you see " iOS Files". Highlight the line and click " Extract».

Specify a location for unpacking and wait for the copy process to finish.
In the resulting "iOS Files" directory, follow the path /Media/DCIM/100APPLE/ where all images will be located. Images from the photostream can be found in the directory /Media/PhotoStreamsData.

The most interesting thing is that you do not need to enter an unlock code to extract files from password-protected backups. Oh how!
When was the last time you backed up your iPhone? If you have never done this in your life, then do it right now, it can save all your applications, contacts and most importantly your photos and videos from being lost. If you lose, break, or have your phone stolen, you will lose your entire collection of photos and videos. But if you have made a backup, then you will be able to restore all your photos and videos in no time.
First method: iFriend
The iPhone is one of the most popular phones in the world, accounting for over 40 percent of the US smartphone market. So it's very likely that you have at least one iPhone buddy. And if that person can trust you with their phone, then you can easily recover your lost photos.
Again, if there is a backup for lost phone, you can recover lost data using iTunes backup or backup iCloud copy. Of course, you should backup your borrowed device before moving on to the next step. If you don't backup your borrowed phone, then their data could be lost forever and they'll hate you. Now that you've created a backup, connect your device to your computer and restore your data using a From This Computer or iCloud backup.
After the device is restored from your backup, you will see all your photos and videos on that device (buddy's device). Now all you have to do is transfer all the content to your computer, flash drive or cloud. Once you've done this, make sure you don't forget to restore your phone back to your friend's backup. Great, now you have photos and videos and your friend's phone is back to normal.
Method Two: Third Party Applications
If you don't have access to an additional iPhone, then you'll need to download a third-party tool. Fortunately, there are a lot of them, although most of them are paid. These apps allow you to search for files in your backups without having to have your phone handy. This is the perfect alternative for lost or broken phones. Here is a short list of such programs:
- iPhoneBackupExtractor (perfect for Windows users)
- IBackup Extractor (Extract 50 items for free)
iPhone Backup Extractor will quickly find and extract all your “lost photos”. After downloading the app, run it and it will automatically search your computer (the one you backed up iTunes to) for backups of all your devices. Once a backup is found, it will quickly provide a summary of everything in it.

Under available data, you will see photos. Click on the blue link and you will be able to extract all your photos. If you use the unregistered limited version, you can only extract 4 photos. IN full version, you can
Your iCloud storage is full and you just updated to new version iOS. How to get back photos from an old backup? There is a solution.
background
While testing, I put up with the gluttony of the system in relation to the battery for several days, after which I decided to return to stable iOS 8.3. During these few days I took a number of photos, but after returning to iOS 8.3, it turned out to be impossible to restore the data stored in the backup copy of the "nine". The iCloud cloud has long been clogged with 20 GB of information and the photos did not get there. How to be? Go back to iOS 9, restore iPhone from an appropriate backup, copy pictures to HDD and then revert back to iOS 8.3? Yes, this is a way out, but I feel sorry for my time.
Ecosystem Apple devices built in such a way that the user can always update to the latest current version firmware without fear of losing contacts, photos or other data. All problems are solved by backups and cloud storage. And if the size of backups is limited solely by the capacity of your hard drive, then after downloading 5 free gigabytes of iCloud cloud, the user has little choice: to put up with the inability to store photos in the cloud or switch to a paid plan that opens access to more remote disk space.

I don’t want to pay, as always, but I need to save photos somewhere. In addition, if you are faced with a situation where backups with the desired photos belong to different versions iOS, remains practically the only way to save pictures.
The world is not without good people, and OS X software developers have already taken care of solving this problem. We will consider two utilities. The first has like free version, the functionality of which will be enough for us to “pull” a photo from any backup, and a paid one with extended functionality. The second one is absolutely free.

iBackup Viewer
Price: Free[Download ]
In-App Purchases
Developer: iMacTools
Compatibility: Mac, Windows
Download the app iBackup Viewer from the official website of the developer. Create a folder where you plan to save photos from the backup, then launch iBackup Viewer.

The program will immediately scan your Mac for backups and inform you about their number. The sidebar displays available copies. Double-click on the desired one and select from the drop-down list Photos.

The possibilities of iBackup Viewer are much wider: you can restore the history of calls, SMS correspondence, notes and contact book, but within the framework of this instruction, we are only interested in photos. After selecting the Photos item in the main application window, all the pictures saved in the current backup will be displayed. copies of the iPhone(within the Camera Roll directory; access to albums and Photo Stream is available only in the full version of the program). Holding down a key command, select the necessary photos, then go to the Menu (gear image) and select the item Save Selected(Save selected).
After specifying the path to the previously created directory, wait for the export to finish. Extracting a 10 GB photo collection took me about 6 minutes. After the export is finished, you can open the folder 100APPLE. All photos will be stored there.
Utility iPhone Backup Extractor offers a more comprehensive approach to restoring data from a backup. There is no option for the user to choose to extract the photo folder. iPhone Backup Extractor restores the entire hierarchy of folders, among which, after exporting, you can find the desired directory DCIM.
Before starting the utility, make sure that in the settings Protection and Security allowed to run applications downloaded not from the application store App Store (Settings - Security and Protection - General tab - Allow the use of programs ...). Without further ado, the application will greet you with a window with a list of backups stored on the Mac available for recovery.
Select the copy that contains the required photos. The list that appears will be full of an impressive number of file and directory names. Feel free to scroll to the bottom and choose iOS Files.

Having specified the folder to which the export will be made, it remains to wait for the copying to finish. Open the folder previously created for export. Appeared directory iOS Files contains all the data from the backup.
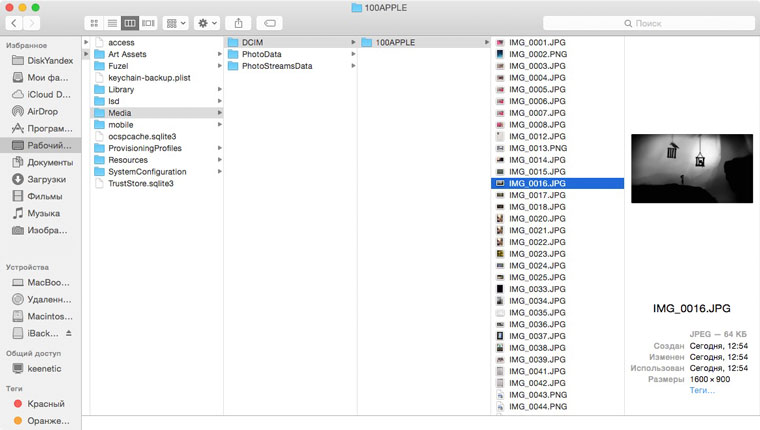
Photos are located at /iOS Files/Media/DCIM/100APPLE/. Photo Stream snapshots in a folder /iOS Files/Media/PhotoStreamsData. The pictures have been restored.
I want to know everything about Apple: