Let's look at how to restore Android if it has turned into a brick. Methods for resuscitating Android when it is “bricked”.
Staining is a complete or partial loss of performance Android device. Not a single user who independently flashes a gadget is immune from this situation.
Correcting the consequences of unsuccessful firmware
If the smartphone constantly resets when loading or the logo appears on the screen for 5-10 minutes, but the system does not start, then technically it is not yet a “brick”. Such a device can be quickly restored via Recovery menu, reflashing it again.
- Turn off your phone.
- Hold down the Volume Down key and press the Power button to get to the Recovery menu.
You have two options - restore the backup if you made one (this is one of the main requirements for flashing), or re-flash the phone. To start a backup, go to the “Backup and Restore” section and start restoring the previous system state.
To flash the firmware, select the “Install zip from sdcard” section and specify required file operating system. This method corrects errors that occur when the firmware is incomplete: for example, when the phone turns off while writing files.
The opposite situation is that the firmware starts, but you cannot get into Recovery. This problem can be resolved even easier: you can use the TWRP Manager, ROM Installer or ROM Manager applications to return the recovery console. After installation, these applications determine the smartphone model and independently download the required recovery.
Restoring the "brick"
Let's consider a more complex option, when the smartphone actually turns into a “brick” - neither the system nor the Recovery menu starts. It is also possible to restore it at home: for this you need to use official firmware from the manufacturer. Let's look at the recovery procedure using a Samsung phone as an example:
- Install on your computer latest version USB drivers from Samsung.
- Install the latest version of the Odin application.
- Download the official firmware for your model and country.
- Turn off your smartphone. Turn it back on by holding down the Volume Down key and the Home button. Wait for the warning to appear (after about 5 seconds).
- Put your phone into Odin mode by pressing the Volume Up key.
- Connect your phone to your computer.
- Launch Odin, click on PDA and point to the tar.md5 file inside the firmware directory
- Launch the firmware using the “Start” button and wait until the operation is completed.
Your “brick” will again become a working device, returning to its original state.
Firmware using Flashtool
This method is suitable for Sony phones, but it can be used on mobile devices from other manufacturers. You will need:
- The “brick” itself that you want to restore.
- Official firmware in FTF format.
- Installed on a computer Flashtool program with firmware drivers.
Before starting work, it is advisable to disable your antivirus and firewall to avoid incorrect operation Flashtool utilities. In addition, when starting to restore the brick, make sure that the phone is fully charged.
- Turn off your phone.
- Place the FTF firmware file in the C:\Users\UserName\.flashTool\firmwares folder.
- Launch Flashtool (32 or 64-bit depending on the OS bit depth).
- Click the lightning bolt button.
- Select Flashmode.
- Indicate in the window the firmware you need, which you previously placed in the “firmwares” folder.
The recovery program will prepare the Android firmware and offer to connect the “brick” to the computer. Press the Volume Down key on your device and connect your phone to your computer.
The Flashtool program must identify the “brick” connected to the computer and run the firmware on it. If the recovery is successful, then at the end of the log you will see the message “Flashing finished”. After this, you can disconnect the phone from the computer and turn it on - Android should start without errors.
Each manufacturer has its own flashing utility, so it is better to look for recovery instructions on specific model phone that has turned into a “brick”. If you cannot return the device to a working condition at home, then all you have to do is contact service center.
Instructions for restoring operation of Sony Xperia
Put it on charge Sony Xperia for about 3 hours to be sure that the device is fully charged.
2. Download the official Sony program - PC Companion and then install it on your PC
3. Launch PC Companion and go to the menu:
Support Zone -> Software Updates -> Recovery

4. Click “Continue” and agree that all data will be deleted
5. Wait a couple of seconds for additional downloads. data and a warning window will appear, where you will also need to confirm your consent to recovery
6. Select your Sony Xperia device
a) Disconnect Sony Xperia from the PC (if connected), turn off the device (if in cyclic boot), wait 5 seconds, hold down the “Volume Down” button and connect to the computer
b) either Disconnect the Sony Xperia from the PC (if it was connected), hold down the device’s power button + hold down the “Volume Down” button and connect to the computer and wait until the drivers begin to be installed and the devices are detected
c) Disconnect Sony Xperia from the PC (if it was connected), turn off the device and remove the battery and insert it, wait 5 seconds, hold down the “Call Button” button and connect it to the computer and wait until the drivers begin to be installed and the devices are detected
8. After identifying the button, release the firmware download, do not disconnect Sony Xperia from the PC, do not insert new devices into USB
9. After downloading, the installation of the firmware will begin, wait until you are in the “Done” tab. After which you will be prompted:
a) disconnect Sony Xperia from the PC, remove and insert the battery and press the power button and wait
b) disconnect Sony Xperia from the PC, hold down the power button and wait.
Brick - more than one novice user asked this question: “How to remove the device from brick condition? But first, let's figure out what a brick is and whether you actually got a brick. If for some reason the phone or tablet does not turn on, then there may be two options: the preloader has failed or the flash memory has failed. In the case when the preloader has failed, the body is revived without problems, but when the flash memory is burned out - only the service center. In one and in the other case, the symptoms are the same, and it’s difficult to immediately distinguish what’s really going on, but it’s worth a try. So, let's look at a real example of how you can revive or remove a smartphone from its brick state.
When writing this manual, I used an MTK processor. We would like to note that brick restoration for other MTK devices is basically identical.
Well, let's get started. If you received a brick instead of a new firmware, then the archive of your downloaded firmware is damaged. To do this, download the archive with the firmware again from a trusted source, for example from NidRom. IN in this case You need to pay attention to which version of the device – 8 or 4 GB of memory; we also recommend reinstalling the drivers for your gadget on your computer.
We are not responsible for any damage caused to your phone if something goes wrong.
Next, we do everything strictly according to the instructions:
1. Unpack the newly downloaded firmware to the root of drive C (C:\);
2. Download a new preloader from here (this preloader is only for LENOVO S820), in some cases you can do without it, but if that doesn’t work, then follow the further instructions;
3. Go to the target.bin folder in the firmware folder, now you need to replace the original preloader file in it with a new one, the one that was downloaded in step 2.
4. Now delete the checksum.ini file in the same target.bin folder
6. Check the box next to DA DL All With Check Sum;
7. Specify the path to the scanner file, and then click the Firmware Upgrade button;
8. Take your phone, or rather a brick, take out the battery from it and connect it to the computer.
9. That's it, now we wait for the end of the flashing process.
That's all, now you have a manual for restoring bricks. We look forward to new comments from you.
Stay tuned, there is still a lot of interesting things ahead.
Restoring a brick phone. Modern mobile phone It’s such a complex thing that it’s better not to delve into its insides unless necessary.It happens that, due to ignorance or carelessness, after an unsuccessful flashing or software change, the phone does not turn on and is blocked. In this condition, the phone called "brick".
It’s clear what to do with a brick, but what to do with such a phone? How to revive it and start it? Of course, there is no universal remedy; each model has its own recovery methods phone.
Errors on the phone, how to turn on the phone. Restoration from brick condition.
Information on how to restore your phone after flashing or from a locked state, or when the phone does not turn on, you can read on specialized forums and websites.
Apple smartphones, just like any other high-tech devices, break down. They may break external elements phone and internal: screen, body, microphone, speaker, battery, camera and others. Today this is not a problem, the maintenance services have spare parts for these devices, and there are also specialists who can repair the entire line of Apple products: iPhone, ipad, iPod, iphone 3g, replace the speaker, microphone, battery, memory, module cameras and other elements of the motherboard of the mobile device.
About the most informative and useful Internet resources about errors and problems that arise in the phone OS and solutions to these problems, as well as about restoring a phone from a brick state, will be described below.
Carelessness or error when flashing the device.
If you did something unhealthy to your phone, and after that it stopped loading at all and won’t let you into recovery, FTM, or fastboot, then don’t despair. There is one more remedy left:
Restoring dead phones that won't turn on at home.
Recovery Samsung phones galaxy series, after unsuccessful firmware. The description posted on the site uses the so-called Jag method. The essence of the method is that it is necessary to make a special Jag plug by soldering contacts (4 and 5) together through a 301 kOhm resistor. This Jag is inserted into the phone with the battery removed. More details on how to restore your phone this way are described here.

For owners of Motorola phones, the FAQ on restoring the phone is available at the link above. The site also provides a description of how to restore a phone by closing the contacts when the battery is removed. Before restoring your phone, you need to download and install special program on PC: Random "s Developments Flash & backup. Next you need to: remove the battery, connect pins 4 and 5 (see photo) to each other on the phone connector (see photo), keeping the needles closed, insert the battery, open the needles, insert the cord into the connector and connect to the computer, in Random's Developments Flash&backup program should display a message that the phone is connected.
Restoring a phone from a brick state.

Restoring a phone from a brick state
This phone recovery method different models, different manufacturers. When restoring a phone, special software is used: a standard flasher from MTS, a programmer from ZTE and a HEX editor. A detailed description with screenshots of the actions is posted on this page of the site (see link).
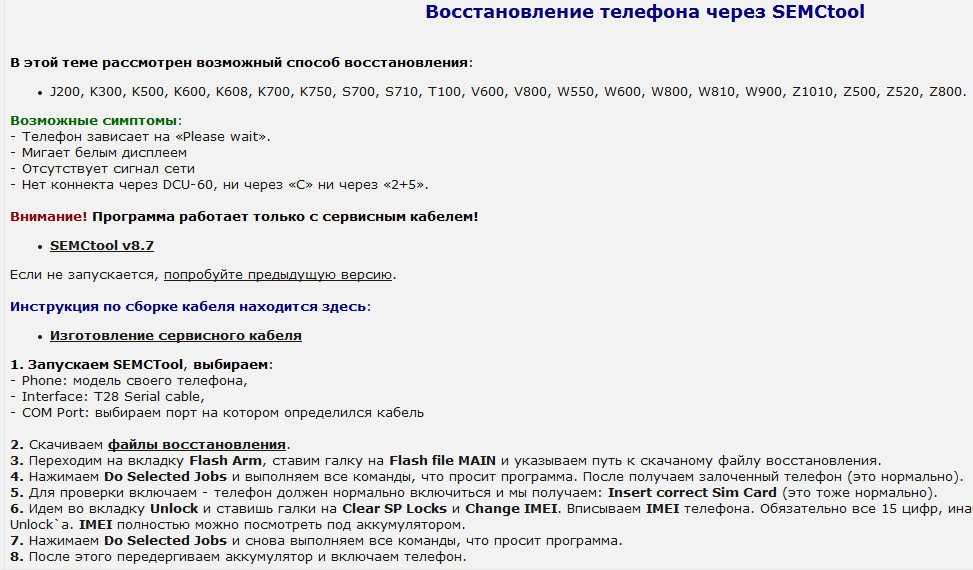
Recovering your phone using SEMCtool
These instructions are for restoring some models Sony Ericsson. Symptoms of failure: the phone freezes on “Please wait”, the white display flashes, there is no network signal, there is no connection through the DCU-60, neither through “C” nor through “2+5”. The method for restoring phones posted on this site is using a service cable, together with SEMCtool v8.7 software, which can be downloaded for free on the same site.

Recovery cell phone- drowned man.
Instructions with pictures on how to restore your phone after it falls into water. To prevent corrosion of the phone's components, you need to very quickly remove it from the water and remove the battery. Then the case is removed and the phone is placed in a jar filled with rice for two days. The fact is that rice absorbs moisture very well and is an excellent absorbent. Plain homemade rice will draw out all the moisture from the smallest components of the phone and also prevent corrosion. You can use cat litter as an absorbent at home.
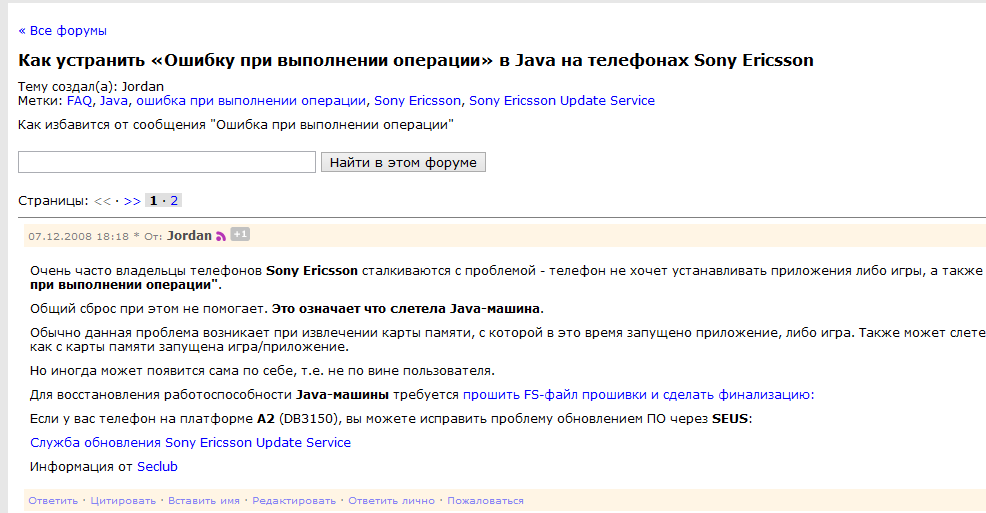
Instructions for Sony Ericsson phone users who have problems installing applications or games on their phone. If, when entering the application/game folders, the message “Error during operation” pops up, this means that the Java machine on the phone has crashed. This problem can be resolved by simply removing and inserting the memory card into the phone. If this does not help, more complex actions will be required. To restore the functionality of the Java machine, you will need to reflash the firmware FS file and finalize it. More details on how to do this are described in this article.
How to turn on the phone.
To enable touch phone, you need to do the following:
Press and hold the Power key until the phone vibrates.
- If the phone was turned on, but the screen went dark, press and release the Power key to turn it on.
- an image of a lock will appear on the screen; to unlock the screen, drag the lock icon or click on it.
- when prompted to enter a code, enter the PIN code from your SIM card. In most cases this is 0000 and click OK.
- wait for the phone to start.
Note: The PIN code for the SIM card is located on a plastic card or in the package received when purchasing a SIM card in the salon cellular communication. But be careful, if the PIN code is incorrect three times, you can activate the SIM card only through the PUK code, which is also included in the package received when purchasing the SIM card. If the PUK code is lost, it can only be restored using the passport of a citizen of the Russian Federation for which the SIM card is issued. Therefore, do not enter your PIN incorrectly more than three times. If you have lost your PIN code and there is no way to recover it through your telecom operator, you can do the following.
Cancel the PIN prompt when you turn on your phone. To do this, find another SIM card with a PIN code you know (you can assign a PIN code in the settings) and insert it into your phone. Turn on the phone according to the steps described above, when entering the password, enter the PIN code you know from another SIM card. Once you have successfully turned on your phone, go to your phone settings and cancel the PIN prompt when you turn on your phone. Having done this, turn off the phone and change the SIM cards. Now, when you turn on the phone, the system will not require you to enter a PIN code.
This is, of course, elementary advice, but there are solutions to more serious problems.
Advice. The SIM PIN is initially provided by your network operator, but can be changed in the Settings menu. To correct an error when entering your SIM card PIN, tap the “Delete” icon.
Show more
The phone won't turn on! Error during phone self-test
The very first thing you need to do is try to reflash the phone. But the problem of the phone not turning on can be not only due to the “crashed” software, but also due to a breakdown of the phone’s on/off button, or a breakdown or failure of the battery - charger and etc.
The phone doesn't turn on. What to do?

remdiag.com.ua- Very detailed description fix the problem the phone does not turn on, how to turn on the phone. The article is divided into points, with a solution to each problem point by point: checking the power source - the battery, the power button is faulty, the power button circuits, the power controller or its soldering is broken, secondary power sources - power supply to the processor, memory, etc. devices, setting up mobile phone software.
Many new experimenters, or simply users of smartphones based on the operating system, who are far from the topic Android systems, are faced with a problem such as the device becoming “bricked”. Let's take a closer look at what an Android brick is.
So, scaling is a complete (less often partial) loss of device functionality as a result of any actions with software, or interfering with the “factory” operating system.
The most common signs that your smartphone has become a brick is a lack of response to buttons, both on-screen and physical; inability to turn on the device; a constant error indicating a problem with the RAM or built-in memory; An error pops up when you turn on the smartphone about the impossibility of loading the Android operating system.
In such cases, the average user has no choice but to take his device to a service center, where he can be charged an undemocratic amount of money for “banal” actions that help return the smartphone to its original working condition. We will try to give several recommendations that will help you avoid such mistakes in the future and warn those who have not yet encountered this problem.
Common reasons why smartphones become bricked
The first and most common reason is flashing the operating system. An inexperienced user, who, for unknown reasons, is tired of his OS, having read information from various unverified sources, downloads all sorts of supposedly the latest and most fashionable firmware, and begins to software “upgrade” his smartphone. In some cases, there are minor losses - non-working applications, blocking of some settings, but, as a rule, after installing suspicious Androids, the smartphone flatly refuses to work, causing panic in the unfortunate master.
The first and simple rule: never reinstall the operating system unless necessary. If you really need it, or really want it, then download Android from trusted sources and carefully read the installation instructions!
No less rare causes of “bricking” are, on the contrary, a rollback to the factory software after installation, so-called custom firmware. Yes, this happens, and very often. Therefore, to avoid this, see the recommendations above. And yet, for those who want to take a risk, you can read the material with recommendations for installing the OS and how to restore a brick using .
In more rare cases, the system crashes after installing various “improvers”, i.e. programs that are designed to improve performance, increase data transfer speeds via Wi-Fi and similar software. Even this, at first glance, easy installation new theme for Android can make your smartphone look like a lifeless brick.
If you have suspicions that this unpleasant event has occurred after your actions with the software, then the first thing you need to do is not to panic. You don’t have much to lose, so: we are looking for official firmware for your smartphone; carefully study the instructions for installing the OS specifically for your model; We are reinstalling. In many cases, after installing the official Android versions, your device will “come to life”, and you will gain invaluable experience of what can be done and what cannot be done, and you will also help others, if anything happens.
Those who are afraid or unsure will have to take the device to a specialist for service, and to avoid being too deceived there, look for information about different services, fortunately there is a great deal of it on the Internet.
Loss of Android functionality on a smartphone or tablet, or so-called bricking, occurs for a variety of reasons. Most often, this is facilitated by incorrect firmware, which can turn an advanced phone into a useless brick. The question of whether it is possible to restore a gadget yourself interests many users.
How to eliminate the consequences of unsuccessful firmware
If after the logo appears when you turn it on, the system does not start for several minutes or the boot constantly resets, then this is not a “brick” and not all is lost. To get started, you need to go to the Recovery menu from your smartphone and do a new flashing.
To do this you need to follow these steps:
If the gadget is turned on, you need to turn it off. Press and hold the volume down key and the power key. The Recovery menu opens, which offers 2 methods:
- restore the backup (this is the main requirement for the firmware; if the phone was flashed, then the backup was also restored). The backup starts running in the “Backupand Restore” section when you select the previous system location.
- flashing - carried out by selecting the “Install zip fromsdcard” section, in which you need to specify the required operating system component. This option corrects errors of incomplete recovery, which can occur, for example, due to the phone being turned off while the files are being written.
Another situation may arise: when starting the firmware, you cannot enter Recovery. This can be easily resolved by returning the console to fix the system. special applications TWRP Manager, ROM Manager or Installer. These applications are created to determine the gadget model and independently download all the necessary components to launch a suitable Recovery.
If none of the above-mentioned programs corrected the error, you can find instructions for downloading the recovery console for a specific brand of smartphone or tablet.
How to restore a real Android brick
We looked at what can be done in case of partial loss of smartphone functionality. Now it’s time to talk about how to restore a completely “dead” Android when nothing starts. It is not at all necessary to immediately go to a workshop; you can try to start the system at home using simple steps.
Let's look at what to do step by step:
- Install the latest Samsung USB drivers on your computer.
- Download and install the latest version of the Odin application.
- Download licensed firmware that is suitable for a specific model and country.
- Turn off the brick, then press the volume down key and the Home key. After a few seconds, a warning will appear on the screen.
- By pressing the button on the phone that increases the sound, switch it to Odin mode.
- Connect the gadget to the computer.
- Launch Odin, press PDA, in it indicate the file tar.md5 in the directory with the firmware.
- Press the “Start” key, start the recovery, wait until the end of the operation.
- Hurray, the “brick” is working!
How to reflash a smartphone with Flashtool
This option is 100% applicable to Sony phones However, devices from other brands can be restored in the same way.
What do you need:
- “brick” Android;
- licensed firmware in FTF format;
- Flashtool program installed on the computer, firmware drivers for it;
- disabled antivirus, firewall, which can react to Flashtool as a viral component;
- It is enough to charge the phone well so that it does not turn off during recovery.
Step-by-step recovery instructions via Flashtool
Each manufacturer of gadgets based on the Android OS also has its own proprietary flashing utility. If it happens that your phone or tablet turns into a “brick,” you should first choose the instructions for your model. If all the above attempts to restore the device remain in vain, you should contact a professional workshop.