As we can see, the CD from year to year is losing ground as a source of music in the car and not only. Of course, no one wants to mess around in a car with disks that are constantly scratched and not much music fits on them. That is why radios without a CD drive are becoming leaders in sales, and most manufacturers of car audio equipment have already stopped producing radios without support. USB, and a few years earlier, CD changers had completely disappeared from the market.
However, with head unit, installed on cars at the factory (not to be confused with radio tape recorders for standard installation!) things are not so good. Indeed, until now, most auto manufacturers complete their cars with radios without support. USB, and sometimes even expensive CD changers (CD changers) that “like” to fail at the slightest violation of operating conditions - for example, the mechanism can fail if you drive into a pit at the moment when the device changes the disk.
What to do if you have just such a car on which an audio system without USB support is installed, and you do not want to change it entirely? There are several ways out.
1. USB car adapter.
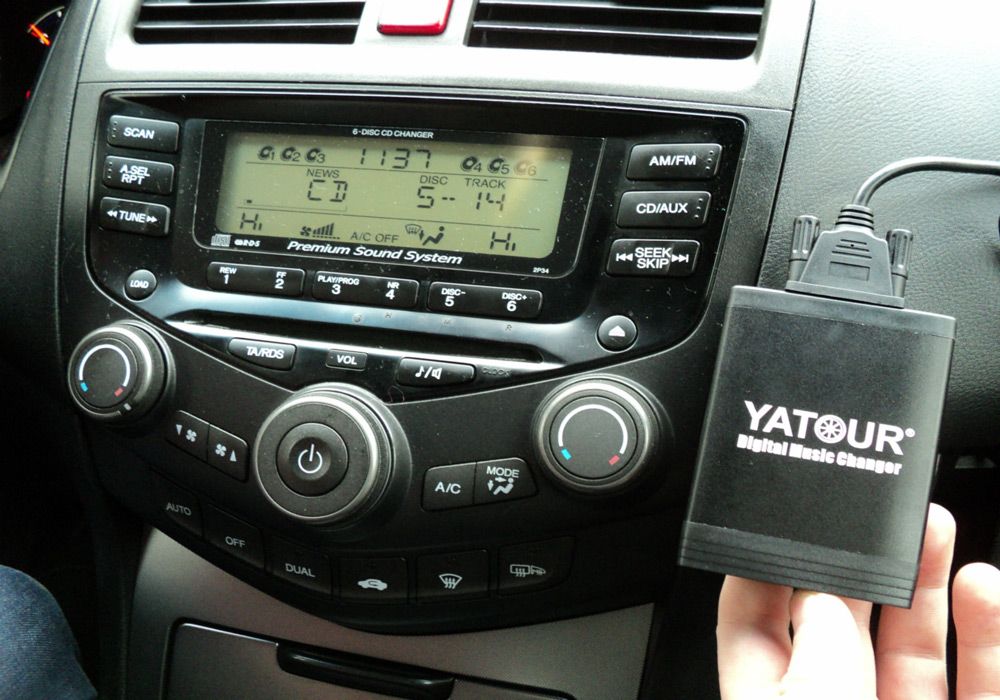
Such USB adapter connects to the factory radio through the connector for the CD changer, which is found in most factory radios. Thus, the head unit perceives the USB adapter as a CD changer and controls it accordingly: when you press the DISC + button, the folder changes to the next one, when you press DISC- to the previous one, and the actual files (songs) on the USB flash drive are switched with the track change buttons ". That is why USB adapters are also called CD changer emulators.
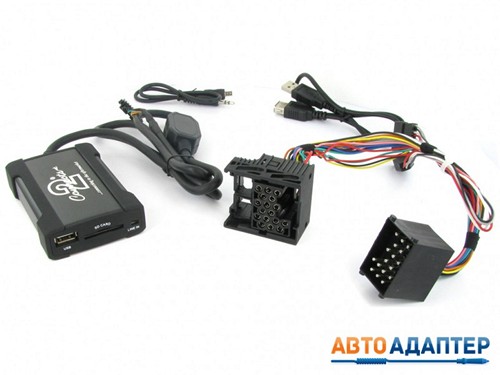
USB adapters are similar in appearance, they essentially differ only in firmware for compatibility with a car head unit and connection wires. Due to the fact that the connection connectors and control protocols are different for different car manufacturers, there are several types of adapters that you need to choose according to your car model.
A well-known European manufacturer of car accessories from England, Connects2, has this moment There are USB adapters for the following makes and models of cars:
| Adapter | car brand | car model |
| Connects2 CTAARUSB001 | Alfa Romeo | USB adapter for Alfa Romeo 147 (2000->), 156 (2000->), GT (2004->) |
| Connects2 CTAADUSB003 | Audi | USB adapter for Audi A2 (2000-2013), A3 (1998-2003), A4 (1997-2005), A6 (1998-2004), A8 (1998-2004), TT (1998-2005) |
| Connects2 CTAADUSB004 | Audi | USB adapter for AudiA2 (2003-2013), A3 (2003-2013), A4 (2005-2013), TT (2005-2013). |
| Connects2 CTABMUSB007 | bmw | USB for BMW Mini (2001-2006), 3 Series (1999-2006), 5 Series (1996-2004), 7 Series (1995-2002).(connector with round pins). |
| Connects2 CTABMUSB009 | bmw | USB for BMW Mini(2001-2006), 3 Series (1999-2006), 5 Series (1996-2004), 7 Series (1995-2002).(flat connector) |
| Connects2 CTACTUSB002 | Citroen | USB for CitroenC2 (2006-2013), C3 (2006-2013), C5 (2004-2013), C4 (2006-2013), C8 (2006-2013), DS3 (2006-2013), DS4 (2006-2013) |
| Connects2 CTACTUSB001 | Citroen | USB adapter for CitroenC2 (2003-2005), C3 (2002-2005), C5 (2001-2004), C8 (2003-2005). |
| Connects2 CTACTUSB003 | Citroen/ | USB for CitroenC1 (2005-2013). (which is not Citroen at all, but Toyota AyGo, the same adapter is suitable for Peugeot 107.) |
| Connects2 CTAFAUSB001 | fiat | USB for fiatMultipla (1999-2013), Punto (1999-2013), Doblo(2001-2013), Sedici (2004-2013). |
| Connects2 CTAFOUSB003 | Ford | USB for Ford Escort (1967-2001), Fiesta (1976-2003), Mondeo (1993-2003), Focus(1998-2004), Puma(1997-2002), Galaxy (1997-2004), KA(1997-2013). |
| Connects2 CTAFOUSB005 | Ford | USB for Ford C-Max(2003-2011), Fiesta (2006-2008), Mondeo (2003-2013), Focus (2004-2011), Galaxy (2004-2013), S-Max (2006-2013). |
| Connects2 CTAHOUSB001 | Honda | USB adapter for HondaAccord (2001-2013), Civic (2001-2013), Jazz (2001-2013), S2000 (2001-2013). |
| Connects2 CTAHYUSB002 | Hyundai | USB for Hyundai (models from 2004 to 2013).(round CD changer connector) |
| Connects2 CTAKIUSB001 | Kia | USB for Kia (all models from 2004 to 2013 with an 8-pin circular CD changer connector). |
| Connects2 CTAKIUSB002 | Kia | USB for Kia (all models from 2004 to 2013 with a 12-pin round connector). |
| Connects2 CTALXUSB001 | Lexus | USB adapter for LexusGS300 (2004-2013), GS430 (2004-2013), GS470 (2004-2013), IS200 (2004-2013),IS300 (2004-2013),RX300 (2004-2013),RX350 (2004-2013),SC300 (2004-2013), SC400 (2004-2013) |
| Connects2 CTALXUSB002 | Lexus | USB for Lexus GS300 (1993-2004),GS430 (2001-2004), GS470 (2002-2004), IS200 (1999-2004), IS300 (2001-2004),RX300 (1997-2004),RX350 (2003-2004). |
| Connects2 CTAMZUSB001 | Mazda | USB for Mazda 3 (2006-2009), 5 (2006-2009), 6 (2006-2009), MX-5 (2006-2009), RX-8 (2006-2009) |
| Connects2 CTAMZUSB002 | Mazda | USB for Mazda 3(2009-2013), 5 (2009-2013), 6 (2009-2013), CX-7 (2009-2013) |
| Connects2 CTANSUSB001 | Nissan | USB for Nissan Almera (2000-2013), Primera (2000-2007), Tiida (2000-2013) |
| Connects2 CTAPGUSB010 | Peugeot | USB for Peugeot 307 (2002-2005), 607 (2002-2005), 807 (2002-2005), 206 (2002-2013), 406 (2002-2004), 407 (2004-2005) |
| Connects2 CTAPGUSB011 | Peugeot | USB for Peugeot 3008 (2009-2013), 307 (2005-2013), 407 (2005-2013), 607 (2005-2013), 807 (2005-2013), 207 (2006-2013), 308 (2007-2013) |
| Connects2 CTARNUSB003 | Renault | USB adapter for Renault Laguna (2000-2008), Megane (2000-2008), Clio (2000-2009), Scenic (2000-2009), Kangoo (2000-2013), Twingo (2007-2013) |
| Connects2 CTARNUSB005 | Renault | USB for Renault Laguna (2008-2013), Megane (2008-2013), Clio (2009-2013), Scenic (2009-2013) |
| Connects2 CTASTUSB002 | seat | USB for Seat Alhambra (2005-2013), Altea (2005-2013), Ibiza (2005-2013), Leon (2005-2013), Toledo(2005-2013) |
| Connects2 CTASTUSB003 | seat | USB for Seat Altea (2004-2005), Cordoba (1993-2005), Ibiza (1984-2005), Leon (1999-2005), Toledo(1991-2005) |
| Connects2 CTASKUSB001 | Skoda | USB for Skoda Fabia (1999-2005), Octavia (1996-2005) |
| Connects2 CTASKUSB003 | Skoda | USB for Skoda Fabia (2005-2013), Octavia (2005-2013), Roomster (2005-2013), Superb (2005-2013) |
| Connects2 CTAMSUSB001 | Smart | Volvo S40 (1995-2004), V40 (2000-2004), C70 (1997-2005), S80 (1998-2005), V70 (1997-2007), XC70 (1997-2007), S60 (2001-2009) |
| Connects2 CTAVGUSB003 | Volkswagen | USB adapter for VW Golf (1998-2003), Passat (1998-2003), Polo (1998-2003), Beetle (1998-2013), Bora (1998-2013), Lupo (1998-2013) |
| Connects2 CTAVGUSB009 | Volkswagen | USB for VW Golf (2004-2013), Passat (2004-2013), Touareg (2005-2013), Touran (2005-2013), Transporter (2005-2013), EOS (2006-2013), Jetta (2006-2013) ), Tiguan (2007-2013), Scirocco (2008-2013), Sharan (2009-2013) |
But if the factory radio does not have a connector for an external CD changer, or when the car uses the MOST optical bus (in most modern European premium cars), then you will either need an adapter that costs completely different money or perhaps such a USB adapter for your car does not currently exist for sale. For such cases, there are alternative options.
2. Bluetooth and USB for universal installation.
For example, we were faced with the fact that on the BMW X3 in the latest body (BMW X 3 F25) we did not find any adapters for USB or iPod. At that time, they simply did not exist. We came to the aid of a wonderful product from the market-leading manufacturer of bluetooth devices, the French company Parrot. This is a kit Parrot MKi 9200, which, in addition to functions speakerphone can play music from USB flash drive, SD card and iPod/iPhone. In short, a complete set of modern sound sources. The Parrot MKi 9200 set has a separate 2.5″ display, which displays all information about the track being played or phone numbers in hands-free mode. The control panel is made wireless, which allows you to install it almost anywhere, including even on the steering wheel. See how it looks in the interior of the BMW X3 in the back of the F25:
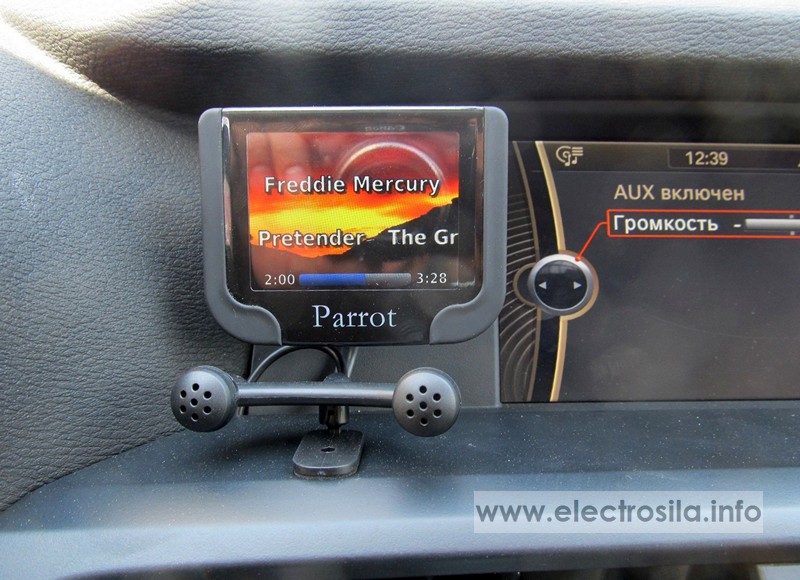
![]() The kit can be connected simply to an external AUX input, as in this example, or directly to speakers in case we are dealing with a four-channel radio with a built-in “4x50” amplifier. AUX connection is more universal, suitable for almost all modern cars. We installed the hands-free kit control panel on the center console.
The kit can be connected simply to an external AUX input, as in this example, or directly to speakers in case we are dealing with a four-channel radio with a built-in “4x50” amplifier. AUX connection is more universal, suitable for almost all modern cars. We installed the hands-free kit control panel on the center console.
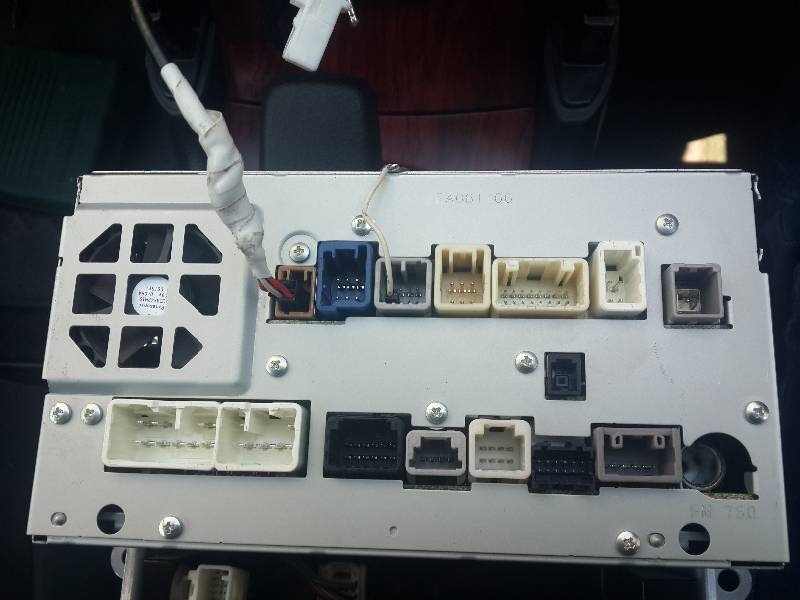
The car has a Futjitsu NSZT-W61G radio. I will not talk about all its capabilities and advantages. It is in the open.
After a detailed study, it became known that you can connect a special USB cable to it, the so-called (USB111), and listen to songs from a standard flash drive. While retaining the function of managing tracks from the steering wheel.
To be honest, there were several options for such a cable on sale on the well-known automotive site. But it was decided to make it on their own. Why? The answer is simple.
I didn't want a collective farm. Namely, so that somewhere in the glove compartment there is some kind of wire into which the same flash drive is inserted.
Manufacturing process:
Any USB computer cable will work as a cable.
The male connector was cut off, the one that is inserted into the computer.
Cleaned and trimmed pvc screen (2-3 cm). I recommend cleaning the metal screen, but not cutting it. Come in handy. More on that later.
The USB cable has 4 wires. red, black, white, green. Everyone will be involved.
5V - red wire
GND is a black wire, and the shielding braid of the cable must be connected to it.
+D - green wire
-D - white wire
Do not confuse.
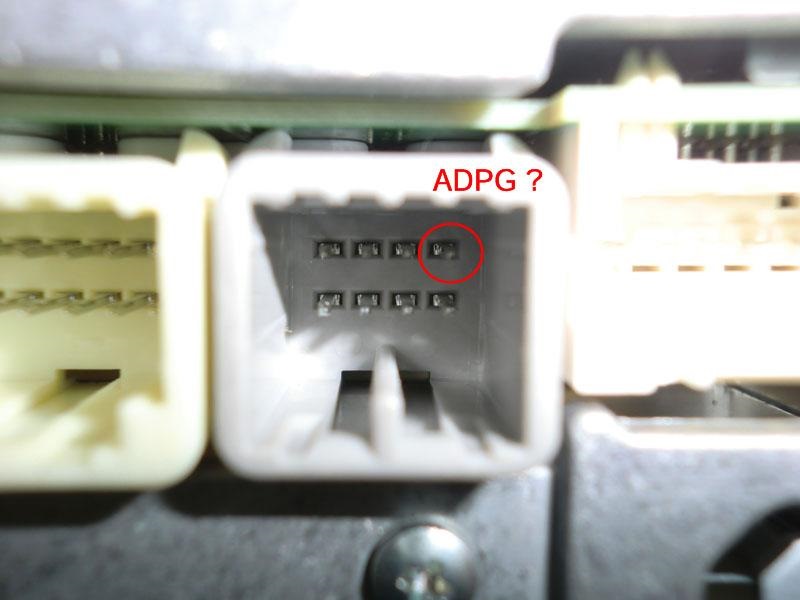
The connector chip on the radio is very specific.
To make the chips, chips were cut from the old system block. Those that come from the power and reset buttons. Thin black pins. They need 5 pieces. It is better to take 2 double chips and one single.
Connect red and black wires to one, white and green wires to the other. To a single one, just a piece of wire 10-15 cm long.
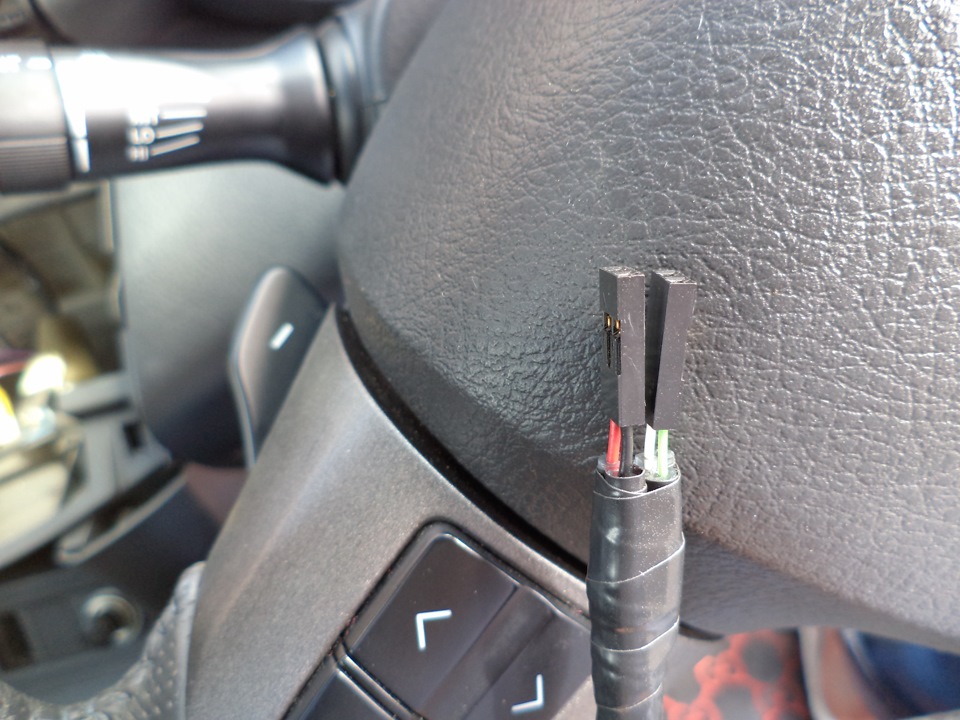
Here's what it should look like.
In my version, I did not immediately take into account that the metal screen of the cable would be involved. Therefore, I had to cut a pvc screen and wind a piece of wire to it. If you leave 2-3 cm of the screen in advance, then it will be easier to join it. It is necessary.
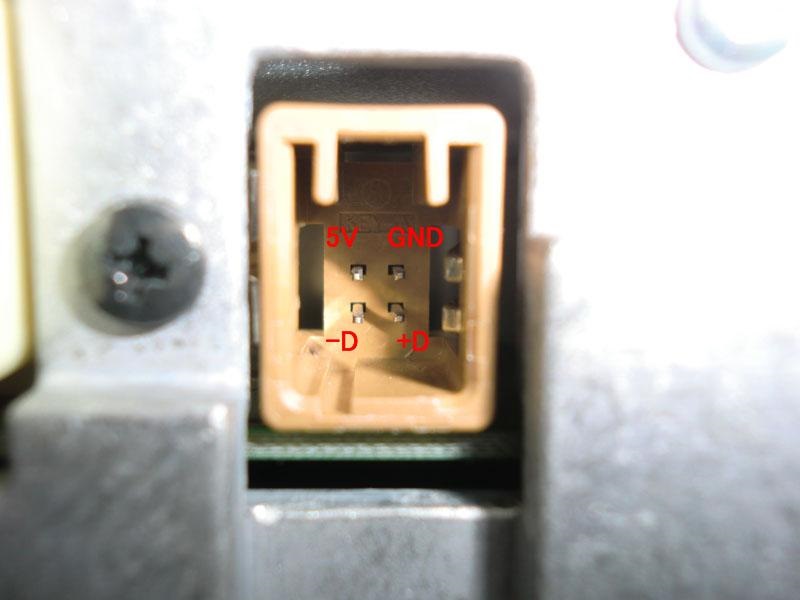
Connection to the main chip. Once again: 5V - red wire, GND - black wire, be sure to connect the shielding braid of the cable to it, + D - green wire, -D - white wire, chip.
The remaining single wire is connected to the second marked connector gray color, to the last (eighth pin), and is attached to the ground.
Connection to the mass of the car.
Be careful if you have this connector turned upside down, as in my case. Then the pin you need will be at the bottom left. See photo below.
Reversed connector.
It is also necessary to connect to the mass the metal screen left in advance from the very USB cable. I don't think there will be questions.
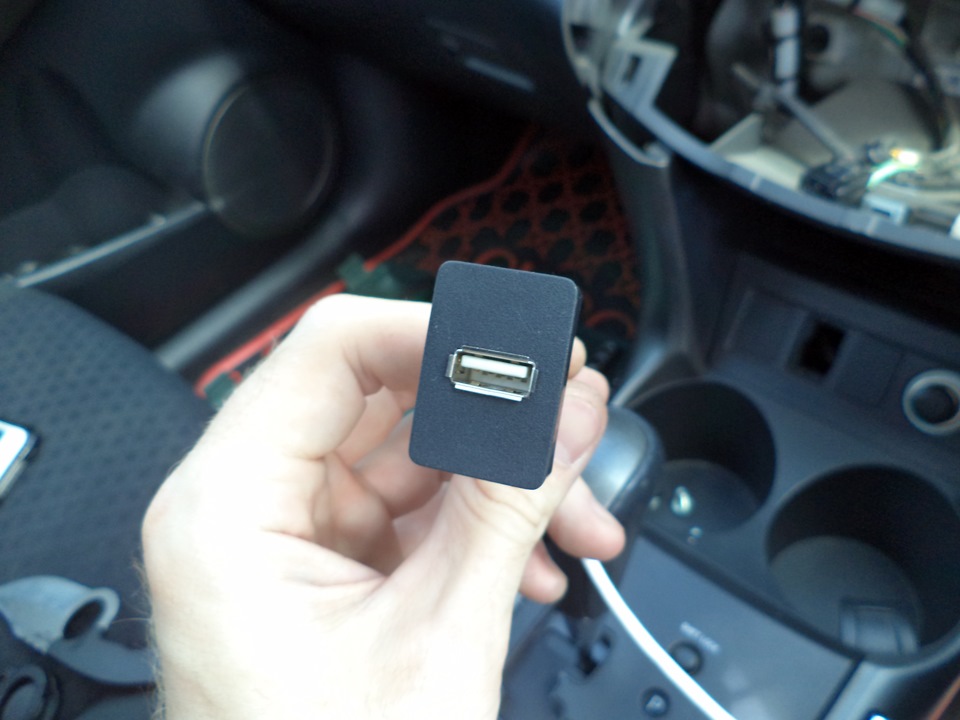
The part of the cable into which the flash drive will be inserted was mounted in one of the standard plugs.
Once upon a time, at the dawn of the automotive industry, cars were only for driving. But since then a lot of water has flowed under the bridge, times dictated their requirements. During this time, a car without a radio (unless, of course, it is a sports car) began to be considered somehow inferior. In fact, this transition coincided in time with the spread of compact carriers. It is very difficult to imagine a vinyl record player integrated into a car or a reel-to-reel tape recorder, but cassette recorders have taken root. CDs came to the court, on which you can burn a bunch and enjoy your favorite songs without repetition, even on a long trip.
Meanwhile, progress does not stand still, and for some time now the most adequate medium for your music is a USB flash drive. It does not require boxes for itself, like cassettes and discs, you can record several times more tracks on it, and the music will not be interrupted by shaking on the eternal Russian pits.
The radio tape recorder with a flash drive has become the de facto standard. Nevertheless, it happens that the head unit does not have such a connector.
Planning an operation
Quality modern devices the budget segment often raises questions. Install a cheap one in your car Chinese radio just for the sake of additional functionality, and then throwing it away after six months due to a breakdown is a dubious pleasure. Therefore, some drivers prefer to remake a regular tape recorder by adding a playback function to it.
Before you start soldering USB into your car radio, think about the price of the issue. If you are not a hardened engineer, and at the same time you are not fond of programming microcontrollers, then something is unlikely to come of this. You will just end up throwing your radio out, wasting time and money. A much more efficient method is to use an FM modulator. It's much easier and faster.
Converting a car radio to USB using this device will take quite a bit of time. Today you can buy the most different models, most of them are equipped with just connectors for flash drives. Usually, by the way, in addition to USB, there are slots for microSD and SD, the modulator transmits a signal at the radio frequency of your choice to the radio. In this way, through a third-party device, you can listen to music from your media.
But for you, this method may be too primitive. A third-party device that dangles looks bulky and uncomfortable; For someone it does not matter, but for you it may be critical. If you want to completely hide the USB in the head unit with your own hands, you can do some simple manipulations with a screwdriver and a soldering iron.
Getting Started
First of all, disassemble the modulator. Under its body, in fact, one microcircuit is hidden. Structurally, this is a simple device, the main thing we need from it in our process is firmware. It is she who determines the operation of the device, and only because we cannot do it ourselves, we basically use . Its model will be written on the microcircuit. You need to find the specifications of this chip on the Internet. In order to convert the radio to a USB flash drive, you need an output connector sound signal. Maybe something like audio out will be written on this board, but usually there is no inscription due to their small size. However, this does not matter, because the pinout diagram is found on the Internet without any problems. Now take a soldering iron with a thin tip and carefully solder the wires to this pin.
Due to the fact that, at its core, the modulator is a simple player with a transmitter, at this stage you can already check the correctness of your actions. If you connect speakers to the audio output while the player is playing, they should play sound. If so, proceed to the next step.
You need to parse . On its microcircuit we find (in the same way, via the Internet) an audio input, and we solder the wires soldered to the modulator here as well. Thus, speaking generally, we replace the sound from the tape in the cassette recorder with a USB flash drive, which is read and transmitted by the modulator. In fact, the work could have ended there, but we didn’t just want to get a signal, we wanted to make an aesthetically attractive design!
Please note that the player will not sound until you insert a cassette. On the one hand, what's the difference, let it spin. On the other hand, you have to turn the cassette over every time it runs out, and this is irrational. Instead, let's try to figure out why, in principle, this happens.
The firmware of the cassette recorder is built in such a way as to reproduce sound only when the cassette deck is in operation. A simple controller soldered to motherboard. On it, as a rule, sensors-buttons are located. So, based on the specification of the radio found on the Internet, we will find out which button / sensor is clamped when the cassette is inserted into the radio, and close it with a jumper. Done, now the system is sure that the cassette is constantly inserted and spinning.
Accordingly, we can unsolder and throw out the blocks we do not need: the motor of the tape drive mechanism, the reading head, the electronic part. After all, we will no longer insert a cassette.

Remaining assembly. USB installation into the head unit will require spatial thinking from you, but if you can place the modulator inside the radio case and bring the flash drive slot into the cassette receiver, you can appearance radio tape recorders to leave practically without changes. Important: use shielded wires for soldering! This will help you avoid unpleasant surprises. There remains the question of food. In the modulator, which is powered by the cigarette lighter, a stabilizer chip is hidden in the power connector. Disassemble this tail, remove the board. We unsolder the wire from the player, fasten the bar to this place with shielded wires, and from the bar we throw the same shielded wires to any place on the radio chip where there is 12 V. Most often, they use just the sites from which we used to solder the tape drive relay.
After that, we recommend that you seal the window of the cassette receiver so that you yourself do not accidentally stuff the cassette into it and break the entire structure. Actually, this is the main work completed. It remains to install the resulting device back into the standard slot on the dashboard and enjoy your favorite music from a USB flash drive.
After installation
The actions described above help to get rid of the annoying shortcomings of data transmission over the air. Directly soldered wires will prevent interference, glitches and signal loss. On the one hand, it would be possible to go further and, having figured out the device of the radio, connect the control buttons from the player to the buttons of the tape recorder with the same wires so that you can switch tracks with standard buttons. On the other hand, we leave such delights to the discretion of inquisitive drivers. Remember only a sense of proportion and safety precautions.
The best prices and conditions for the purchase of new cars
Credit 4.5% / Installment / Trade-in / 95% approval / Gifts in the salonMas Motors
UPDATE!:
This post was made 6 years ago. During this time, there are already many better solutions than what I proposed below (namely, the FM modulator should be built into the radio board).
I highly DO NOT recommend going this route.
Solution options:
-buy a radio tape recorder from restyling and bring out the aux easily and naturally
-buy a socket for 2 din and buy a mayfun 1-2din (the best solution)
-buy 1 din, disassemble, solder with the native board and there will be a stock look, but the filling is from a normal mafon
- squirming with a dorestyle head and inventing cheats - I don’t advise, the sound will still be a poop, just kill time, nerves and money
Good day, friends!
I'll start with the fact that I'm a music lover to some extent and therefore for a very long time I wanted to install a USB in my car! Burning discs that take up an incredible amount of both space and my nerves - enough! With USB, everything is much simpler, I wrote down on a USB flash drive what and how much you want and that’s it, listen, I don’t want to) And besides, there’s only space, nothing is needed! What am I telling you! I think all the advantages of the latter you already know firsthand!
So, as options I had to install a new radio tape recorder in a pocket above the standard one (well, or in the glove box, but it’s quite inconvenient there), buy a DMS device - (about $ 400 for everything about everything would work out) or buy a new native radio tape recorder in general , for example Macintosh (you know how much it would cost me).
But my problem was that I did NOT want to change the internal integrity of my car! I really, really like the panel, and besides, such unreasonably big money ...
In general, I searched for a long time and now, I found it! Talgat helped me with my problem (and not only me!)! Now here I go and rejoice!)
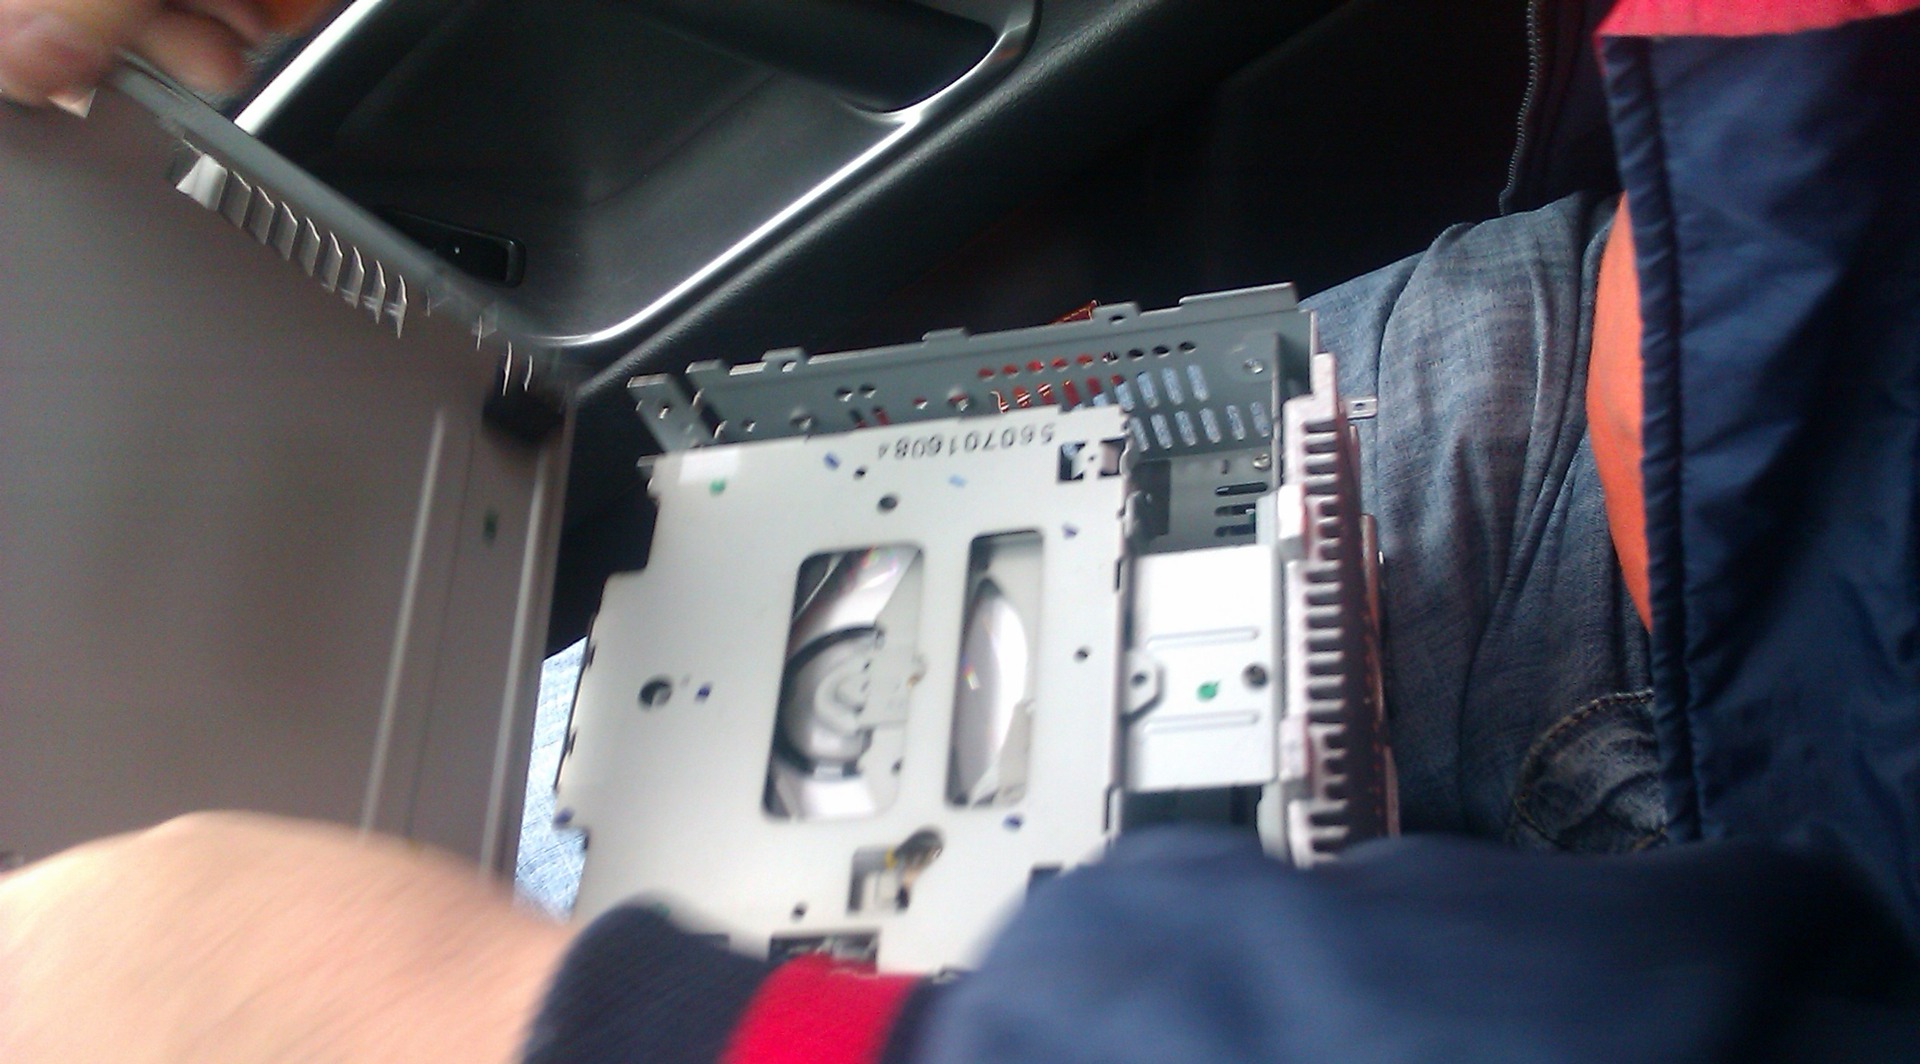
1) The disassembly process is quite easy, but you have to be very careful, otherwise you will scratch everything.
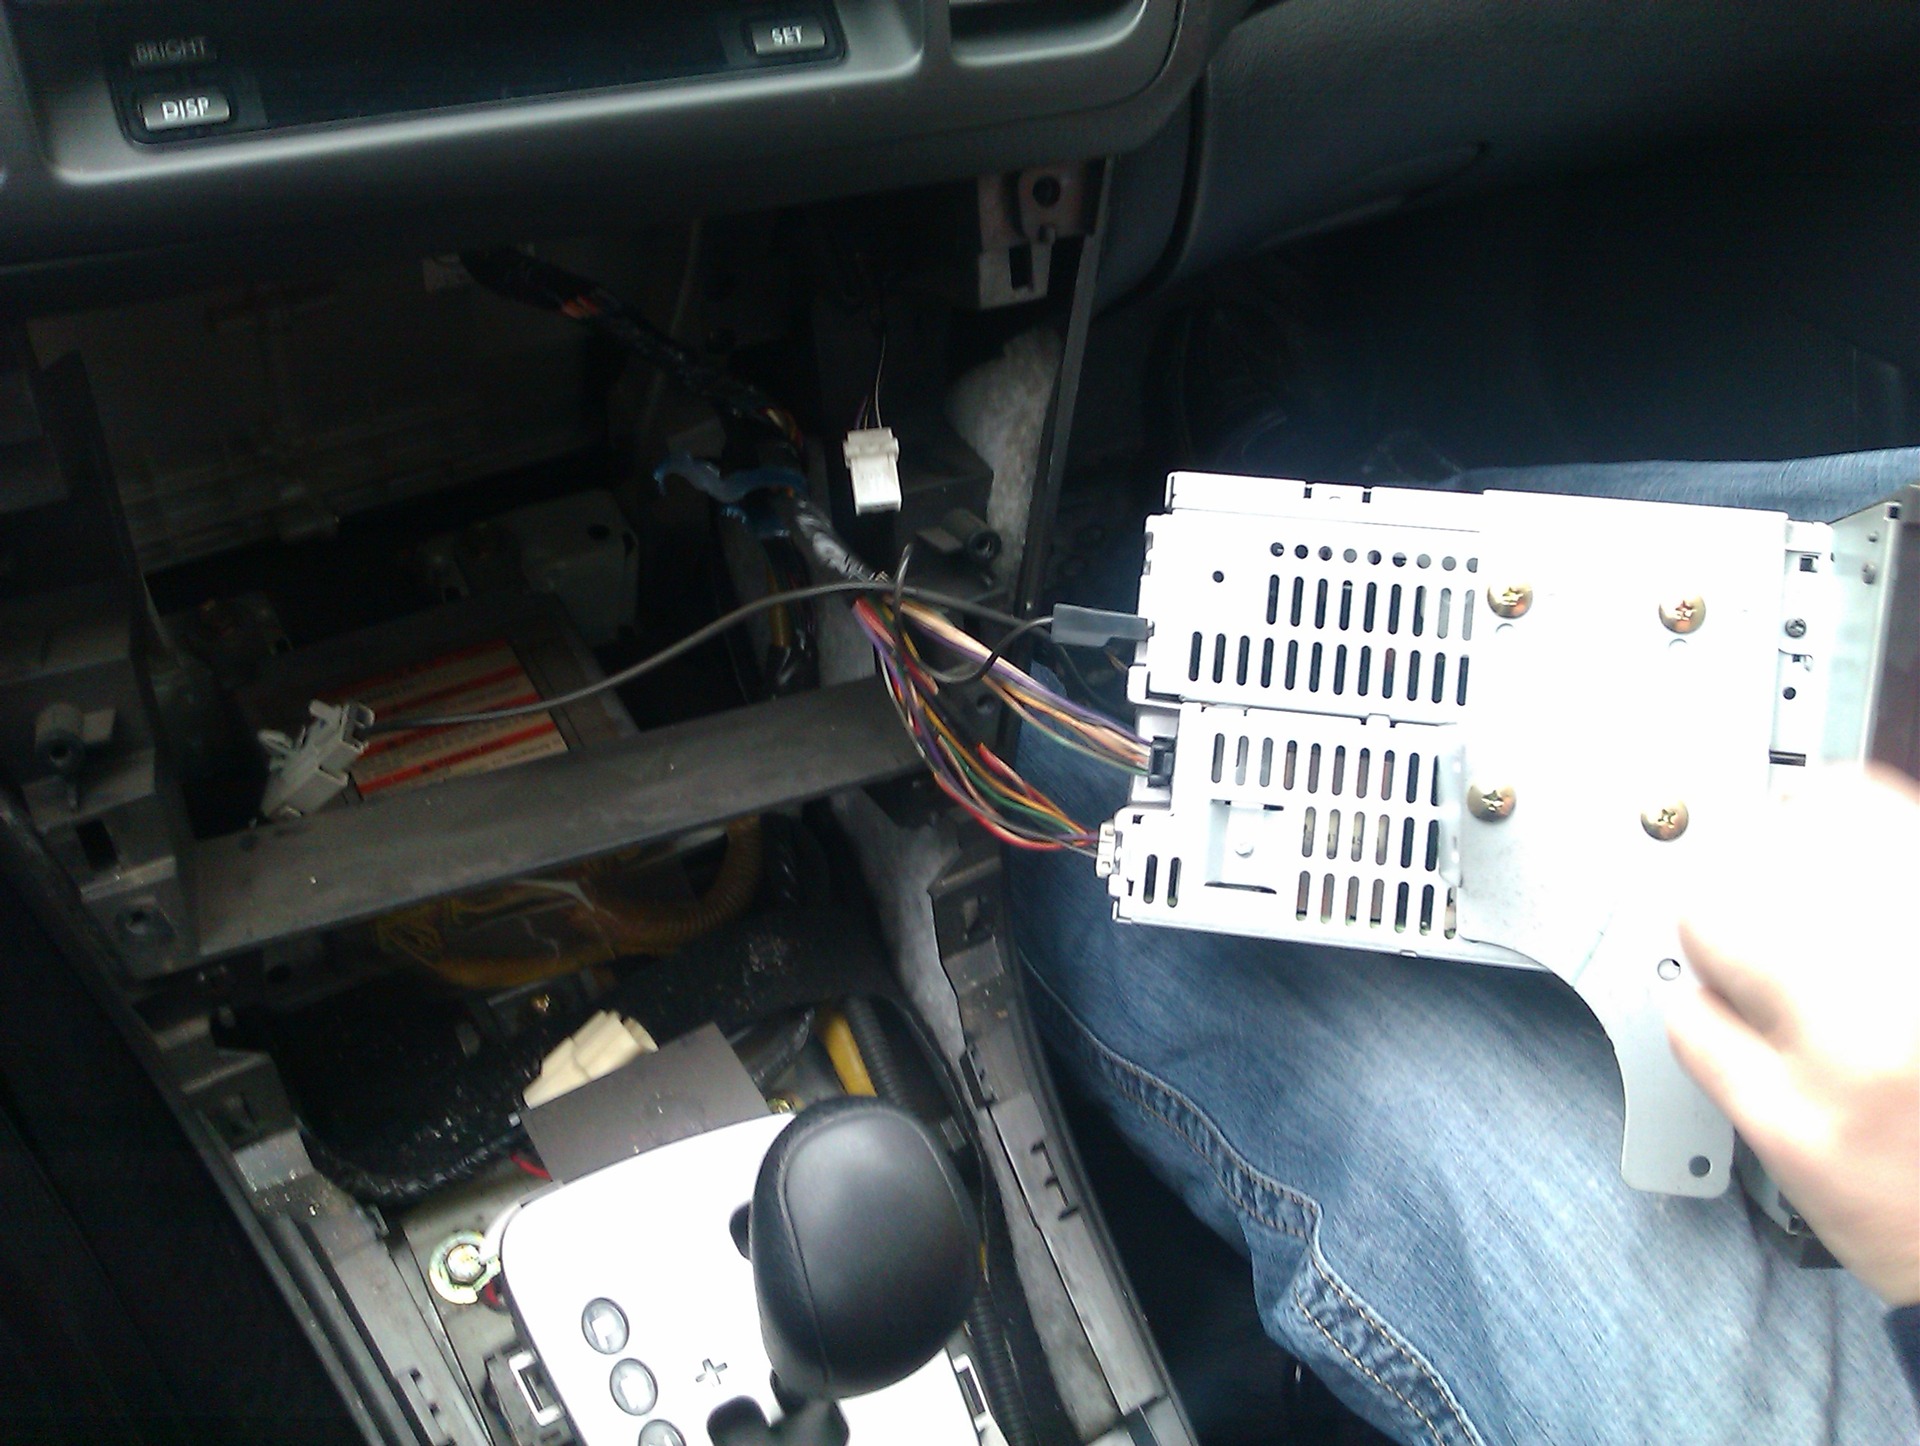
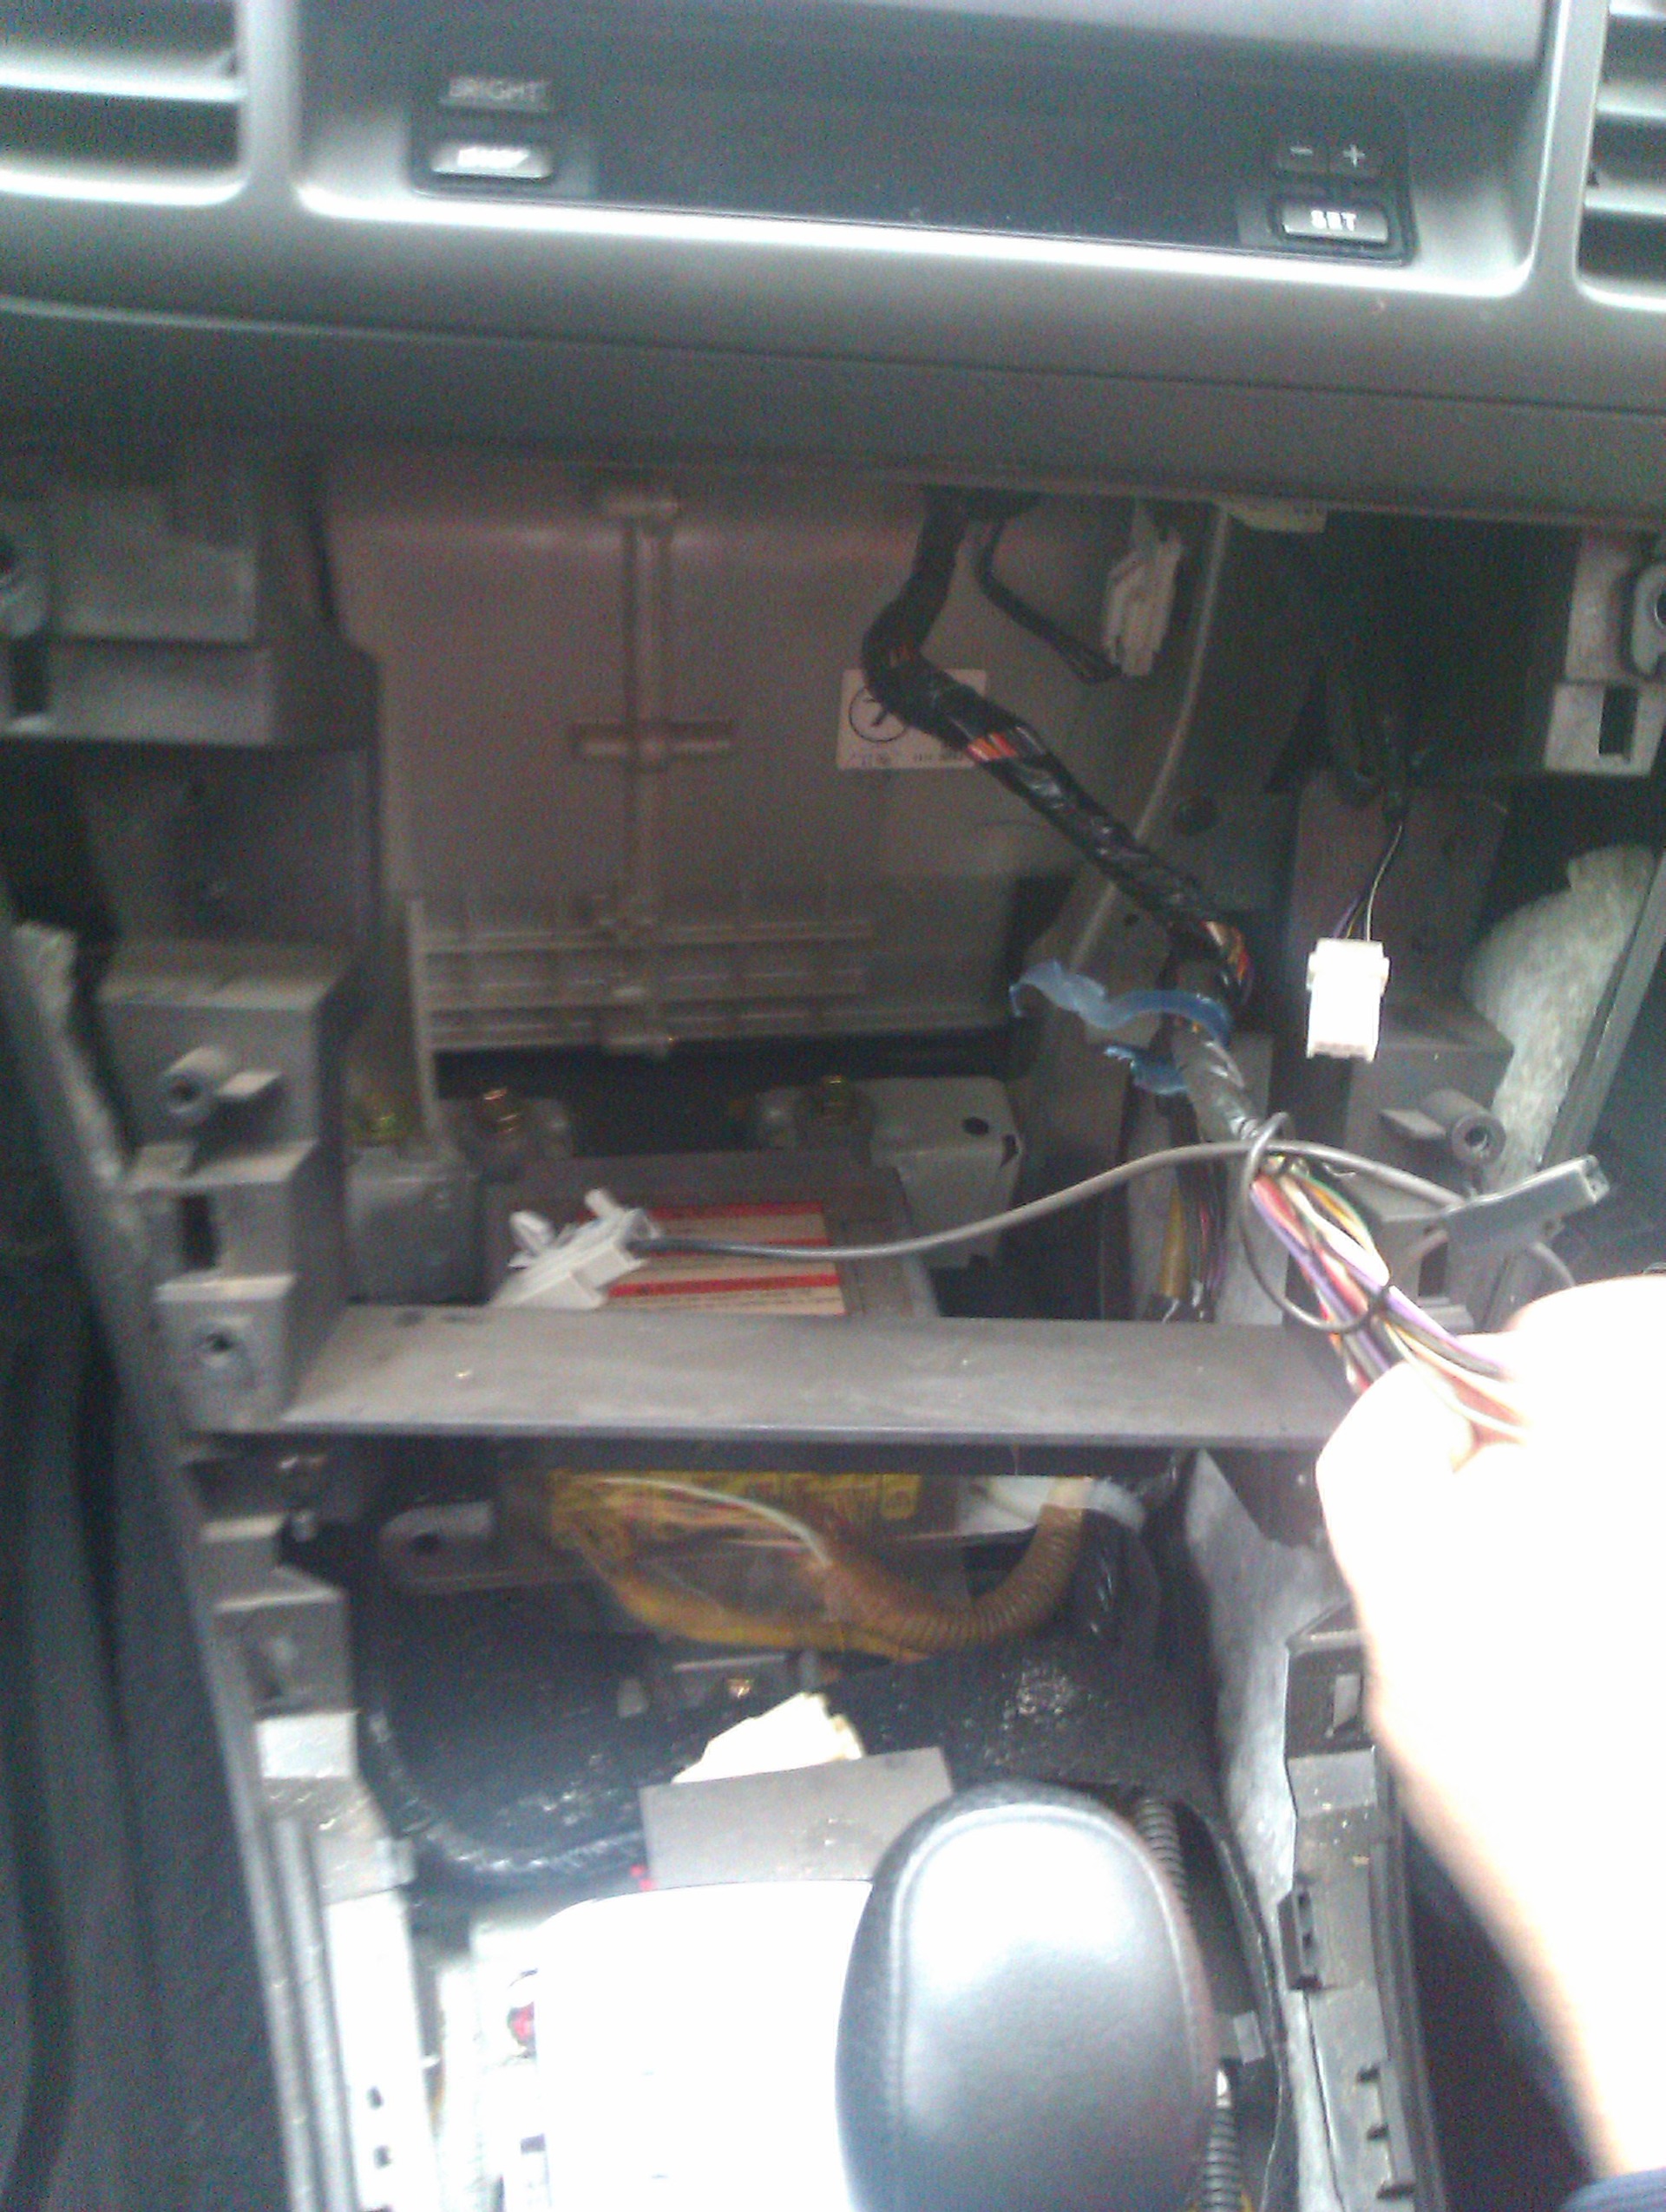
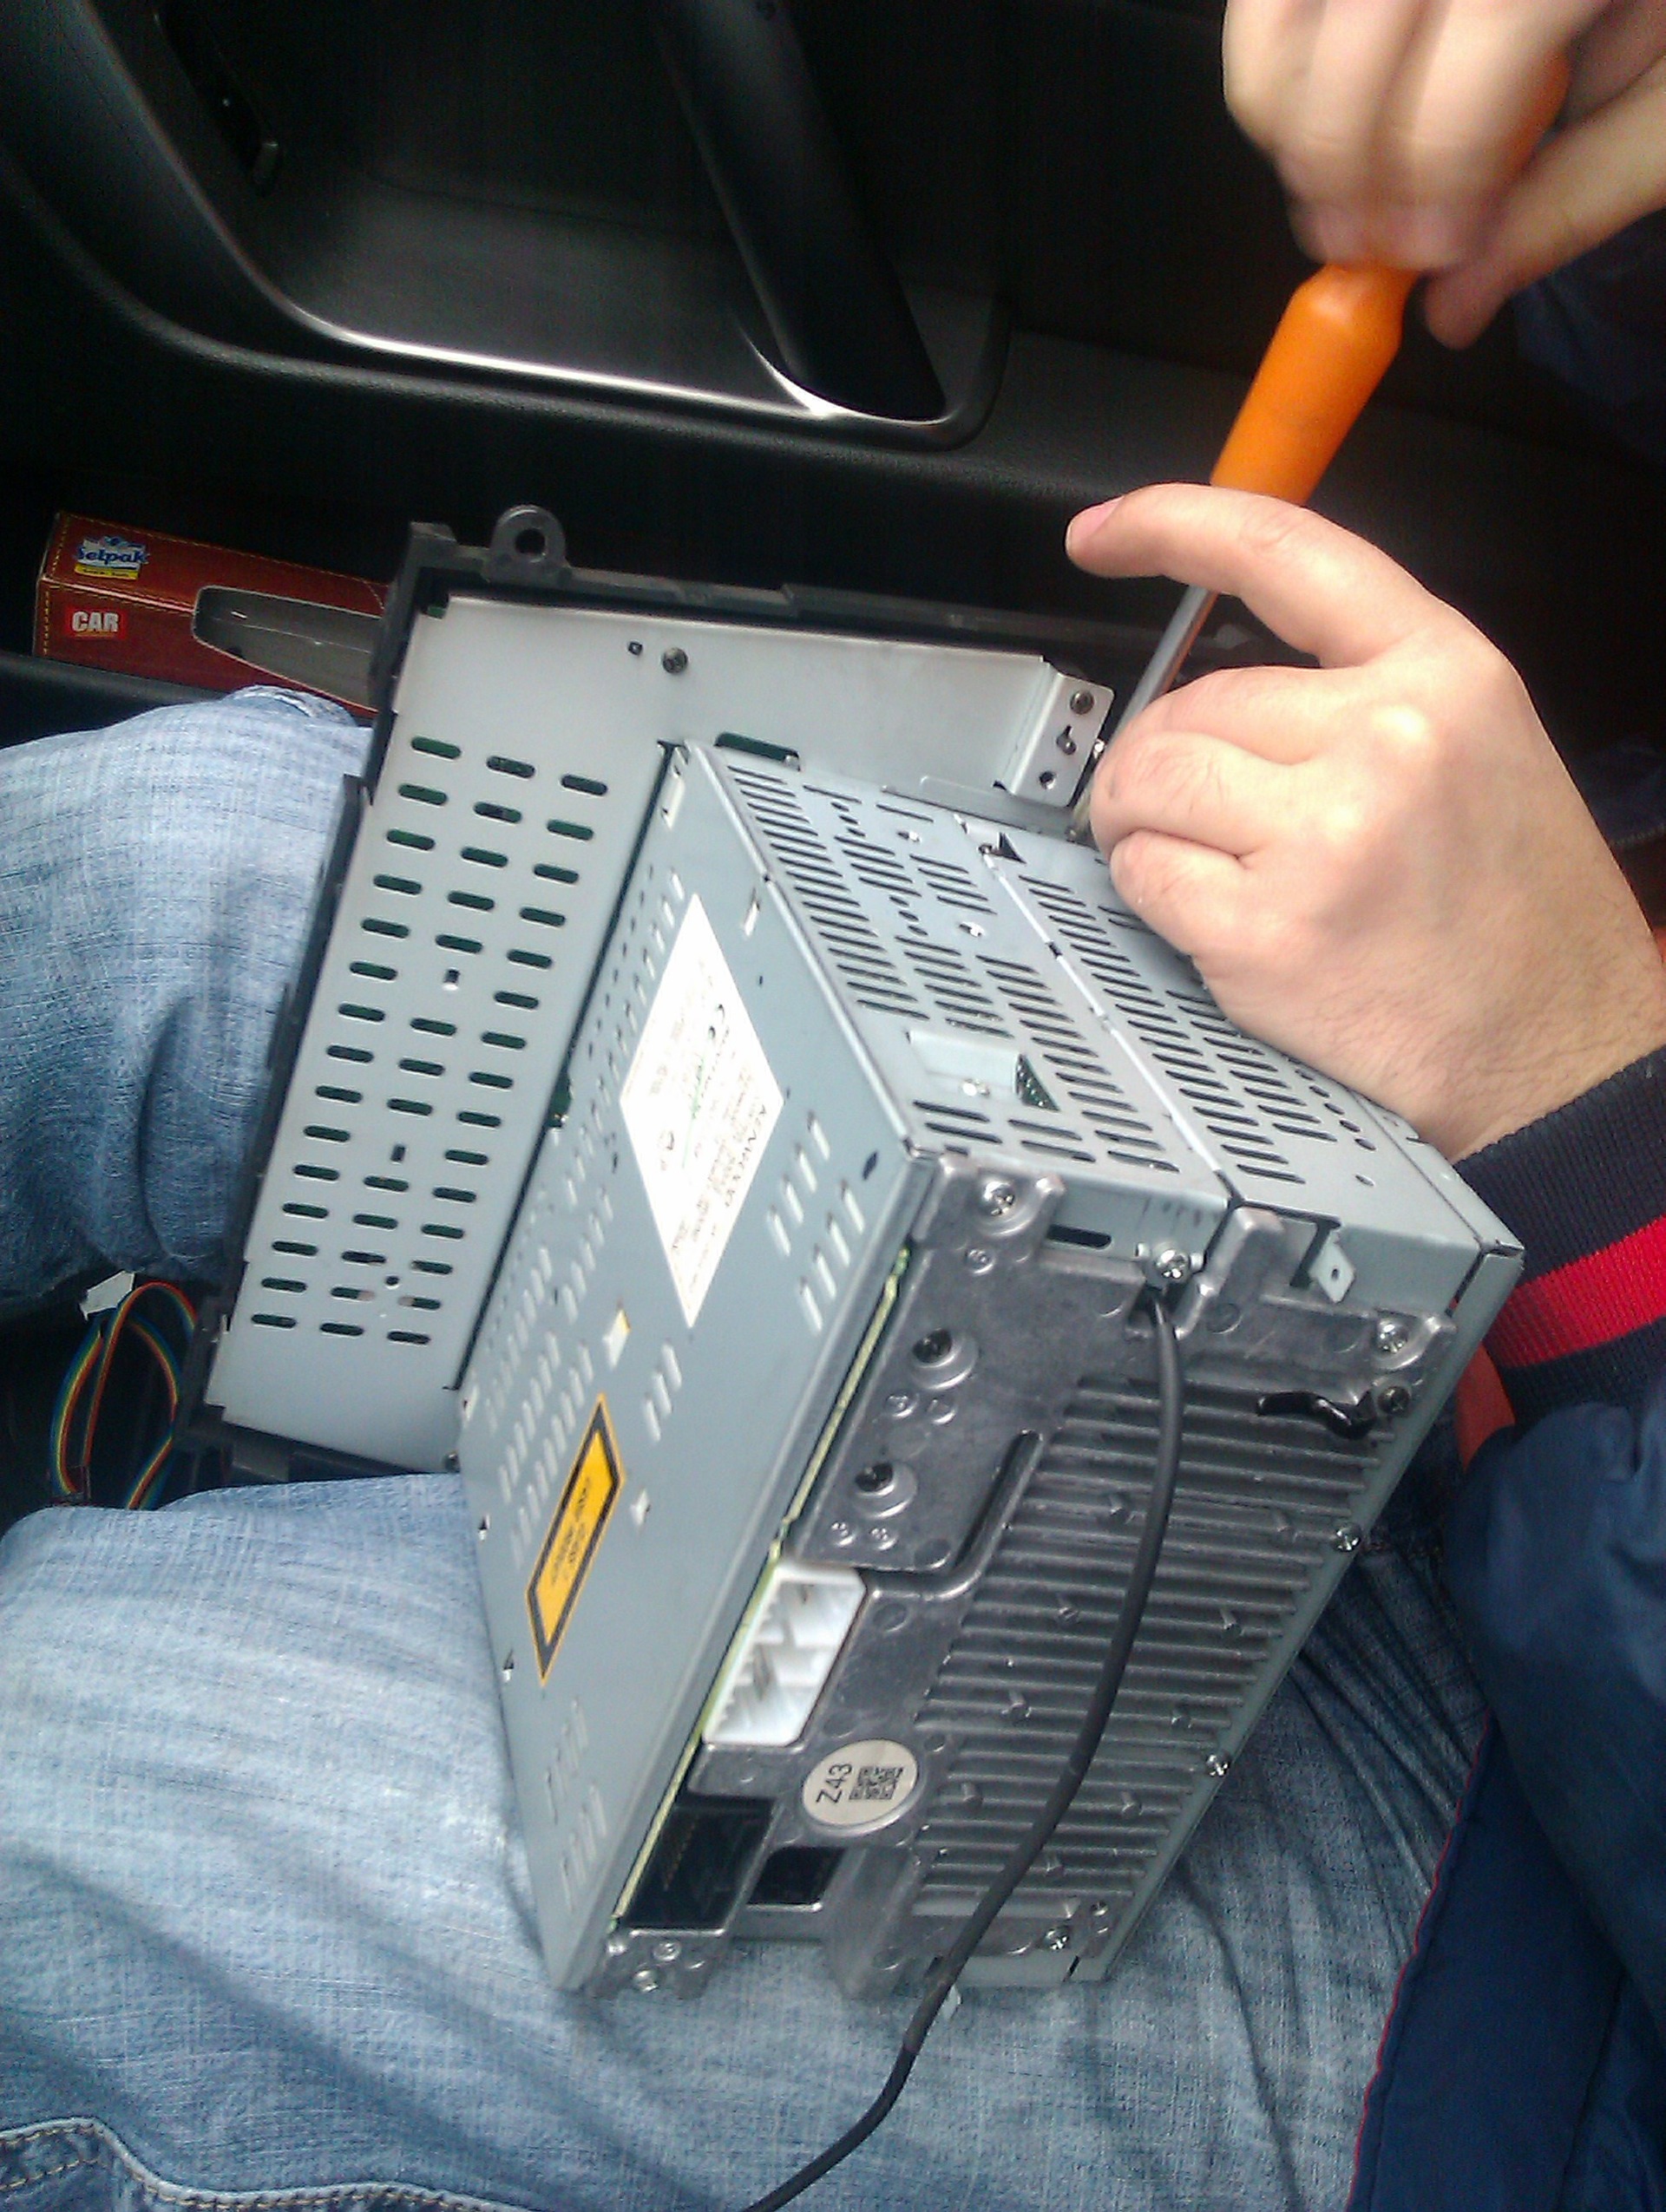
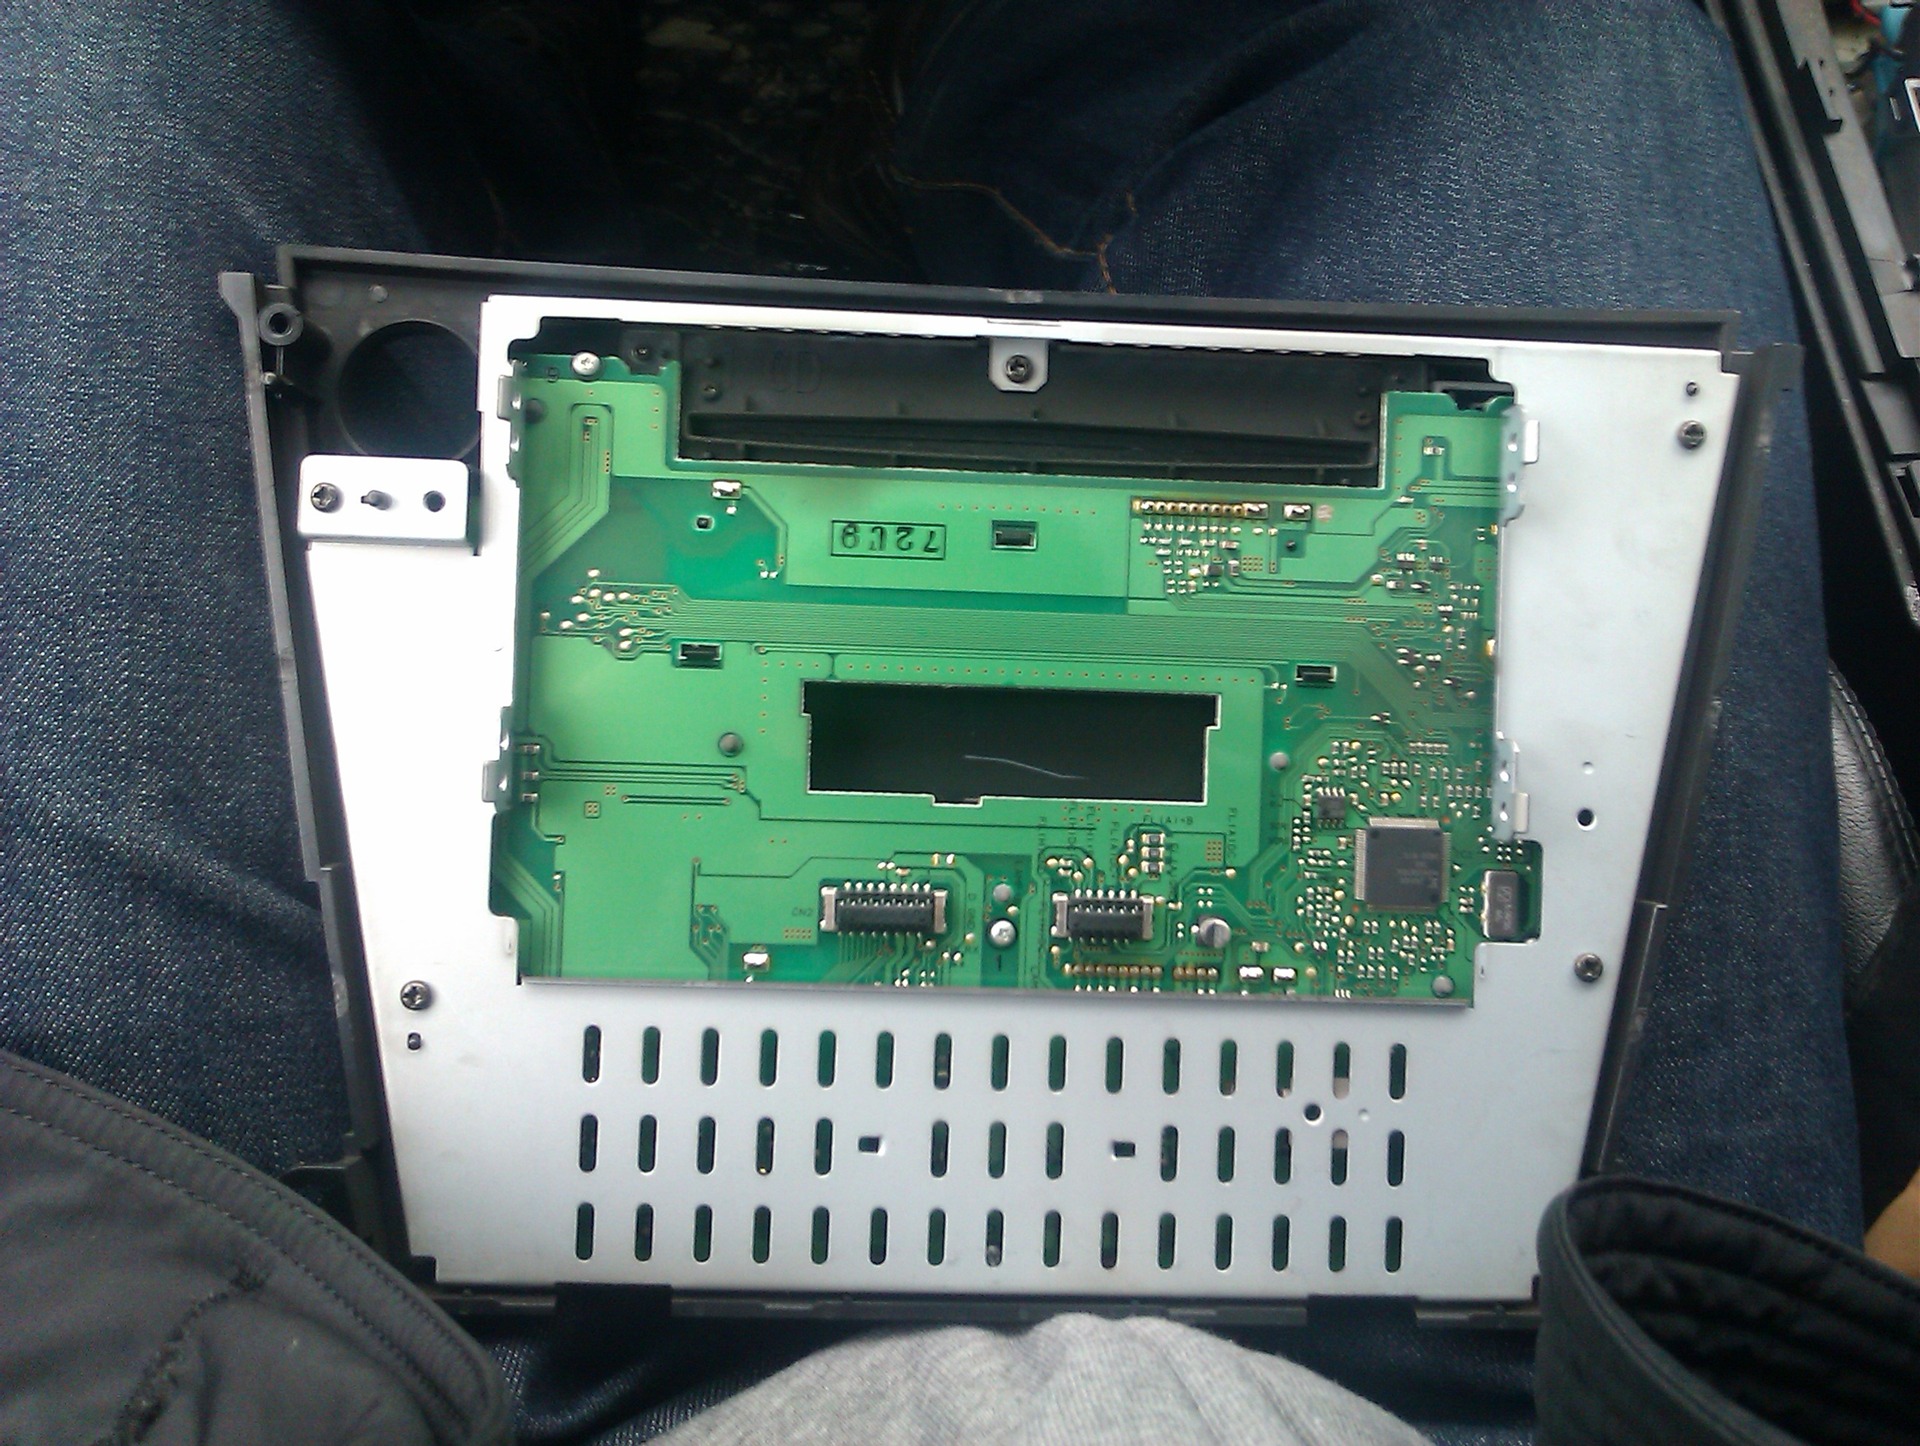
2) We disassemble the radio itself.
There are a lot of bolts and they are small, also be careful with them, otherwise you will be tired of looking for them later.
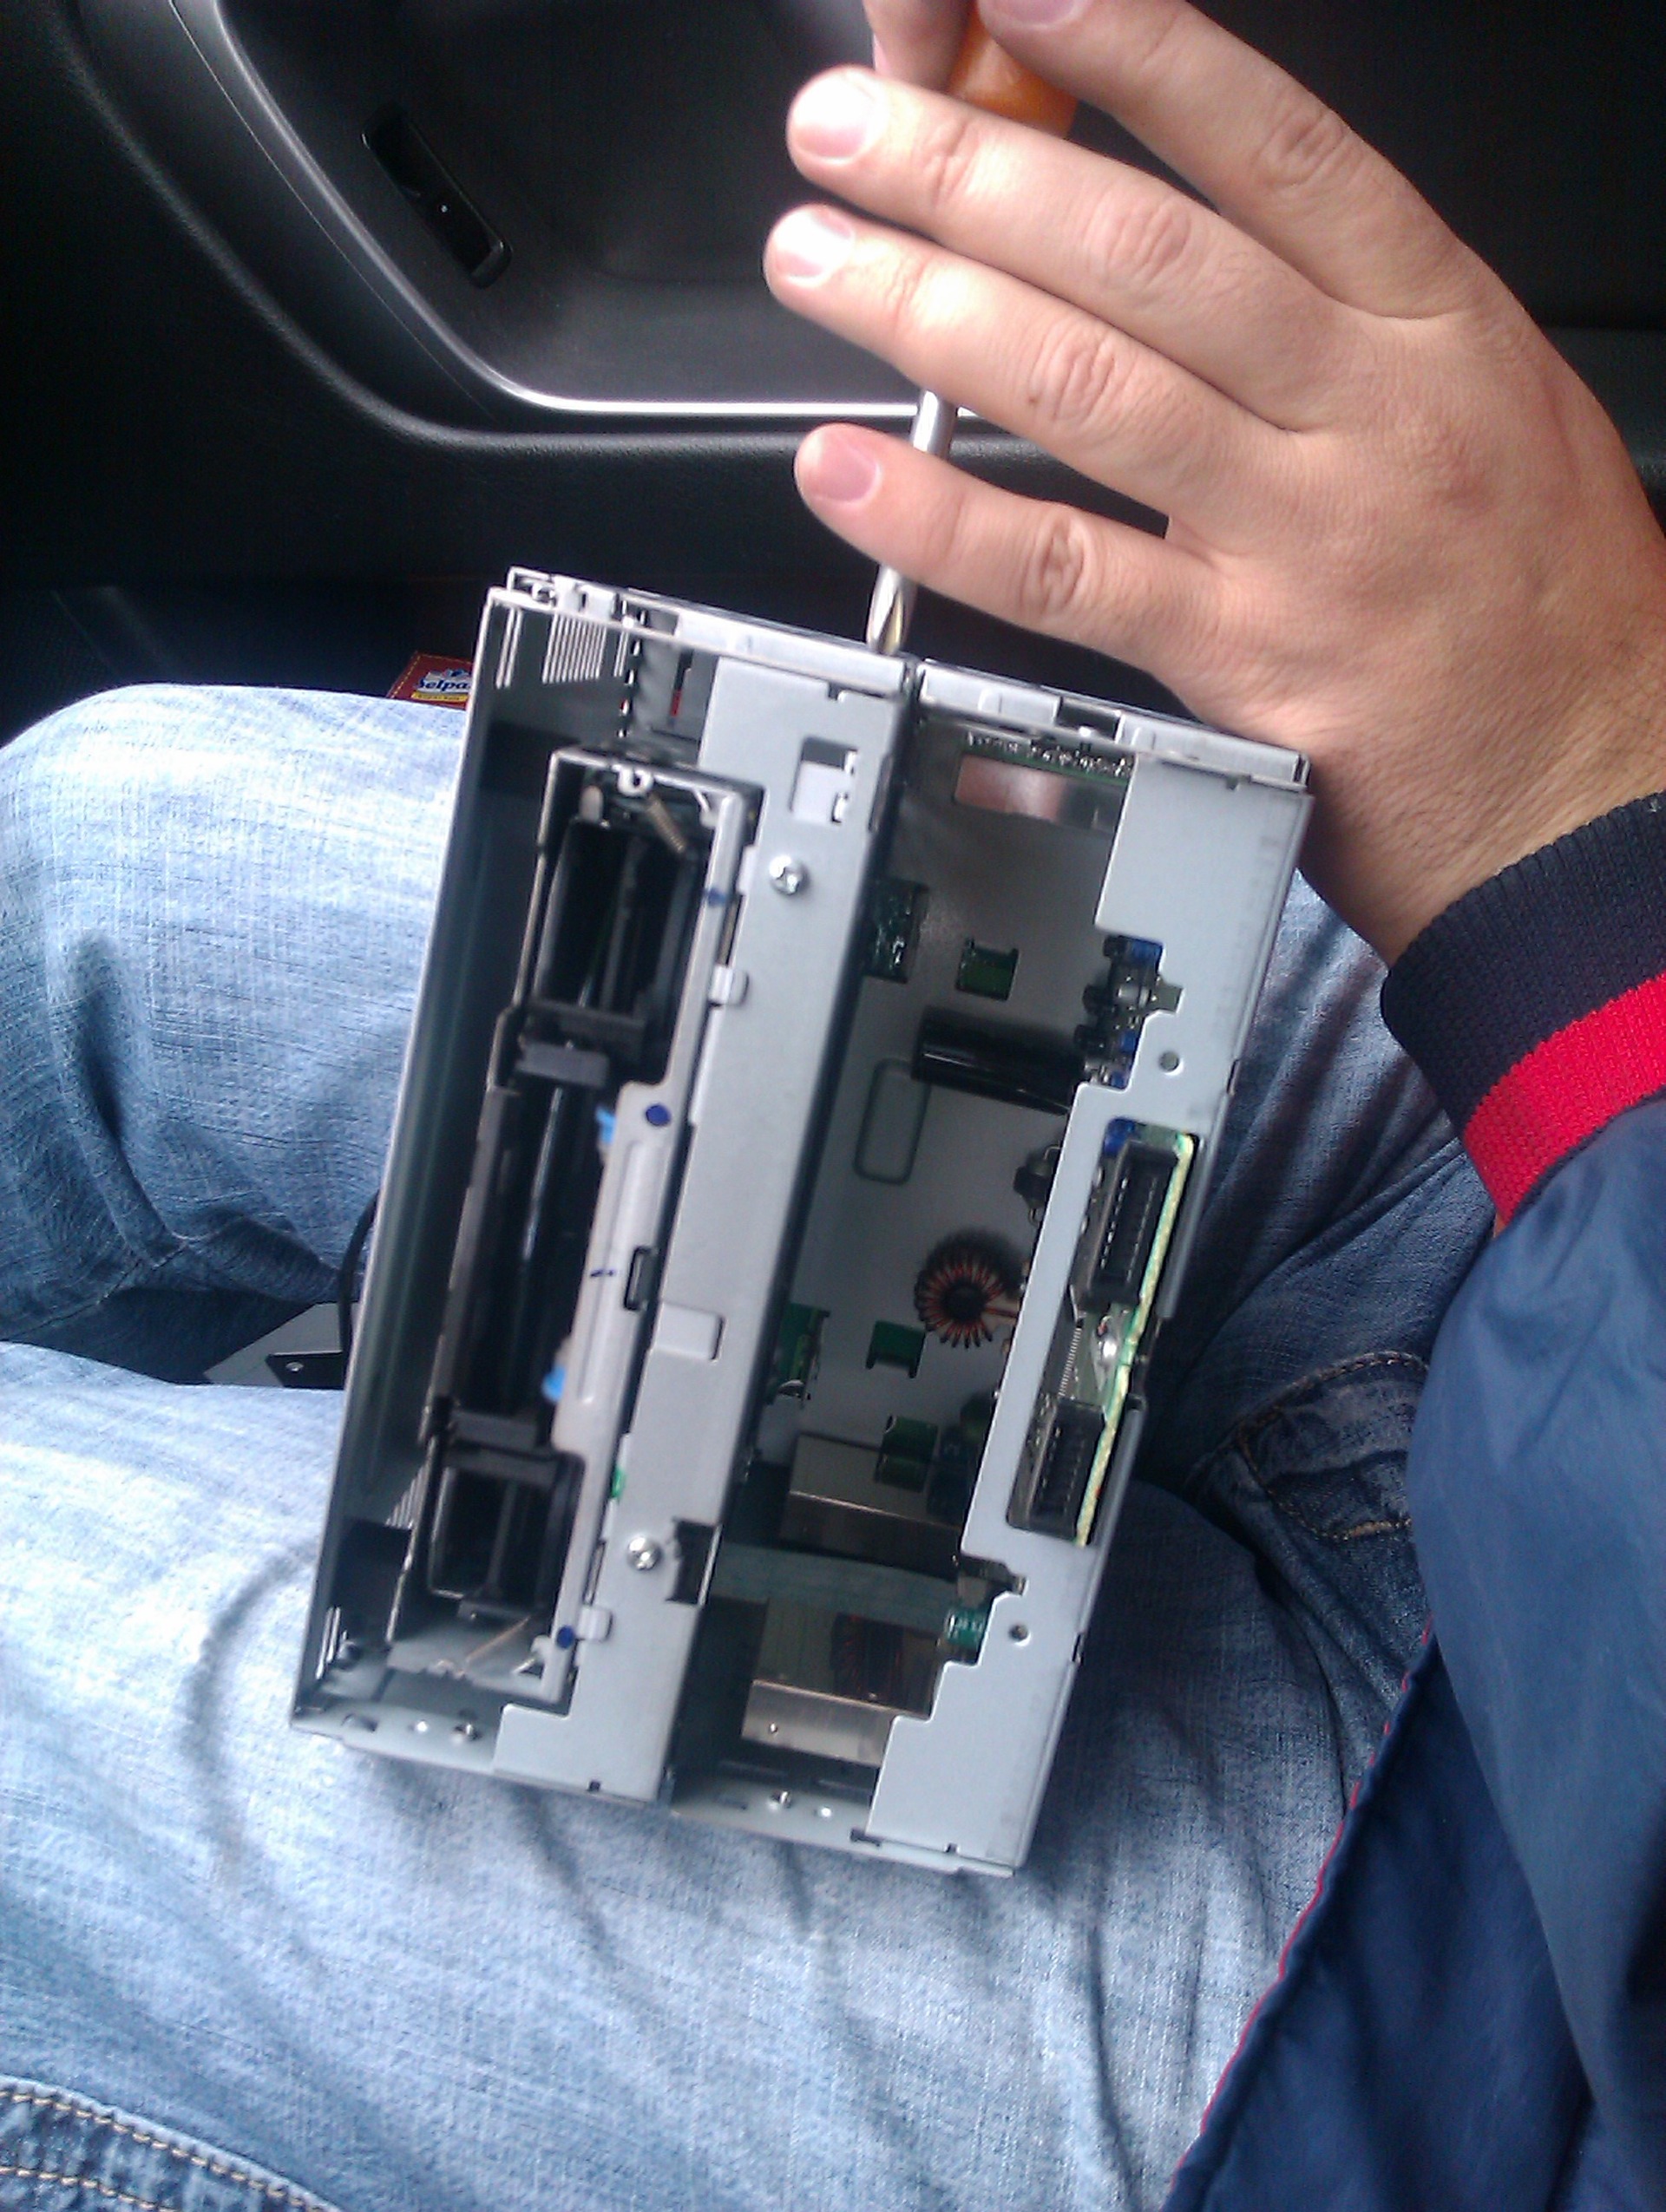
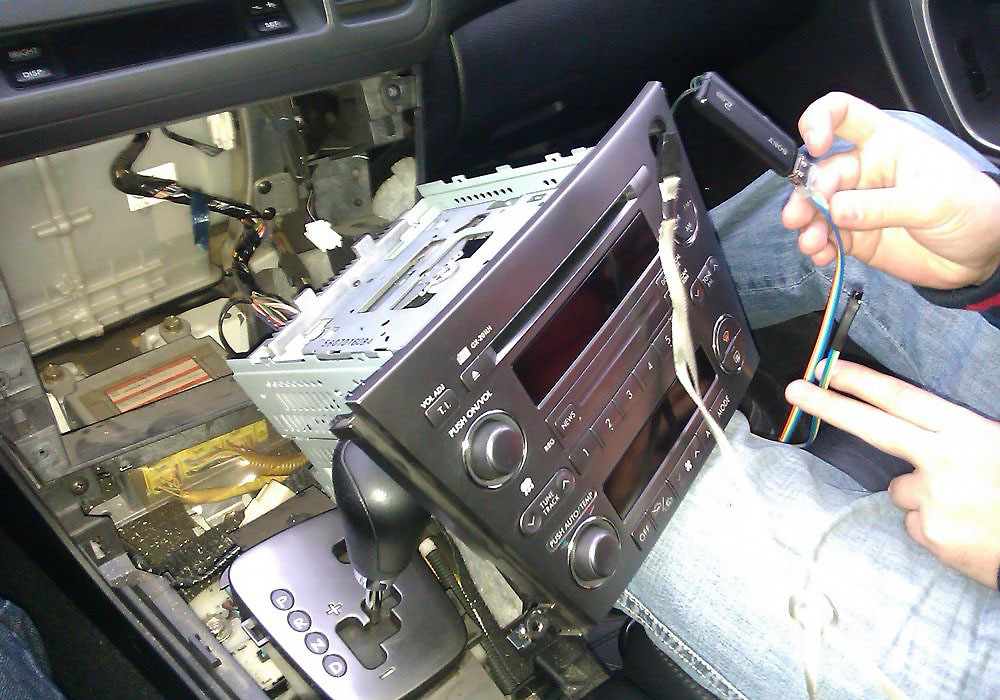
3) Front panel a la "muzzle")))

Even today there are some modern cars that are equipped with radios without USB connector not to mention old cars. This state of affairs does not suit many car owners, which prompts a search possible solutions. One of the available options to equip a USB head unit is to connect the input yourself, it's easy to do, but not all car radios accept this solution.
What is the USB input on the car radio
Many car owners are faced with a situation where the head unit in the car does not read music from a flash drive. And the whole problem is that the device simply does not have a USB input, i. it was not originally provided. At the same time, this situation is relevant not only for old cars, but also on modern foreign cars you can often find such distinguishing feature. Almost everyone will agree that you want to listen to music in the car without any restrictions, and you can’t burn much on a CD. Yes, and the disks in the car today are somehow inconvenient and out of date. How to be, is there a solution to the problem? After all, replacing the radio, the pleasure is not the cheapest and not everyone can afford it. Below we will try to understand the situation in detail and find the best solution.
The photo shows an example of a head unit Audi TT with USB input, but even today there are some cars whose radios do not have a USB connector
How to make and connect a USB input to the radio
Today, what only electronic devices and devices do not exist and, of course, the problem indicated above did not stand aside. It is not necessary to change the head unit, it is enough just to improve the device. There are different options that we will consider.
USB adapter from an mp3 player for a regular tape recorder
For this method, we need the simplest mp3 player that can read music files of the appropriate format from both a memory card and a flash drive. An important feature: the player must have an audio output (jack) for headphones. A signal will be taken from it and fed to the radio. It is worth noting that to complete the procedure, at least minimal skills in working with a soldering iron are needed to avoid solder shorts during the soldering process and damage to the insulation of wires, elements, etc. The implementation of the player is done as follows:
- We disassemble the radio and remove the CD drive or tape drive mechanism from it (if the radio is a cassette).
- We take power from the standard device to power the player, the board of which we first remove from the case.
- Depending on the player's supply voltage, you will have to implement a voltage converter circuit. For example, the car's on-board network has 12 V, and the player is powered by Li-ion battery 3.6V.
- We take the sound signal from the output of the player and feed it to the AUX input of the radio. The connection will require a shielded wire, i.e. the wires must be braided. On the radio board, you need to find the audio input contacts. We solder the wire from the player to them.
- We are mounting the player board inside the radio, since after removing the CD drive, the space will be freed. For convenience, the USB connector itself is located in a hole designed for cassettes or disks.
- Connect the wires carefully to avoid a possible short circuit.
- To control the player, the buttons are connected to unused buttons from the CD drive.
- It remains to assemble the radio, install it in place and you can enjoy the music, for which it is enough to activate the AUX mode.
Installing USB into the radio is possible by introducing an mp3 player into the device
Thus, we assembled the USB adapter ourselves. With this connection method, the volume level on the radio should be made lower, which will eliminate the loud signal when high level input signal.
DIY adapter
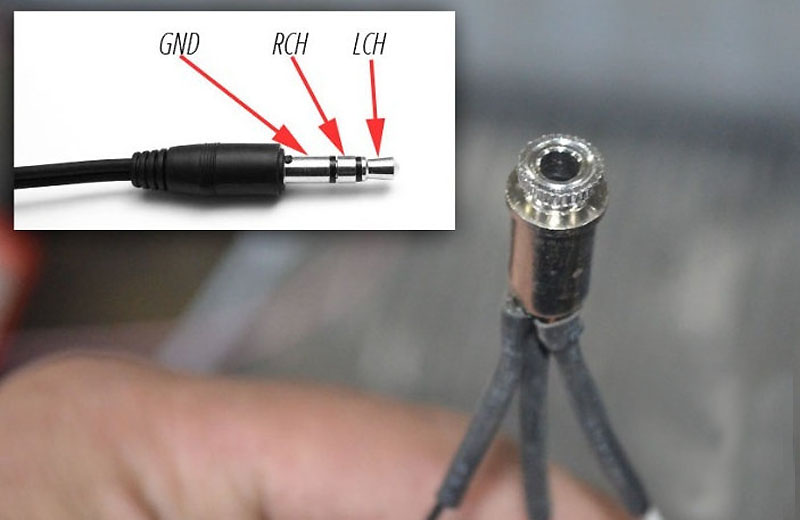
Consider another option for connecting a flash drive. In this case, you will need a plug from standard headphones, tulip-type connectors and a 4-wire copper-braided wire. An adapter will be made from these elements. For the procedure to be successful, the radio must have an AUX input. Before starting work, make sure that the wire from the headphones is not broken. To do this, nicknamed it a multimeter. The whole process is as follows:
- We remove the insulation from the wire from the headphones and see the conductors of red and Green colour, which correspond to the right and left channels (we cut off the headphones themselves). These conductors must be stripped and soldered to the middle contacts on the tulip connector.
- The braid of the main wire is connected to the steel base of the “tulip”.
- The finished adapter must have the following wiring: the signals of the right and left channels are fed to the middle contacts of the “tulips”, and the steel base is the common contact.
- We connect an adapter to the external audio signal connector of the radio, with which you can connect any device: tablet, smartphone, player, etc.
- It remains to activate the AUX mode and you can listen to music.
How to make an AUX connector
From the above, you can understand that the radio should have an AUX input. But what if there is no such connector, how to connect an external signal source in this case? There is a way out of this situation, and you can do everything yourself. For this we need:
- audio jack (standard 3-pin stereo jack);
- wire for connections (2 in screen);
- soldering iron and everything you need for it (solder and flux);
- multimeter.
To make AUX on the head unit, you will need to remove the device
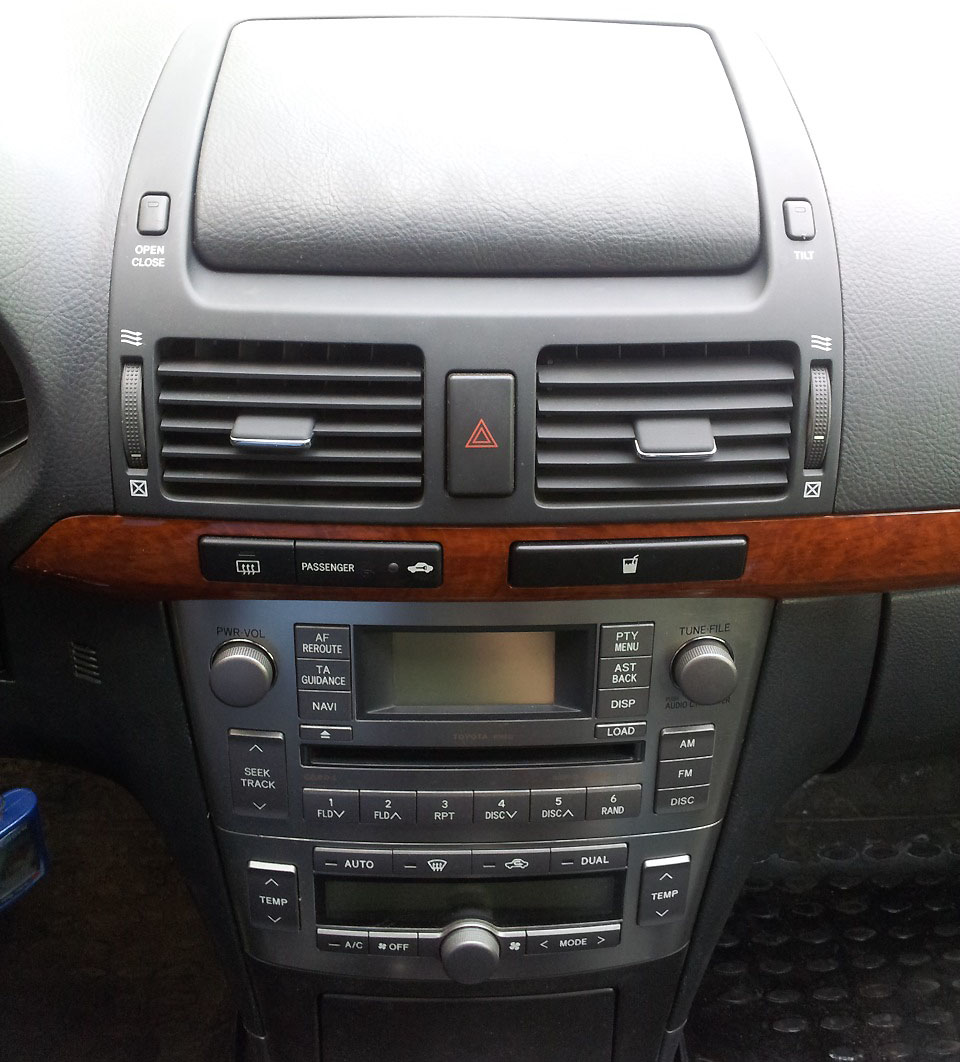
After everything is prepared, you can proceed to dismantle the device. Let's consider the whole process using the Toyota Avensis head unit as an example. To remove it you need:
- Pry off the decorative strip from the end on the right, pull along the entire length and remove it.
- Disconnect the connector from the button responsible for heating the rear window.
- The radio is fixed with two bolts. To unscrew them, you need to use a screwdriver with a magnet. Otherwise, the bolts will fall behind the panel.
- To provide free access, the handbrake must be raised.
- We move the selector to the central position and press the Shift Lock button, while the ignition must be turned off. In the corner we hook the selector panel by snapping off the caps.
- Disconnect the connector going to the ashtray and remove the panel.
- From below, more fixing bolts will be visible, which we carefully unscrew.
- We take out the radio so that access to the connectors on the rear panel is provided.
- Disconnect all connectors.
- Remove brackets (left and right).
- Using a flat screwdriver, we pry off the plastic locks of the front panel, after which we remove the panel itself.
- Under the panel there is a seal, which we also remove.
- We unscrew the bolts that connect the front panel to the side walls and the player. After that, the walls can be removed to the side.
- Remove the back cover of the radio and the top of the player.
- It is necessary to carefully lift the player, after which two cables will be visible and accessible. We take them out of the connectors and remove the player.
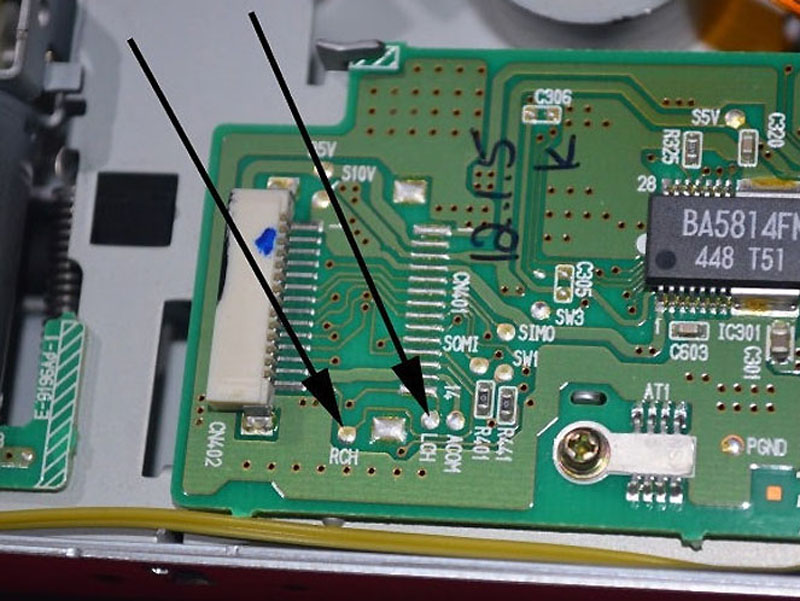
To signal from external source, on the radio board you need to find the connection points RCH and LCH
This completes the disassembly process. But before connecting the AUX connector, you need to understand the board and find two points (RCH and LCH). These points correspond to the two channels (outputs) of the player to the head unit. After the points are found, perform the following actions:
- We take 3 wires of different colors ( the best option- a shielded pair of cores) of small cross section and a length of about 0.5 m.
- We connect one of the wires by soldering to ground.
- Solder the other two wires to the right and left channels. For soldering use a low-power soldering iron 25-30 watts.
- After the wires are soldered, you should write down what color wire corresponds to which channel.
- The wires are wrapped in heat shrink tubing.
You can make an AUX input on a head unit with your own hands, and you will need a minimum list of parts and tools
If there is a question of introducing an AUX connector into a cassette recorder, then the process is not difficult. On the front panel of the device there is a volume control with 3 outputs arranged in a row. We solder wires 25 cm long to the extreme conclusions. It is desirable that the wire be shielded, which will avoid interference. From the device, the wires are brought out. Alternatively, you can make a small hole in the side wall for them. It remains to connect the audio connector and in order not to get confused with the channels, our mark will come in handy. When the wires are soldered to the connector, they select a convenient place to mount it.
Upon completion of installation, check the performance of the speakers in radio mode. To supply an external signal (from an mp3 player, smartphone or tablet), use the appropriate audio adapter that connects the audio output of one of the listed devices to the AUX input of the radio. At the same time, you need to turn on the CD on the radio to activate the channels.
Video: How to install AUX on the example of a Kenwood radio
Connecting a flash drive to AUX - is it possible?
Many people wonder - is it possible to connect a USB flash drive directly to the AUX input of the radio? The answer is simple - you can't. And all because the flash drive needs power, plus there is simply no sound signal output from this type of media. To play music from a flash drive, there must be a reader. Those who buy an adapter of this type: on the one hand, an audio connector, on the other, a USB socket, connected to each other by a piece of wire, will be disappointed. Such an adapter will not work for the same reasons as listed above. In this case, you need to purchase a special adapter (adapter), which is not just a piece of wire, but a device assembled in a separate case.
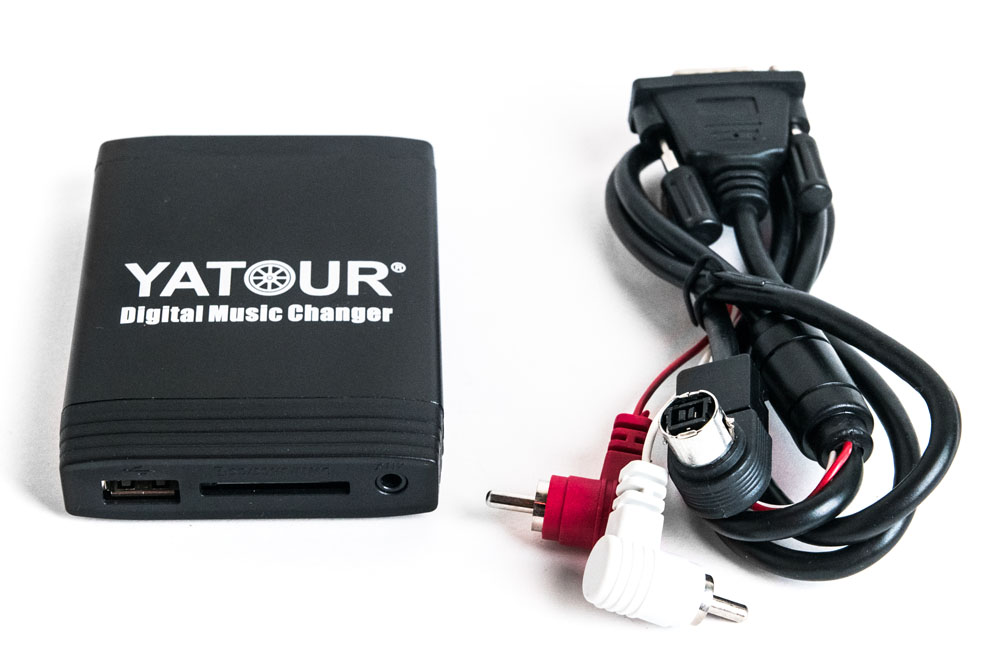
To integrate into the head unit USB and AUX, you can purchase a special adapter
Thus, we have considered possible ways obtaining a USB connector for connecting a USB flash drive to a CD or cassette player. In fact, there is nothing complicated in this procedure. The main thing is not to rush during the soldering process, to perform actions carefully and connect the wires to the appropriate points. At the same time, the costs, compared with the acquisition of a new radio, are minimal.
In order to be able to connect a USB flash drive to the head unit, it is not necessary to buy a new expensive device. It is enough to make simple improvements and you can listen to music both from a flash drive and from other signal sources. This will require minimal skills in working with a soldering iron and a phased procedure.