Ever since iOS 5 activation process iPhone has become extremely simple and understandable to any technology user Apple, but what if iPhone 5 your first device with a bitten apple on the end? Then you can’t do without our instructions for activating a new iPhone. If you have one of the previous iPhones running iOS 5 or higher, this instruction It will also help you take the first step towards using your new gadget.
After the iPhone 5 is unpacked, inserted, or made by hand, according to ours), turn on the iPhone by long pressing the button on the top end and proceed directly to the activation process. All screenshots, unfortunately, are in English, but the process is similar for the Russian language, so you won’t get lost.
1) First of all, we are asked to choose our country of residence and language. We choose Russia-Russian accordingly. 
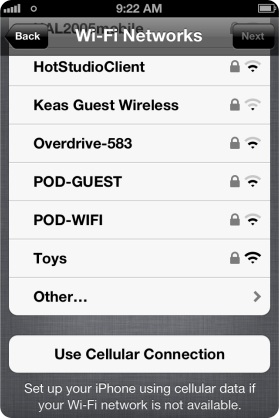
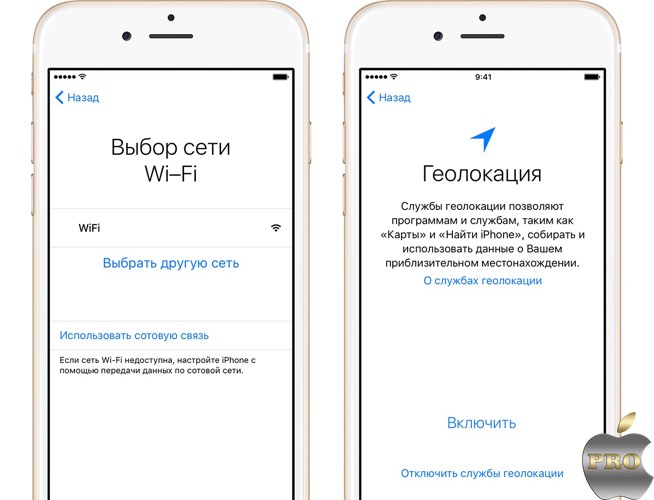
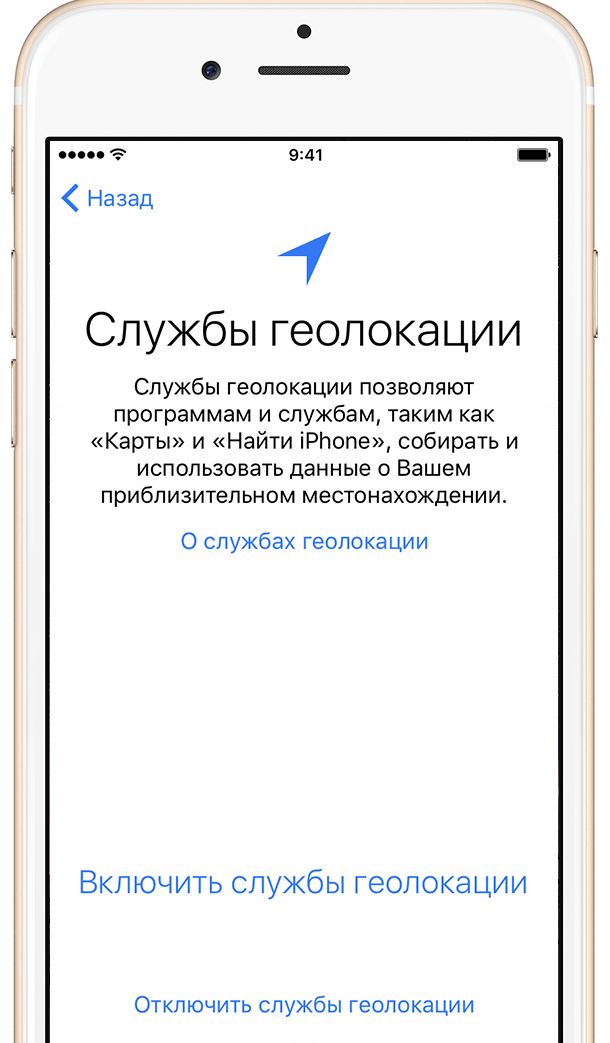
2) Next, we will be asked whether to enable geolocation services; they are necessary for the operation of many applications (geotags in photos, maps, navigator and even Siri), but if you moonlight as a spy, then you don’t have to activate them :) After iPhone 5 will ask us to connect to wireless network(Wi-fi), the Internet is required to complete the process of activation and configuration of a number of Apple services. Accordingly, we connect if there is an active network nearby, if not, we choose to use Mobile Internet from your mobile operator. 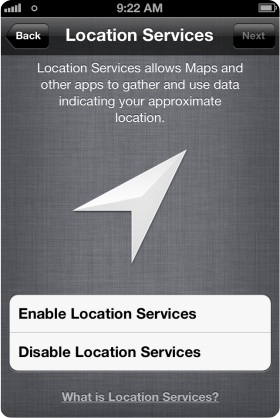
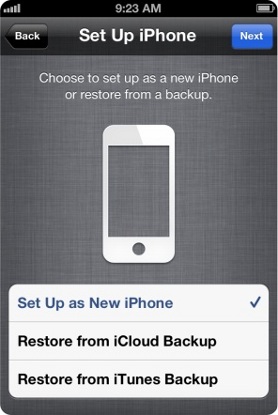
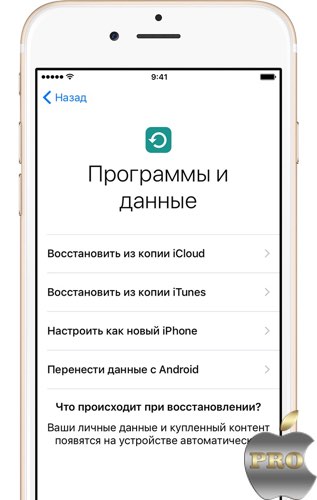
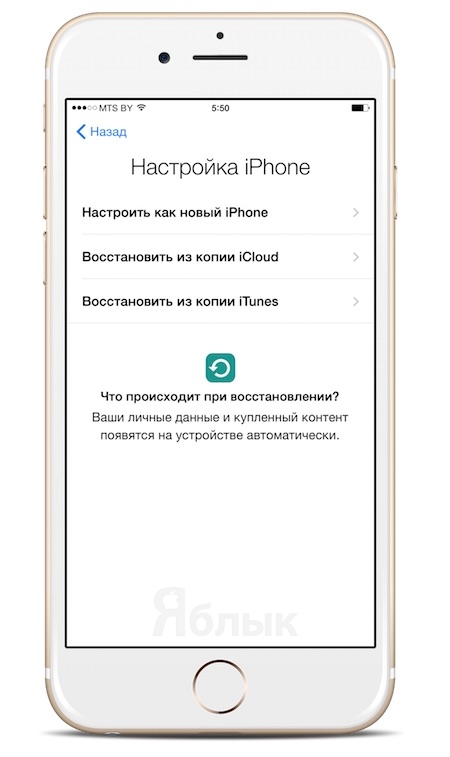
3) Then comes the activation stage in your operator’s network; you may have to wait a bit until all the settings arrive. The next stage is restoring from a backup, if this is not your first iPhone. Restore options from iTunes and iCloud are available. If iPhone 5 is your first phone from Apple, select “Set Up an New iPhone” 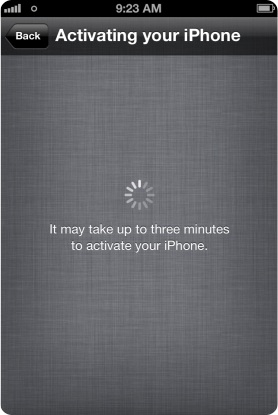
Note: All further steps are optional, in fact, you can already use the phone by simply skipping them, but we still strongly recommend finishing the setup in order to feel the full power of the new iPhone 5, paired with the equally fresh and wonderful iOS 6.
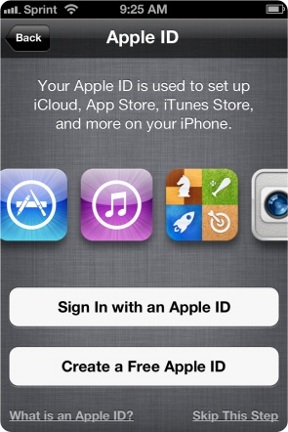
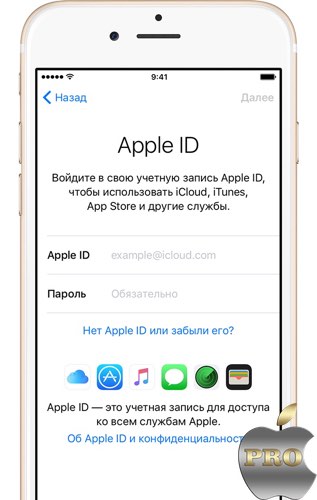
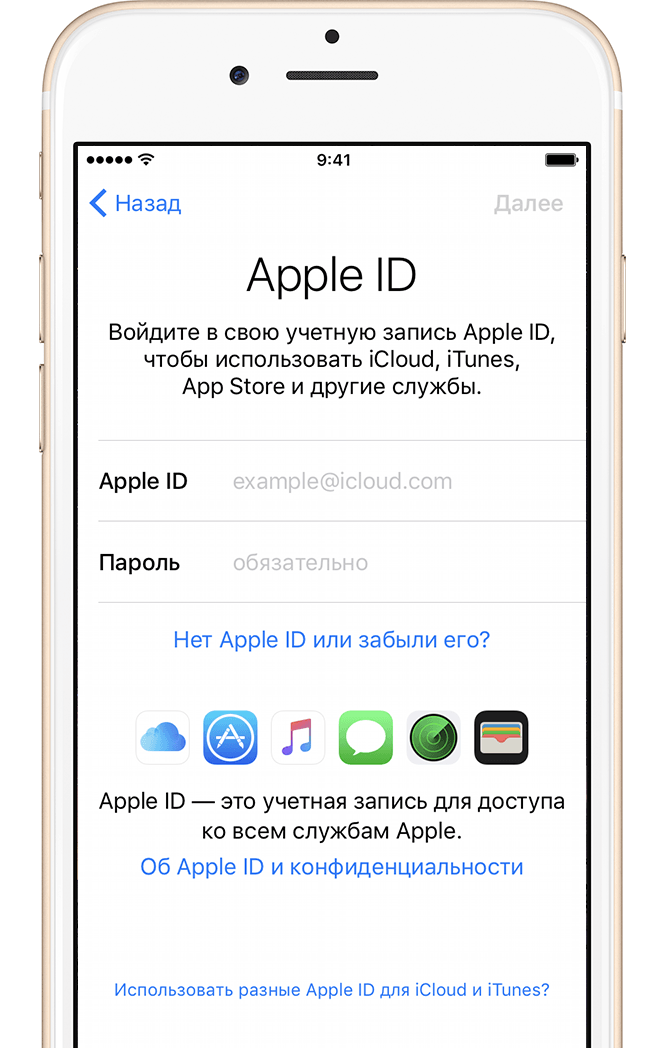
4) At this step, we need to connect to a wireless network (Wi-fi) and log in with your Apple ID (a personal identifier in the Apple ecosystem, without which you will not be able to use even the 10th part of all services), or register a new one (for free), in in case of his absence. 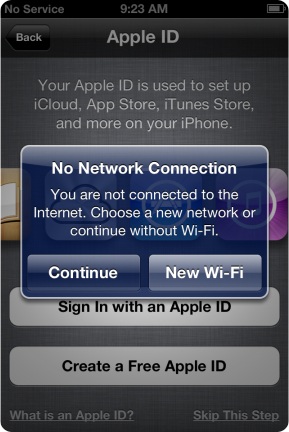
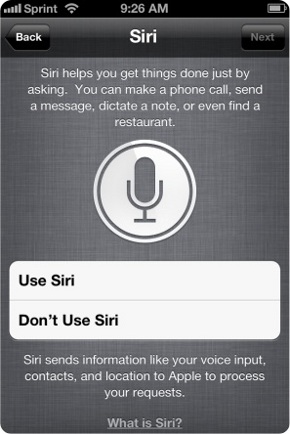
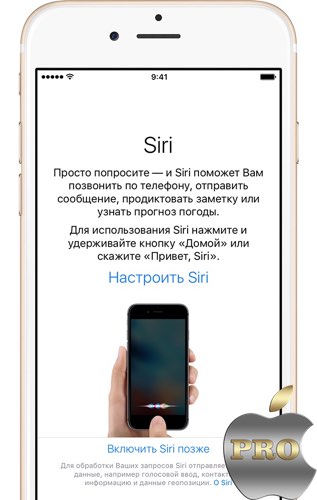
5) Next, we need to accept the agreement on “rights and responsibilities”, click “Agree”, or “Accept” in the Russian version of the interface, and activate voice assistant- Siri. Siri still doesn’t understand anything in Russian, so it’s up to you to turn it on or not. 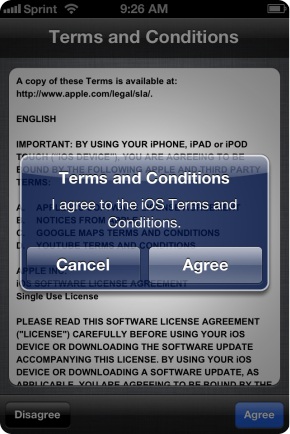
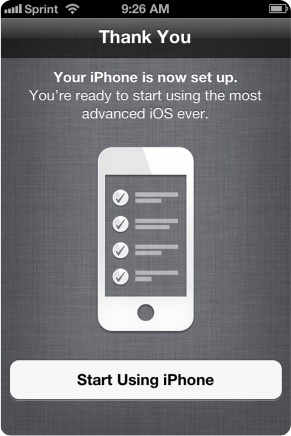
6) We have reached the final! At this stage, we will be asked whether to send diagnostic data to Apple and will be shown the treasured “Start using iPhone” button. That's it, your iPhone 5 is ready for battle :) 
04 April 2016 The new iPhone has many new features and capabilities. Here are ten of our favorite tricks for the new iPhone SE!
Use "Hey Siri" without unlocking.
Siri has always been a useful companion on the iPhone, but it's got a few new tricks lately. One of the best additions is the mode speakerphone, allowing you to ask her questions without even unlocking your iPhone. Enable this new feature in Settings > General > Siri > Allow "Hey Siri". You need to set up Siri by repeating this phrase several times and then it will work.
Live Photos Live Photos are kind of like magical photos from Harry Potter. Whenever you take a photo with this mode enabled, you will get a few seconds of video before and after the photo was taken. It's pretty amazing, but it can also use up a lot of extra storage space (and the iPhone SE only starts at 16GB). You can disable this feature by tapping the icon (three circles) in the top center of the camera app; yellow means it is on and white means it is off.

Night Shift is a brilliant new addition to iOS 9. Once enabled, it will shift the display's color temperature throughout the day, making things look warmer in the evening (more yellow, less blue). Scientific research has proven that this will make it easier for you to go to bed in the evening while avoiding exposure to bright blue light. You can enable this in Settings > Display & Brightness > Night Shift

Unfortunately, this function does not work in Russia yet, but if you often travel abroad, be aware that Apple Pay works in iPhone SE, thanks to the NFC chip and fingerprint reader. You can use the service to pay for all types of goods and services, both in the real world (for example, shops and the subway) and on your iPhone (when ordering from ASOS, for example). It's an easy-to-use payment method that's worth trying.

One of the lesser-known additions to iOS 9 was Medical ID. The idea is that even if you are unable to speak, the rescuer will be able to see information such as date of birth, blood type, allergies and emergency contact number. It's worth setting this up once if you end up needing it.
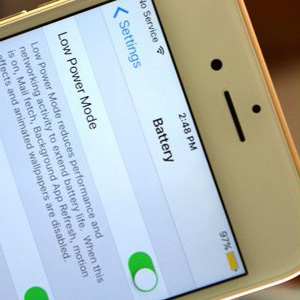
Low Power Mode is a new addition to iOS, offering a way to extend the life of your battery. Your iPhone SE will prompt you to enable the mode at 20% and 10% battery, but you can enable it earlier if you want in Settings > Battery. The mode disables synchronization and some visual effects, and turns the battery icon yellow to let you know that power saving mode is on.

The iPhone SE comes with some nifty animated backgrounds created from thousands of photos from high resolution. You can find them in Settings>Wallpaper>Choose new wallpaper>Dynamic.

The new battery consumption section in the settings menu is really useful as it shows big list how much battery each application consumes. If you are looking for the reason why your iPhone is not working as long as before, you just might find it here. Once you've identified power-hungry apps, you can remove them or limit their operation.
Hello dear friends! I thought for a long time about what would be so useful to write on New Year’s Eve and the decision came by itself. Surely due to the upcoming holidays the number iPhone owners increased significantly. This means that the number of questions about using the gadget has increased, correct setting and optimizing it battery life.
Initial iPhone setup
First of all, I want to warn you that you should not fall for the offers of an abstruse seller to set up an iPhone and create an Apple ID for a symbolic amount. Firstly, you can do it yourself without any problems with the help of this small guide, and secondly, I have repeatedly had to fix the mistakes of such customizers (either the Apple ID will be made ugly, or they will not tell the owner the answers to the security questions). So send them to hell, we’ll set everything up and create it ourselves. And just one more important recommendation - be sure to keep the receipt, despite the fact that international Apple warranty(1 year) obliges official service centers to carry out repairs and maintenance without a receipt; it will come in handy if you sell your phone. This way you can easily prove that the iPhone was bought in a store and you are not a huckster.
Attention! Depending on the phone model and software version, the above setup items may vary slightly.
1. So, we press the treasured power button and we see such a screen.

2. Select a country, region.

3. Connect to WiFi, or use cellular communication. Next, you are prompted to enable or disable location services. As a rule, I enable and then, at the detailed configuration stage, disable geolocation for applications where it is not needed. The fact is that it does a good job of reducing the battery life of the phone, so it’s better to turn off everything unnecessary. I'll tell you more about this later.
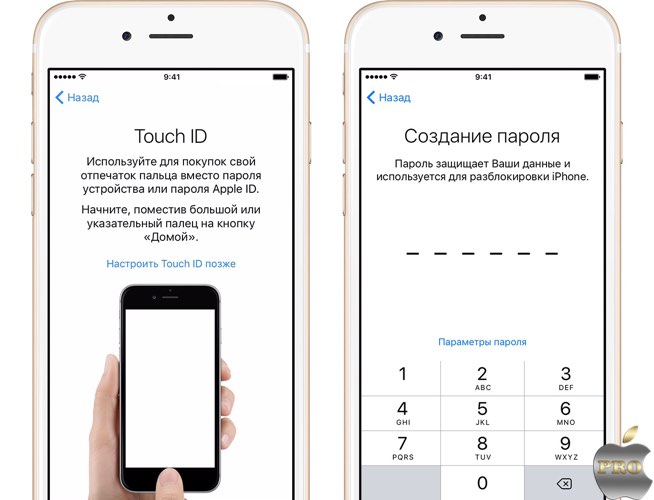
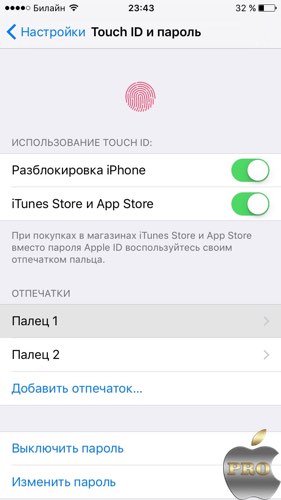
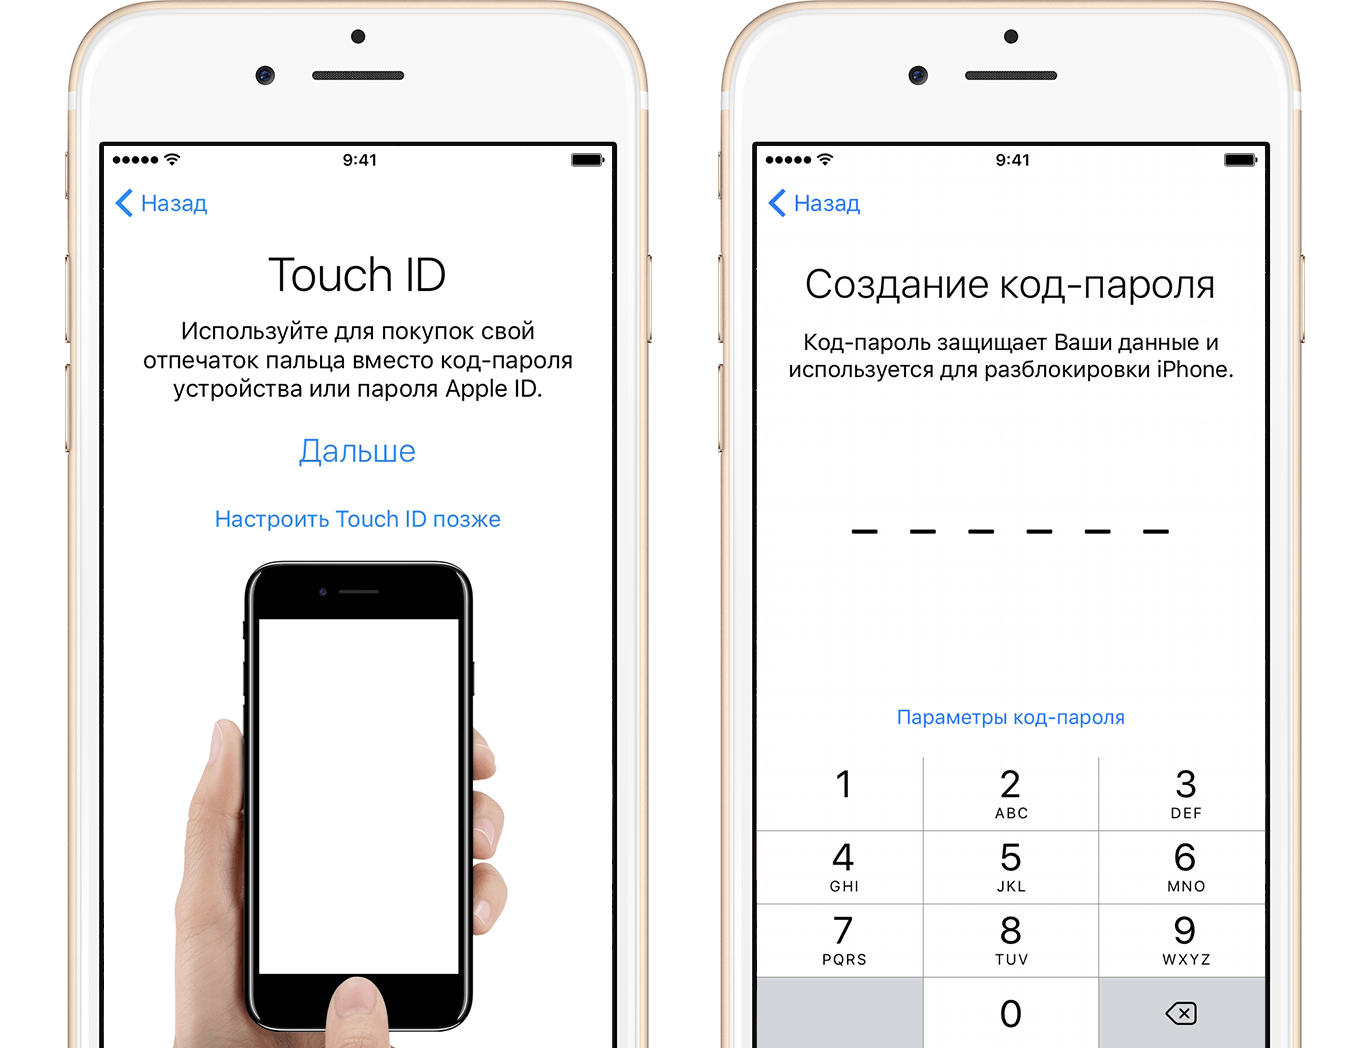
4. If you purchased an iPhone 5s or higher, you can configure Touch function ID allows you to access the phone, as well as the AppStore and some applications using a fingerprint.
Next, you need to come up with a six-digit numeric password, which is necessary if it is impossible to unlock the iPhone using a fingerprint. By the way, if six digits are too many for you, you can set a 4-digit password by clicking “password options.”
5. If the iPhone you purchased is not your first and you have prudently made a backup copy of data from your old device, you can select the appropriate item. Or set it up as new.
6. Now we are asked to enter an Apple ID or create one. If you do not have this ID, then I advise you to click “No Apple ID” and then skip the creation step. A little further I will tell you how you can create an Apple ID without a credit card.
7. Siri. Not very long ago, Apple’s voice assistant acquired the Russian language and learned to more accurately recognize the owner’s requests. It helps me a lot, especially when driving.
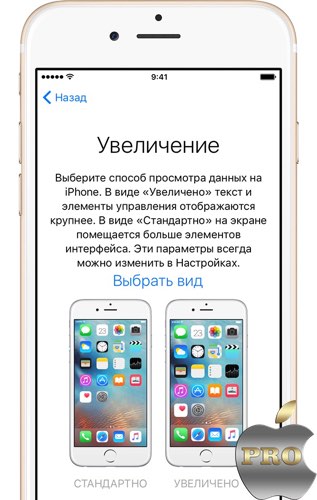
9. This step is for owners of 6 and later iPhone models. The system offers you to choose one of two options for displaying information on the screen: “standard” and “enlarged”. If there are no vision problems, then “standard” is the best.
10. Click “get started”, drum roll... and now we finally see home screen phone. Congratulations :)
What I mean is that the advice below is purely advisory in nature and is not dogma. It all depends on which of the two user groups you belong to.
2. Import contacts to iPhone. About everyone simple ways transferring contacts to iPhone, read this short tutorial.
3. Now let’s return to the issue of setting up geolocation services (settings>privacy>geolocation services). I recommend turning on geolocation (select “when using the program”) for the following items:
- Cards
- Camera. Your photos will be automatically assigned a geolocation.
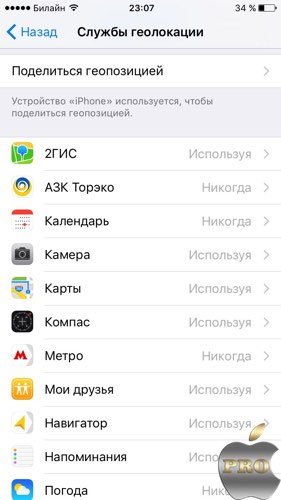
All other checkboxes are optional.
Scroll down the list and select “system services”. Disable:
- Geolocation iAds
- Compass calibration
- WiFi networks
- Diagnostics and use.
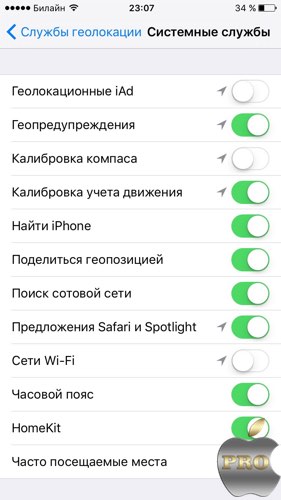
Be sure to leave the “find iPhone” switch turned on, the rest is again optional. If necessary, you can always adjust the geolocation settings to suit you.
4. Software Update. Do not forget to update iOS promptly (settings>general>software update), usually with each new Apple firmware improves stability and performance. But not always :). Keep in mind that this procedure requires stable WiFi if you are updating over the air (without a computer). Since updates weigh around 1 GB and not everyone can afford to spend all their mobile traffic on this matter.
For a complete look at the coolest features of iOS 9, read on
5.Get to grips with iTunes. Unfortunately, many beginners cannot make friends with iTunes. I think the reason lies in the fact that Apple decided to cram too large a list of functions into it. Here are a couple of articles for your reference.
7. Installing applications. If you have already created an Apple ID, now you just need to go to the AppStore, select the right application, download it and run it.
By the way, if you don’t want to enter a password every time you download applications and content, then in the Touch ID settings (settings>Touch ID and password) you can activate fingerprint access.
This is where I think I will end my short guide. I sincerely hope that these tips could save someone from making mistakes. Of course, this is not a complete list of everything that can be configured and optimized. Therefore, I look forward to your comments with recommendations.
Happy upcoming year everyone! I wish you new iPhones and successful operation! 🙂
Apple technology is one of the easiest to use. With each new version iOS developers They are trying to simplify the system and make it as comfortable as possible for owners. But despite this, inexperienced users still have problems setting up Apple gadgets upon first activation. Let's look at all the settings and their nuances in detail.
Setting up iPhone, iPad and iPod from scratch: description of all points
The initial setup largely determines the level of quality and ease of interaction with the device. Although many of its points can be skipped or changed later, for optimal performance It is recommended to perform all the necessary manipulations at the start of the gadget.
Selecting a country, setting time and date
Once your Apple device starts up, a welcome message will appear on the screen. Swiping it aside will take you to the interface language options. Next you will need to select your country. After this, based on the time zone data of the selected region, the time and date will be determined automatically.
Selecting a language and region
Connecting to Wi-Fi will be useful when performing subsequent device setup steps, in particular creating a new Apple ID or connecting an existing one (if you use one authentication system on several Apple gadgets). However, if you intend to save time or simply do not have access to a Wi-Fi network at the moment, you can skip this step.
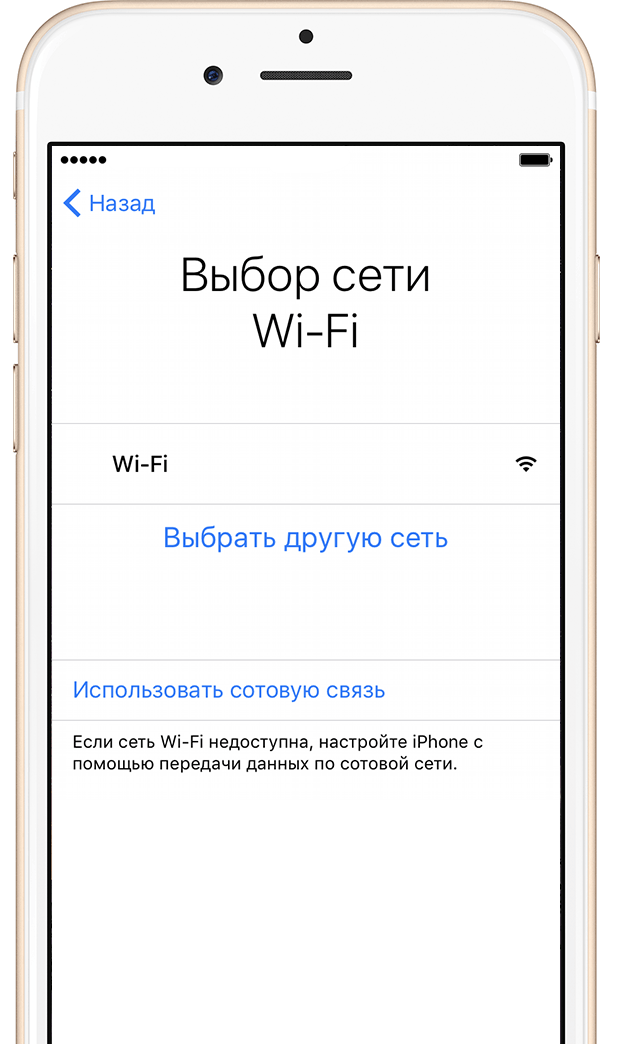
Connect to a wireless network
Geolocation
In this device settings item, you are prompted to enable or disable geolocation. Location services are responsible for collecting information about your geographic coordinates. They are used by apps like Maps, Instagram, Camera, etc. to calculate your approximate location. In addition, using geolocation services you can track Apple device. This function will come in very handy if the gadget is lost or stolen. As for the advantages of turning off geolocation - it will save battery power.
You can activate or deactivate location services at any time by going to Apple's settings. Also, their effect can be limited for some programs.
Geolocation
Setting up iPhone, iPad, iPod
At this stage it is proposed:
- set up your Apple device as new;
- restore it from backup copy in iCloud;
- restore the device from a backup copy on a local disk.
If your smartphone or tablet is completely new and you are setting it up from scratch, don’t hesitate to select the first option. However, when setting up a gadget after a firmware upgrade or system recovery, it will be more relevant to use backup copies of data.
Setting up iPhone, iPad, iPod
Apple ID
The next step is to create an Apple ID or log into an existing account. Apple ID is an account that gives access to applications such as App Store, Apple Music, iCloud, iMessage, FaceTime, etc. To create it, you will need to fill out the following information:
- FULL NAME.;
- e-mail to which the account will be linked;
- account password;
- select security questions and answers to them (required to restore your account);
- Date of Birth;
- spare email;
- mailing address.
If you decide to skip this step, add or create new Apple ID can be accessed through the device settings at any time.
Terms of Use
Next, you must accept the terms of the license agreement for use. This point is mandatory and cannot be skipped. It's no secret that 99% of Apple users accept the terms of use without reading them. But if you decide in good faith to read full list nuances user agreement and still disagree with some point, the only way out is to reject the terms of use and return the device to the store.

Terms of Use
Touch ID and passcode
Acceptance of the terms of use will take you to the final stages of setup - creating a fingerprint using Touch ID and a password. These options will help protect your smartphone or tablet from unauthorized use. Confirming your password and/or fingerprint is required when unlocking the gadget (moving from the lock screen to the desktop) and logging into the App Store. You can skip this step and create a password and fingerprint at any other time by going to iOS settings.
Touch ID and passcode
The Touch ID function works on Apple devices with a fingerprint scanner, i.e. from iPhone 5s and higher. On older gadget models, a standard password is used.
Diagnostics
The final step requires you to agree or not to send system diagnostic data to Apple. The request is very standard and there is nothing in it that would violate confidentiality. On the contrary, information about errors and failures in the iOS system will allow developers to improve it and correct shortcomings in subsequent updates.

Diagnostics
Having finished with the last stage of setup, all that remains is to click the “Get Started” button and enjoy using your Apple device.
First launch and setup of an iPad, iPhone or iPod immediately after purchase - video
Initial Apple setup does not take much time and requires minimal manipulation. Most of the steps, namely connecting to Wi-Fi, geolocation, creating an Apple ID, Touch ID and password, can simply be postponed until later. The iOS system makes it possible not only to return to setting all these options at any time, but also to change them in the future, based on personal preferences.
After purchasing a fresh iPhone, iPod or iPad, or simply doing full reset, for example, to fix problems with the operation of the device, the user needs to perform the so-called activation procedure, which allows you to configure the device for its further use. Today we will look at how device activation can be performed through iTunes.
Activation via iTunes, that is, using a computer with this program installed on it, is performed by the user if the device is not able to connect to a Wi-Fi network or use cellular communications to access the Internet. Below we will take a closer look at the procedure for activating an Apple device using the popular iTunes media combiner.
How to activate iPhone via iTunes?
1. Insert the SIM card into your smartphone and then turn it on. If you are using an iPod or iPad, start the device immediately. If you have an iPhone, then you won’t be able to activate the gadget without a SIM card, so be sure to take this point into account.
2. Swipe to continue. You will need to set the language and country.
3. You will be prompted to connect to Wi-Fi networks or use the cellular network to activate the device. IN in this case neither one nor the other suits us, so we immediately launch on computer iTunes and connect the device to the computer using a USB cable (it is very important that the cable is original).
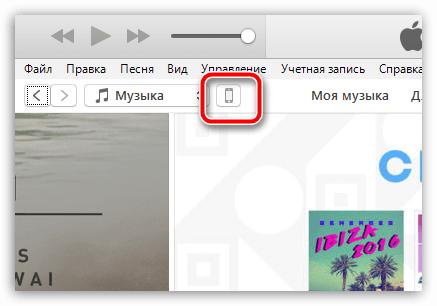
4. When iTunes detects the device, in the upper left area of the window, click on its miniature icon to go to the control menu.
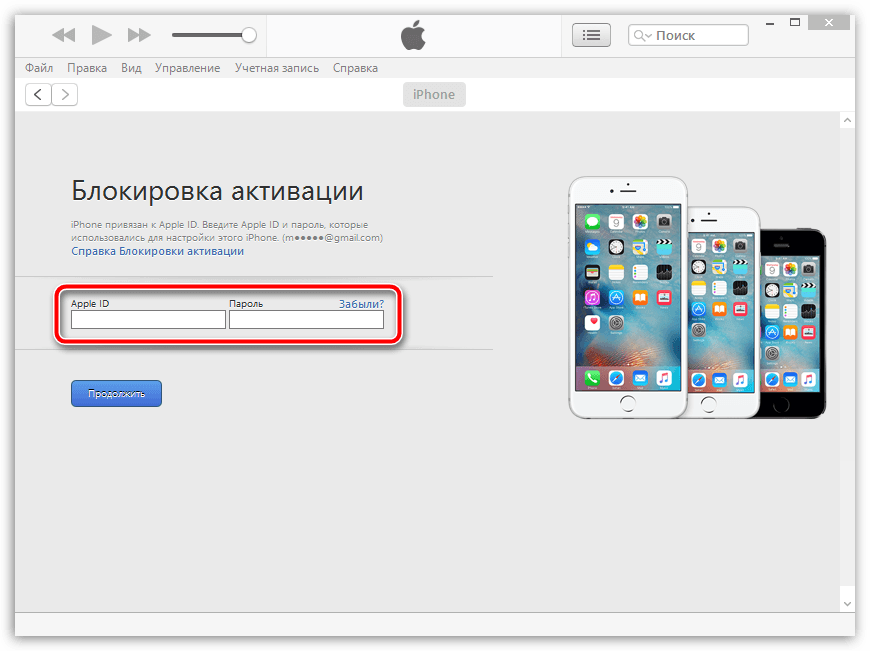
5. Next, two scenario options can develop on the screen. If the device is linked to your account Apple ID, then to activate it you will need to enter the address Email and the password for the identifier linked to the smartphone. If you configure new iPhone, That of this message It can’t be, which means you can immediately move on to the next step.
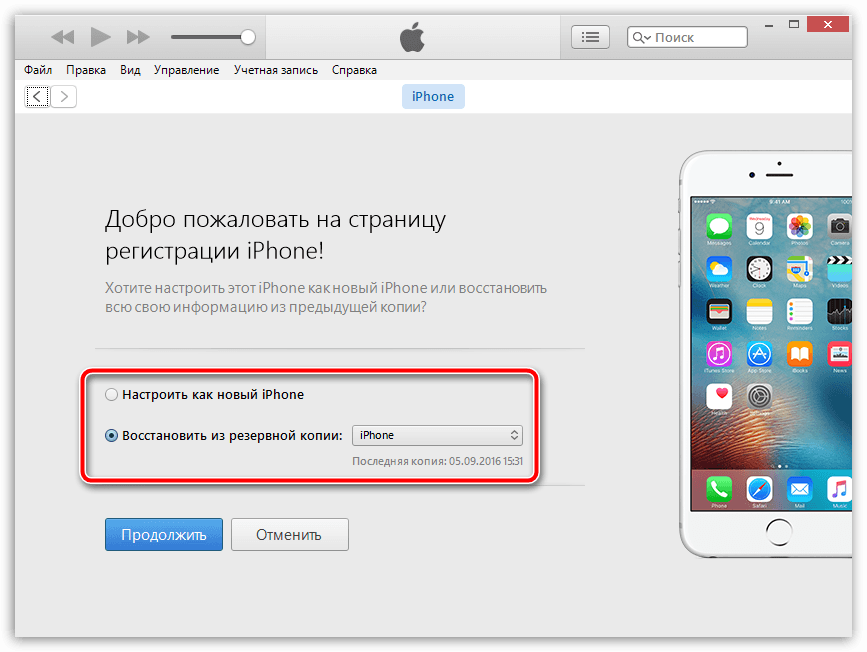
6. iTunes will ask you what you need to do with your iPhone: set it up as new or restore it from a backup. If you already have a suitable backup on your computer or iCloud, select it and click the button "Continue" to have iTunes proceed to activate the device and restore information.
7. The iTunes screen will show the progress of the activation and restoration process from the backup. Wait until this procedure is completed and under no circumstances disconnect the device from the computer.

8. As soon as activation and restoration from the backup are completed, the iPhone will reboot, and after restarting the device will be ready for the final setup, which includes setting up geolocation, enabling Touch ID, setting up a digital password, and so on.
Overall at this stage iPhone activation via iTunes can be considered complete, which means calmly disconnect your device from the computer and start using it.