These parameters assume that the router's IP address is 192.168.0.1 . If this configuration does not work, try the following settings:
- IP address - 192.168.1.2
- Subnet mask: 255.255.255.0
- Default Gateway: 192.168.1.1
- Preferred DNS server: 192.168.1.1
After you set all the settings and save them, try opening the page with the address in your browser 192.168.0.1 or 192.168.1.1 . If you see a window asking for a username and password, then proceed to the next step. Otherwise, you need to double-check what you did and find the error.
Setting up a router in the web interface
So, here is a window for logging into the router’s web interface. If you or someone else has used the router, then ask them for the password and username. And if the router is new, then the login information can be found in the instructions for the router. Usually this is a simple username (user, admin) and an equally simple password. These are factory settings. After the first login, I recommend changing at least the password for this account, since anyone can find out the factory settings for any router and gain access to it.
The web interface of each Wi-Fi router is different from others. There are those where you get access to a huge number of settings, and those where you can barely customize anything. But all of them have a mandatory minimum - setting up a username and password, through which you can identify the user of the provider’s services. This is the setting we need to find. And then find and fill in the appropriate fields with the name and password that your provider provided you with. In addition, you can read the article about setting up the Internet on a computer - the meaning is the same. The main thing here when setting up a router is to choose type PPPoE connections , which is used by most providers.
After all the above steps, you have successfully installed and configured Wi-Fi work a router that will now provide Internet access to all those who connect to it. Don't forget to ensure good security for your Wi-Fi router.
Instructions
Go to the banks. Their capacity should be from 0.75 liters to one liter. When opening cans, make sure that the keys do not come off or get lost. They will be needed to build the antenna.
Take the cable and screw it with the end where there is “foil” to one of the cans. After this, screw the cable core to another can. It is better to screw the cable elements to the keys themselves - this will improve the quality of reception. You can solder the cable to the cans using so-called “bugs”.
Secure the jars to the trempel. To do this you will need insulating tape or tape. When attaching the jars to the wooden trempel, make sure that they are located in one straight line. In this case, the distance between them should be about 75 mm. Take the completed structure in your hands and walk around the apartment with it in order to find the point where the reception will be best.
Now connect the cable using a plug to the TV and enjoy relaxing on the sofa in front of the TV. As a rule, such an antenna allows you to catch standard channels. But other situations also happen: for example, if cable television is not password protected, then you can watch paid channels absolutely free.
Antenna is a device for emitting and receiving radio waves. Nikola Tesla is considered the inventor of the antenna. The shape, size and design of antennas are varied and depend on the length of the emitted or received waves and the purpose of the antenna. Antennas can be made of conductive or dielectric materials. Emissive structures can be made by sputtering conductive materials onto dielectric substrates. The most famous television antenna is ASP-8, let's look at how it should be connected to obtain a consistently strong signal.
You will need
- To connect the antenna you will need:
- - pliers;
- - screwdriver;
- - varnish;
- - soft wire;
- - metal pipe with a diameter of 50 mm and a length of 6 m;
- - TV cable 10 m.
Instructions
Buy an ASP-8 television antenna in the store, which is the most common nowadays, as it has a signal amplifier and is quite easy to operate. Carefully examine the design of the receiving device, look at the assembly drawing. Assemble the antenna as shown in the figure; in the middle there is a plastic box, inside of which you need to place the amplifier. When purchasing an antenna, ask the seller for the most powerful amplifier, which one he has. The amplifier looks like a radio circuit board with various parts. Paint over back amplifier with nail polish, a thick enough layer, this will save it from corrosion in various weather conditions. Screw it onto two bolts according to the design.
Strip the end of the cable from insulation, strip the center wire and mesh. Don’t forget to thoroughly clean them of the varnish that covers the wires. In the central part of the amplifier, find the connection block, connect the central wire of the cable in the middle, and secure the mesh in the clamping device with two bolts. Now also varnish the top surface of the amplifier, including the cable connection. Close the amplifier cover, sometimes it is screwed on with small screws or simply snaps into place. If it does not close tightly, then glue it with some kind of glue or sealant. Attach the cable along the entire length of the pipe with wire every 50 cm.
note
Pay attention to the quality of the cable, pull it to see if there are any breaks in it.
Install the antenna mast using two people.
Sources:
- Antennas
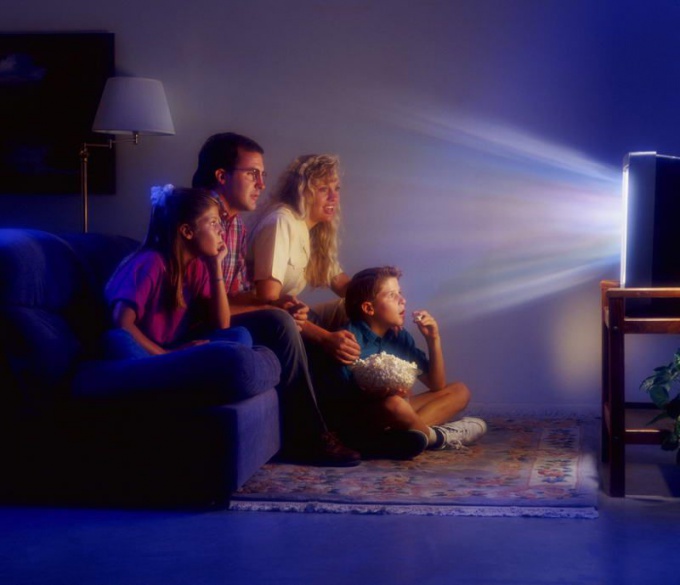
There are situations when you simply need to watch one or another television program - for example, a broadcast of the Olympics or the World Championship. And what to do if at this very moment you find yourself somewhere where there is no room TV antenna or is her action not enough? You can make an indoor antenna from improvised materials. Of course, it will not be able to completely replace a factory-made antenna, but it is quite suitable as a temporary solution in an “extreme” situation.
You will need
- - television cable;
- - plug;
- - two empty tin cans;
- - scotch;
- - electrical tape;
- - soldering iron;
- - “bug” screw.
Instructions
Get your TV cable. Please note that the cable length must be at least 3-5 meters. Carefully cut the soft outer shell of the TV cable at one end. Under this layer there is a silver-colored shielding braid, and below it is the next protective layer.
Cut off the top sheath of the cable 10-15 cm from the edge. Carefully twist the screen so that you get a branch. Trim the middle layer of protection by approximately 1 cm.
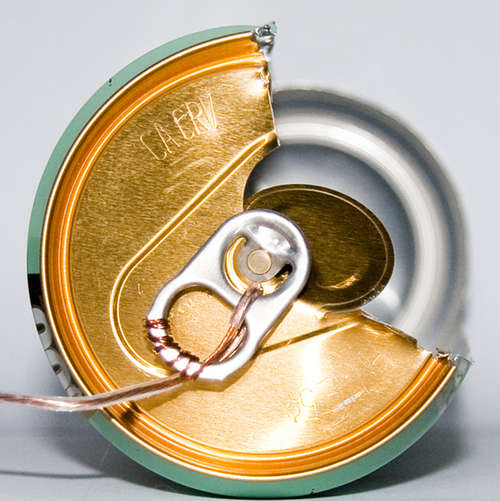
Take the tin cans and carefully open them. Cans should be opened in such a way that the opener keys do not become detached from the cans. Empty the contents of the jar, wash and dry it.
Using “bugs”, screw the cable core to one of the cans and the screen to the other. Using tin and a soldering iron, solder the “bugs” to the tin can.
Attach the jars to the trempel
As a trempel, you can use a wooden hanger, a long ruler or a plastic stick. The use of metal objects as a tramp is unacceptable, because in this case, your antenna simply will not work. Make sure the cans are in line and secure them with tape, wire or string. The distance between banks is determined empirically.
Connect the plug to the cable. To do this, you need to disassemble the cable from the other end and secure its central core in the central part of the plug, and attach the braid to the side. Care must be taken to ensure that none of the braid wires are caught in the center wire. This can lead to a sharp deterioration in the quality of the television signal.
Sometimes it happens that one of your family members urgently needs the Internet while you need to complete important work on the computer. If repeated frequently, such a situation threatens to develop into a chronic conflict. However, in order to eliminate the fight for space at the computer in the future, you can install wi-fi at home.
Instructions
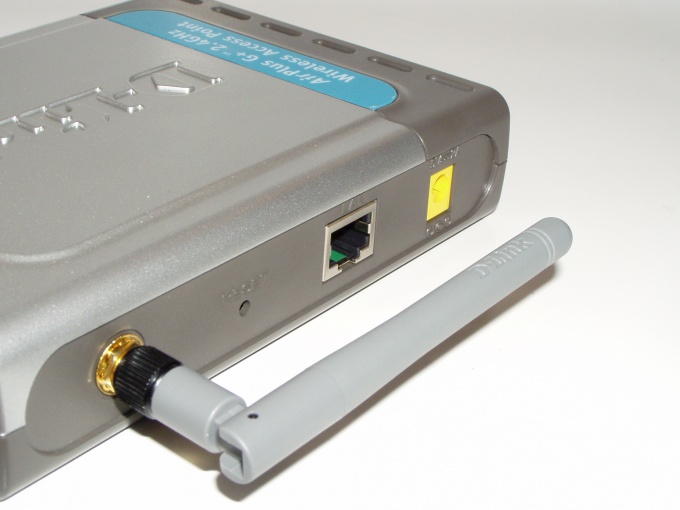
In order to install wi-fi at home, we need a special device - a router. When choosing a router, check with your Internet provider which models are suitable for the type of connection you are using. Perhaps company representatives will recommend routers from certain manufacturers. Before purchasing, you should listen to their advice: special tests have probably been carried out, and with the recommended models the connection to the Internet will be more stable and faster.
We create a serial connection between the router and computer. We connect the wire through which we communicate with the Internet into the corresponding socket of the router, and with the second wire included in the kit we connect the router itself and the computer by inserting it into the connector of the network card. A wired connection must be established with at least one of the computers: wireless settings will be made through it.
Having connected power to the router, start the computer and go to any of the browsers installed in the OS. IN address bar register the router’s IP to access the settings: http://192.168.1.1/. However, he may be different. Please refer to the help documentation to clarify the address and login and password to access the settings page.
On the wi-fi router settings page, you should fill in 2 main tabs that directly affect communication: these are “Internet connection” (“WAN”) and “ Wireless network" On the “WAN” page, enter your Internet login and password, connection type and IP address. On the “Wireless Network” tab - encryption settings, the access key to the Wi-Fi network and its name (SSID), by which it will be detected by other computers. Reboot the router.
We check that the Wi-Fi router is connected and installed correctly. We are looking for a network using other computers or communicators. After detecting it, enter the access password and start browsing the Internet. If the connection is not interrupted and the channel works stably, then the wi-fi at home is installed correctly.
Video on the topic
Sources:
- installing wifi on computer
To receive television signals in places where a conventional indoor antenna is no longer sufficient, a device that is specially made from improvised materials is ideal. You can make a fairly effective and simple antenna from just a couple of beverage or beer cans.
Instructions
Before starting work, stock up on two half-liter tin cans, take out a soldering iron and flux, as well as insulating tape (or tape), an antenna power cable (RG-58 or similar), and a drill with a five or six drill bit.
Drill a hole about five to six millimeters in diameter in the center of the bottom of one of the cans. Then pass the cable through this hole, and then bring it out through top part cans, which will be the left half of the wave emitter. The bottom will be on the right side.
Strip the extended end of the cable to a distance of approximately 15 mm, fluff it over the surface of the can and solder it to it. Remove the central conductor from the insulation by 3 mm and solder it to the middle of the bottom of the second can.
In this place, soldering should be done using a narrow soldering iron, because the gap between the cans should be minimal. Now both banks will be sequentially located. Wrap the gap between them with two turns of electrical tape to fix the size of the gap, and also protect the soldering from bad weather with the same tape. If you don’t have one at hand, tape or at least a rag will do.
Helpful advice
To make an antenna, it is better to take half-liter beer cans made of tinplate. And when soldering, you should use a special flux. Please also note that such banks cover a smaller range, successfully accepting only UHF. You can expand the range by using two liter jars. They will also receive the meter range quite well along with all the main channels.