Good day.
In order to organize a wireless Wi-Fi network at home and provide Internet access to all mobile devices (laptops, tablets, phones, etc.), you need a router (even many novice users are already aware of this). True, not everyone dares to connect it and configure it themselves...
In fact, most people can do this (I don’t take into account exceptional cases when an Internet provider creates such a “wild” with its own parameters for accessing the Internet...). In this article I will try to answer all the most common questions that I heard (and hear) when connecting and setting up a Wi-Fi router. So let's get started...
1) What router do I need, how to choose it?
Perhaps this is the first question that users who want to organize a wireless Wi-Fi network at home ask themselves. I would start this question with a simple and important point: what services does your Internet provider provide (IP telephony or Internet television), what Internet speed do you expect (5-10-50 Mbit/s?), and at what protocol you are connected to the Internet (for example, now popular: PPTP, PPPoE, L2PT).
Those. The functions of the router will begin to appear by themselves... In general, this topic is quite extensive, therefore, I recommend that you read one of my articles:

searching and choosing a router for your home -
2) How to connect the router to the computer?
As a rule, the router itself comes with a power supply and a network cable for connecting to a PC (see Fig. 1).
By the way, please note that on the back wall of the router there are several sockets for connecting a network cable: one WAN port and 4 LAN ( the number of ports depends on the router model. In the most common home routers, the configuration is as in Fig. 2).
Rice. 2. Typical rear view of the router (TP Link).
The Internet cable from your provider (which was most likely previously connected to the PC’s network card) must be connected to the blue port of the router (WAN).
Using the cable that comes with the router, you need to connect the computer’s network card (where the provider’s Internet cable was previously connected) to one of the router’s LAN ports (see Fig. 2 - yellow ports). By the way, you can connect several more computers this way.
At an important moment! If you don’t have a computer, you can connect the LAN port of the router to a laptop (netbook) with a network cable. The fact is that the initial setup of the router is better (and in some cases, it is impossible to do otherwise) via a wired connection. After you specify all the basic parameters (set up a wireless Wi-Fi connection), you can disconnect the network cable from the laptop and continue working via Wi-Fi.
As a rule, there are no issues with connecting cables and power supplies. Let's assume that your device is connected, and the LEDs on it started blinking :).
3) How to enter the router settings?
This is probably the key question of the article. In most cases, this is done quite simply, but sometimes... Let's consider the whole process in order.
By default, each router model has its own address for entering the settings (as well as login and password). In most cases it is the same: http://192.168.1.1/, however, there are exceptions. Here are a few models:
- Asus - http://192.168.1.1 (Login: admin, Password: admin (or empty field));
- ZyXEL Keenetic - http://192.168.1.1 (Login: admin, Password: 1234);
- D-LINK - http://192.168.0.1 (Login: admin, Password: admin);
- TRENDnet - http://192.168.10.1 (Login: admin, Password: admin).
At an important moment! It is impossible to say with 100% accuracy what address, password and login your device will have (even despite the brands I listed above). But this information must be indicated in the documentation for your router (most likely, on the first or last page of the user manual).
Rice. 3. Enter your login and password to access the router settings.
For those who were unable to enter the router settings, there is a good article with reasons (why this could happen). I recommend using the tips, link to the article below.

How to log in to 192.168.1.1? Why it doesn’t log in, the main reasons are:
How to enter the Wi-Fi router settings (step by step) -
4) How to set up an Internet connection in a Wi-Fi router
Before describing these or those settings, a small footnote should be made here:
- First, even routers from the same model range can have different firmware (different versions). The settings menu depends on the firmware, i.e. what you will see when you go to the settings address (192.168.1.1). The settings language also depends on the firmware. In my example below, I will show the settings of a popular router model - TP-Link TL-WR740N (the settings are in English, but understanding them is not so difficult. Of course, setting up in Russian is even easier).
- The router settings will depend on the network organization of your Internet provider. To configure the router, you need connection information (login, password, IP addresses, connection type, etc.), usually everything you need is contained in the Internet connection agreement.
- For the above reasons, it is impossible to give universal instructions that are suitable for all occasions...
Different Internet providers have different types of connections, for example, Megaline, ID-Net, TTK, MTS, etc. use a PPPoE connection (I would call it the most popular). In addition, it provides higher speed.
When connecting PPPoE to access the Internet, you need to know the password and login. Sometimes (as for example, MTS) uses PPPoE+Static Local: access to the Internet will be provided, after entering the password and login for access, the local network is configured separately - you will need: IP address, mask, gateway.
Necessary settings (for example PPPoE, see Fig. 4):
- You need to open the “Network / WAN” section;
- WAN Connection Type - indicate the connection type, in this case PPPoE;
- PPPoE Connection: Username - specify the login for accessing the Internet (specified in your agreement with the Internet provider);
- PPPoE Connection: Password - password (similar);
- Secondary Connection - here we either do not indicate anything (Disabled), or, for example, as in MTS - we indicate Static IP (depending on the organization of your network). Typically, this settings item affects access to the local network of your Internet provider. If you don’t need it, you don’t have to worry too much;
- Connect on Demand - establish an Internet connection as needed, for example, if the user accesses an Internet browser and requests a page on the Internet. By the way, please note that there is a column below Max idle Time - this is the time after which the router (if it is idle) will disconnect from the Internet.
- Connect Automatically - connect to the Internet automatically. In my opinion, the optimal parameter is what you need to choose...
- Connect Manually - connect to the Internet manually (inconvenient...). Although for some users, for example, if they have limited traffic, it is quite possible that this type will be the most optimal, allowing them to control the traffic limit and not go into the red.

Rice. 4. Setting up a PPPoE connection (MTS, TTK, etc.)
It is also worth paying attention to the Advanced tab - in it you can set DNS (they are sometimes necessary).

Rice. 5. Advanced tab in the TP Link router
Another important point - many Internet providers bind your MAC address to the network card and do not allow you to access the Internet if the MAC address has changed ( approx. Each network card has its own unique MAC address).
Modern routers can easily emulate the desired MAC address. To do this you need to open the tab Network/MAC Clone and press the button Clone MAC Address.
Alternatively, you can tell your new MAC address to your Internet provider and they will unblock it.
Note. The MAC address is something like this: 94-0C-6D-4B-99-2F (see Fig. 6).

Rice. 6. MAC address
By the way, for example in “ Billine» connection type is not PPPoE, A L2TP. The setup itself is done in a similar way, but with some caveats:
- Wan Connection Type - the connection type must be selected L2TP;
- Username, Password - enter the data provided to you by your Internet provider;
- Server IP-address - tp.internet.beeline.ru;
- save the settings (the router should reboot).

Rice. 7. Setting up L2TP for Billine...
Note: Actually, after entering the settings and rebooting the router (if you did everything correctly and entered exactly the data that is needed), the Internet should appear in your laptop (computer) that you connected via a network cable! If this is the case, all that remains is to set up a wireless Wi-Fi network. In the next step, we will do this...
5) How to set up a wireless Wi-Fi network in a router
Setting up a wireless Wi-Fi network, in most cases, comes down to specifying the network name and password to access it. As an example, I’ll show the same router (though I’ll take Russian firmware to show both Russian and English options).
First you need to open the Wireless section (wireless network), see fig. 8. Next, set the following settings:
- Network name - the name that you will see when searching for and connecting to a Wi-Fi network (enter any);
- Region - you can specify “Russia”. By the way, many routers don’t even have such a parameter;
- Channel Width, Channel- you can leave Auto and not change anything;
- Save your settings.

Rice. 8. Setting up a Wi-Fi wireless network in the TP Link router.
Next, you need to open the “ Wireless Security". Many people underestimate this point, but if you do not protect the network with a password, then all your neighbors will be able to use it, thereby reducing your network speed.
- Version: you don’t have to change it and leave it automatic;
- Encryption: also automatic;
- PSK password is the password to access your Wi-Fi network. I recommend that you indicate something that is difficult to find by regular search, or by random guessing (no 12345678!).

Rice. 9. Setting the encryption type (security).
After saving the settings and rebooting the router, your wireless Wi-Fi network should start working. Now you can set up a connection on your laptop, phone and other devices.
6) How to connect a laptop to a wireless Wi-Fi network
As a rule, if the router is configured correctly, there should be no problems with setting up and accessing the network in Windows. And such a connection is made in a couple of minutes, no more...
First, click on the Wi-Fi icon in the tray next to the clock. In the window with a list of found Wi-Fi networks, select yours and enter the password to connect (see Fig. 10).
Rice. 10. Selecting a Wi-Fi network to connect your laptop.
If you entered the network password correctly, the laptop will establish a connection and you can start using the Internet. Actually, this completes the setup. For those who did not succeed, below are some links to typical problems.

The laptop does not connect to Wi-Fi (does not find wireless networks, there are no connections available) -

Problems with Wi-Fi in Windows 10: network without Internet access -
When you connect to a new Internet provider, you are unlikely to rush to immediately connect the single end of the Ethernet cable to your computer. It will be much more convenient (and not much more expensive) to use a router. With it, you can simultaneously connect many devices to the Internet - from desktop computers and laptops to smartphones, tablets, TVs, even cameras and doorbells.

Router: pros and cons
What are the advantages of a router over other connection methods (for example, Ethernet modems?)
- Multiple devices are connected simultaneously (computers, smartphones, tablets, TVs, cameras, etc.)
- Multiple communication methods (Ethernet, Wi-Fi)
- Fine network configuration, in particular security
- Routers have additional functions (for example, working with a built-in or USB-connected drive)
We will look at the most common option today: how to install a Wi-Fi router without additional hardware functions (server, etc.) and configure it to work with wired and wireless equipment.
The best place
Where is it better to install a router in an apartment or in a house? The answer to this question depends on several factors:
- Provider cable. If the experts didn’t leave such a long tail, you simply won’t be able to install the router somewhere in the kitchen.
- Workplaces. Of course, it would be nice to have optimal reception throughout the entire house or apartment, but if this is not possible, then you will have to install the router closer to the place where you usually work, be it an office, a balcony, or even a toilet.
Try to think about the location of the router so that there are as few concrete barriers as possible between it and your workplace. For a wired connection, this can be solved by simply laying the cable.
In some cases (for example, if you have a large house) you will need Wi-Fi repeaters. These are small, inexpensive Wi-Fi boosters that can be a lifesaver in hard-to-reach places. However, for a relatively small living space (2-4 rooms), the correct installation of a router in an apartment solves all problems without the help of repeaters.
Connecting the incoming cable
Before installing the router yourself, make sure that the incoming Ethernet cable is correctly crimped, that is, it has an RJ45 type plug installed. For ADSL type communications using a telephone line, an additional splitter adapter is required that splits the signal into the Internet and telephone communications. In any case, the splitter will have the same Ethernet socket (RJ45), to which you need to connect the corresponding cable. It is easy to distinguish RJ45 from a telephone plug/connector: RJ45 is larger. 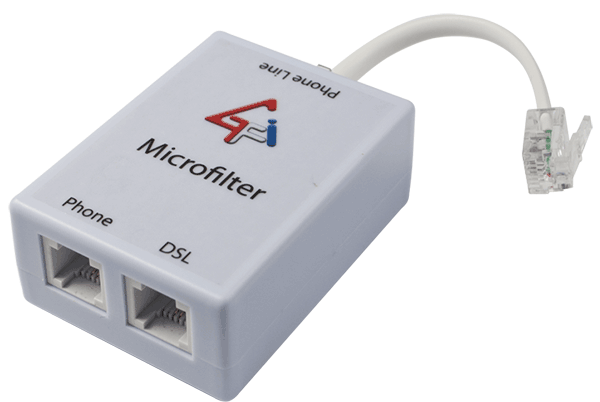
Find a port on the router signed as WAN (Wide Area Network - external network). It is to this that you need to connect the provider's cable, although the router probably has other similar ports. Usually the WAN port is also highlighted in color.
Now you can connect your computer, TV, and other devices that require a wired connection to the remaining output ports.
Software Internet setup
Although you have already connected the router and computer using a cable, you will not immediately have access to the Internet. First, find the instructions that you received from your provider: you will need the data from it before setting up a Wi-Fi router (TP Link or any other manufacturer).
Then you need to log into the router interface from your computer. To do this, in the address bar of your browser, instead of the usual address, you must type the IP address of the router. As a rule, this is 192.168.1.1 (if this is not the case with a particular router, you can check this on the sticker on its bottom or in the instructions). 

A page will open in your browser where you need to enter your username and password to log in. As a rule, manufacturers do not hesitate and set the default login to “admin” and the same password. Enter your login information, click “Login”, and you will be taken to the router control panel.
First of all, you need the “DHCP Server” tab. 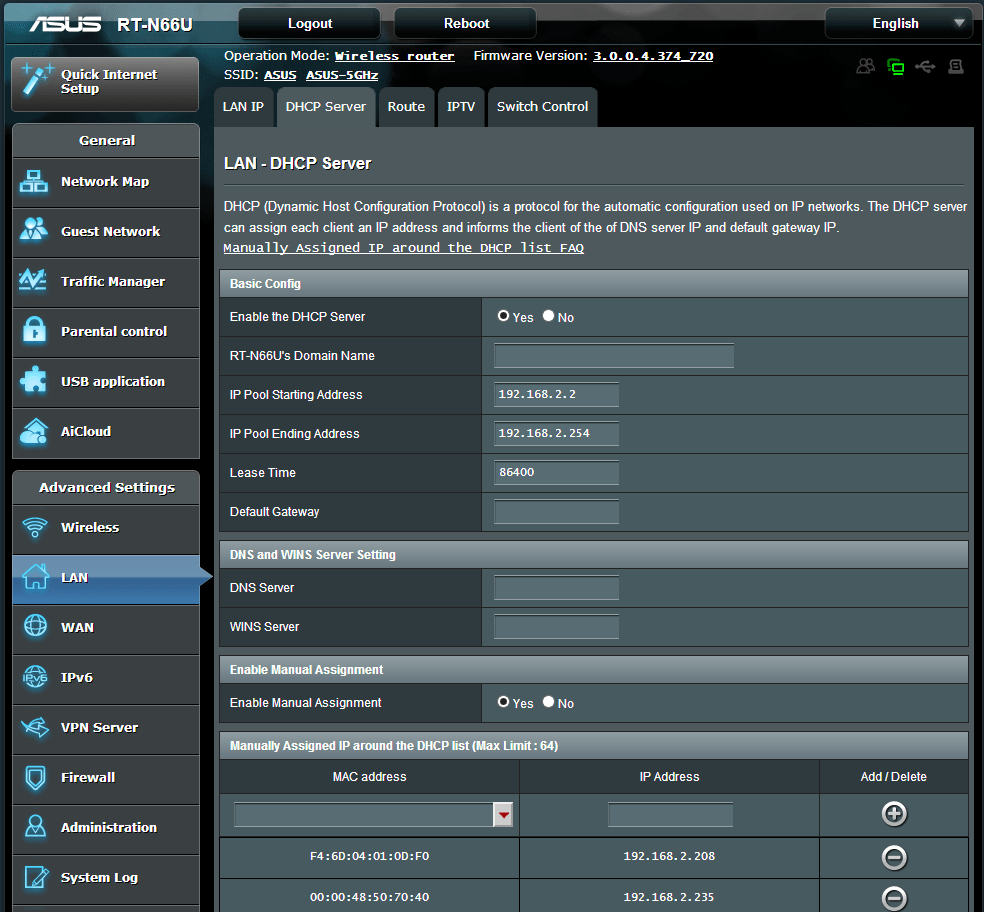
Enter this section and find the Enable button there. After that, click "Save" or "OK". If there is no such button in the section, it means that the settings are saved automatically when you exit.
Check with your provider's instructions to determine what type of connection you are using - dynamic or static IP address. Dynamic in our case is simpler. All you need is to select this connection type in the settings and save them. Sometimes you may need to enter a Hostname.
Providers rarely offer a static IP address. As a rule, it is needed when you need remote access to your workplace or store some publicly accessible materials on it. But it happens that providers simply offer only this type of connection. In the case of a static IP address, you will have to manually enter a whole set of data: your actual IP, default gateway, subnet mask and DNS server. All this data should be in the instructions from the provider or in an appendix to the contract.
There is another type of connection: PPPoE. If for some reason your provider chose it, then you will also have to enter your username and password (twice).
In the web interfaces of routers from different manufacturers, sections may be organized differently, but there is a search system through which you can find keywords, or a list of sections where you can find the necessary tabs.
An important point: even if your computer is a laptop with a Wi-Fi module, for the initial setup you will still have to connect it to the router using a cable. The fact is that wireless communication is inactive by default in routers. And the next step will be to turn it on.
Setting up Wi-Fi on the router
As a rule, in the router’s web interface (we hope you haven’t logged out of it yet?) there is a tab called “Wireless.” Here you no longer need any data from the provider: how to install a router for Wi-Fi devices - at your discretion.
Enter in the “SSID” line the name under which your network will be recognized by devices. The main thing is that you can then recognize it from dozens of others, which today abound in every home in a major city. So come up with some catchy name.
Then create a password. Of course, it doesn't have to be "12345" or your first and last name. However, it should be simple enough that (if necessary) you can easily tell it to your guests, and they will understand it unmistakably.
Some routers support the “guest access” function (an additional SSID is used for this). Through the guest network, the user can access the Internet, but the administrative panel of the router remains inaccessible to him. If your router has such a function, then it is better to name the SSID with full access something unclear and come up with the most complex password for it, but for guest access it is easier to choose a name and password.
Select your network standard. The “later” letter of the alphabet it is designated, the higher its speed: for example, “b/g/n” will provide faster Internet than just “b/g”. It would seem that nothing could be simpler: select the most advanced mode, and that’s it! However, can you guarantee that all your devices support it? Not to mention your guests' gadgets. Therefore, it is better to leave the move to ensure compatibility with older standards.
Select a security standard. The most popular option today is WPA-PSK/WPA2-PSK mixed. This type of encryption reliably protects data and does not slow down work with it.
If your router is equipped with a built-in hard drive or a USB port for connecting it, then, of course, you would like to provide access to it from several devices. For example, you work on documents in your office, from a desktop computer, but later you want to go to the balcony with a laptop and work in greater comfort, in the fresh air. Or you want to open downloaded movies directly on your TV. Then you will need to find a list of trusted devices and add there all the devices (laptop, TV) to which you give access to memory.
You can limit the number of simultaneous connections to your router. If you do not want to do this, leave the number 0 in the “Connection limit” line - this means no limits.
When choosing a place for the router in the apartment, do not forget: sometimes you will need to reboot it manually, so you should not hide it very high. Although if you have children or playful animals, then it's probably better to play it safe.
Nowadays there are a huge number of different Wi-Fi routers from different manufacturers on sale. And that’s good, there’s plenty to choose from. But immediately after purchasing a router, we need to install, connect and configure it. And if the connection process is practically the same depending on the model, then the setup process itself and the page with the router settings can be different even from the same manufacturer.
It is very difficult to give detailed and step-by-step instructions on setting up different models in one article. But I'll try. In this article I will describe in detail and show how to install and configure a Wi-Fi router. Regardless of what manufacturer and model you have. This universal instruction is suitable for both setting up a new router and re-configuring it. You can do everything yourself. And you don’t have to pay specialists for setup.
Login to the router settings. How to log into the web interface?
Each router has its own web interface (site with settings, control panel), which can be accessed through a browser by going to the appropriate address.
Important! To go into the router settings and configure it, your device (PC, laptop, smartphone, tablet) must be connected to the router via cable or Wi-Fi network. At the same time, there may be no access to the Internet on the computer. You don't need internet to log into the control panel!
If you have a high-speed connection on your computer (maybe with your provider's name), then after connecting through the router there is no need to start it!
To enter the settings we need find out the address our router and factory username and password for authorization. This information is located on the body of the device itself. It looks something like this:

On a computer or mobile device that is connected to the router, open a browser (Opera, Chrome, Yandex.Browser, etc.) and go to the address indicated on the case. Or try 192.168.1.1 and 192.168.0.1.
Important! We enter the address in the address bar, and not in the search bar. Many people get confused and instead of a page with settings they end up on a page with the search results of some search engine.

On the login page you need to specify a username and password. The factory settings are indicated on the device body. Most often these are admin and admin. On some models, the default settings are not protected, and immediately after logging into the control panel, you need to set a login and password.
Articles that may be useful to you at this stage:
If the settings page has opened, we can continue. If not, then see the article with solutions to this problem at the link above.
How to set up a Wi-Fi router?
In order to use the Internet through a router, you need at least:
- Set up an Internet connection.
- Set up a Wi-Fi network.
In most cases this is enough. I also recommend changing the password that protects the router’s web interface. There are also settings for IPTV, USB drives, parental controls, etc., but not everyone needs them.
In the control panel of almost every router there is a so-called “Quick Setup Wizard”, also known as “Quick Setup”. On some devices, it opens immediately after logging into the control panel. With its help, you can configure your Wi-Fi router step by step. Internet connection, wireless network, etc. For example, what it looks like at TP-Link:

You can try it, it's very convenient.
Internet setup. The most important step
The main thing is correctly configure the router to connect to the provider. If he cannot connect to the Internet, then all devices will have a “No Internet access” connection. Many users who try to configure everything themselves most often encounter problems at this stage.
Each Internet provider uses a specific type of connection. Dynamic IP (DHCP), Static IP, PPPoE, L2TP, PPTP. This type of connection must be specified in the control panel of the router, and certain parameters provided by the Internet provider must be specified.
Important! You must know exactly what type of connection your provider has. Also all the necessary data for connection (Username: Password), if they are necessary. As a rule, this information is specified in the contract that you received when connecting to the Internet.
Some providers bind by MAC address. It would also be desirable to clarify this.
If your provider uses a “Dynamic IP” (DHCP) connection, then the Internet should work immediately after connecting, since this type of connection is set by default on routers.
If the Internet through the router is already working (and you haven't run any connections on the computer), then you can skip this section and go straight to setting up Wi-Fi.
When the connection type is PPPoE, L2TP, PPTP, or Static IP (which is very rare), then you need to set the necessary parameters. Usually, this is the login and password that your provider gave you. In the control panel, the section with these settings is most often called: “WAN”, “Internet”, “Internet”.
For example, what the PPPoE connection setup looks like on an ASUS router:

Other examples:
Target: so that the Internet through the router works on all devices. Via cable and Wi-Fi. If this does not happen, then there is no point in continuing the setup.
You can always call the provider and clarify what parameters should be specified and where. They help many people over the phone.
Articles that may be useful to you:
I hope everything worked out for you.
Changing Wi-Fi network settings
I highly recommend changing your Wi-Fi network name and password. It is also advisable to set your region. Everything is simple there. This can be done in the section with wireless network settings. It can be called differently: “Wi-Fi”, “Wireless network”, “Wireless”, “Wireless mode”. If you have a dual-band router, then the settings must be set separately for the network at 2.4 GHz and 5 GHz.
- In the "Network name" (SSID) field you need to enter a new name. In English letters.
- In the "Password" field (wireless network key) create and write down a password. Minimum 8 characters. Security type - WPA2 - Personal.
- Well, there should be a “Region” field there. Change it to yours. IPTV on ASUS routers.
If something doesn’t work out for you during the setup process, you can always reset the settings to factory defaults and try setting everything up again. Find the “Reset” or “Reset” button on the case, press it and hold for about 10 seconds. The indicators will tell you when the reset occurred.
You can leave questions in the comments. I just have a small request, describe the problem in detail. Write the router model. Otherwise, it’s very difficult to understand and advise something when you don’t understand the question itself. Best wishes!
Wi-Fi provides fast wireless Internet access without being tied to wires and a modem. You only need a device with a Wi-Fi module - using it, several devices can connect to the network at once.
To properly configure the router you do not need special education
Buying and setting up a router will take a little time and does not require special knowledge. To consider in detail all stages of connection, we will use the settings for TP-Link brand models, the most popular among a large number of users.
Before you move on to installing Wi-Fi, you need to figure out how to install your router and make sure it's working properly.
How to connect a Wi-Fi router? First, we choose a place for it - the main thing is that it does not stand on the table where the computer is located or on the system unit, since in such cases interference in work often occurs. Therefore, we move it a little away from other equipment and place it closer to the center of the house so that the waves cover as much area as possible.
To find out how much the router covers the room, after installation, download special applications - they will make the device work as efficiently as possible.
On the back of the router there are the following connectors (in the basic version):
- 4 Lan - port for connecting to a PC. A maximum of 4 computers can be connected to one device at the same time. We insert the cable into one of the ports, and connect the other part to the connector on the back of the system unit.
- A cord with an Internet connection is installed in the WAN cable socket.
- We plug the power cable into the outlet.

Here you will also see a reset and on/off button - their functions are clear. When you have sorted out the wires and inserted them where needed, an icon about a new connection will appear at the bottom of the desktop. Now we need to find out if your PC has installed the router correctly.
Device Manager - setting up the operation of a computer with a router
How to enter the router settings and check whether the computer correctly recognized the equipment. We use the Control Panel, stop at the chapter Network Connections - if you have Windows XP, in Windows Vista/7/8 this section is designated “Network and Control”, “Network and Sharing Center”.
Current connections will appear here - select “Local Area Connection” and look at the properties. You will now see a list of components where you stop at “TCP/IP Internet Protocol”. Here we check how the checkboxes are marked:
- Typically, lines are highlighted that talk about automatically obtaining an IP address and DNS server.
- For some suppliers, information is entered manually, so you will see filled-in lines. Check them with the data in the contract or instructions for the device, enter the correct numbers if they do not match.
The next step is to move on to how to enter the router settings.
Browser and entering parameters
The router is configured using a browser.
Enter your IP address in the address bar. In most cases, this is the combination 192.168.1.1 - the standard version of the address, which, however, differs for some Internet service providers. After pressing Enter, you will see the Wi-Fi router settings. If this does not happen, then the IP address is not suitable and you need to enter other numbers.

How to find out the IP address:
- In documents or on the back of the router.
- If, when entering the properties of “Local Area Network Connections”, the IP address field was previously filled in and was not set to automatic detection, copy it.
- Try checking other addresses - the last two values may look like 0.1, 0.2, or 1.2.
- Enter in the command line (it opens through “Start”) the action cmd, and then ping 168.x.1, and you will be shown all the device parameters.
After entering the IP, a form for entering your login and password appears in front of you. We fill both lines here with the word admin, after which the parameters of the router itself will appear directly.
Reflashing equipment
First of all, setting up a router begins with flashing it to the current version - after the release of each model, a lot of time passes, during which improvements are made and errors are corrected. Therefore, installing the most current version will avoid operational problems.
You can get it on the manufacturer's website. Download the file and go to the settings again (you know how to enter the router settings through a browser) in the System Tools, subsection Firmware Upgrade. Here we select “Browse...”, upload the file and after clicking Upgrade the update will begin.
Clarification: The firmware is optional, so you can do without it - it will not interfere with the operation of the device.
Setting up an Internet connection
After rebooting the Wi-Fi equipment (it will happen automatically), we proceed to setting the parameters for accessing the World Wide Web. In the System Tools section, select the Password tab and enter new data to enter the settings at your discretion.
Now in the Network section we stop at the WAN graph, where we select the type of connection provided by the provider. Mostly this is a dynamic IP (Dynamic), but in some cases this option is not correct.
How to find out your connection type?
It is listed in the documents along with the rest of the data for setting up a Wi-Fi router. If they are missing, find them on the website of your Internet service provider or contact a specialist by phone.
Note: if you need a different type of connection (not dynamic), enter additional information yourself in the fields located in this form after selecting the desired parameter.
The remaining fields will be filled in automatically when you select the Dynamic IP option.

Let's move on to the Wireless section. We put a checkmark next to Enable (if there is such a line), in the Wireless Network Name or SSID we come up with a name for the connection that will be seen by everyone who wants to use Wi-Fi. Below there may be a tab for selecting your country - indicate it, save the changes made and move on to the next stage of our setup.
Wireless Security - you should take filling out this part of the parameters seriously, because here you can secure your network from unauthorized access. Select WPA/WPA2 and set a password in the PSK Password field - without it, no one will be able to establish a connection with your Wi-Fi.
Additionally: MAC Address and copying it
Sometimes providers tie a Wi-Fi access point to the PC's network card. This equipment has a personal MAC code, which we copy into the router settings - to do this, click the “Clone MAC - Code” button.

Where can I find it? Depending on the manufacturer, the address may be located in different sections, mainly in Wireless. In the most common TP-Link models, the MAC address is located in the Network folder; to copy it, you need to select a special column.
The Wi-Fi router setup has been successfully completed. Confirm the reboot - the router will prompt you to do it, then all the changes made will take effect.
Wireless access is convenient, practical, it’s easy to install such Internet, it just takes a little time and a little effort. Now you know how to go into the router settings and fill out all the necessary fields to get quick access no matter what part of the room you are in, and use the Internet on any device that supports this technology.
Hello! I’ll probably start with the fact that I’ve already written a lot of articles on setting up Wi-Fi routers, and about problems that may arise during the setup and operation of wireless access points. All articles are on this site, mainly in the “Internet” section. In this article I will provide links to the most necessary materials that may be useful to you when setting up a Wi-Fi router.
What is this article about? I want to talk in general terms about installing and configuring a Wi-Fi router yourself. Perhaps you want to buy a router and create a wireless network at home. Now is the time that we can’t live without it. One computer connected to the Internet via cable is a thing of the past. These are constant fights in the family for the opportunity to surf the Internet and a long line in the back :).
Moreover, now almost all devices have the ability to connect to the Internet via Wi-Fi. Phones, smartphones, tablets, laptops, netbooks, etc. And if there is no Wi-Fi at home, then you are simply limiting their capabilities.
Before I forget, I would like to separately write a few words about the harmfulness of Wi-Fi, or rather the waves that a Wi-Fi router emits. I wrote about this in a separate article. If you are interested in this question, then read the article. I will only say that there is no point in hiding from these “harmful waves”.Start searching for networks in your home. And you will see how many routers your neighbors have already installed (provided that you do not live in a village, there most likely will not be Wi-Fi networks). Moreover, the radiation from Wi-Fi is several times less than from a regular mobile phone, which we also hold near our heads. So they are afraid of a Wi-Fi router, this is not entirely normal and stupid.
Another plus of a wireless access point (aka Wi-Fi router) the fact that you can completely get rid of wires in your home. For some reason I am sure that your computer is not installed near the front door :). This means that the network cable needs to be stretched through the entire house. What if you just made a good renovation? A Wi-Fi router solves all problems. You can put it or hang it near the entrance doors, and some manage to place it in the common corridor (well, when there is a corridor for two apartments).
You probably ask: “But what about an ordinary desktop computer that does not have the ability to connect via Wi-Fi and needs to connect via a network cable?” everything is very simple, there are Wi-Fi receivers for such cases. I wrote about how to connect a desktop computer to Wi-Fi in an article.
Is it possible to connect and configure a Wi-Fi router yourself?
Maybe! And put aside any doubts and excuses, like I don’t know how, it’s difficult, etc. Well, for example, I set everything up myself, and I also wrote instructions for the site. If you are planning to call a specialist who will install and configure Wi-Fi, then my advice to you is to try it yourself first. It won't work out- Call the master. It will work out- Great! Will you be able to, for example, change the provider and what, call the technician again? And then you can set everything up yourself. Moreover, everything is relatively simple. You just need to want it!

Here is my detailed information to help you. Everything is there in detail and point by point, there shouldn’t be any problems. Using these instructions, you can configure other routers, because the process is practically no different. A lot of useful information is also in the comments, you can read them too.
Now I just remembered that I didn’t write about choosing a Wi-Fi router, because you are probably very interested in this question. I won’t recommend anything specific. Choose a router based on the amount of money you are willing to spend on it and the advice of the store salesperson (well, if the sales consultant is smart). All routers are good in their own way and all have their drawbacks. A year ago I bought a cheap one for my home (250 UAH/1000 rubles) router TP-Link TL-WR841N, the store recommended it to me. Excellent device, after a year of operation, no problems at all.
Possible problems when setting up a Wi-Fi router yourself
Judging by the comments to the articles on this site, there are problems. But this shouldn't scare you. Someone got a defective router, someone simply didn’t want to understand the nuances of the setup and immediately wrote: “Serega help, for some reason it’s not working!” :).
Setting up a router - main points:
- Connect the router to the computer via a network cable
- Connecting the Internet to the router
- Go to the router settings
- Setting up a tab WAN. Settings from the provider, if you don’t know what settings to specify, then you can safely call and ask the provider.
- Setting up a wireless Wi-Fi network. Set password, encryption type, security type, etc.
These are the main points; read the article for more details on setting up. As for various kinds of problems and errors, they most often arise when specifying settings from the provider and when setting up a wireless network.

But if there is a problem, then there is a solution. I tried to collect all the main problems when setting up a router and connecting to Wi-Fi. Of course, not just problems, but their solutions.
For convenience, I'll probably make a list of links to pages where I wrote about solving certain errors:
- Well, the most common problem when setting up a router is probably... Not only is this article the most popular on this site, so at the moment (04/09/2013) it is left for 739 comments.
- And others... :)
I tried to collect all the articles with the main errors. If you don’t find something, use the site search, maybe I missed something. Well, or ask in the comments, we’ll try to figure it out.