Hi all! Recently a friend asked me how to connect a second HDD to a computer or laptop. In general, without hesitation, I decided to write an article about this for you. I say in advance that if something doesn’t work out for you, write about it in the comments, I will help. Now let's begin.
How to find out what hard drive is in your computer
In general, initially, they connect second hard disk to a laptop or computer for those who have a lot of information stored and no longer have enough disk space. Personally, I store all the necessary data on removable media, be it a flash drive or a pocket. But in our case, we will figure out how to connect a second hard drive to a computer without a specialist.
First, let's disconnect all the power cables from the computer and unscrew the side cover; this can be done by taking a screwdriver and unscrewing the four bolts. We look at the picture where they are located and how the side cover of the system unit is removed.
note that hard disks in the system unit can be located on a special shelf or cell, in the center or at the bottom of the unit. Install the second hard drive not next to it, but across the cell; this should be done to ensure good cooling.
Before the purchase hard drive It is important to know what connection interface your drive has. This could be an IDE connector with a wide cable and a plug, or it could also be SATA, it’s not difficult to distinguish it, the cable itself is narrow and the plug is small. SATA connectors are the most popular now and such drives will not be difficult to buy.
If your motherboard and hard drive have a SATA connector, then you can connect it in a couple of minutes. First, we fix our hard drive into the cell and connect the sata wire from the drive to the motherboard to it.
Now we take our sata cable and connect this wire from either side, you can’t go wrong, don’t worry. Connect the second end of the wire to motherboard.

Just so you know, all motherboards have at least two sat connectors, you can see them in different places and they look like this.

Now let's connect the power cable from the hard drive to the power supply.
Please note that SATA and IDE connectors are also different, and if your plugs do not match, then you should buy an adapter that looks like this.
Now we connect the power cable to the hard drive.
Now we have everything ready, the second disk is connected. You can safely close the lid, tighten the bolts and download the toys to your computer, there is enough memory for everyone.
Video on the topic
If something didn’t work out for you, write to me in the comments, I will be happy to help everyone. Bye!
Hello dear visitors. In this lesson, using a real example, I will show you how to connect to your computer hard disk. I want to warn you right away that this is not difficult and it will not waste much of your time.
Let's get started right away!
First of all, prepare system unit: Turn off the power and disconnect all cables from it so that they do not interfere with us. After this, remove the side cover from the system unit by unscrewing the two screws on the back.

Now we can already see the insides of our computer. note to the lower right system unit. Here are the connection compartments hard drives.

Pick up the hard drive and carefully insert it into the free slot. The main thing is that the connectors for connection are turned inside the system unit.


Here the holes in the hard drive and on the slot itself where the drive is connected must also match. We will use these holes for fixation. We take 4 bolts and fasten them on one side and the other.

Completed at this stage installing a hard drive into the system unit. Now you need to connect it to motherboard. To do this, modern computers use a SATA power cable and a SATA interface cable. This is what they look like:

First of all, connect the SATA interface to the hard drive.

Be sure to connect the correct way. If you suddenly feel that the cable does not fit into the connector, then try connecting it on the other side. He'll definitely fit in.
The other side of the cable must be connected to the motherboard. We look for a suitable connector and connect it. Typically, these connectors are located at the bottom of the board and are labeled SATA.

The last step remains - supply power to the hard drive.
We take the SATA power cable and connect it to the hard drive, next to the first connector.

The other side of this cable must be connected to the power supply. Examine the wires coming from the power supply and find a connector for connection.

By the way, if you already have another hard drive is connected to the computer, then most likely the power is already leaving it and of course you can use it so as not to create new wires.
This is how it can hang unnoticeably among the wires:

After connecting the hard drive to the system unit, we proceed to setting it up in the system. Close the system cover and reconnect all the wires. Let's turn on the computer!
If you have new hard disk, then most likely it will not be immediately detected by the system and you need to format it.
Open the Computer section and see if a new hard drive has appeared?


Click on the Computer section right click and select Manage.


ATTENTION! The main thing here is not to mess anything up and not to delete data from the necessary disks!!!
Create a simple volume and format the new hard drive and, if necessary, assign a drive letter to it.


Well, as you can see, in modern computers connect hard drive very simple! It only remains to mention that in addition to the modern SATA interface, there is also IDE, which is used in old drives! It looks like this:

Now let's sum it up brief summary. So, to connect the hard drive to the computer you need to do the following steps:
1. Install the hard drive in a free slot
2. Connect the SATA interface
3. Connect SATA power
4. Set up a hard drive in Windows
That's all, good luck connecting the hard drive!
Not all users personal computer they purchase a device for productive video games, video rendering or 3D model processing. Quite a lot of people use PCs exclusively for watching videos, storing photos and surfing the Internet.
For such users, the main parameter in the computer will be the volume internal memory. The more disk space, the more data you can store, which is especially important if you watch videos in 1080p resolution and listen to music without compression. Thus, the average size of a film can be about 20 gigabytes, and the size of one music file can be at least 15 megabytes. What can we say about video games, which can reach 60 gigabytes in an uninstalled form and more than 100 when installed.
A modern computer simply must have at least one terabyte of memory, otherwise a person will constantly experience inconvenience associated with a lack of memory. Let's figure out how to install multiple hard drives in a computer.
What parameters should the motherboard support?
Of course, no one will buy a new one (MP) for the sake of a hard drive; however, if the MP is significantly outdated, then you will still have to change it.
Previously, hard drives were connected to the MP using the so-called IDE connector.
It is quite simple to distinguish an IDE connector from a modern SATA connector. An outdated connector is connected using a cable made of many wires, while the SATA connector is connected to 2 thin wires, one for power and the other for data transfer. If the motherboard does not have a SATA connector, the person will have to replace the motherboard.

When purchasing a motherboard, the buyer should pay attention to the availability of SATA 3 standards and the number of SATA connectors. In addition, a person must pay attention to ensure that the power supply has enough connectors to connect power to SATA components.

Selecting a hard drive
Depending on how many SATA connectors are on the motherboard, a person can purchase as many hard drives. There are motherboards with 12 connectors for connecting hard drives, but for such a computer you will have to purchase an appropriate power supply. Firstly, it must have enough power connectors, and secondly, the power supply must have enough power to operate so many components.
If the computer motherboard only supports SATA 2 type, then the SATA 3 hard drive connected to this interface will operate at a slightly slower speed, limited by the SATA 2 data rate.
When choosing the amount of memory, it is advisable to purchase the most capacious drive possible, especially if the MP is limited to 2 - 3 SATA connectors. However, if the buyer is not limited in funds, he can purchase a hard drive with the maximum capacity available on sale. Although, of course, it is better not to store all data on one drive.
As a manufacturer, it is best to purchase hard drives that are developed by well-known companies, such as Toshiba, WD and Seagate.
A running computer makes quite a noticeable noise, the source of which is the hard drive. The hard drive is especially noisy when reading or writing. Naturally, the more hard drives, the louder the noise emitted by the computer. Hard drives with a lower rotation speed of 5400 - 5700 rpm are less noisy. Unfortunately, the reduced rotation speed negatively affects the overall speed of operation. In addition, if the computer is assembled to order or independently, then you should choose a high-quality case with anti-resonance properties. In order to completely get rid of noise, you need to purchase SSD drives, but their cost is significantly higher than the cost of classic disks with lower capacity.

Hard SSD drive with a capacity of 250 GB will cost the same as an ordinary 1 TB HDD, but its data exchange speed is several times higher than ordinary hard drives. The material "" explains about the units of measurement of information.
Before installing a new component, you must turn off the computer and remove both system unit covers. You can access the motherboard from the left side of the case. In the front of the case there are several compartments “pockets” into which hard drives are installed. The number of “pockets” depends on the form factor of the case. Standard ATX case form factor on average has about four sites for installing hard drives.

The hard drive placed in the bay is secured with bolts on both sides of the system unit. Typically, bolts are included with the hard drive.

A securely fixed hard drive produces significantly less noise. In addition, the hard drive has a moving mechanism, which is why a poorly secured part can be damaged due to constant vibrations.
After installing the hard drive into the case, it must be connected to the motherboard and power. Both connectors are similar, but it is simply impossible to connect power to the data connector.

Thus, a special SATA cable is connected to the hard drive, the other end of which is connected to the motherboard.

Wires for powering the hard drive are connected directly from the power supply.
After a successful connection, the computer turns on in normal mode. Most often, after turning on, a tool for adding a new device appears on the screen.
If the hard drive is not detected by the system, then you need to enter the menu “ Control Panel", Further " system and safety" And " Administration", Then " Computer management", then "Disk Management" and format the new volume.

After formatting, you should right-click on the unmarked space and select “ Create a new volume».
Thus, the ideal option is a computer with 2 - 3 hard drives, the smallest of which will be allocated for the operating system (system drive).

Hard drives installed on your computer will appear in “My Computer” as local drives.
Share. Connect the second hard drive to the computer.
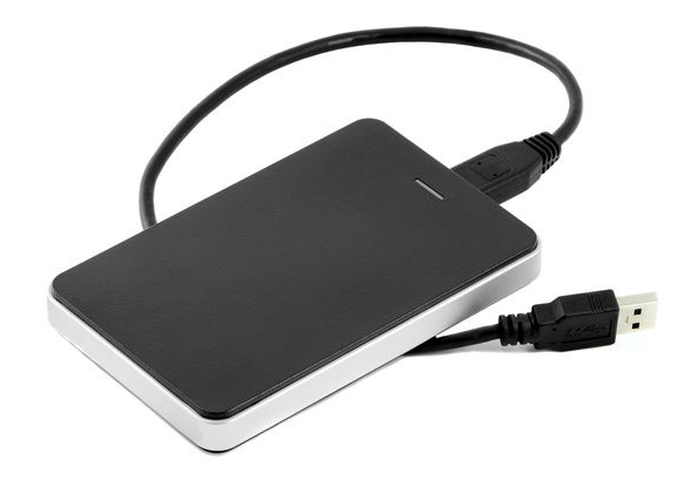
The time has come when one hard drive in a computer is no longer enough. More and more users decide to connect second HDD to your PC, but not everyone knows how to do it correctly themselves in order to avoid mistakes. In fact, the procedure for adding a second disk is simple and does not require special skills. It is not even necessary to mount the hard drive - it can be connected as external device, if there is a free USB port.
Connecting a second HDD to a PC or laptop
Options for connecting a second hard drive are as simple as possible:
- Connecting the HDD to the computer system unit.
Suitable for owners of regular desktop PCs who do not want to have external connected devices.
- Connecting a hard drive as an external drive.
The easiest way to connect an HDD, and the only one possible for a laptop owner.
Option 1. Installation in the system unit
HDD type determination
Before connecting, you need to determine the type of interface the hard drive works with - SATA or IDE. Almost all modern computers are equipped with a SATA interface, so it is best if the hard drive is of the same type. The IDE bus is considered obsolete and may simply not be present on the motherboard. Therefore, connecting such a drive may cause some difficulties.
The easiest way to recognize the standard is by contacts. This is what they look like on SATA drives:
And this is how the IDE does it:
Connecting a second SATA drive in the system unit
The process of connecting a disk is very easy and takes place in several stages:
Boot priority for SATA drives
The motherboard usually has 4 connectors for connecting SATA drives. They are designated as SATA0 - the first, SATA1 - the second, etc. The priority of the hard drive is directly related to the numbering of the connector. If you need to manually set the priority, you will need to go into the BIOS. Depending on the BIOS type, the interface and controls will be different.
In older versions, go to the section Advanced BIOS Features and work with the parameters First Boot Device And Second Boot Device. In new BIOS versions, look for the section Boot or Boot Sequence and parameter 1st/2nd Boot Priority.
Connecting a second IDE drive
In rare cases, there is a need to install a disk with an outdated IDE interface. In this case, the connection process will be slightly different.
Connecting a second IDE drive to the first SATA drive
When you need to connect an IDE drive to an already working SATA HDD, use a special IDE-SATA adapter.
The connection diagram is as follows:
- The jumper on the adapter is set to Master mode.
- The IDE plug connects to the hard drive itself.
- The red SATA cable is connected on one side to the adapter, and the other to the motherboard.
- The power cable is connected on one side to the adapter, and on the other to the power supply.
You may need to purchase a 4-pin to SATA adapter.
Initializing the disk in the OS
In both cases, after connecting, the system may not see the connected disk. This does not mean that you did something wrong; on the contrary, it is normal when the new HDD is not visible in the system. The hard drive must be initialized before it can be used. Read about how this is done in our other article.
Option 2. Connecting an external hard drive
Often users choose to connect external HDD. This is much simpler and more convenient if some files stored on the disk are sometimes needed outside the home. And in the situation with laptops, this method will be especially relevant, since there is no separate slot for a second HDD.
An external hard drive is connected via USB in exactly the same way as another device with the same interface (flash drive, mouse, keyboard).
A hard drive designed for installation in the system unit can also be connected via USB. To do this, you need to use either an adapter/adapter or a special outer casing for hard drive. The essence of the operation of such devices is similar - through the adapter the HDD is supplied required voltage, and the connection to a PC is via USB. Hard drives of different form factors have their own cables, so when purchasing you should always pay attention to the standard that specifies the overall dimensions of your HDD.
If you decide to connect the drive using the second method, then literally follow 2 rules: do not neglect safe removal devices and do not disconnect the disk while working with the PC to avoid errors.
We talked about ways to connect a second hard drive to a computer or laptop. As you can see, there is nothing complicated in this procedure and it is absolutely not necessary to use the services of computer specialists.


Today there was some kind of computer quiz on the radio. The prize is an 8 GB flash drive. Question: what is the name of the place where everything is stored? computer memory? Possible answers: driver, clipboard or hard drive (yes, the announcer read exactly hard drive). Let's talk about hard drives.
Many people ask: how to connect a second hard drive to a computer? If we are talking about modern computer and a SATA screw, then there are no problems: turn off the computer, secure the hard drive with 4 bolts, insert the power cable and the SATA cable. Plug the second end of the cable into any free port of the motherboard and turn on the computer. In general, it is better to print this article and store it on paper, because if you need to read it, the computer will be turned off.
If IDE hard drives, you will have to dance a little with a tambourine, or rather with a jumper.
IDE hard drives can coexist on one computer only under the condition of subordination: one must be the main one (master), the rest must be subordinates (slave). This is established using a jumper - a tiny plastic “key” that closes certain contacts.
The details of jumper installation are always indicated either on the top cover of the hard drive (the sticker should contain the inscription Jumper Settings or similar), however, there are cases when the jumper positions are indicated directly on the board next to the contacts.
Please don't change jumper position and do not disconnect (connect) the hard drive while the computer is on! And don’t say later that I didn’t warn you.
Just in case: hard drive with operating system and programs must be “Chatlanin”, and music, films and other documents can safely live on “Patsak”.
The dancing with the jumper is over, let's move on to the train. On one side there is one connector - it is intended ONLY for the motherboard. Insert it carefully into the corresponding slot on the motherboard, as shown in the figure.
Attention! Insert IDE cable The connector on the motherboard can only be inserted on one side: the “key” must fit into the groove. On the other hand, there is no groove and the insertion will not only be incorrect (it will lead to undesirable consequences), but also problematic.
There are two connectors at the other end of the cable. Important! At the far end of the cable there must be a main hard drive, the jumper of which is set to master. The near connector, accordingly, is only for the slave.
Finally there was food left. The 4-core cable ends with a connector that is connected with characteristic notches at the top; plugging in the power with the reverse side is very problematic.
Many thanks to the members of the Subscribe group " Computer literacy» Sergey and Elena (Kazak7 and Greta*) for their comments, thanks to which the article gained a logical continuation. Sometimes the comments contain a lot useful information. Good luck with all your connections!
Windows Registry