Introducing Beta 2 operating system Windows Vista™. We appreciate the time you spent evaluating and deploying the print management snap-in, as well as your feedback and suggestions.
What is the Print Management snap-in?
Print Management is a Microsoft Management Console (MMC) snap-in that you can use to install, view, and manage all of your organization's printers from any computer running an operating system. Windows Server 2003 R2 and Windows Vista Beta 2. There is also a Print Management snap-in for Windows clients XP (x86 and x64). Print Management in Windows XP operates similarly to other versions of Print Management, except that it does not support property pages (such as Printer/Ports/Driver/Form Properties and Server Properties) or the AutoAdd feature. network printers on the local server. The Print Management snap-in provides current information about the status of printers and print servers on your network. You can use Print Management to establish connections to printers on a group of client computers simultaneously. The Print Management snap-in helps you find printers that are in an error state using filters. It also sends notifications by e-mail or runs scripts when the printer or print server requires attention. For printer models that are linked to a web page, Print Management has access to more information, such as toner levels or paper quantities, which can be managed remotely if needed.
Who is Print Management for?
This guide is intended for the following readers:
print administrators and support specialists;
IT planners and analysts involved in product evaluation;
corporate planners and IT systems developers;
users who implement new products earlier than others.
Benefits of Print Management
The Print Management snap-in saves the print administrator a significant amount of time when installing printers on client computers and managing and monitoring printers. Tasks that might have required up to 10 steps on each individual computer can now be completed in 2 or 3 steps on multiple computers simultaneously and remotely.
Using the Print Management snap-in with group policy, you can automatically grant users and computers in your organization access to printers. Additionally, Print Management can perform automatic search to install network printers on the local subnet of local print servers.
In this guide
Requirements for using the Print Management snap-in
To use Print Management in Windows Vista Beta 2, Print Management is automatically installed and accessed through Microsoft Management Console (MMC).
The Print Management snap-in allows you to view printers running on print servers under Windows control 2000 Server, Windows Server 2003, Windows Server 2003 R2, Windows Server® Code Name "Longhorn", and Windows Vista Beta 2.
It is recommended that you use the steps in this guide in a test environment first. The walkthroughs should not necessarily be used for the purpose of deploying Windows Server OS features without the accompanying documentation (listed in the Additional Resources section) and should be used with caution when used as stand-alone documents.
Security requirements
To take full advantage of Print Management, you must be logged on to the print server that you manage as an administrator or a member of the Administrators group.
The recommended approach is to use accounts with limited rights to perform standard, non-administrative tasks, and accounts with broader powers - only to perform special administrative tasks.
You can use Print Management to monitor any print server and printer without administrative rights. However, you may not be able to perform certain functions, such as adding or removing printers and printer drivers.
Steps to deploy and use Print Management
To deploy and use Print Management, you must complete the following tasks:
Step 1: Install the Print Management snap-in
Print Management is installed automatically and accessed through Microsoft Management Console (MMC).
Block pop-up messages from trusted sites
Some printers have web pages that provide access to additional characteristics and functionality. Accessing these web pages may occasionally cause you to receive warning messages from your web browser. Internet Explorer. There are two ways to resolve these messages. The first method is to add each printer's Web site to Internet Explorer's list of trusted sites. The second method is to disable the Enhanced Security Configuration option in Internet Explorer using the Install Windows Components item. For more information about how disabling this setting affects server security, see Managing Internet Explorer Enhanced Security Configuration on the Microsoft Web site (http://go.microsoft.com/fwlink?LinkId=28735) (at English language).
Step 2: Open Print Management
To be able to use Print Management on a computer in a different location using Remote Desktop, remote computer Windows Server Longhorn and Print Management must be installed.
To open the Print Management snap-in
Open Control Panel, select item Administration and click Print management.
Step 3: Add print servers
In the Print Management snap-in, you can add both local server print and network print servers. Note that the computer on which Print Management is installed does not have to be a print server.
Adding a Local Print Server
If the server on which you are using Print Management is also a print server, and you want to manage the printers hosted on it using Print Management, use the following procedure to add a local print server to Print Management.
To add a local print server
Adding a Network Print Server
To add a print server
Enter the name of the print server you want to manage.
Click the button Review to find and select a print server.
Print management or print servers Adding and removing servers...
In the dialog box Adding and removing servers In chapter Selecting a print server execute in the field Adding a server one of the following:
Click Add to the list.
Add all the required printers and then click OK.
Step 4: View Printers
In the Print Management snap-in tree, there are three places where information about printers is stored: , Print servers And Deployed Printers. Folder Custom printer filters contains objects “All Printers”, “Not Ready”, “With Print Jobs”. An object All printers Displays a dynamic view of all printers on all servers that can be managed by Print Management. All custom views, or filters, of printers that you create are stored in the folder Custom printer filters.
Added network print servers are stored in the folder Print servers. Each print server is automatically assigned four objects that serve as filters for server information:
Drivers
Printers
To quickly access the dialog box Print Server Properties click right click mouse object Drivers, Forms or Ports and in context menu select Driver management, Form management or Port management.
Folder Deployed Printers contains a list of all printers located in the Print Management snap-in and managed using objects group policy. For more information about managing printers using Group Policy, see the section later in this chapter.
Standalone print servers
If the server goes to offline mode operation, the icon for that print server changes and is appended to its name. (Disabled). All printers on this server will be hidden in all views. Objects Drivers, Forms, Ports And Printers will also not be displayed until this server is brought back online.
Printer Information
Information about each printer appears in the Console Results pane. The results pane contains columns with values such as printer name, queue status, number of jobs in queue, and server name. To view only certain printer characteristics, you can add or remove columns shown, and you can filter all of your organization's print servers to show only printers that have certain values. In Fig. Figure 1 shows the filtered view and the resulting columns.
In any view, you can sort by one of the criteria by clicking the corresponding column header.
Rice. 1. Table of printers with the value "Suspended" in the "Queue Status" column
You can also set up an advanced view that will show you more information about the queue and, if you have a printer web page, give you access to it. In the advanced view, you can add, remove, and sort columns.
Adding and Removing Columns
When you click on an object Printers each print server or site in the folder Printers In the results pane, you can view columns of printer information. In this view, you can change the columns, and the selected columns will be the same in all objects Printers and in all custom views.
To add or remove columns
Right click Printers, hover over Performance and then click .
In the dialog box Adding and Removing Columns select the column name and click Add or Delete.
The selected columns will be used the next time you open Print Management only if you save the MMC file.
Displaying the Expanded View
The expanded view appears below the columns in the right pane and is separated by a separator. The expanded view is convenient when you need Additional Information about the status of the print job, its owner, number of pages, size of the job, when it was sent, its port, importance, etc.
When Enhanced View is enabled, it is enabled for all objects Printer all print servers and custom views.
To open the extended view
In the Print Management snap-in tree, under a print server node, right-click Printers and select from the context menu Show expanded view.
Note.
To show or hide columns in the expanded view, select your printer. On the tab Tasks Right-click the column header row and select the column you want to show or hide from the context menu.
Filtering Views
You can use the filtering feature to create custom views of printers, for example you can filter for printers that have certain error conditions or are located in a specific building group, regardless of the print server they use. The data in each view is dynamically updated. All filtered views are stored in the folder Printers
An example of a useful filter is shown in Fig. 2. This custom view contains all printers on the specified print server that have a queue status other than Ready and that have one or more jobs in the print queue.
Rice. 2. Apply filter criteria to create a custom view of printers
Each custom filtered view can be configured to send email notifications and run a script. For information about using these features, see the section later in this chapter.
To customize and save a filtered view
Enter a name for the printer filter. This name will appear in the folder Custom printer filters tree of the Print Management snap-in.
On the list Field Click the print queue or printer status feature.
On the list Condition select the required condition.
In field Meaning enter value.
Continue adding criteria until the filter is ready and then click the button Further.
Check the box Send notification by email and enter the email addresses of one or more recipients and the sender. To route messages, you must specify an SMTP server.
To create a new printer filter without sending email notifications, clear this check box.
Select the check box and then enter the path to the script file. To add additional arguments, enter them in the field Additional Arguments.
To create a "New Printer Filter" without specifying a script, clear this check box.
In the Print Management snap-in tree, right-click the folder Custom printer filters and select from the context menu Add a new printer filter. This will run Printer Filter Wizards.
In chapter Printer filter name and description do the following:
Enter a description to help distinguish this printer filter from others. This description will be displayed when you select the Properties item for this filter.
In chapter Define a printer filter do the following:
In chapter Set up notifications (optional) do the following:
In chapter Run script do the following:
Click the button Ready.
Step 5: Save the custom view
When you use Print Management custom views, you can save one or more views. Print Management snap-in files have the extension .msc.
You can configure the following Print Management snap-in settings for viewing:
added print servers;
custom views (filters) and notifications;
column settings.
Step 6: Manage Printers
You can use Print Management to manage all of your enterprise's printers, including branch office printers. You can use one interface to manage printer sharing, update drivers, and manage print queues. There is no need to navigate to separate folders for each printer on each printer server.
Automatically install printers on a local print server
The local print server administrator can add and remove printers. The Print Management snap-in allows you to automatically discover printers that are on the same subnet as the print server, install the appropriate printer drivers, configure queues, and organize printer sharing. Unless the printer driver cannot be found, no user action is required.
The auto-discovery feature does not work through firewalls, so if you need to use this feature for branch offices or other locations outside the server's subnet, use Remote Desktop to log into the local print server and run the process from that computer. You must have administrator rights on the computer on which printers will be added.
To automatically add network printers
In the Print Management snap-in tree, right-click local print server and select from the context menu Adding a Printer.
This will run Network Printer Installation Wizards.
Select Search for printers on the network and automatically configure the port.
Note.
You may be prompted to select a printer driver to install, but otherwise the process is automatic.
Use Print Management to manage more printers
Some management tasks can be performed on multiple printers simultaneously. To do this, you can set up a filter so that all the printers you need are in one view and easy to select.
You can perform the following tasks on multiple printers at the same time:
pausing print jobs;
canceling print jobs;
resuming print jobs;
adding the printer to the list;
removing a printer from the list;
removing the printer.
For more information about each of these tasks, see the following sections of this guide.
Pause, cancel, resume print jobs on one or more printers
When the printer is not responding due to a problem, such as being out of paper, you can use the Print Management snap-in to cancel or pause all print jobs. These steps can be performed on more than one printer at a time. If you want, you can set up a filter to show all the printers that you want to cancel jobs on, making it easy to select all of those printers at once.
To pause, cancel, or resume print jobs from the printer
In the Print Management snap-in tree, under the print server node, click Printers.
In the results pane, right-click the printer where you want to pause, cancel, or resume all jobs, and select the appropriate command from the context menu.
Removing printers
You can remove one or more printers from the print server at the same time. Note that you can create a custom view and use it to filter all the printers that you want to remove.
Warn users that the printer will be removed and provide them with a different printer. Before you remove a printer, make sure its queue is empty.
To remove a printer from the print server
In the Print Management snap-in tree, under the print server node, click Printers.
In the results pane, right-click the printer you want to remove and select Delete.
Updating Device Drivers
Information about printer drivers for each server added to the Print Management console is shown separately. By default, columns showing the driver name, driver version, environment, and vendor are displayed. You can add desired columns to display additional information such as configuration file path, data file path, default data type, driver file path, manufacturer.
Scroll detailed information can be exported to text file, so that you can later use it outside of the Print Management snap-in.
To manage device drivers
To add a printer driver, click Add and follow the steps Add Printer Driver Wizard.
To remove a printer driver, select the driver from the list and click Delete.
To reinstall the printer driver, select the driver and click Reinstall.
To view printer driver information, select the driver and click Properties.
Drivers and select from the context menu Driver management.
Perform one of the following actions:
Adding or removing printers from the Active Directory list
Inclusion in the list of services Active Directory makes it easier for users to find and install printers. After you install printers on the print server, you can use the Print Management snap-in to add them to the Active Directory list.
In fact, you can add multiple printers to the list at the same time. If necessary, you can set up a filter to show all the printers you want to include or remove from the list, making it easy to select all of them at once.
To include or exclude printers from the Active Directory list
In the Print Management snap-in tree, under the print server node, click Printers.
In the results pane, right-click the printer you want to add or remove from the list and select List in Active Directory or Remove from Active Directory.
Export a list of printers and displayed columns
Data for each object Printers, including those displayed in this moment columns can be exported to a text file.
To export a list of printers
In the Print Management snap-in tree, under the appropriate print server node, right-click Printers and select from the context menu Export list.
In the dialog box Export list in field File name enter the file name and click the button Save.
Deploying printers to users or computers using Group Policy
You can use Print Management with Group Policy to automatically add printer connections to the Printers and Faxes folder on the client computer.
To do this, use dialog box Deployment using Group Policy to automatically add printer connection settings to an existing Active Directory Group Policy Object (GPO). When Group Policy processing starts on client computers, the printer connection settings will be applied to the users or computers associated with this GPO. When you monitor a print server that has printers that you deploy using this method connected to, they will appear in the Deployed Printers object in the Print Management snap-in tree.
This method of installing a printer is useful in a laboratory, classroom, or branch environment where all computers in a classroom or office must have access to a single printer. It can also be used in large organizations where computers and printers are often separated by purpose, workgroup or department, such as printers in the marketing or human resources department.
A connection to a printer that was established using a connection designated for a specific user is available to that user regardless of which computer the user is on the network. Connecting to a printer using a connection specific to a specific computer appears in the Printers and Faxes folder and will be available to anyone using that computer.
To enable this feature on computers running Windows operating systems earlier than Windows Vista Beta 2, you must use the PushPrinterConnections.exe utility.
To do this, on all computers or for all users who, after deploying printer connection settings using Print Management, will receive a GPO with printer connection settings, add the PushPrinterConnections.exe utility to the machine boot script (for specific computers), or into the user login script (for connections for specific users). This utility reads the settings made by a GPO that contains printer settings and adds a connection to the printer.
It is recommended that you use a single GPO to configure printer connections and to run PushPrinterConnections.exe to ensure that the appropriate users and computers are updated whenever the GPO is updated.
Note.
Computers running Windows 2000 only support printer connections that are intended for specific users. To use printer connections for certain computers, you must be using Windows XP or a later operating system.
Important!
To use a GPO to manage printers, you must have write access to the GPO. Before you can install printers using Group Policy, you must have a GPO associated with the appropriate users and computers to configure printer connections. You can use Group Policy Object Editor or Active Directory Users and Computers to create a GPO.
For more information about using Group Policy, see Enterprise Management with the Group Policy Management Console on the Microsoft Web site (http://go.microsoft.com/fwlink?linkid=22814).
To set printers for groups of users or computers using Group Policy

To use PushPrinterConnections.exe
If printer connections are being deployed to specific machines, go to Computer configuration, Windows Settings , Scripts (start/stop);
If printer connections are being deployed to specific users, go to User Configuration, Windows Settings, Scripts (input/output).
In the Group Policy Management Console (gpmc.msc), right-click the GPO with printer connection settings and select Edit.
In the Group Policy Object Editor tree, navigate to one of the following:
Right click Launch or Entrance and select from the context menu Properties.
In the dialog box Login Properties or Launch properties select Show files.
Copy the PushPrinterConnections.exe file to this location and then close the window.
In the dialog box Login Properties or Launch properties click Add.
In field Script name enter PushPrinterConnections.exe.
To enable logging, enter –log in field Script Options. The log is written on the computer on which the policies are applied to the file %windir%\temp\ppcMachine.log (for connections of specific machines) or to the file %temp%\ppcUser.log (for connections of specific users).
Click the button OK.
Step 7: Troubleshoot printer problems
Print Management has several features that can help you identify and resolve problems with printers, including those located in remote locations. By setting up predefined filters, you can easily find all printers that have a status other than Ready or that have backup copy queues. Many devices, regardless of manufacturer, provide extensive status information that can be easily accessed through the Print Management snap-in. With good monitoring of your organization's printers, you can even prevent problems before they occur, such as detecting that you're running low on paper or toner.
You can also set up an email alert to alert you that a specific printer needs attention. This is especially useful if the printers are located in different locations and different people are responsible for managing them. Using automated system, which will notify you when a printer or print server is not working, problems can be resolved faster and control program will require less attention.
Using the printer web page
Multifunction printers sometimes have a Web page that can be accessed through the expanded view of the Print Management snap-in. Functionality Printer web pages may vary depending on your printer model and manufacturer. Some multifunction printers provide remote functions such as detecting the amount of paper in each tray and the toner level. In some cases, printer web pages can help you delete print jobs or update device drivers.
Note.
If the printer does not work due to a network error, you cannot view the printer's web page.
Setting up an email notification
When you create a view or filter for specific printer settings, you can automatically send an email notification when the filter conditions are met. This is useful for troubleshooting printer problems, especially in organizations that have multiple buildings and administrators.
For example, you can configure a view that displays all printers managed by a specific print server that have a state other than Ready. The administrator can then receive email notifications from Print Management when the printer status changes from Ready to Ready.
To send these notifications, you must configure the sending of these messages on your SMTP server.
To set up email notifications

Setting up server notifications
In addition to setting up notifications for a custom printer group, you can set up notifications for print server objects. For example, if the server is offline or the print queue is down, an email notification can be sent. To do this, right-click the print server object, select from the context menu Notification and then follow steps 2 and 3 in the “To set up email notifications” section.
Print a test page
You can quickly perform a test print on any printer in your organization. This may be necessary to check the printer, especially if it is located in another building.
To print a test page
In the Print Management snap-in tree, click the appropriate print server.
In the results pane, right-click the printer you want to test print on and select Print a test page.
Using Scripts
When you create a filter that filters based on specific printer criteria, you have the option to run a script when the filter conditions are met. Notifications for running scripts are defined in the dialog box Notifications. The ability to set up notifications to run scripts is useful for troubleshooting and troubleshooting printer problems.
For example, you can automatically run a script to restart the print queue when printers go offline. You can also automatically run a script that performs a test print.
The script launched by the filter notifications is passed the following arguments: user_arguments printer_name \\server_name filter_name. If the script does not accept the parameters specified by the Print Management snap-in, you can use the Test button to verify that the script is working correctly. Custom_arguments must be separated by spaces. The length of Print Management and user-defined parameters must not exceed 2048 characters.
Server notification arguments: user_arguments server_state server_name. For example, you can automatically run a script to restart a remote print queue when a service goes offline.
Scripts can be written in Visual language Basic Script (.vbs) or any other scripting language available in this computer. The script must be on the same computer as the Print Management snap-in. The script must be run with the credentials of a user who must have permission to execute everything the script does.
An example of a command that could be used in a script would be to restart a remote print queue: sc\\%2 start spooler
Step 8: Troubleshoot Print Management snap-in
If you are using a firewall with Print Management, some or all of the printers on network server stamps may not appear. To resolve this issue, add Print Management to the exceptions list in Settings software firewall. For example, in Windows Firewall this is a setting on the tab Exceptions.
To display printers when using a firewall
Click the button Start, select Control Panel, Windows Firewall.
On the tab Exceptions select General access to files and printers and press the button Change.
In the dialog box Service setup click the button Change area and select Any computer (including from the Internet).
Click the button OK.
Logging errors, comments and suggestions
Your comments and reviews have great importance to improve this feature in future releases of Windows Vista Beta 2. Please provide comments and feedback regarding your experience using Print Management, the problems you encountered, and how helpful you found this document. We'd also love to hear your suggestions on how we can make this feature more useful.
Follow the instructions on the Microsoft Connect website (http://go.microsoft.com/fwlink/?LinkId=49779) to log errors. We are also interested in your feature requests and general feedback about Print Management.
Quite often, clients come to us with very simple questions. But sometimes, not everything is as simple as it seems at first glance. One such question is how to remove my printer driver? Sometimes printers fail, and when removing drivers, an unpleasant situation occurs. The newly installed printer does not want to print.
For this reason, many users are faced with the problem of uninstalling the printer driver. It would seem such a simple procedure, but unfortunately Windows 7 sometimes gives surprises and the driver is simply not removed. So how to remove a printer driver? There is one way that should help in this matter.
How to remove a printer driver in Windows 7
Let's carry out complete removal drivers. Let's go through everything step by step - removing the printer driver is not so difficult. So, in Windows 7:
1. Delete the printer and “Devices and Printers”, which can be accessed through “Start”.

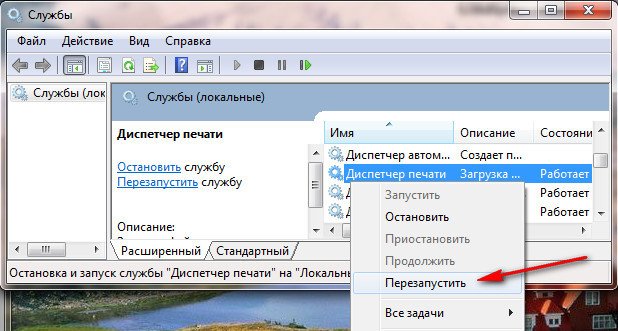
2. Again through “Start” enter Services.msc to the search bar. Next, you need to find the “Print Manager” service and restart it.

3. Once again go through “Start”, this time enter the command printui /s /t2 and go to the print server properties.

4. Go to the “Drivers” tab and remove the printer drivers. It is better to select "Remove driver and driver package".


5. Again, through “Start” we drive in printmanagement.msc and go to “Print Management”. Further:
Custom filters → All drivers → right-click on the driver “Remove driver package”

After removing the driver
After you have uninstalled the printer driver, be sure to install it again. The easiest way is to find suitable driver for your model on the printer manufacturer's website. This will save you from problems such as viruses or a broken driver. Now you know how to remove a printer driver in Windows 7. We hope that the article was useful and you removed the broken drivers.
Note: Using this panel with the mouse is interesting, but difficult, especially with complex operators such as integrals.
Personality editor for creating your own fonts in Windows 7
The personal identification editor is part of the operating room Windows systems, since version XP. This tool allows you to create your own characters and add them to Windows fonts, similar to font editors. To create symbols, you are given a 50 by 50 grid. You do not have to draw symbols from scratch, you can also open existing symbols and copy them to later compose your symbols.
Note Note: Be careful when using this tool as you will be changing the used Windows fonts. Also, please note that any changes you make will only be available on your computer unless you copy and install the modified font files to other computers.
There are several ways to open the Personal Sign Editor, but here is a method that will allow you to open it in all current versions of Windows:
- Press the key combination "WinKey (Windows key) + R"
- Enter "eudcedit" (without quotes)
- Press Enter or OK button
- The Personal Sign Editor will open.
Now, you know about three little-known Windows tools.
Removing a Windows 7 printer is associated with certain difficulties and in a simple way It will not work to remove the wrong driver. Let's do this operation together, screenshots of each of our steps are at the end of the article.
- First thing to do: Go to Control Panel->Devices and Printers and delete our printer until we reboot.
- Second: Start->Run, type Services.msc and go to the tab Services restart Print Manager.
- Third: Start->Run, type printui /s /t2 we get into the window Print Server Properties and remove our printer driver. We can choose Remove driver and driver package.
- Fourth: Opening Print management Start->Run, type printmanagement.msc. In folder Custom filters need to choose All drivers, right-click on our driver and select from the drop-down menu Remove driver package. If an error appears, it means it has already been deleted.
Also in Print Management, in the tab Print servers, select the item Drivers And Printers remove our driver.
Basically remove Windows 7 printer driver Now we have already succeeded and after a reboot the new driver should be installed successfully, but you can still do the rest of the manipulations to be sure.
- Fifth: Look at the menu Uninstalling or changing a program Is there any mention of your printer, if yes, then click Remove, then remove all components of your printer software. Delete all files related to the printer from your computer, starting with the folder Program Files.
- Just in case, look through the registry for the presence of keys with the name of your printer.
Reboot and install a new printer driver.


A printer is indispensable these days. peripheral device for office and home. Therefore, users often have personal computers Windows 7 OS causes problems with drivers on these devices. Problems can be very different. For example, the printer does not want to print, the device driver is outdated and needs to be replaced, or the wrong driver is installed on the printing device.
To solve this or that problem you need remove or reinstall printer driver. To solve this problem, we have prepared material that describes in detail the process of removing and reinstalling the printer driver. In addition, in the material you will find useful information, which will help you solve some problems associated with printing devices.
Removing the printer driver from Windows 7
First let's get down to business to the Control Panel section "". You can get there using the program " Execute" and the following command: control printers The program is launched using the keyboard combination Win + R.
After executing the command, the required section will open. It is also worth noting that this section can be found in the Control Panel itself.

For example, we took a new MFP.

Our next action will be to remove it from the section that we opened. To delete it, right-click on it and select “”.

Now we need to go to the add-on " Services" To do this, in the program " Execute" we use the following command: Services.msc You can also find this add-on in the Control Panel in the Administrator section. In this add-on we need to find the service " Print Manager" After that, right-click on this service and select “ Restart».

Operations performed will reboot the one under consideration service. This is necessary so that the drivers on the print server can be uninstalled normally. Now let's move directly to the print server. This can be done with the command in the program “ Execute": printui /s /t2

In the window that opens, we find the driver related to the Samsung M2880FW MFP and delete it with the Delete button. Our actions do not end there yet. We need to go to the latest add-in " Print management" To do this, execute the following command: printmanagement.msc in the program “ Execute" In the add-on that opens, go to the sections “ Custom filters / All drivers“After that, we’ll find our printer from the list and delete it.

After completing all the steps described in the example, you will completely get rid of all traces of the Samsung M2880FW MFP driver in Windows 7. All traces will be deleted regardless of how the device is connected: even if parallel port or WiFi.
Now all that's left to do is last action, namely remove all software related to the MFP Samsung M2880FW. This can be done using standard Windows 7 tools via uninstall panel.

The example shows how standard system tools can easily remove all traces of drivers. In addition, the above method is suitable for everyone Windows versions, for example, for XP. The only difference in Windows XP will be the name of the section for printers.
Correct installation of printer software
The main reasons for printer malfunction are: drivers, which Windows user 7 downloaded from unreliable source. Such sources can be various pirated resources and torrent trackers. Therefore, if this is exactly the situation you have, then - delete Software of your device, using the method described in the first example. After this, you need to download software for the printer or MFP from reliable source.
The most reliable and only safe source of printer drivers is the website of the printing device manufacturer.
For example, to download drivers for an MFP Canon PIXMA MG7740 You must go to the company’s device support website www.canon.ru/support. Then enter the name of this MFP in the search menu.

After completing the search, the site will return results containing required software for proper operation of the MFP in question Canon PIXMA MG7740.

Uninstalling Drivers Using Driver Fusion
Driver Fusion is a great tool for removing software for printing devices. You can download the utility from its official website https://treexy.com. The utility has a Russian interface, although some sections are poorly translated.
Consider the work Driver Fusion more details. Let's launch the utility and go to the section " Driver's family" From the Russian title of the section it is clear that it is incorrectly translated. The correct translation is " Driver family».


In the window that opens you can see almost all printer manufacturers. To remove all drivers from the Windows 7 operating system, select the required manufacturer and click the " Delete" After these steps Driver Fusion will begin to completely remove all traces of drivers from the selected manufacturer. All types of printers are removed from various types connections - at least through a parallel port or USB interface.
The example shows that using the utility is quite easy. It performs the task of removing drivers much easier than standard means Windows 7 described in the first example. Therefore, Driver Fusion can be recommended to beginners.
Using this utility, you can remove the driver for any device. I would also like to note that the utility supports both new and old Windows operating systems, so you can run it on XP or ten.
Conclusion
One of the main reasons for the inoperability or malfunction of a printing device is drivers obtained from unreliable sources. Therefore, follow the examples and recommendations in the article to solve and avoid problems with your printer. We hope that our material will be useful to you.
Video on the topic