 Modern houses are like a gallery of various household appliances. And almost every device has its own remote control. There is nothing strange that sometimes you can get lost in the "collection" of remotes and not understand what's coming from what. And in general, ideally, they would be replaced with one remote control. But I don’t really want to lay out a tidy sum for such a device. Yes, and there is no need to throw money away. This video tutorial will show you how to make Universal remote Do it yourself.
Place the electronics on your wrist, the loudspeaker on your thumb, and the microphone on your little finger. Cut the wires to the correct length to connect the speaker and microphone to the electronics. Remove the insulation from the ends of the wires, whitewash them and solder the elements. Slide the electronics back into the case, cutting out holes for the wires from the microphone and speaker so that they come out freely.
Put on a second glove to cover and secure the wires. Be sure to wear gloves before you get started so you don't get ink on your hands. Cut off the lid of the container with a wallpaper cutter. Remove the sponge and rinse the inside of the cartridge.
Tutorial video "How to make a universal remote control with your own hands"
Infrared port returns to smarts
To make a remote control for any technique with your own hands is within the power of everyone. To do this, you do not need to be a super-physicist - just follow detailed instructions. But before describing step by step how to make a universal remote - one interesting fact.
Cut a cube out of the new sponge a little larger than your cartridge and then push it into the container and fill it with normal fluorescent ink. Start by preparing the chassis for your lawn mower. From plywood about 7 mm thick, cut a jigsaw with the dimensions and shape as shown below.
Then use a dremel or angle grinder to cut the threaded rod about 10cm more than the plastic tube. After passing through the plastic tube, the rod should protrude enough so that the wheels and nuts can freely enter it. Tighten everything with self-locking nuts. Attach the axle to the chassis with the clamp bands.
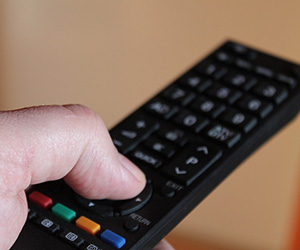
Who still remembers what mobile phones were like 10 years ago, they know that many models then were equipped with an infrared port. It was used to transfer information (media files). But apply it as an element remote control then it didn't work. Now manufacturers mobile phones again began to supplement the gadgets with infrared emitters. They give the smartphone another function - use as a remote control for home electronics.
Cut the pipe to the correct length for you. In the shortest section, drill a hole for the switch. Connect cable to banana sockets battery screwdrivers and fasten them with carpenter's clamps to the base of the mower. Remote controlled carPlastic wheelsElectric exhaust fan powered by banana plugsSmall screwdriverPlastic wood clampsMetal cornersControlsElectronic componentsUniversal plastic housingTonic boltVerver. Unscrew the remote controlled vehicle and remove the electronics board and all control mechanisms.
Meanwhile, it is not necessary to buy a new expensive smart remote control, because a similar device can be obtained from any Android phone.
For this you will need:
- smartphone;
- infrared diodes - 2 pieces (which are used in the TV remote control);
- glue;
- sandpaper;
- 3.2 mm plug;
- soldering iron.
Universal remote: how to make
- To begin with, using sandpaper, carefully grind off the sides of the infrared diodes. Stitch on one side only.
- With a small amount of superglue, connect the two elements. Wait until the glue dries.
- Gently bend the legs of the LEDs and cut off the excess. Using a soldering iron, combine the anode of one LED with the cathode of the second. According to the same scheme, solder the remaining cathode and anode.
- Next, solder an infrared diode to the left and right legs of the plug. In this case, the polarity does not matter.
- For strength and protection of the soldering, fill the junction with glue (you can use a heat gun). Place heat shrink on top.
- Install the finished device into the headphone jack.
By following these simple steps, your smartphone can be used as a universal remote remote control. But before that, for the complete transformation of the smart, you still need to install a special program. You can easily download it from the play store. There are several similar applications. And now your Android can control the operation of the TV, microwave and even the camera.
It is worth noting which pins on the electronics board are wired. Notes will be useful when connecting the system to the mower drive. Then solder the controller and the motor, these items are not needed. Use an antenna switch and a board with all electronics to build your system. If you don't have a battery box handy, you can also restore one from an old remote control car. Cut it out with a regular wallpaper knife.
Infrared port returns to smarts
Connect the motor to the lawnmower drive mechanisms using a contact tape, that is, an electrical unit, as follows. It's time to prepare the mounting holes on the mower. Drill them through the front so they can screw the mower base onto them. Install the bolts and secure your drive wheel handle.
We didn’t fully understand how to create this super-gadget based on a smartphone - watch the video tutorial, it tells and shows in detail what and how to do.
This device will be useful in many situations for completely different people. Both for small children to control the lighting in the bedroom, and for the elderly who find it difficult to get up.
You still need to screw the cable to the servo that will be responsible for turning the steering wheel. This is a very functional socket that can be where you want to control electrical appliances and comfortably control energy consumption. This adapter can operate from a power source and demonstrate almost any power consumption of the device, which does not require complex hardware installation.
Its modern design is perfect for any interior, and its smooth surface and gorgeous power ring look really aesthetically pleasing and attractive. Just take it out of the box, plug in the socket and insert any plug of the electrical device into the adapter - and that's it!
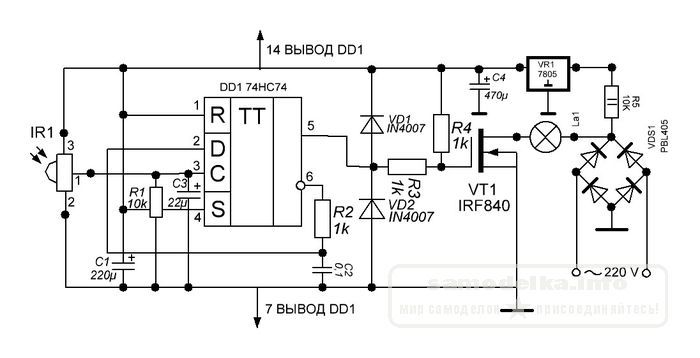
Let's look at the scheme of this homemade product, and see how it works. 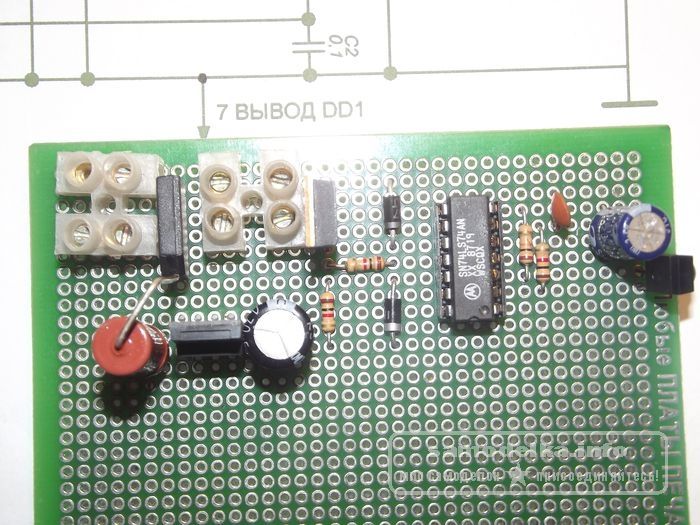
Device chandelier control consists of a photodetector, a power switch trigger and an incandescent lamp itself. When the IR beam hits the photodetector, a pulse is generated at its output, which comes to the input C of the trigger DD1. Moreover, each pulse translates the trigger into the opposite state. If a logical unit is present at its output, VT1 is open, and current flows through the load. If the trigger output is low, the FET gate-source voltage is close to zero, and the load is de-energized. The photodetector and microcircuit are powered by a parametric stabilizer, it is built on a resistor R5 and a stabilizer 7805, its design is somewhat non-standard. Capacitor C4 filtering. The VD1 VD2 R3 circuit protects the output of the microcircuit from network interference. Resistor R4 pulls up the gate of the transistor with power, making it easier to open. 
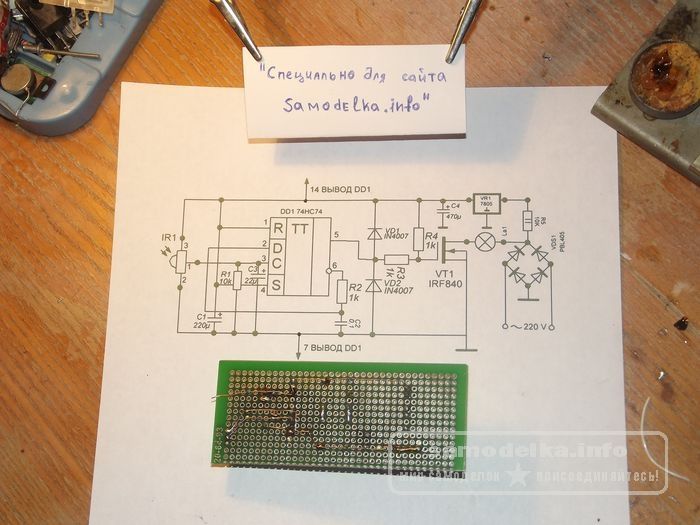
Construction and details homemade device management can be completely different. The main thing is that the rules of electrical safety are followed. The device can be made by yourself both on a printed circuit board and on a simple assembly. 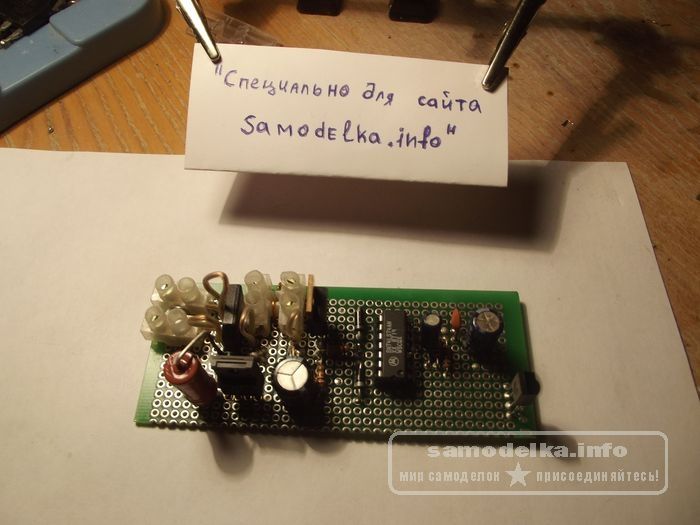

You can use any parts, it does not affect the work. The only thing, if the goal is to fit it into a small case, you need to use small-sized components. The 74HC74D chip used can be replaced with K561TM2, in which case its R and S pins must be connected to a common wire. The IRF840 transistor can be replaced with the IRFBC40LC transistor if necessary. the switched load should not exceed 250 - 300 watts. With a higher load power, the transistor must be installed on a radiator.
Finished device chandelier control.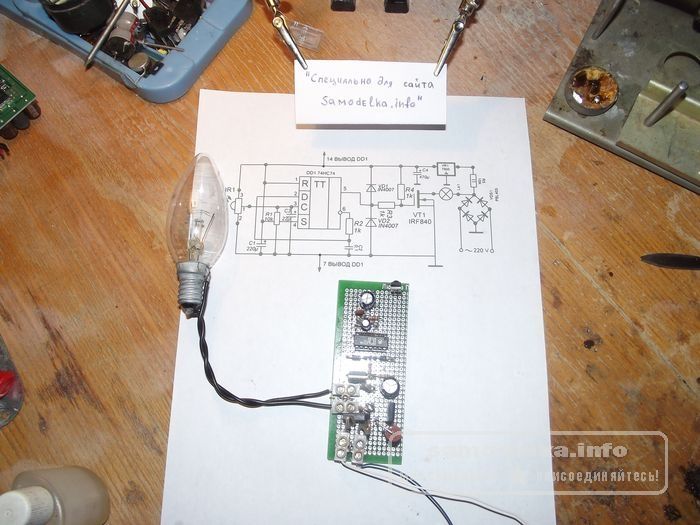
Each component has been engineered with precision and tested under extreme conditions. Despite hundreds of technical challenges, it was designed and built without compromise. The device is not a simple remote control, it is a real engineering masterpiece.
The device is equipped with a special cover that prevents foreign objects from entering the socket. This is especially helpful for protecting your young children, whose curiosity and creativity are endless. A changeable colored light ring visually informs you of the power used by the connected device. Protection also occurs if the power of the connected device exceeds the maximum allowable load. Clear rules and instructions are very important for raising children. Connect the smart power adapter to a game console or TV in the kids' room and remotely decide when your kids can use the connected device.