Shortcuts located on the desktop are designed to provide quick access to the necessary folders and applications. If a user frequently logs on to the network, it is easier to display the Internet icon on the desktop than to access the folder where it was located during installation each time.
Instructions
Is there no Wi-Fi icon on the Windows taskbar or in the Network and Sharing Center menu? This does not mean that the equipment has failed. Equipment breakdown is only one of the likely reasons. In some cases, you can do it yourself.
What to do if there is no "Wireless" icon network connection».
This problem occurs if:

Is there a Wi-Fi receiver?
If a receiver is not installed on your computer, you will not see the Wi-Fi network icon. But how can you check what kind of adapter you have? The simplest thing is to look at the PC characteristics. Laptops should have a sticker that lists the device specifications. Another option is to find out the adapter model and find information about it. Do you have a desktop computer? Then look for system unit ports for connecting a modem. If an antenna is installed there, then the product is suitable for operation via Wi-Fi.

And the easiest way:
- You need the Windows Control Panel.
- Open Device Manager. It's in the Hardware and Sound category.
- Expand the Network Adapters menu.
- See if there are any models that say "Wirelles", "802.11" or "WiFi".

If there are no such inscriptions, configure wireless connection will not work. But you can purchase a Wi-Fi module or a network card that already has an antenna. There are also external Wi-Fi receivers.
Driver
Windows usually loads the software it needs on its own. But if the network hardware driver is missing or damaged, it must be installed manually.

To connect, you need to download the software. There are several ways. The first one is suitable if the driver was installed incorrectly.
- In the Manager, right-click on the item with the yellow triangle.
- Select "Delete" and confirm the action.
- Restart your computer.
- After Windows startup will “detect” the presence of a new device.
- If this does not happen, go to the Manager again.
- Select any item.
- "Actions - Update configuration."

This will only work with equipment that is installed on a plug-in basis. and Play” (meaning “Plug and Play”). The software for these devices downloads itself. You can use them immediately after connecting. If the board does not have such a function at all:
- Select any item in the Manager.
- "Actions - Install old device"
- A window with explanations will open. Click Next.
- Check " Automatic search" or "Manually".
- Select Network Adapters.
- If you know the model and type of gadget, find it in the list.
- Wait until the installation finishes.
To download an update for outdated software:
- In the Manager, right-click on the device.
- In the drop-down list, click on “Update Driver”. This option will be active if Windows has detected the hardware model.
- Select “Automatic search” so that the system finds the software on the network and downloads it.
- Or click “Search on your computer” to specify the path to the installer.
A disk should be included with your new Wi-Fi adapter or laptop. From it you can download the necessary software. If you do not have a CD with the driver, and the system itself did not find it:
- Go to the network equipment manufacturer's website.
- Copy the model name into the search bar.
- Open the information page for your adapter.
- Download the software from there. It is usually located in the “Support”, “Downloads”, “Files” or “Programs” section.
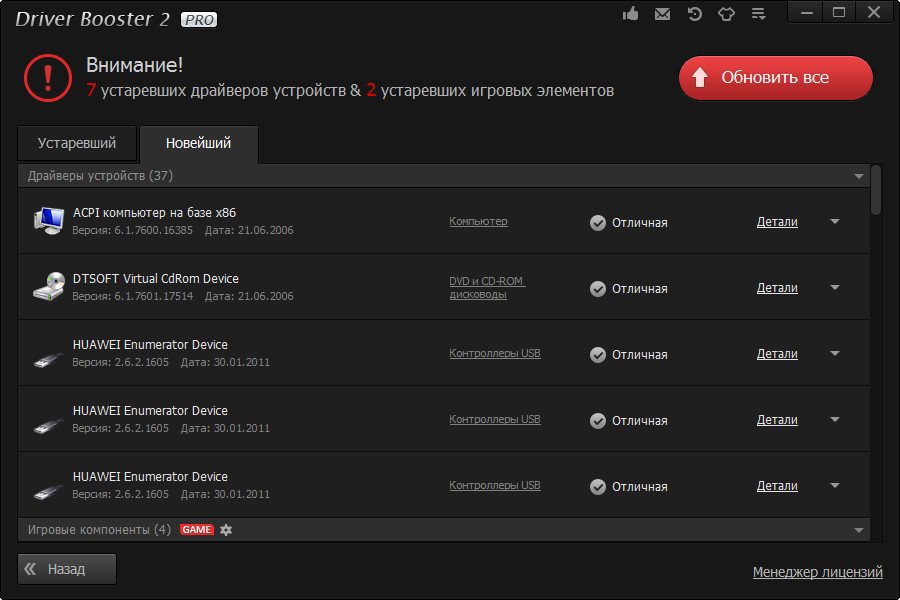
Exist special applications to install system software. For example, Driver Booster. It detects the hardware model and downloads for it current versions drivers.
Settings
Your network configuration may be incorrect. To connect to Wi-Fi you need to configure it. Do some diagnostics first.

To connect to the access point, the Wi-FI module must be active. On laptops, it can be controlled using a keyboard shortcut. Which buttons to press depends on the gadget model. For example, "Fn+F5", "Fn+F7" or "Fn+F9". The corresponding images are drawn on them. But sometimes users touch them accidentally. Yes and on desktop computer The Wi-Fi module may be disabled. For settings:

Now you can restore your connection “over the air” if the Wi-Fi icon disappears. But if the network card still breaks down, it is better to contact a technician at a service center.
Connection icon local network serves as a kind of indicator that displays the presence or absence of a connection. You've probably noticed that when you don't have internet, this icon is crossed out with a red cross.
Usually the local network connection icon is located on the taskbar or in the tray. When you hover over it, the connection status is displayed, and when you click with the right or left mouse button, you can configure the network connection settings (the same settings are available in the control panel).
Now let's move directly to solving the problem with the disappearance of the local network connection icon. Earlier on our website you could already find an article about. So, the methods for solving both problems are absolutely identical. But as they say: repetition is the mother of learning.
And so that the local network connection icon on the taskbar is necessary:
1. Open the tray and click “ Tune».
2. The window for editing notification area icons will open. Click on "".

3. This will cause another window to open" System icons ", where you will see a list of available system icons for Windows 7, as well as their behavior. They can be either disabled or enabled.
Opposite the " Net» set position « On».

Then just click "OK" and you can exit all open windows. The LAN connection icon will reappear on
How can I display an Internet icon on my desktop?
Master's answer:
Any PC user probably knows that on the desktop of the monitor screen there are usually shortcuts to the most popular applications. If you access the Internet quite often, it is much more efficient and rational to place the Internet icon on your desktop. This way, you won't have to waste time searching for the information you need in the folder where you originally placed the icon.
The number of icons on your desktop is determined by the tasks you set for yourself. You may need to place one or two icons. When automatically connecting the Internet to the system, one browser shortcut on the desktop is enough. If the user logs into the Internet himself, it is necessary to add another icon. This is a shortcut that is designed to connect to the network.
To connect to the network directly from the desktop, you need to select the “Start” command. You can use the “Windows” key and select the “Network Neighborhood” option from the menu. The folder will open. Pay attention to the left side of the window, where the panel of common tasks is located. Select "Show network connections." The panel may not appear on the screen. In this case, go to the “Tools” menu, go to “Folder Options” and use the marker to mark the line “Display a list of common tasks in a folder.” It is located in the “Tasks” group on the “General” tab. All. All that remains is to apply the received settings.
As soon as all network connections appear on the monitor screen, find the icon you need and click on it with the right mouse button. In the context menu that opens, in the “Desktop (create shortcut)” submenu, select the “Send” command. There is another option: use the cursor to select the desired connection icon and, holding it with the left mouse button, drag it to the desktop.
To place a shortcut to your browser (a program that helps you surf the Internet) on your desktop, do the same. Go to the directory where the browser is installed. The path to follow most often looks like this: “My Computer”, then the disk with the “Program Files” system and the folder with the “name” of the browser. Select the file to run – “IEXPLORE.exe, firefox.exe”. Do all the same actions with it that were described above.
If you wish, you can place the browser and network login icons on the Quick Launch panel to the right of the Start button. Use your mouse. “Hook” the cursor on the icon you need and, holding the left mouse button pressed, drag it to the Quick Launch panel area located on the taskbar. If there is not enough space on the panel, uncheck the “Lock the taskbar” line with a marker by right-clicking on it. Adjust the size to the desired size and dock the resulting taskbar.
But, let's get back to how to restore the missing language bar and icons.
How to return the sound and internet icon to the taskbar
First, let's look at how to return the sound and Internet icons in Windows 7. To do this, go to “ Control Panel» –> «».
Here, opposite the “Network” and “Volume” icons, there should be a tracking parameter “ Show notification icon».

But, if you did not find the necessary items in this area, then move on to the next setting by clicking on “ Enable or disable system icons».

A window will open in which, opposite the required icons (Volume, Network), set the parameter “ On.».

After saving the settings, the sound and internet icon will return to the taskbar.
How to return the sound and network icon to the taskbar in Windows XP
In XP, these icons are returned separately, in different settings. For example, to display the network, we also go to “Control Panel” -> “Network connections" and then open properties " Local network connections».

And at the bottom of the window, check the box “ When connected, display the icon in the notification area».

For sound, open the item “ Sounds and audio devices", where we also check the box " Show icon on taskbar».

Bringing back the missing language bar
For Windows XP, go to the following path: “ Control Panel» –> «» –> « Language» –> « More details».

« Language bar" -> mark " Show the language bar on the desktop».

In Windows 7, the path is similar to “Control Panel” -> “Regional and Language Options” -> “Change the keyboard...”.

Tab " Language panelь" –> " Pin to taskbar" After which the missing Language bar must return to their place.

After going through all these steps, you can check if the icons have appeared or not. If you checked everything correctly, the icons should definitely appear. But if the recommendations described above did not help you and the language bar that disappeared did not appear, then leave your comments and we will try to find a solution to the problem together.
With the proliferation of computers, many questions have arisen from less experienced users about solving certain problems related to setting up a PC. Most often, users are looking for answers to questions about the Internet, the loss of certain opportunities. This also applies to the case when the Internet access icon disappears from the taskbar. There can be many reasons for this phenomenon. You should look into them in more detail and determine why the Internet icon disappeared on the taskbar.
The human factor plays the main role in disrupting computer operation. By clicking in the wrong place, a person may think that there is no access to the Internet, the icons of which, like the volume mixer and language bar icons, could disappear.
The first and main factor is the person himself. He could simply click in the wrong place, uncheck a box in some settings window, and delete or hide the icon.
The second problem when icons may disappear is viruses and malware. They penetrate the system with files downloaded from unverified sources and can not only hide and delete all icons, including the Internet connection icon, but also block access to the network and violate the integrity of system files and the registry responsible for access.
Sometimes it happens that a user installs some themes and customizations into his system. In these cases, all standard icons and all appearance The OS changes to the desired one.
Important! Things don't always go smoothly. There are also program conflicts in which old icons may disappear and new ones may not be installed. The reason for this may also be installed firewalls.

Options for restoring the Internet icon on your computer
As already mentioned, the reason for the disappearance of an Internet icon is most often the negligence and inattention of a person or the infection of the computer with virus programs that can violate the integrity of system files and hide important icons. To solve the last problem, you should check your PC using scanners and install good antivirus. Other solutions to the problem when the Internet icon has disappeared will be described in more detail.
Control Panel
If Windows 10 is installed as the OS, then returning the icon is simple. To do this you need:
- Go to “Taskbar Settings” by right-clicking on it and selecting the appropriate item;

- Find the link to select the icons displayed, called “Select the icons displayed in the taskbar” and click on it;

- After a window with a list of icons appears, you need to find the item “Network and Internet access”;
- Select to display the icon by setting the switch to “On”;

Important! In a similar way, you can configure the display of all icons that interest the user.
System icons
For owners personal computers with older operating systems installed Windows versions The method of customizing system icons is suitable. If the previous method also did not help Windows 10 owners, you need to do the following:
- Go to the Control Panel and find the “Notification Area Icons” item or write its name in the Start menu;
- Click on the link to enable and disable system status icons;

- Find the “Network” item and opposite it select the behavior value “On”;

Windows XP
For this more old version operating system the actions will be slightly different, since the installation of icons responsible for certain functions will be located in different places. To return the icon demonstrating your Internet connection, you need to do the following:
- Go to Control Panel or search for “Network Actions”;
- In the “General” tab you need to find “Local Area Connection”;

- In the properties of this network, you must check the box next to “When connected, display an icon in the notification area” and save the changes;

Checking drivers
The driver may also be the reason for the icon disappearing. Whether it is outdated or deleted does not matter. To update or reinstall it you need:
- Go to Device Manager from Control Panel or Start Menu. In new systems, this is done by right-clicking on the Start menu button and selecting the appropriate item;
- In the Manager, find the “Network cards” item and expand it. The name will be indicated there network card. You need to right-click on it and select “Update drivers”. If this does not help, then you can go to the official website of the board manufacturer and find the latest drivers for it;

Enabling in BIOS
If, when solving the problem using the previous method in section Network cards a specific card was not found, it may be disabled in the BIOS. To enable it, you need to follow these steps:
- Enter the BIOS when restarting the computer in the standard way. This is usually done by pressing the F2, F8, F12 or other keys at startup. The power button depends on the model of PC, laptop, motherboard or BIOS version.
- Find the Onboard LAN Controller tab and select Enabled;
- Save changes, exit and restart your PC as normal.

If everything is done correctly, the desired sign will appear in its place.
Important! These methods are the most common and very easy to perform. There is another method related to editing the registry. It is suitable for more advanced users.
Registry fix
To restore the display of icons using the registry:
- In the Start menu, write “Registry Editor” or regedit. You can also press Win+R and enter “regedit”;

- In the editor, find the branch HKEY_CURRENT_USER\Software\Classes\Local Settings\Software\Microsoft\Windows\CurrentVersion\TrayNotify, select last tab and remove the IconStreams and PastIconsStream parameters;

- After this, you need to go to the Task Manager in the usual way (key combination Ctrl + Alt + Delete) and go to the tab with processes;

- In “Processes”, find the explorer.exe process, which is responsible for displaying folders, shortcuts and icons, and end it;

- Without leaving the Manager, go to the File tab and select Run, entering “explorer.exe” or simply “explorer” in the field.

The process will be updated, and the lost icons will appear in their places, the system will work correctly.
Thus, there are many ways to solve the problem when the Internet icon disappears on the taskbar. The specific method depends on the system version and the reason for the missing icon. In almost any case, you don't need to be a very experienced computer user to solve icon display problems.
Recently, when surfing the Internet, I often came across in comments or on specialized sites such questions as: the language bar, sound and Internet icons have disappeared, how to return them. Let's look at what could be causing these icons to disappear.
First of all, it is the human factor. When setting up the system, a checkmark was removed somewhere or the icon itself was accidentally deleted. The second option may be the appearance of viruses on the computer. But these cases do not occur so often. If you are sure that the cause of everything is a virus, you can check your computer using free program Dr.Web Cruit.
But, let's get back to how to restore the missing language bar and icons.
How to return the sound and internet icon to the taskbar
First, let's look at how to return the sound and Internet icons in Windows 7. To do this, go to “ Control Panel» –> «».
Here, opposite the “Network” and “Volume” icons, there should be a tracking parameter “ Show notification icon».

But, if you did not find the necessary items in this area, then move on to the next setting by clicking on “ Enable or disable system icons».

A window will open in which, opposite the required icons (Volume, Network), set the parameter “ On.».

After saving the settings, the sound and internet icon will return to the taskbar.
How to return the sound and network icon to the taskbar in Windows XP
In XP, these icons are returned separately, in different settings. For example, to display the network, we also go to “Control Panel” -> “Network connections" and then open properties " Local network connections».

And at the bottom of the window, check the box “ When connected, display the icon in the notification area».

For sound, open the item “ Sounds and audio devices", where we also check the box " Show icon on taskbar».

Bringing back the missing language bar
For Windows XP, go to the following path: “ Control Panel» –> «» –> « Language» –> « More details».

« Language bar" -> mark " Show the language bar on the desktop».

In Windows 7, the path is similar to “Control Panel” -> “Regional and Language Options” -> “Change the keyboard...”.

Tab " Language panelь" –> " Pin to taskbar" After which the missing language bar should return to its place.

After going through all these steps, you can check if the icons have appeared or not. If you checked everything correctly, the icons should definitely appear. But if the recommendations described above did not help you and the language bar that disappeared did not appear, then leave your comments and we will try to find a solution to the problem together.
The language bar, sound and internet icons have disappeared, what should I do?