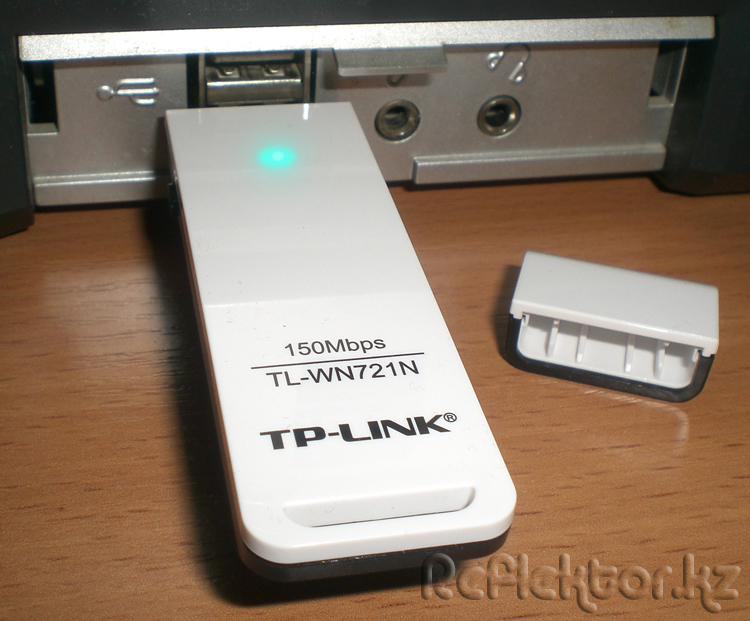
Today we will see how easy and fast it is to plug desktop computer To Wi-Fi networks . For this purpose, we will use a wireless USB network adapter from the company TP-LINK, model TL-WN721N(without detachable antenna). What's included packaging set: Quick Setup Guide, installation disk with driver and utility, USB extension cable(it is not visible in the photo below) and the actual neatly laid “flash drive”. We read what is written on the packaging - Specifications:
The inscriptions “Excellent speed”, “Quick Security Setup (QSS)”, “Easy to operate” are actually quite true. “Easy to install” could also be added here.
Packaging of TP-LINK USB adapter
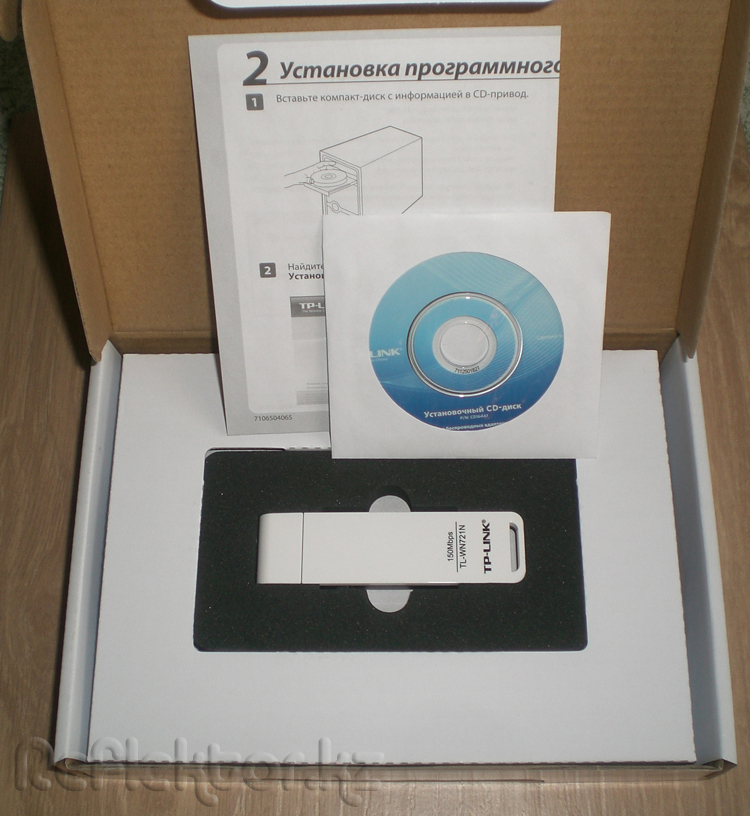 Set wireless USB adapter
Let's go directly to Wi-Fi connection network by connecting the USB adapter to the computer and inserting the installation CD into DVD drive. When we run the autorun.exe program from the CD, we will see the installation wizard window as in the image below, where we will need to select the appropriate adapter model, hover over it with the mouse and click on: “Install Driver and Utility”. Model TL-WN722N Comes with a detachable antenna.
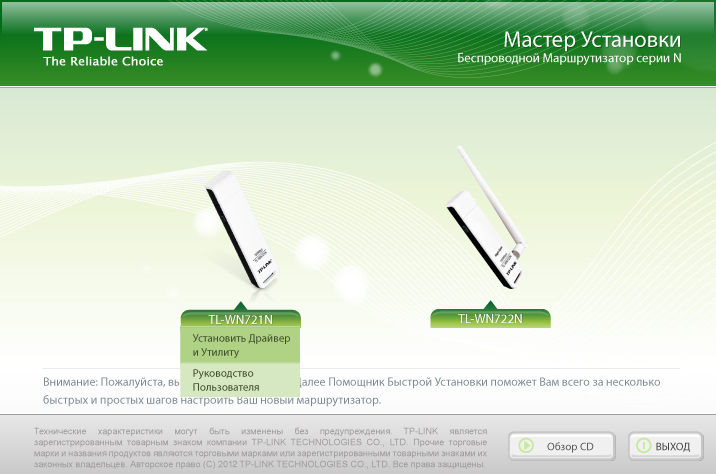 Installation wizard: select the model and click install
After this, the Install Shield Wizard window will open in front of us to install the configuration utility wireless mode and the TP-LINK driver to your computer, click the “Next” button.
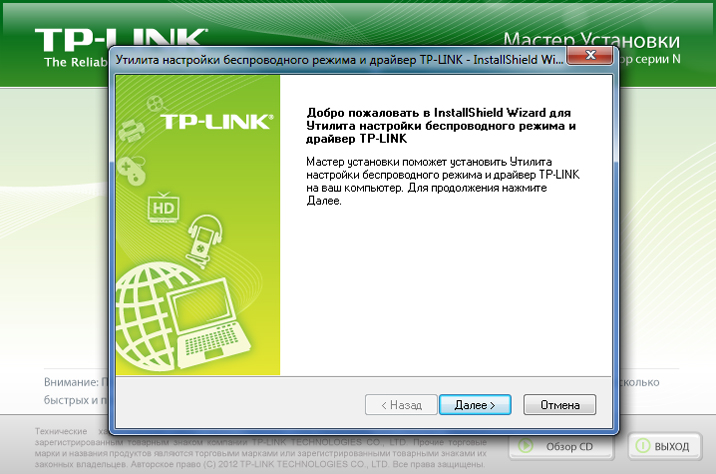 Install Shield Wizard window, click "Next"
In the next window, select the appropriate installation type, i.e. either we install only the driver, or the driver and the utility. We recommend choosing to install the driver and utility, since with the utility, selecting a network and connection is much faster and more intuitive. If you install only the driver, you can manage the connection through “Current connections”, where a list of wireless networks will appear. Click "Next".
 Selecting the installation type - driver only, or driver with utility
Then the program will prompt you to select the folder in which we want to install the files. You can select your own previously created folder, or you can install files in the default folder suggested by the program. Finally, click the “Install” button, after which the process of installing the driver and utility will begin, after which the connection settings program will open automatically. Installation does not cause any problems or questions, everything happens quickly and intuitively.
 Driver and utility installation process
The wireless mode setup utility consists of 5 sections: State , WPS , Net , Profile And Additionally . When you launch the program for the first time, it opens - Net where we can see our Wi-Fi router, as well as active networks of our closest neighbors, with graphic image signal level. By clicking on the name of your network, enter the access password, click OK, and we are on the Internet. The entire procedure, from installation to connection, takes no more than five minutes.
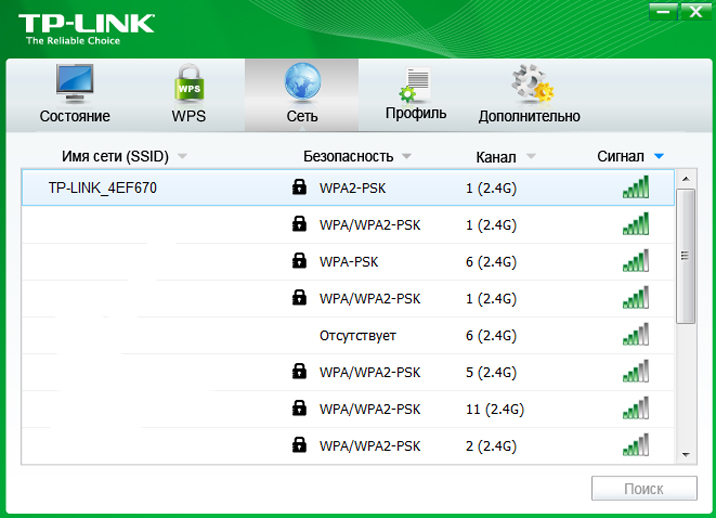 Utility window - Network

Enter the network access password
In principle, no special settings of the utility are required when connecting a network. Let us briefly describe all five of its sections, so State - here we see general information our network: profile name, network name, network type, speed, encryption, IP address, etc., the graphical scale of signal strength, measured in percentage, looks interesting. WPS - Wi-Fi Protected Setup, a standard developed by wireless equipment manufacturers to simplify the process Wi-Fi settings networks. This section is intended for quick, simple and safe setup. On the adapter itself, on the side, there is a small WPS button, by holding it for three seconds we can activate quick setup. Here you can choose two methods: either press the button on the adapter, or enter the PIN of the access point (router) manually. Net - we won’t describe anything here, since everything is clearly visible in the image, and we have already talked about it briefly. Let's just add that here you can connect or disconnect the network. Profile - you can add a profile by entering the profile name, SSID, network type, security type, encryption, and check the automatic connection box. Additionally - select a customization tool wireless network, using the utility or wireless setup wizard Windows network. Here we can also select and switch wireless adapter. Mode SoftAP: two buttons - turn on, turn off. Energy saving mode - similar two switches.
 Wireless USB adapter
All sorts of adapters have been released over the past few years. Sometimes it seems that developers are trying to translate one interface into another, seemingly completely incompatible. This article will focus on the Ethernet to USB adapter. This tandem, by the way, also seemed a little strange until recently. After all, converting a network interface to USB without special electronics was considered difficult to achieve.
The article will also provide a description, characteristics and overview of several key models.
Purpose
An Ethernet USB adapter is used to connect a device equipped with a USB port to the network via regular RJ-45. This allows you to free up the main Ethernet connector for other needs. This can also help in a situation if it is not in the system at all.
General technical specifications
Externally, almost all Ethernet USB adapters are a small box similar to a flash drive. It is very convenient to carry in your pocket or small bag.
On one side of the case there is a connector for RJ-45, and on the other there is a small piece of wire with a USB “male”. Sometimes it can be a solid structure.
Different versions of the device can be equipped with LEDs indicating its functionality.
Since there is not only a USB interface, but also an Ethernet interface, often in order to integrate the adapter into the system, for its correct operation you will need to install drivers, which are usually included in the kit.
Model overview
For comparison, it is worth considering the main representatives in this niche. Almost all leading companies producing network and electronic devices. Since this is specific equipment, you can find these devices only in some stores or on the well-known Chinese product portal.
Satechi 3 Port USB 3.0 + Ethernet LAN Network Adapter
This Ethernet USB adapter is designed in a classic compact style. On board he carries one Ethernet port, capable of operating at speeds of 10, 100 and 1000 Mbit/s. A special feature of the device is the presence of 3 USB ports, which makes it a compact hub for connecting additional devices, for example, external hard drives or mobile phones to charge them.
To get started, you do not need to install any drivers. The device is immediately ready for use after direct connection.
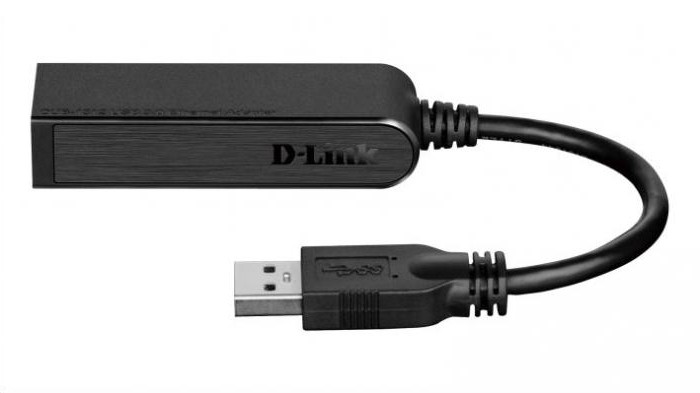
DUB E-100 from D-Link
A very simple and compact Ethernet USB network adapter. The most budget version, intended for domestic needs. One available USB port and a standard RJ-45 connector. Speed characteristics are defined at 10 and 100 Mbit/s. For normal operation The device requires installation of drivers from the CD included in the kit. Installation is quite simple and does not require any special skills.
One of the features of the adapter is its reduced power consumption, which is especially important for laptop owners.
Supported operating systems include the entire Windows line, as well as MAC OS and Linux.
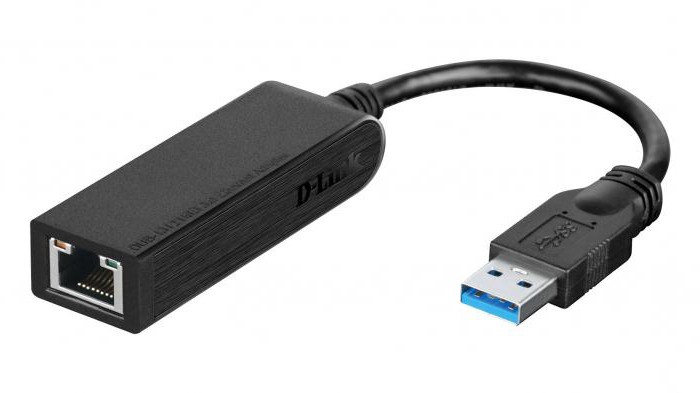
DUB-1312 from D-Link
Essentially, this is an improved version of the previous adapter. It has the same compact dimensions. But it uses USB 3.0, which gives higher data transfer speeds while guaranteeing backwards compatible with USB 1.0 and 2.0. The performance of the Ethernet interface has also increased and reaches 1000 Mbit/s.
Just like its younger brother, it requires installed drivers in the operating system. Energy saving technology is used in the same way.
TP-Link UE330
The device is an adapter with a USB-female to Ethernet, as well as one standard USB for connecting to a computer.
The presence of 3 USB version 3.0 ports capable of transferring data at speeds up to 5 Gbps makes it indispensable as a hub when connecting other devices. If the number of connectors on a PC is limited, then the device will help when connecting additional peripherals.
The adapter is capable of working in all known operating systems, no driver installation required.
HP XZ613AA
One of the most simple devices to connect the network to a computer via USB. By the way, the version used in it is 2.0, which is not so fast. The network element is capable of transmitting data at speeds of 10 and 100 Mbit/s.
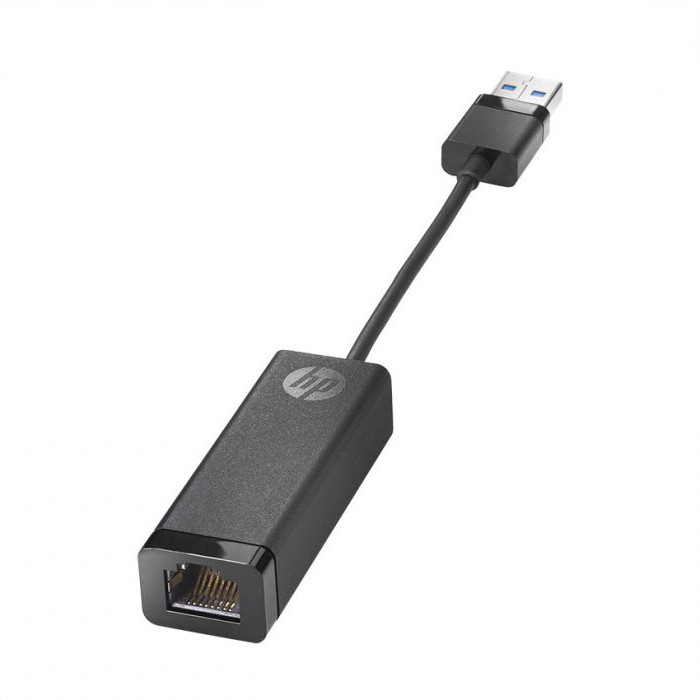
The device can work normally in the Windows line. And to provide indication there are LED lamps.
HP N2Z64AA
This adapter is less compact, but has an additional USB connector. Both are version 3.0, which provides high data transfer speeds. Well, and, in fact, the RJ-45 connector itself for connecting to the network.
5bites UA3-45-03BK
Quite an interesting adapter model. The cable is separated from the housing and is connected if necessary. Since the device is also a hub, it is an ideal Ethernet USB adapter for a printer. This is facilitated by three USB connectors with high operating speeds, which version 3.0 guarantees.
Among the interesting features, it is worth highlighting the automatic algorithm for determining the connection diagram - direct or crossover. The adapter can work with all known desktop systems.
StarTech.com USB31000NDS
This adapter is just that: an adapter. That is, they are placed in one case without any wires USB connectors and Ethernet. This is both a minus and a plus at the same time. It will be convenient to place it in the back of the system unit, but in a laptop the “rigid coupling” will sometimes get in the way a little.

This USB to Ethernet converter adapter has USB version 3.0, which gives good performance. The network interface speed is 10, 100 and 1000 Mbit/s. This is quite enough for comfortable browsing on the Internet and downloading rather “heavy” files.
The device can automatically detect the connection pattern, whether crossover or direct.
Wi-Fi NetGear A6100-100PES USB 2.0
Speaking about network adapters via USB, we cannot help but consider the Wi-Fi version. This device is nothing more than a wireless adapter, only the Wi-Fi interface is used instead of Ethernet.
To avoid interference and, as a result, reduced speed, the adapter has two frequencies - 2.4 and 5 GHz. Since many household appliances and devices can also operate on 2.4 GHz, a 5 GHz backup would be a great solution.
The device is very compact and easily fits into a pocket or small purse.
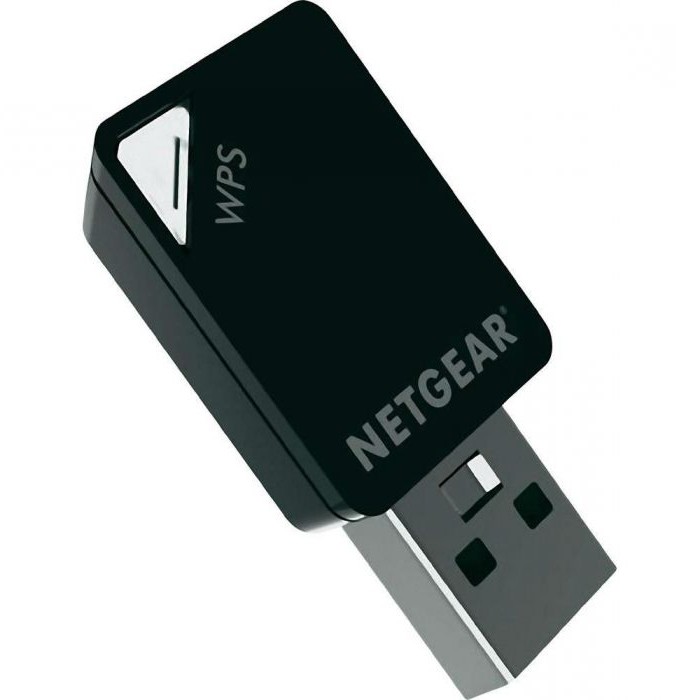
One of the interesting features is the special Push N Connect function, which allows you to establish a connection with one click. Naturally, everything must be configured in advance.
Conclusion
Many craftsmen are trying to assemble a USB Ethernet adapter with their own hands. However, due to the narrow specificity of the device, this approach has not been widely used. And you can’t find ready-made prototypes and diagrams as such. Of course, you can create something similar from Arduino elements, but the time and search for components is unlikely to justify the effect of the craft.
In general, judging by the reviews, this type Few people will appreciate network cards. This is due to the fact that today, on almost any personal computer or laptop always has at least one RJ-45 connector. Therefore, installing an additional port may be necessary in very rare cases. In addition, sometimes it is easier to install a ready-made network card into the system. But many still find it useful and use adapters to expand the capabilities of their computers and systems.
Until recently, a USB connector in a car was considered almost a luxury. There is no such connector in many modern models, not to mention cars produced 10-15 years ago. In this article I will tell you how to get 5 V for a USB connector from a 12 volt on-board network.
Many people install it in their car various devices powered from a cigarette lighter – DVR, GPS navigator, and you also need to periodically connect the phone charger. And because There is only one cigarette lighter socket, buy a splitter, but this is not a solution, wires stretching across the dashboard not only distract and interfere, but can cause an accident.
As a rule, all these devices are designed for a voltage of 5 V (standard USB interface voltage), and a converter from 12 to 5 volts is contained in the plug of each of these devices. I suggest installing one 5 V power supply into the car and from it via USB, mini USB connectors power all necessary devices.
Updated 07/30/2015.
The information from the article is still relevant today, but it appeared alternative solution– ready USB adapters with connection to a 12 V network. We are not talking about cigarette lighter adapters; they were on the market at the time of the first publication, but about independent converter devices.
 The device consists of two modules. The housing with external thread is designed in the form of a cigarette lighter socket and a USB adapter with two connectors is inserted into it. The manufacturer claims the following characteristics:
- Output voltage: 5V;
- Output current: 3 A.
Buy on AliExpress
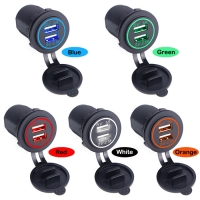 Unlike the previous option this device has a one-piece design and backlight with a choice of colors: red, green, blue, orange, white.
Stated characteristics:
- Input voltage: 12 – 32 V;
- Output voltage: 5V;
- Output current: 1A; 2.1 A.
Buy on AliExpress
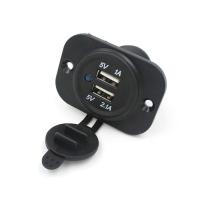 The adapter has a removable flange with holes for screws, which does not add to its aesthetics, but it can be installed without a flange. Please note that USB connectors have different output currents. Characteristics:
- Input voltage: 12 – 24 V;
- Output voltage: 5V;
- Output current: 1A; 2.1 A.
Buy on AliExpress
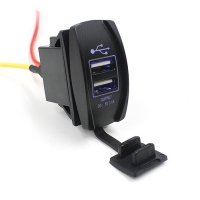 Structurally, the adapter differs from its round counterparts, thereby complicating installation. But it looks nice on the outside and should fit well into the interior of the car. Technical specifications:
- Input voltage: 12 – 24 V;
- Output voltage: 5V;
- Output current: 3.1 A.
Buy on AliExpress
These are the USB adapters currently available. They are easy to install. You can connect it to the power supply circuit of the cigarette lighter and, please, we have a full-fledged USB connector in the car. But there is a small nuance - these adapters do not have a separate (cable) 5 V output. This is important for constantly installed devices, for example, a DVR. Thus, the old part of the article has not yet lost its relevance. Let's read!
Modellers use UBEC to power aircraft, car, and ship models. What it is?
UBECUniversal battery elimination circuit- This is a pulsed on-board power supply device, the output of which is 5 or 6 V.
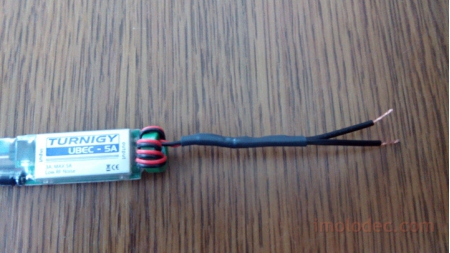
The choice fell on TURNIGY 3A UBEC with noise suppression. I bought it on HobbyKing. Also available on Parkflyer.
The TURNIGY 3A UBEC converter has thermal protection. The shielded housing serves to suppress interference. It has a high efficiency of 92%, the minimum difference between the input and output voltages is only 1.22 V.
The heart of this converter is the MP1593DN chip; the datasheet can be downloaded at the end of the article.
Technical characteristics of the TURNIGY 3A UBEC converter:
- Input voltage: 5.5 – 23 V;
- Output voltage: 5V or 6V, set by switch;
- Output current: 3A;
- Dimensions (LxWxH): 51x16.6x8.5 mm;
- Weight: 11.5 g.
This is how I received it (I already opened the package and couldn’t resist):
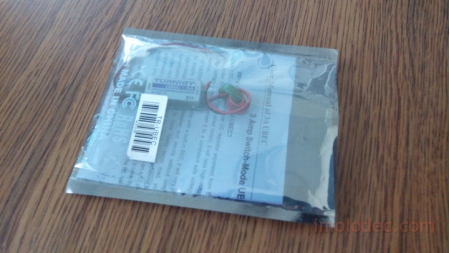
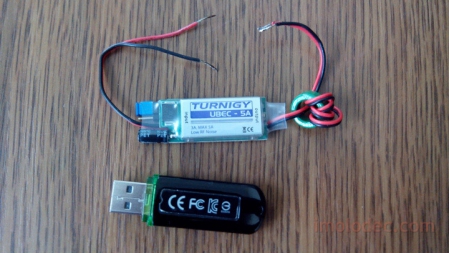
The kit includes instructions and, in fact, the UBEC itself. For comparison, I put a USB flash drive next to it:
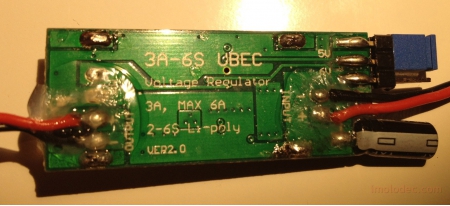
The jumper has already been set to 5 V, there is a marking on the board on how to switch the output voltage to 5 or 6 V. Let me remind you that we need 5V! The next two photos show this marking. And also what is hidden under the screen. Thanks to Kirill Rodionov from Parkflyer for these photos, I didn’t have to disassemble my converter.

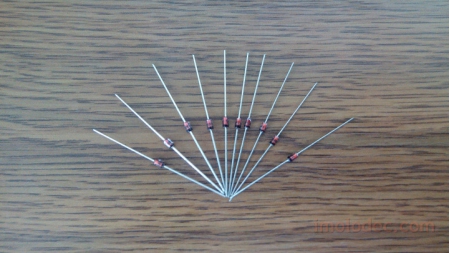
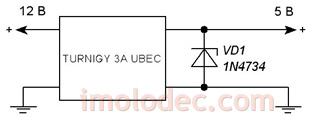
For additional protection, if the converter suddenly fails, so that there is no 12 V at the output, I installed a 1N4734 zener diode (datasheet at the end of the article): stabilization voltage 5.6 V; dissipation power 1 W, stabilization current 45 mA. This is the set I bought on ebay:
The zener diode is connected to the circuit parallel to the output, with the cathode to the plus “+”. The cathode on the zener diode is marked with a black stripe:
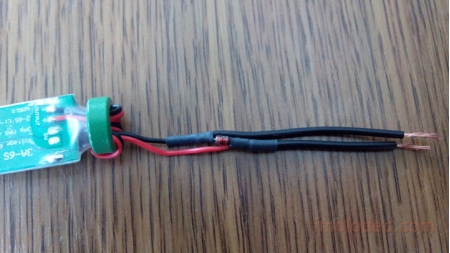
We solder the zener diode, the red “+” wire, to it with a strip. Additionally, I soldered short conductors with a cross section of 0.5 mm 2, which will then make it easier to wire the circuit. Preliminarily put on pieces of heat-shrinkable tube:

After shrinking individual pieces and a common tube placed on a zener diode with a hairdryer:
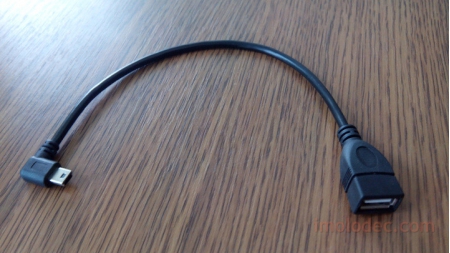
Since I need power for the DVR and for charger phone, then two connectors are needed - a mini USB plug and a USB socket.
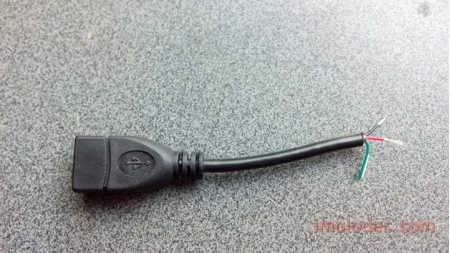
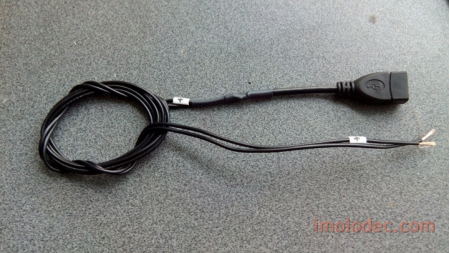
I found a wonderful adapter on ebay - USB A Female to Mini USB B 5Pin Male left angle adapter. On one side it has a corner mini USB connector, and on the other there is a USB socket:
With tears in his eyes, he cut it in half:

Due to lighting, the photos were taken on different tables.
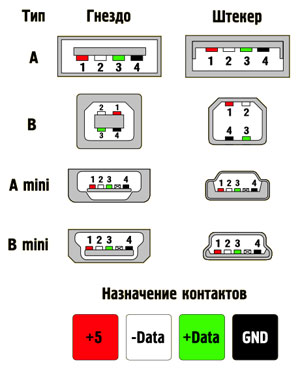
The red wire is positive “+” and the black wire is negative “-”. Just in case, I checked according to the connector pinout:
I took the wire taking into account laying it behind the decorative elements of the interior. For the mini USB connector, the wire length is longer, because The DVR is installed at the top of the windshield. For standard USB wire In short, I’ll put it somewhere on the dashboard, I haven’t decided yet.
I connected the wires and labeled them so as not to get confused. Similarly, I put a heat-shrink tube on each conductor and on top of one common one:
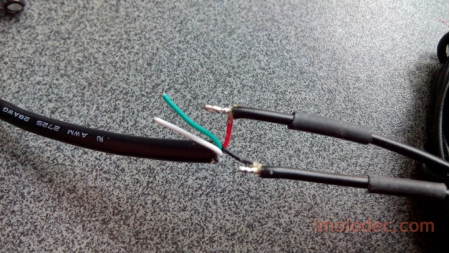
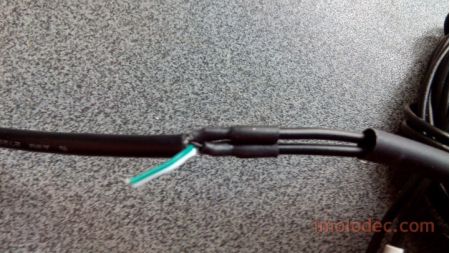
We got these two cables:

I soldered and assembled everything together, observing the polarity. This is what the final version of the installation kit looks like:

All that remains is to install this structure in the car, lay the wires and bring it into in the right places USB connectors. It is necessary to connect through a fuse; you can use one of the standard ones from the non-responsible circuit.
Many DVRs have a function automatic switching on and shutdown when power is supplied or lost. It is very comfortable. Therefore, if you connect the converter to the cigarette lighter circuit, then this function will work because The power supply to the cigarette lighter depends on the position of the key in the ignition switch. But in this case, for example, charging your phone from a new USB connector in the car will not be very convenient; you need the ignition key to be in the lock.
If this problem is not relevant for you, connect UBEC to the cigarette lighter circuit. Otherwise, connect to a circuit independent of the ignition switch, and to maintain the function of turning on/off the DVR, use an additional relay:

The diagram shows an automotive relay in general case, but it can be without a quenching diode and without a normally closed contact 87a.
Summarize. The TURNIGY 3A UBEC voltage converter is ideal for organizing USB connectors in the car. It is made with high quality, meets the stated characteristics at an affordable price.
This converter provides 3 A output, which theoretically allows you to connect up to six devices to it. According to the specification on USB interface, the maximum current consumed by the device should be no more than 0.5 A, for USB 3.0 no more than 0.9 A.