Hello dear reader! If you've ever wondered how to transfer a file from a host machine to a virtual machine in Hyper-V, then this article is for you! The fact is that it is not always possible to organize network connectivity between the host and the virtual machine, and sometimes this is not necessary at all. Fortunately, Hyper-V provides a simple ability to transfer files directly to virtual machines (both Windows and Linux and others) using PowerShell, and now we will tell you about it.
It is important to note that this functionality became available only in version 3 of PowerShell. Therefore, check the version you have installed. To do this, in the PowerShell console, enter the command $PSVersionTable
Process
So, let's reveal all the cards right away. To transfer files to guest (virtual) machines, you need to use a command with the following syntax:
Copy-VMFile -Name “Name virtual machine” -SourcePath ?Path to\the file\that\we want to transfer? -DestinationPath ?Path to\folder on the virtual machine\where we want\to put the file? -CreateFullPath -FileSource Host
The core of the team is part Copy-VMFile, which, in PowerShell terminology, is called a cmdlet (Cmdlet), followed by cmdlet keys that define the parameters and rules for executing the command. For example, in the example above, using the key -Name we indicate the name of the virtual machine to which we want to copy the file, the path to which we indicate in the key -SoucePath. The directory where we want to place the file on the virtual machine is indicated in the key -DestinationPath. Key -CreateFullPath will create a directory if it doesn't already exist. Well -FileSource Host means that the source from which we are transferring the file is the host server.
However, if you execute the command at the current stage without preliminary preparation virtual machine, you will receive the following error:

To avoid this, you must first enable support for Guest Services in the virtual machine settings. To do this, go to the virtual machine settings, then select Integration Services(Integration Services) and check the box next to (Guest Services).

Or simply enter the command Enable-VMIntegrationService -Name ?Guest Service Interface? -VMName “Virtual machine name”
After this you should enter the command Copy-VMFiles again, after which it will begin copying files from the host to the specified directory on the virtual machine. This method suitable for files of any size, the only limitation is the disk space used by the virtual machine.
Was this article useful to you?
Please tell me why?
We are sorry that the article was not useful for you: (Please, if it is not difficult, indicate why? We will be very grateful for a detailed answer. Thank you for helping us become better!
From Windows to Ubuntu installed on Virtualbox? When I connect USB it only appears in Windows.
How can I see this in Ubuntu?
6 Solutions collect form web for “How to transfer files from Windows on Ubuntu to Virtualbox?”
There are two ways that I usually use
Option 1. Before loading Ubuntu, in the settings of the VirtualBub Uuuntu virtual machine, specify the shared folder. Then after logging into Ubuntu, create a new directory like /media/vboxshared and mount that drive using the command sudo mount -t vboxsf SHARENAME /media/vboxshared . Enter the password when it asks for a password.
Option 2: Before booting Ubuntu, add a new network adapter and select Bridged Adapter. Then after logging into Ubuntu, run the command ifconfig -a | more ifconfig -a | more to get the IP address of this new one network adapter. On Windows, use WinSCP or FileZilla to transfer a file to Ubuntu
In any case, you can easily make the USB key visible in the guest. From your question, I'm assuming that you are running Ubuntu on the guest and the host is Windows.
Whenever you insert the USB key, if you want to see it in the guest system, follow these steps:
Cleanly unmount the USB from windows by clicking the corresponding icon in the bottom right corner and selecting the "safely remove..." option.
In the VirtualBox window, select the menu item “Devices => usb devices” in the main menu of the guest window and select your USB key. It should now appear in Ubuntu.
This operation is equivalent to physically inserting your USB key into the USB port of your guest computer.
Otherwise other options
Shared folder as stated in laebshade and Alvin Sim's answers. But it can be slow.
FTP etc as stated in Alvin Sim's answer (assuming you have an ftp server on your Windows host).
Simple samba mounting from a guest:
Mount -t cifs // winhost / share / home / yourname / mntpoint -o user = winusr% paswd, uid = 0, gid = 0, file_mode = 0777, dir_mode = 0777
For small volumes and frequent synchronization, open account Dropbox.
Sudo mount -t vboxsf SHARENAME /media/vboxshared
- create your shared folder on your PC. for example "c:\SharedBoth"
- Make sure you select your shared folder c:\SharedBoth from c:\SharedBoth menu "settings" - "shared folders" - "add" - "permanent/automount" before starting the ubuntu virtual machine.
- launch ubuntu terminal, enter the command above,
sudo mount -t vboxsf SharedBoth /media - then check if the sf_SharedBoth folder is created in the media folder. Before you do step 3, you need to make sure that you have installed "Guest Additions"
Who is the host and who is the guest? In any case, Virtualbox has a sharing mechanism that you can use; just install the Guest Additions as described in the documentation, then configure shared resource in the VirtualBox configuration.
Thanks for the answer Alvin Sim. Although this is clear, I still spend some time getting it right. Ok, here are my detailed steps using Alvin Sim option 1.
- Before running your guest
- Go to VirtualBox Manager
- Select your desired guest
- Go to user settings
- As a guest settings scroll down the left side menu and go to shared folders
- IN shared folders add your interested folder to host machine
- After adding the host folder path you will see the updated folder list V shared folders. Remember your new folder Name, specified in this list. Let's say it's HOST_SHARE .
- Click OK and save your changes.
- Start your guest computer
- In the guest machine create a new folder like GUEST_SHARE
In the guest terminal, enter
sudo mount -t vboxsf HOST_SHARE GUEST_SHARE
You will find your materials in this GUEST_SHARE folder.
- In the virtual box, log into Ubuntu.
- In the menu bar, click Devices -> USB Devices -> Select your device (Pendrive).
- Then go to the Home folder. On the left you will see your device.
How to move a file from your system to virtual system? and got the best answer
Answer from Kostya Prosvirnov[guru]
1. After installing the system and all the necessary “stuffing” for the virtual machine, select the image installation disk under
named VBoxGuestAdditions.iso, which is located in the installation folder VirtualBox program(default
this is C:Program FilesSun xVM VirtualBox).
2. We produce automatic installation VBoxGuestAdditions for virtual machine.
3. Determine which folder on the real machine we will make shared (here - Shared).
4. Next, in the virtual machine we launch command line via Start - Run. And we execute the command
net use c:vboxsvrShare.
5. After rebooting the virtual machine, open My Computer - Tools - Connect network drive.
In the window that opens, in the Folder field, click Browse and select VirtualBox Shared Folders - VBOXSVRShare.
Answer from 2 answers[guru]
Hello! Here is a selection of topics with answers to your question: How can I move a file from my system to a virtual system?
Answer from Alex Tarych[active]
What virtual machine? If Virtual Box, then when creating it a shared folder is created.
Answer from The Demon[guru]
Create a shared folder and install additionally on the guest operating system.
Answer from Alexey Varlamov[guru]
set up a network bridge between your computer and the virtual one, then on your computer, on some folder, click property-do general access, then climb into the virtual network and get on the computer, something like this)
Another way is to put it on a flash drive, and then start the virtual machine and click at the top of the device and select the flash drive
VirtualBox useful application from Oracle for creating virtual machines. In simple words, you can run multiple operating systems on your computer at the same time, such as Windows, Android, or . This is a shell that emulates the work real computer with certain characteristics (processor, RAM, video memory). But if you read this article, then you probably know why VirtualBox is used. We will answer a question that Oracle VM users often ask – “ How to transfer files to a virtual one VirtualBox machine ”
For example, I use Windows 10 and installed good old Windows XP on a virtual machine. How to exchange files between the real and additional OS? Very simple.
Method 1 – Shared Folders
First of all, you need to install the VirtualBox Guest Additions. Without them, you won't be able to work with shared folders. Start the virtual machine, select “Devices”, “Mount Guest OS Additions disk image” from the menu.
The installation will begin, after which you will need to reboot the machine. Installed? We can continue.

Launch VirtualBox, select the desired virtual machine and click “Configure”.

Go to the “Shared Folders” tab. Click on the add a new folder icon, specify its name and location. Also, do not forget to check the box next to “Auto-connect” so that the guest OS will automatically connect this folder.

Launch the virtual OS. A network drive has appeared in Windows XP Explorer, which is shared folder, which can be used both with the guest OS and with the real one. Now you can calmly postpone necessary files to the VirtualBox virtual machine.

Method 2 – Drag’n’Drop function
Oracle VM has very useful function called Drag'n'Drop. It allows you to transfer files using the mouse by dragging them into Right place. In the virtual settings. machine, go to “General”, “Advanced” and activate this function. The mode is bidirectional.

Hello friends! Today, Vladimir has prepared some amazing material for fans of virtual machines!
Hello admin, please tell me how to transfer the VirtualBox virtual machine to a regular computer?
A few months ago Windows 10 came out and I was afraid to install it directly on my computer, but installed it on a virtual machine, then installed all the programs I needed into the operating system: browsers, free OpenOffice, Skype and so on, after a while I began to notice that I liked Windows 10 and I even had the idea of transferring it to a regular computer! Is this possible? I couldn't find such information on the Internet.
How to transfer a VirtualBox virtual machine to a regular computer. Or how to transfer Windows 10 from a virtual machine to a desktop PC using the Vhd2disk program
Hello friends! It is possible to transfer the VirtualBox virtual machine to a regular computer, and often such a need arises system administrators, developers of various software and other computer specialists, this may also be needed to the average user PC.
- Note: There is a website created specifically for virtual machine lovers.
To transfer, you can use a still little-known program Vhd2disk- designed specifically for transferring virtual operating systems to physical hardware, or in other words - to create an exact copy virtual disk VHD on a regular hard drive.
So, we have a VirtualBox virtual machine with Windows 10 installed on it.
Disk management
Disk 0, this is a virtual disk with installed Windows 10.
When creating the virtual disk, I specified the size as 250 GB. The operating system is installed on the drive (C:), and various files are located on the drive (E:).

First of all, we convert the virtual disk of the VDI format belonging to the virtual machine into the VHD format.

File -->Virtual Media Manager.
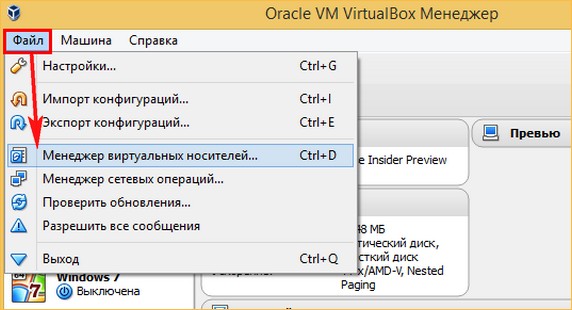
Select with the left mouse the VDI virtual disk belonging to operating system, which we want to transfer to a regular computer and click on the button Copy.


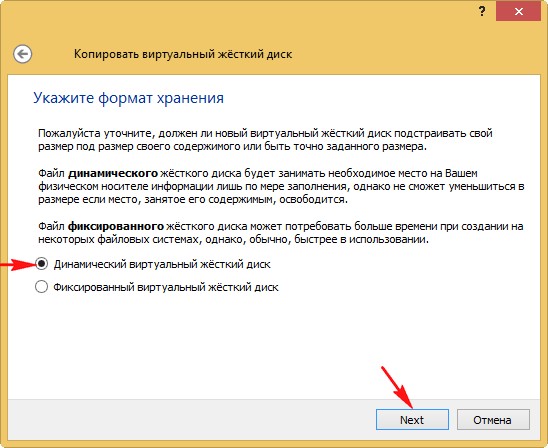
Mark the item VHD (Virtual Hard Disk).
Next.

Mark the item Dynamic virtual HDD .
Next.
Left-click on the explorer button.

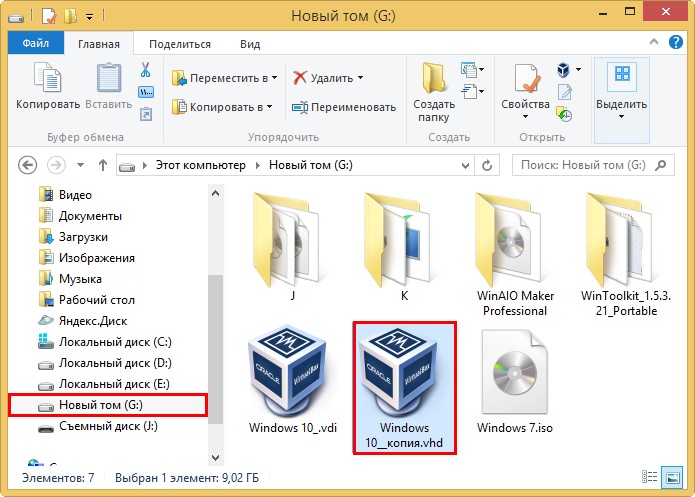
Select a location to save the future copy of the virtual hard drive, I will select disk ( G:), since there is a lot of free space.

Copy.

There is a short process of converting the VDI virtual hard disk to the VHD format.

At the end of the process, click on the button Close.

On disk (G:) next to virtual hard drive VDI there is a copy of it, only in VHD format.
Disk management
You need to deploy a copy of the virtual disk onto a completely blank physical hard disk without partitions.
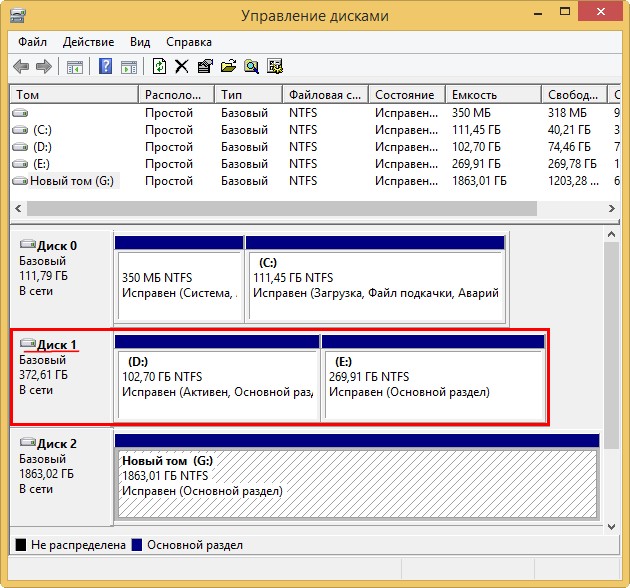
Open the Disk Management snap-in.
I will choose Disc 1.
I delete all partitions on it.

Vhd2disk
It's time for the Vhd2disk program. Download it from the official website:
https://docs.microsoft.com/en-us/sysinternals/downloads/disk2vhd
Let's launch the program. In the main window, left-click on the explorer button.

In the explorer that opens, find a copy of our virtual VHD disk, select it with the left mouse button and click Open VHD.

In field Target drive we must indicate the serial number of the hard drive to which we will deploy a copy of the virtual disk. Click on the arrow.

Select from the drop-down list PhysicalDrive1, since we will expand the contents of the VHD virtual disk on Disc 1.

Click on the button Vhd to disk.


The process of copying the contents of the VHD virtual hard disk to a regular hard disk begins.
The process has completed successfully.
Status: VHD dumped on drive successfully!(VHD successfully copied to hard drive!).

Go to Disk Management, click Action-->Update.

As you can see, the hard disk (Disk 1) is an exact copy of the VHD virtual hard disk from the virtual machine and installed Windows 10.

Trying to boot into Windows 10.
We restart the computer and enter the boot menu, select our hard drive (a copy of the VHD virtual disk with Windows 10).

Preparing devices
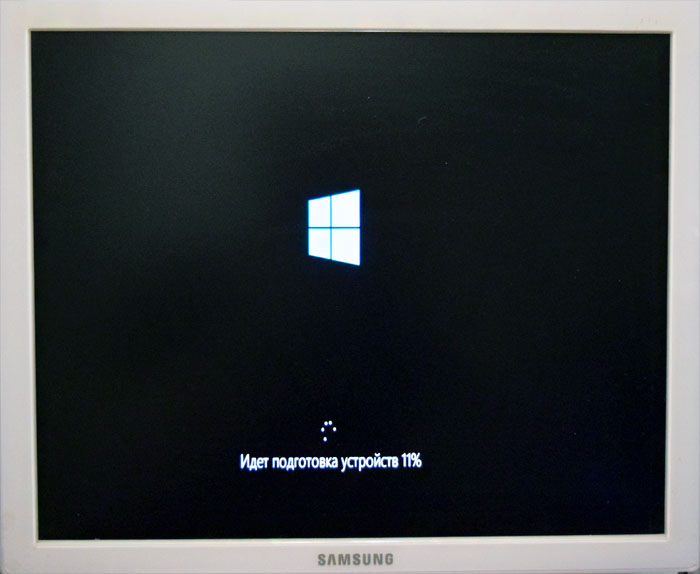
Windows 10 is loaded!


Disk management.

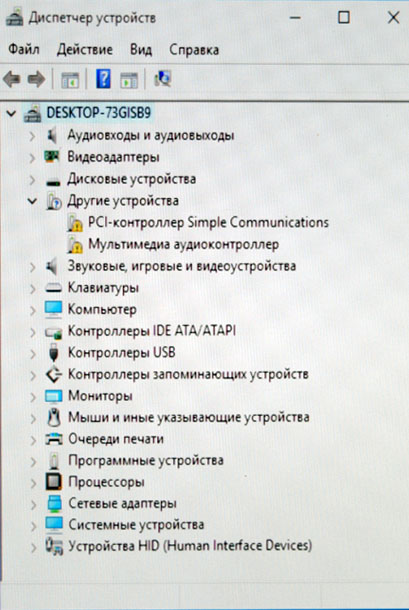
There are several devices in the task manager without drivers, but this is not a problem for us; we install the drivers using .