Sometimes, while working at a computer, we need to “photograph” some event occurring on our monitor screen. For example, some program generated an error, or some kind of notification, which is impossible to deal with on your own, but you need to solve this problem. This is where the ability to “photograph” what you see on the monitor comes in handy—to take a so-called “screenshot” of the visible area of the monitor, or “screen” for short. To do this, you need to press the “Print Screen” key (sometimes the name on it is written in abbreviated form, for example, “PrtScrn”), usually it is located either to the right of the F12 key, or just below. You can see its location in the pictures below.

The image will be placed on the clipboard, and to inform the program developers (or the service technical support) about an error, you can paste it into a letter or other document (for example, MS Word, Excel or PowerPoint) and send it to them so that they can figure out why this or that error occurred and give recommendations on how to fix it. If you want to save the screenshot to your computer, then you need to open any graphics editor(the simplest is built into Windows Paint), paste it there (either through the “Edit” - “Paste” menu, or with a simple key combination “Ctrl” + “V” in the English keyboard layout) and save it in any convenient place on your computer or at removable media information.
If you need to take a screenshot of not everything that is happening on the monitor, but only a separate window of a folder or program, then you need to make this window active, and then press the “Alt” + “Print Screen” key combination on your keyboard.

In general, screenshots are needed in cases where it is easier to show or send a screenshot of what is happening on the screen to your interlocutor than to explain it for a long time or manually retype it into the text of the letter.
But what to do if you need a screenshot of a page that vertically does not fit into the size of the monitor? For example, you need to save as an image a long page that is five to six vertical lengths of your monitor, according to your vertical scroll bar.
There are several ways to do this.
1. The simplest, not requiring installation of any programs, and at the same time the most time-consuming, and not very quality method- this is to take several screenshots one after another, each time scrolling the page down one screen, and simultaneously insert the resulting images one after another, for example, into Word or Excel. The disadvantage of this method is that it takes a long time, the resulting image is not whole, and the need to adjust the edges of the previous and next images to each other. You can use this method only in cases where you are in a hurry and you do not care about the quality of the final result. In this case, you will not get a whole, unified image.
2. Using online services for creating screenshots of any website pages. For example, let's try to get a screenshot of one of the pages of my website “Computer Smarter”, on which I talk about increasing the text size (opens in a new window):
On my work monitor, this page takes up four vertical screen sizes. There is a wonderful online service that easily copes with the task, resulting in full screenshots of long pages. I suggest you familiarize yourself with it and use it in the future if you like it.
By following the link above, you are taken to a simple page on which you need to indicate the address of the site page from which we want to receive a full-size screenshot. Copy it from address bar browser (or directly from this article) and point to our test page on this site: https://site/sovetyi/kak-uvelichit-razmer-teksta.

Click the “Capture Screenshot” button and wait for the site to generate the image (progress will reach 100%). This usually takes from a few seconds to a couple of minutes, depending on the vertical length of the page.


Click on the “Download Image” button, and the automatic downloading of the screenshot of the resulting page begins.
We open the resulting image and make sure that the service worked perfectly, a screenshot of a long page was received and saved as a picture for further work.
Of course, there are a fairly large number of online services that allow you to do the same thing as Web Screenshots, but some of them are quite difficult to learn, some require registration in order to get the necessary image, so I recommend you what I use myself.
3. If you are using a browser Google Chrome, then the task becomes simpler. In this case, you need to find and install an extension for Google Chrome called Awesome Screenshot. To do this, just enter search query search engines Google or Yandex the following line “Awesome Screenshot for Google Chrome” (you can copy it directly from here), and follow the first links in the search results to go to the site for installing extensions for this browser.
Yandex:

Google:
After going to the extension installation site, click the “+ Free” button and install it in your browser:

Confirm the installation of the extension by clicking on the “Add” button:

As a result, an icon of the installed extension will appear at the top of your Google Chrome browser:

Let's look at the main features of this extension. Click on this icon and open its menu:

Briefly about the main points of this menu:
- Capture visible part of page— take a screenshot of a part of the page visible on the screen
- Capture selected area— take a screenshot of the selected area (a very convenient option). After clicking on this option, you can select any area on the monitor screen with the mouse and get an image of this area.
However, for our initial purposes (taking a screenshot of a long page), we need to go to desired page on the Internet and select the menu item “ Capture entire page"("take a screenshot of an entire page").
The extension itself will scroll the page all the way down and redirect you to new page, where you can edit the screenshot you took, or you can simply click the “Done” button at the top

Our screenshot is ready, all that remains is to select further actions with it on the right:
- Save— save the picture in a graphic file format;
- Copy— copy it to the clipboard;
- Print— send the picture to the printer for printing.
We will save it as a picture, so select “Save”

We indicate the location on your computer where to save the received file, and finish working with the extension.
I hope you found this article helpful. If you have any questions about the operation of the methods specified in the article, ask in the comments.
Post navigationHello.
Who among us has not wanted to capture some episode on a computer screen? Yes, almost every novice user! You can, of course, take a picture of the screen (but this is too much!), or you can take a picture programmatically - that is, as it is correctly called, a screenshot (the word came to us from English - ScreenShot) ...
You can, of course, take screenshots (by the way, they are also called “screens”) and in " manual mode"(as described in this article:), or you can configure one of the programs presented in the list below once and receive screenshots by pressing just one key on the keyboard!
It is about such programs (more precisely, about the best of them) that I wanted to talk about in this article. I will try to present some of the most convenient and multifunctional programs of their kind...
F astStone Capture
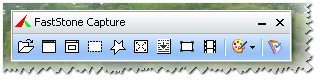
FastStone Capture window
One of best programs to take screenshots! She has helped me out more than once and will help me out again :). Works in all versions of Windows: XP, 7, 8, 10 (32/64 bits). Allows you to take screenshots from any windows in Windows: be it a video player, a website or some program.
I will list the main advantages (in my opinion):
- the ability to take a screenshot by setting up hot keys: i.e. press the button - select the area you want to screenshot, and voila - the screenshot is ready! Moreover, hotkeys can be configured to save the entire screen, a separate window, or select an arbitrary area into a screenshot (i.e., very convenient);
- after you have taken a screenshot, it will open in a convenient editor where you can process it. For example, change the size, add some arrows, icons and other elements (which will explain to others where to look :));
- support for all popular image formats: bmp, jpg, png, gif;
- the ability to auto-load when Windows starts - thanks to which you can immediately (after turning on the PC) take screenshots without being distracted by launching and configuring the application.
S nagit
![]()
Very popular program to take screenshots. It has a huge number of settings and various options, for example:
- the ability to take screenshots of a specific area, the entire screen, a separate screen, scrolling screenshots (i.e. very large tall screenshots 1-2-3 pages high);
- converting one image format to another;
- There is a convenient editor that will allow you to carefully trim the screen (for example, make it with uneven edges), add arrows, watermarks, change the size of the screen, etc.;
- Russian language support, all Windows versions: XP, 7, 8, 10;
- there is an option that will allow you to take screenshots, for example, every second (well, or at the time interval that you set);
- the ability to save screenshots to a folder (each screen will have its own unique name. The template for specifying the name can be customized);
- the ability to customize hot keys: for example, you configured buttons, clicked on one of them - and the screen is already in the folder, or opened in the editor in front of you. Convenient and fast!

Options for creating screenshots in Snagit
The program also deserves the highest rating, I recommend it to absolutely everyone! Perhaps the only negative is that a fully functional program costs a certain amount of money...
G reenShot
Another cool program that allows you to quickly get a screenshot of any area (in almost 1 second! :)). Perhaps it is inferior to the previous one only in that it does not have such large quantity options and settings (although this may be a plus for some). However, even those that are available will allow you to quickly and easily make high-quality screenshots.
In the program's arsenal:
- a simple and convenient editor in which screenshots are saved by default (you can save them automatically directly to a folder, bypassing the editor). In the editor you can change the size of the picture, crop it beautifully, change the size and resolution, and add arrows and icons to the screen. In general, very convenient;
- The program supports almost all popular image formats;
- practically does not load your computer;
- made in the style of minimalism - i.e. there is nothing superfluous.
By the way, the view of the editor is shown in the screenshot below (such a tautology :)).

Fraps
(Note: a special program for creating screenshots in GAMES)
This program is designed specifically for creating screenshots in games. But not every program can take a screenshot in a game, especially since if the program is not designed for this, your game may freeze, or you may experience lags and freezes.
Using Fraps is very easy: after installation, run the utility, then open the ScreenShot section and select hotkey (which will take screenshots and send them to the selected folder. For example, the photo below shows that the F10 hotkey and screenshots will be saved to the “C:\Fraps\ScreenShots” folder).
The screen format is also set in the same window: the most popular are bmp and jpg (the latter allows you to get very small screenshots, although they are slightly inferior in bmp quality).

Fraps: ScreenShot settings window
An example of how the program works is presented below.

Screen from computer game Far Cry (smaller copy).
By the way, in order for screenshots to be saved on your desktop and not uploaded to the Internet, you only need to adjust one switch in the program settings. Click on the program icon in the lower right corner of the screen and select the “save location” option.

Where to upload screenshots - ScreenCapture
In addition, if you save pictures to your desktop, you can select the format in which they will be saved: “jpg”, “bmp”, “png”. It's a shame the "gif" is missing...

How to save screenshots: choosing a format
Generally, great program, suitable even for completely novice users. All main settings are displayed in a prominent place and can be easily changed. Moreover, it is completely in Russian!
Among the shortcomings: I will highlight the installer, which is quite large in size - 28 MB * (* for this kind of program this is a lot). And also the lack of support for the gif format.
Light Shot
(Russian language support + mini-editor)
Small and simple utility for creating and easily editing screenshots. After installing and launching the utility, to create a screenshot, just click on the “Preent Screen” button, and the program will prompt you to select an area on the screen, as well as where you will save this picture: on the Internet, on your hard drive, on social media networks.
Light Shot - selecting an area for the screen.
In general, the program is so simple that there is nothing more to add :). By the way, I noticed that using it it is not always possible to screen some windows: for example, with a video file (sometimes, instead of a screen, there is just a black screen).
J Shot
Developer website: http://jshot.info/
A simple and functional program for creating a screenshot of the screen. What’s especially pleasing is that this program has the ability to edit a photo. Those. After you have taken a screenshot of an area of the screen, you are offered a choice of several actions: you can immediately save the picture - “Save”, or you can transfer it to the editor - “Edit”.

This is what the editor looks like - see photo below

Screamshot Creator
A very “light” (weighs only: 0.5 MB) program for creating screenshots. Using it is very simple: select a hotkey in the settings, then click on it and the program will prompt you to save or discard the screenshot.

Screenshot Creator - taken screenshot
If you click save: a window will open in which you will need to specify the folder and file name. In general, everything is quite simple and convenient. The program works very quickly (even if the entire desktop is captured), and it is also possible to capture part of the screen.
P icPick (in Russian)
A very convenient program for editing screenshots. After launch, it offers several actions at once: create an image, open it, determine the color under your mouse cursor, and capture the screen. Moreover, what is especially pleasing is that the program is in Russian!

PicPick Image Editor
How do you proceed when you need to take a screenshot and then edit it? First, screenshot it, then open some editor (Photoshop for example), and then save it. Imagine that all these actions can be done with one button: the picture from the desktop will be automatically loaded into a good editor that can handle most of the most popular tasks!

PicPick image editor with added screenshot.
Shotnes
(With the ability to automatically post screenshots on the Internet)
A very good screen capture utility. After you remove the desired area, the program will offer several actions to choose from:
- save the picture to HDD your computer;
- save the picture on the Internet (by the way, it will automatically place a link to this picture on the clipboard).
There are small editing options: for example, highlight some area in red, draw an arrow, etc.
Shotnes Tools - Shotnes tools
For those who develop websites - a pleasant surprise: the program has the ability to automatically convert any color on the screen into code. Simply click the left mouse button on the square area, and, without releasing the mouse, navigate to right place on the screen, then release the mouse button - and the color is defined in the line “web“.
Define color
S creen Presso
(screenshots with the ability to scroll the page, to create high-height screenshots)
A unique program for creating high-height screenshots (for example, 2-3 pages high!). At least, this function, which is in this program, is rare, and not every program can boast of similar functionality!
I’ll add that the screenshot can be made very large, the program allows you to scroll the page several times and capture everything in full!

Screenpresso workspace
Otherwise standard program of this kind. Works in all major operating systems: Windows: XP, Vista, 7, 8, 10.
By the way, for those who like to record video from the monitor screen, there is such an opportunity. True, there is more to this matter convenient programs(I wrote about them in this post:).

Video recording / Snapshot of the selected area.
S upper Screen
(Note: minimalism + Russian language)
A very small screen capture program. Required for operation installed package Net Framework 3.5. Allows you to perform only 3 actions: save the entire screen into a picture, or a pre-selected area, or an active window. The program does not fully justify its name...

SuperScreen - program window.
E asy Capture
But this program fully lives up to its name: it takes screenshots easily and quickly, just by pressing one button.
By the way, the good news is that she immediately has a mini-editor in her arsenal, reminiscent of regular paint - i.e. you can easily edit your screenshot before posting it for public viewing...
Otherwise, the functions are standard for programs of this kind: capturing the entire screen, active window, selected area, etc.

EasyCapture: main window.
Lip2Net
(Note: easy and fast adding screenshots to the Internet + receiving a short link to the screen)
Quite a popular program for creating screenshots! I’ll probably say a banality, but “it’s better to try once than to see or hear 100 times.” Therefore, I recommend that you launch it at least once and try to work with it.
After starting the program, first select the function of capturing part of the screen, then select it, and the program will open this screenshot in the editor window. See below picture.

Clip2Net - a screenshot of part of the desktop was taken.

Results of publishing the screenshot on the Internet.
-----------------------
This concludes the review of the best programs (in my opinion) for capturing the screen and creating screenshots. I hope that you find at least one graphics program useful. I would be grateful for any additions on the topic.
Capturing, that is, a snapshot of an image on a monitor screen is called a screenshot. Read the lesson about taking a screenshot using standard Windows OS tools: Windows Scissors.
Today, to view most web pages and interact with them, we scroll - we scroll the contents of the window with the mouse wheel. We'll look at how to take a screenshot of such a long web page in this lesson.
A primitive and labor-intensive method is to generate a series of screenshots to fit the screen size with sequential manual scrolling of the page. As a result, the coherent content of the page is divided into a certain number of pictures, which have yet to be combined in some graphics editor. Therefore, to create a complete screenshot of a long web page, we use specialized tools.
Works stably and quickly creates a screenshot of a long web page free online service Web Screenshots. We go to the address: https://goo.gl/sZpCF5 to this resource, paste the URL of the captured page into the request field and click the “screenshot” button:
After some time, depending on the length of the page, the capture is made and the screenshot appears in the active service window. Click anywhere on the resulting image right click mice, open context menu and save the screenshot to the selected directory:

Saving a screenshot of a web page to a file png format We view it with scrolling, for example, in standard Paint.
The Snapito service also deserves attention - https://goo.gl/NUvZiV Additional functions it allows you to capture with a time delay and select the size of the screenshot. You can save the image only in jpg format:

Another way to capture online is to install an additional tool in your browser. One of these extensions for Google browser Chrome - FireShot. Find and add it to the browser from the Chrome online store:

After installation in the right top corner The FireShot plugin icon appears in the browser window, clicking on it opens the menu of the add-on functions:

IN free version screenshot extensions can only be saved in png, jpg and pdf formats.
Similar free plugin For Opera browser in Windows OS - Capture Webpage Screenshot - FireShot.
And in Firefox, the function of creating a scrolling screenshot is already built into the browser. To activate it, use the combination Ctrl+Shift+I to open the “Developer Tools” panel and by clicking on the gear icon, go to the “Tool Settings” section:

In the “Additional tool buttons” subsection, enable the “Take a screenshot of the entire page” function.

After this, a camera icon appears on the toolbar; by clicking on it, we take a full screenshot of the current web page. Opening the download log, we find the saved screenshot file:

In addition to online services and plugins for various browsers, many desktop applications have been developed to capture scrolling web pages.
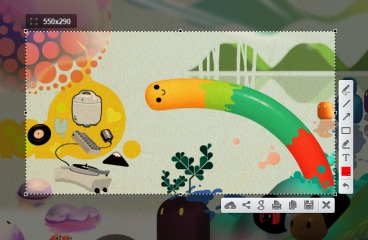
FastStone Capture - popular multifunctional program to take screenshots and record screen activities. The free trial period is 30 days. Convenient, with a laconic interface, easy to learn program:

Having captured the page, the program opens it in the editor, where the screen can be viewed, supplemented with inscriptions, watermarks, pictures and saved in in the required format(bmp, gif, jpg, pcx, png, tga, tif, pdf).
Thus, after comparing tools for capturing a long web page, we select the best option for ourselves.
Hello, dear readers of the blog site. Today I want to talk about a computer screen capture program called Snagit. Why might you need it? In principle, not everyone needs to take screenshots (sometimes just text content is enough) - it all depends on the topic you are writing about.
But the Snagit program has a lot of capabilities and can be useful not only when designing new article on the site, but also just in the household for solving a number of everyday tasks, one way or another related to taking a screenshot or recording video from the screen (for later, for example).
But first, I will briefly tell you (I will open America) about how to take a screenshot of the screen (Print Screen), where these screens are saved and how, without additional software, but only using the Windows operating system, pre-process the captured screenshot and save it to a file in the raster graphics format that is most convenient for you. You won’t always have the Snagit or program at hand, but you will need to take a photo.
How to take a screenshot using Print Screen
Let's first define what a screenshot is. Well in general case, this is a screenshot, i.e. an image of everything that the user sees on his monitor. In a particular case, you can take a screenshot not of the entire viewing area, but only of the active application window or even any separate area, but for this you will already need special programs, for example, the same Snagit.
But we’ll talk about this a little later, but now let’s see how to create a screenshot standard means Windows. This operating system provides two sets of hotkeys that allow you to take screenshots of the entire computer screen (button Print Screen), and pictures of only the active one in this moment application window (key combination Alt + PrintScreen).

When operating systems did not yet have GUI, then pressing the Print Screen key resulted in printing an exact copy of the viewing area (screenshot) in . You probably noticed how in films that were ten years or more ago, you only pressed one Print Screen button to print the content.
But in modern graphic operating systems (Windows), clicking on Print Screen no longer leads to the transfer of a screenshot to the printer port, but leads to it copy to.
Actually, this is quite frequently asked question— where screenshots are saved. The fact is that after pressing the mentioned key or the Alt + Print Screen key combination, the screen is automatically saved in the clipboard (as the clipboard is sometimes called), but no messages about this appear.
It is not entirely clear to a Windows user whether his action (numerous taps on the Print Screen key) had any consequences. Did he manage to take a screenshot or not? It turns out that the second step after this should be to transfer the contents of the clipboard to some program that could allow you to slightly correct the screenshot taken, well, and most importantly - save it to file.
It is not entirely clear to me why the Windows developers did not provide the ability to automatically open the system's default graphics program after the user took a photo by pressing the mentioned keys. This would be logical and would not raise numerous questions from newcomers: “and where are screenshots saved??»
Okay, let's leave Bill Gates alone and see what kind of software can be used to save the screen that we still managed to take and put it on the clipboard. Probably the simplest option, which will be available even in bare Windows, is the simple and default graphics editor MS Paint. You can get to its shortcut by following the path: Start - Programs - Accessories - Paint.
So, you need to take screenshots by pressing the Print Screen or Alt + Print Screen keys. In the first case, everything that is displayed on your screen will be captured, and in the second case, only the window of the application that was currently active will fall into the capture area (for example, it was selected by clicking on its top panel, or by clicking in the taskbar).
After taking the screenshot, you just need to open the Paint editor (or any other graphic editor or one installed on your computer, or possibly) and press the key combination Ctrl+V. In the editor window you will see the screenshot you took of the screen or active application:

Once you take a screenshot of the screen, you can easily crop or resize it, and then save it to the file you need. graphic format by pressing Ctrl+S to open the Save As dialog box. The saving format must be selected based on the characteristics of the image. Read more about this in the article about (Gif, Png or still Jpg).
The screenshot given just above was taken using the Alt + Print Screen key combination; it captured only the active window (MS Paint editor), and not the entire contents of the viewing area. In general, there is nothing complicated about it, but nevertheless, the software market has a whole galaxy of specialized applications for this matter. Why then do you need software tailored only for this task, when everything is so simple?
It turns out that they are needed, but why exactly they are needed, we will try to look at the example of one of the best, in my opinion, programs for creating ordinary screenshots, snapshots of website pages (including long ones, i.e. automatically scrolling them to the end and creating a kind of panorama, as well as for recording video from the screen.I'm talking, of course, about Snagit (the great and terrible).
Because of this program, I still haven’t found the proper incentive to start learning Photoshop, although I have pretty good video tutorials on Photoshop, which have helped my wife become a guru in communicating with this wonderful, but very difficult to master graphic editor.
Snagit, on the other hand, allows me to do almost everything I might need when adding images to an article. Its built-in editor is so intuitive, that all my explanations in this article could be reduced to just a link from which you could download a program for taking screenshots. But I won’t provide you with such a link, because I’m trying to follow the law and not distribute counterfeit software, but you yourself have a mustache.
Let me first give you an example from life when I found an application called Snagit useful and it would be difficult to do without it. It wasn't that long ago. I was in charge of finalization by Alexey Kurakov. Actually, the text of the interview itself was sent by mail many times in the form of a Word file, where changes were made.
But the question arose: how to show Alexey the final version of the interview in the form in which it will be published. It would have been possible to set his own password and login for him in WordPress to access the draft interview, but this was not convenient for a number of reasons, and I wouldn’t want to force Alexey to tinker with passwords and the nuances of working in the admin panel.
Over time, I began to solve this problem using the Public Post Preview plugin, but then I remembered Snagit - after all, it can take a screenshot of entire site pages, and not just the area that fits on one screen.
As a result, Snagit completed the task in a minute and I received, albeit difficult, but still a very clear screenshot of the entire page with the future interview. Alexey read it, was pleased with the design, made several comments, after which I published this article with peace of mind. This is a slightly unusual use of a program for taking screenshots from the screen, or rather from the website.
But in addition to the ability to take screenshots of various areas of the screen and record videos, Snagit has a very easy to understand and master, but at the same time very functional graphic editor in which the screenshots you have made are immediately opened. This is exactly what the standard Windows screenshot tool is missing.
Creating screenshots in Snagit - features and settings
But first things first. Let's first get acquainted with the capabilities of the program, and only then we will talk about the capabilities of the graphics editor built into it. So, I think the question is where to download working version Snagit, you have already decided for yourself, so we will consider this stage, as well as the standard stage of installing the application, to be completed.
I’ll say right away that Snagit has a lot of possibilities and it won’t be possible to describe them all in one article, and I don’t think that’s necessary. The main task for me is to arouse your interest in trying it out in action, well, what screenshots and in what cunning way this program is capable of taking, you will find out without me at random (scientifically - by the method of successive iterations).
All operations in Snagit (as well as in Windows) can be done in many ways different ways and you will probably find at least one of them. The main window immediately after launch will look something like this:

Actually, Snagit is already in this state ready for work - taking screenshots. I have a version of the program with partial Russification number 11. To take a screenshot, just click on the big red circle, or use the key Print Screen.
In general, before, before I became an admin on the site and when I had a lot of free time, one of my favorite pastimes was finding and installing the newest versions of programs I needed and didn’t need. Now I just feel sorry for wasting time on this.
Compared to the ninth version, which I used for quite a long time before, the controls have changed somewhat. By default, creating screenshots (Image) is selected and activated universal method "All in one":

In fact, a very convenient mode. Let's say you press the Print Screen button and move the mouse cursor to the application window from which you would like to take a picture. What do you see? If you move the cursor over different places in the window, either the entire window, or the menu, or some other internal divisions will be automatically selected.
Those. Now you don’t need to aim precisely to draw a frame around the fragment you want to capture. In most cases you will be required just a mouse click to create a screenshot desired area. In other cases, you can move the cursor and, by pressing the left mouse button, circle the area of the screen that you want to receive as a screenshot.
By default, the window (snagita) disappears after clicking on the big red button or on Print Screen. It’s almost always needed there, but when writing this article it prevented me from taking explanatory screenshots. Therefore, I had to choose from top menu“Service” - “Program settings”
and on the “Options” tab, uncheck the box "Hide Snagit window when collecting data."

There will also be checkboxes that automatically, after taking a screenshot, send it to the graphic editor window, so that you can make fun of it to your heart’s content, and not be puzzled by the question of novice video users: where did the screenshot you just took go?
The mouse cursor will take the form of a crosshair, and next to it you will see magnifying glass(can be removed by pressing the M key on the keyboard), which allows you to more accurately position the cursor when selecting the area of the future screenshot.

If the object from which you want to take a screenshot has scrolling option, then when you move the mouse to the border of the window you will see a button with arrows offering you help in this difficult task.
After you hold down the left mouse button and select the area to take a screenshot, you can release it. As a result, the Snagit graphic editor window will open, where the screenshot you made will be located. Everything is very, very simple. I would even say it is elementary and intuitive.
Go ahead. Do you want to use Snagit? take a screenshot of the entire screen? Yes, easily! Move the cursor to the upper left corner; a yellow frame will surround the entire viewing area. Although, of course, you can select the “Full Screen” option from the drop-down menu of the “Input” area and click on the huge red button (or you can also press Print Screen on the keyboard).

But then this mode will have to be changed, so it’s easier to get the hang of using all the features of the “All in one” option so as not to bother and get confused.
But note that Snagit is a pretty smart program, it understands that you may want to take a screenshot of not the entire viewport, but only certain areas of it. Move your mouse cursor around the screen, and when the selected area matches your idea, feel free to click on the left mouse button. Your huge or not so huge screenshot will open in the Snagit graphic editor, waiting for you to start mocking it.
So, but if you need to take a screenshot of a long website page (and not only), so that it all fits, then you will choose the “Scrolling window” option (see in the figure above). Go to the place where you need capture large fragment with scrolling and press PrintScreen on your keyboard. A yellow bidirectional arrow will appear at the bottom, which you need to click on.

Snagit will start scrolling down the site page (one by one) until it reaches the bottom. The resulting long screenshot will open in a now-traditional graphics editor, where you can do with it whatever your heart desires. Another thing is that the same thing can be done without switching to the “Scrolling window” mode, but by remaining in the “All in one” mode. You just need to move the mouse cursor to the border of the scrolling window and a bidirectional arrow will definitely appear.
Capture video from the screen and create screenshots with a time delay
This is where we went over the basic basic features of a screen capture program called Snagit. It’s worth saying a few more words about screen video recording with her help. To do this, you will need to click on the “Video” label next to the big red button in the main window, and then on this largest button (or press Print Screen on your keyboard).
Next, you select, while holding the left mouse button, the area where you will play the video. For example, in this way I recorded some online seminars so that later, if necessary, I could watch them again. To do this, I highlighted the area on the site where the video was broadcast. As a result, the “Record Video” window will appear.

The next step is to start the video in the selected area (if necessary) and click on the “Rec” button in the Snagit program window. Video recording will begin, which will be accompanied by a scrolling yellow frame on the sides of the capture area, as well as a blinking red dot on the video camera icon in the tray (the area in the lower right corner of the monitor).

To stop recording video from the screen, you will need to click on the button with a square (or pause to pause) in the program window. If the window is not displayed, then click on the video camera icon in the tray and the window will appear.
After looking down a little, Snagit will open the screen-recorded video in its wonderful editor, where you can view it and, if necessary, save it in the format you need.
Of course, there are specialized applications for recording video from the screen, but Snagit can be useful for a quick and simple operation. Well, okay, this is not a primary task, so let's get back to how else you can take screenshots using this program.
Sometimes you need to take a picture of something that needs to be brought into the desired state first. For example, show a certain complex drop-down menu item expanding it:

Make it regular using Windows It's not possible to capture the screen, but Snagit does it right away. So, screenshots of drop-down menus and other complex objects can be taken using the “10-second delay” icon and clicking on the big red button.

A countdown stopwatch will appear at the bottom of the screen on the right and you will be given ten seconds to prepare the object to take a screenshot. Personally, I take screenshots of complex objects and dropdown menus a little differently. I select “All in One” in the main window of the Snagit program and open the drop-down menus I need, and then press the Print Screen key on the keyboard.
The drop-down menu freezes, after which I have the opportunity to select the desired area of the screen (holding the left mouse button) and calmly take a screenshot from it (releasing the left mouse button). Although it is possible that a ten second delay could be useful in some exceptional cases that I have not yet encountered.
So, let's finish this article by analyzing all the possible options for how to make a screenshot in Snagit. The rest you will somehow manage on your own, fortunately everything there is simply impossible.
But nevertheless, I want to pay a little attention to the second part of the program, namely its graphic editor, which is amazingly intuitive and has almost all the tools that a webmaster might need to prepare an article for publication.
Editing taken screenshots in the Snagit editor
So, the screenshot itself, which we manage to capture from the monitor screen with some program, will not always satisfy the requirements that we place on it.
Very often, it may require modification and the addition of explanatory inscriptions, icons, arrows, frames, underlines, and other nonsense that will make the graphics in your article more beautiful, and most importantly, more informative.
Like this:

All this allows you to do graphic editor in Snagit. It will even be possible to create your own drawing in a couple of minutes using very visual tools.
For example, like this:

In general, in the editor, all the tools are visible and located in the top panel:

In the upper left corner there is a round button, which is an analogue of the missing “File” menu item, i.e. there you can save, send, print and delete graphic files opened in this editor. Although, the save button in the form of a floppy disk is displayed on a separate panel at the very top.
On the tab "Drawing" Snagit provides you with quite a lot of standard elements that you can use to design the created screen. There will also be many different options for lines, frames, arrows, inscriptions and other crap that is easier to look at than to read about it:

All additional graphic elements for screenshots look presentable and will not be embarrassing to use in .
On the tab "Image" you will be given tools to mock your screenshot. You can resize the screenshot, rotate it, overlay different visual effects. In general, try it.

The graphic editor will have as many possibilities as the main part of the program. It’s impossible to tell everything. Do you know what the main difficulty I had when writing and formatting this article? I couldn't use Snagit to take screenshots of itself. I had to go into its settings and look for a solution (I gave it above in the text).
In general, to solve the question of how to make a screen on a computer, as well as to avoid the question of where they are saved when you click on Print Screen, I advise you to try using Snagit.
It is possible that you have your own ideas on this matter, but this software very quickly wins over you and it will be difficult for you to do without it, as, for example, many people can no longer imagine themselves without.
Good luck to you! See you soon on the pages of the blog site
You might be interested
 Clip2net - how to take screenshots and post them online for free
  Free minimalistic Screenshotter with the ability to instantly share links to screenshots (without restrictions)
  The best Android emulators for computer
  Plugins and themes for Mozilla Firefox- what add-ons and extensions are worth downloading and installing?
  FastStone Image Viewer is a photo viewer program that helps reduce (compress) the size and weight of photos
  Extensions and themes for Google Chrome
  Viber and WhatsApp - what are they, comparison of Viber with WhatsApp and choosing the best one
  Graphics for the Web - how to prepare an image in Photoshop and insert a picture or photo on the site
  How to convert Word document(doc) in PDF file, and also convert it to FB2
We greet you! Taking a screenshot of your computer is quite easy using the default keyboard shortcuts. But there are times when you need to take a screenshot of an entire page, but you don't just want one small part of the page, you want the entire web page - or at least more than one part of it. How to take a screenshot on a computer with a page scrolling? We have tried many tools and methods, but only some of them work. This is what we will talk about today, and we will also point out the pros and cons of each method. Here we go?
1 Capture scroll box or entire page using Snagit
We've been fans of Snagit for a long time. This is a powerful screen capture and editing app that allows you to do almost everything related to screenshots. Together with Camtasia ( software for screen recording and video editing), these are great products from TechSmith.
Please note: Snagit is not free, but it does have a 15-day free trial trial version. To take a full screenshot of a page, follow these steps (we'll use Snagit for Windows as an example).
Step 1. Download Snagit and install it on your computer. Open the main capture window. Under Image > Selection, make sure you select Scrolling Window. Click the red "Capture" button to continue.
Step 2. Go to the page you want to take a screenshot from, then move your cursor to that area. Now Snagit will be activated and you will see three buttons with a yellow arrow icon.
The bottom arrow represents "Capture the vertical scroll area", the arrow to the right represents "Capture the horizontal scroll area", and the arrow in the lower right corner represents "Capture the entire scroll area". We will use the "Capture Vertical Scroll Area" button.
Step 3. Snagit now automatically scrolls the page and captures parts of the screen. The Snagit editor panel window will soon appear with the photo he just took.
Pros:
Minuses:
2 Online service Web-Capture.Net
This is an online website screenshot service. Slap on Web-Capture, copy the URL of the web page you want to capture and paste it here (see below). You can also select the file format to export. Press "Enter" on your keyboard to continue or "Capture Web Page".
We wait. It took us about two minutes before we saw the message: “Your link has been processed! You can download the file or ZIP archive. Now you can download the screenshot.
Pros:
Minuses:
3 Method using default commands
Make the page smaller and use the default commands. This is a quick fix if the page extends beyond the visible area of your screen. Zoom in until it fits the screen and then use the default commands to capture the full screenshot.
That is - in Windows, press "Print Screen" on your keyboard. It will save the screenshot to the clipboard, so you will have to open a graphics editor and paste the screenshot into new file.
4 Screenshot using PicPick
There are many free utilities for screenshots, both free and paid. Most of them are difficult to install and do not work as we would like. We chose PicPick as one of the best available programs. It is free, available for Windows, XP and later, with a full range of different features.
Step 1. Download and install PicPick. A simple installation wizard guides you through the entire installation process, from installing files to creating a desktop shortcut.
Step 2. Once opened, select the selection type from the list located in the “Screen Capture” section in the lower left corner of the main program window.
Like the Snipping tool, there are options for free-form, rectangular, windowed, and full-screen screenshots, as well as fixed-area and scrolling window options for more control when capturing elongated images.
Step 3. Save the screenshot. Make any changes you want, such as cropping and applying filters, and click on the main file in the top left corner.
Then select "Save As", write a new file, select a save location and select the desired file format from the drop-down menu. There are many formats to choose from including JPG, PNG, GIF or PDF. After completion, click on the “Save” button in the lower right corner.
Pros:
There are no cons. Well, at least we didn’t find it)).
Conclusion
We've shared with you four methods to take screenshots of a full or scrolling web page. As we said, different methods have their own advantages and disadvantages, so be sure to choose the one that best suits your needs.
If you have long-term screenshot needs, we highly recommend Snagit as it is more powerful and convenient, although you will have to spend some time getting familiar with the app or free program PicPick. If you have any questions or suggestions, feel free to leave a comment below. And that's all for us. Bye everyone!
Sincerely, Vyacheslav and Valeria!