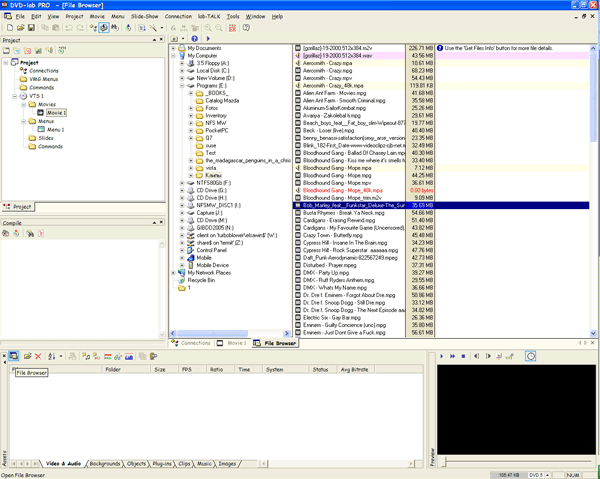
I described to you the process of writing data to a DVD using free program « AshampooBurningStudio 6FREE" This program can not only write to DVD discs, but also create images from CD or DVD discs and burn images to a CD or DVD disc.
There are situations when your DVD discs with valuable information can be scratched, lost, etc. and you will lose your data that was stored on these drives. To avoid such unpleasant situations, you can make an image (an exact copy) of these disks on your computer’s hard drive in advance, and then write this image back to a DVD disc (blank). Or, for example, you need to make a copy DVD disc to a blank DVD. So, in this article I will tell you how to make an image of a DVD or CD and using which free program.
Creating an imageDVDdisk
Where to download and how to install the program AshampooBurningStudio 6FREE"I told in . After installation, launch the program.
Then insert your CD or DVD with data and click “Next”

Choose the path where you will save the disk image and file format. I recommend choosing the file format " ISOFileFormat"as the most common and supported by many programs. Then press the button " Further»


After successful saving, press the button " Exit»

The CD or DVD image has been saved!
Burning a disk image toDVDdisk
So, you have learned how to create an image of a DVD or CD. Now I will show you how this image can be burned to a blank DVD.
In the main program window, click “ Create/burn disk image", then " Write downCD/DVD/Blu-ray disk from disk image»

In the new window, click the button " Review" and select the disk image you want to burn. The supported file formats are ISO, CUE/BIN and ASHDISC. After selecting the image file, click " Further»

Insert a blank CD or DVD and press " Change options»


After changing the recording options, click " Write downDVD»

In the next window we see the process of burning a disk image. For more detailed information about the recording, you can click the button " Show details»

The program will show detailed messages about writing to disk with status messages.

If recording and verification are successful, the window “ Recording and verificationData DVDs are a success!» Click « OK»

Menu for DVD is a topic that will be discussed in this article. The site has already discussed the issue of creating a menu for DVDs, but over time, programs have been released that significantly simplify the procedure for creating a menu for DVDs. Therefore, several programs were specially selected that allow for novice users Create a DVD menu without any hassle. You can find a lot of programs online that create disc menus, but we have selected the best of them. To create a menu for a DVD you will need only one program, but it was decided in the article to use several programs to create a DVD menu, since each of them has its own advantages and disadvantages. It’s up to you to decide which program to use to create your DVD menu.
This article will also discuss the following questions:
Why is it necessary?DVD menu
 Every DVD video disc, whether licensed or pirated, has a built-in menu. By using standard menu Can:
Easily switch between movies
Turn on/off subtitles,
Select an audio track in music discs,
Quickly switch between slides
Implement a convenient search for a video fragment on a DVD disc
But the DVD menu you create can be much more attractive and functional than the standard menu, since you will create the DVD menu design yourself according to the theme of your disc. In addition, you can insert a beautiful photo instead of the usual background, you can make playing scenes instead of standard icons, etc. Therefore, the menus you create will be original and unique.
Creating your own menu for a DVD disc
We present to your attention two ways to create a DVD menu. The first method is simpler and easier for a novice user to quickly learn. It is built on ready-made templates. This way you can quickly create a menu for a DVD disc in just a few clicks. The second method provides more flexible options when creating menus for DVDs. This method involves working with a professional program to create a DVD menu. What method to work with is up to you!
Creating a DVD Menu Using NERO 10
(spoiler title=Easier way opened=0)
To create menus in NERO 10 there is an application called NeroVisionXtra. This is where we will create the DVD menu. This application looks like this:

Since we want to make a menu for DVD, we go to “Make DVD/DVD-Video”. Screenshot:

A new project will open. First you need to import files into it, and then create a menu. Therefore, click “Import / Import files ...”

We indicate the video files that will be included in the DVD, their format does not matter, the process of adding video files to the NeroVisionXtra program is as follows:

After adding to NeroVisionXtra:

We have added four files, these will be the corresponding four DVD menu buttons. How many menu buttons to make is up to you. You may have a significant number of individual video files, but to have fewer buttons in the menu, you can merge or merge several video files into one. How to do this was discussed in the guide: How to merge videos?
Go to the “Templates” tab and select the “Smart3D” value in the category. It has only one template called Cube. We select it (additional templates can be downloaded from the Internet by clicking on the “Additional templates” button). It already has built-in music and flash animation. It is well suited for those who agree to use ready-made templates. Screenshot:

As a result of applying the template:

The template has six buttons in total. In our case, two will remain free. Now you can make the appropriate inscriptions on the template. It has the corresponding fields marked in red. Let's look at the screenshot:

Double-click on the field indicated by red lines and a window appears where you can enter a new name:

Enter a different name and apply the changes by clicking anywhere on the menu template.


At this stage, the menu video will start playing, we can watch it. By the way, this program emulates the operation of a DVD remote control. If everything suits you, then click “Next”

Now let's set where the DVD movie will be recorded. The program can write it to disk or to a folder hard drive. For example, let's write to a hard drive (hard drive). Specify the folder where the DVD movie will be recorded and click “Record”.

I would like to speed up the recording process. To do this, change the program priority. Replace "Normal" with "High". NeroVisionXtra will significantly speed up your work. In this case, it is recommended not to do anything on the computer, because work with other programs will be significantly slowed down. When recording is complete, NeroVisionXtra prompts you to save the log file. You don't need it, so you don't have to save it. When the menu is created, the following window will appear:

Creating a DVD Menu Using DVD Lab Pro
The program that we will use to create a DVD menu has a full set of tools for creating quality menus. The program developers paid special attention to setting up effects and unique DVD menu elements. Often when preparing DVDs, the user looks for the most better program to achieve your goals. Such a program is DVD-lab Pro - a fairly powerful solution for creating DVD menus. The program can create beautiful animated effects of buttons moving when selected, etc. Using the program you can create menus for DVDs on any topic. You can also make a slideshow of photos for easy viewing on TV. detailed instructions, (in the drop-down line) will help achieve the desired result. So, let's begin!
(spoiler title=A more flexible way opened=0)
Launch DVD Lab Pro. The program offers to set the main characteristics of the future project.

First of all, we indicate the desired television system - PAL or NTSC. Below we mark the item that best suits your project.
Normal (VTS Menu+Movie) is the most common option for building a DVD: menu + movie. If the disc contains several VTS (Video Title Set), then you must specify the second item - Advanced (VMG, VTS Menu+Movie).
If the disc does not have a menu, check the third item Simple (Movie Only).
And if you have already used the program and you have a template or an unfinished project, mark the last option.
Now you need to enter into the project the necessary video, audio data, as well as pictures for the menu background and subtitles if necessary. The Assets window is used for these purposes. DVD-lab Pro supports the main types of video and audio stream files: mpv, m2v, mpa, m2a, ac3, dts, wav, aiff, mpg, vob. An interesting feature of the program is that it immediately checks imported files for compatibility.

Using the “Explorer” button, double-click to add a video to the project.

Now a few words about the format of sound files. A DVD typically requires audio at a sampling rate of 48kHz. Therefore, if you input audio with a different value for this parameter (for example, the AudioCD sampling rate is 44.1 kHz), DVD Lab Pro will offer to re-encode the “wrong” audio file. If you want to use Dolby Digital AC-3 sound in your project, you should either encode it first using third-party programs.
When importing files in MPEG or VOB format, the program offers to demultiplex them or use them as is. Please note that when using MPEG or VOB without demultiplexing, they must be compatible with the DVD format (mpeg-2).
Now we enter into our project the video file of the main film and the starting video and two sound files. If necessary, we transcode the sound into AC-3 format. Since we are using two video files in the project, we will add one more Movie element. To add new elements, click on it right click mouse and context menu select the desired item. This Project window displays the project elements that will be included in the DVD: movies, menus, slide shows, and the relationships between them. All elements are shown in a tree structure.

All that remains is to drag the files from the Assets window into the Movie 1 and Movie 2 windows and the sound files to them.
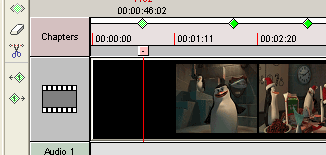
Now we need to break our film into chapters. This is necessary so that you can create an episode menu. You can do this in two ways - automatic and manual. In most cases, it is more convenient to use manual arrangement of chapters - you need to click on the episode, a vertical bar and a plus sign will appear. By clicking on it, a marker will appear at the top (as in the picture).

By the way, for ease of viewing, you can use the viewing window. (Bottom right). You can also place markers there.
At automatic search Chapters analyze changes in the image of the scene. Set Sensitivity in the range from 0 to 255. The recommended value is 220. To call the menu you need to:

And set the necessary parameters.

Creation main menu
Now let's start creating the main menu. It will appear immediately after inserting the disc into the DVD player. In the “Project” window, double-click on the line Menu1. A window will open in which we will work on the design of the future DVD menu. In essence, it is a simple graphics editor with support for raster and vector graphics.
Let's start by adding a background. Open the “Backgrounds” tab in the Assets window (below) and transfer the image you like.


A window will open in which you can select the font type, its size and type the inscription itself. Then you can change the size of the inscription or position it depending on the requirements of the project.
But in our 3D project several lines have already been created by default. All we have to do is change the inscriptions to our own. This can be done just below the project itself.

The project has already specified where each menu element will be, but you can adjust it a little if something doesn’t fit somewhere.
1- Disc title “My DVD”.
2- “Watch”,
3- "Episodes"

As you can see, the last three inscriptions will be active menu elements or buttons. But more on that later. For now, let's see what properties of objects can be changed. The entire right side of the program is occupied by the Properties panel. It consists of several bookmarks. Now we, perhaps, will not dwell in detail on those bookmarks that allow you to change appearance objects. Because you yourself can customize the design of all menu elements without any difficulties.
The Fill tab provides additional textures for filling objects, which can be combined with the effects of the Colors tab. In addition to choosing the texture itself, there is a fill type setting: normal fill, overlay, negative, transparent. Additionally, we have four effects: emboss, metal shine, 2-lights shine, RGB-shine. In addition, you can add textures yourself - to do this, simply copy your files in JPG format to the C:\Program Files\ folder DVDlabPro\Textures\.
Also a useful tab - Lyrs (Layers - layers) - allows you to work with layers, similar to in Photoshop. To move layers, use two buttons - Bring Forward (up) and Send Backward (down).
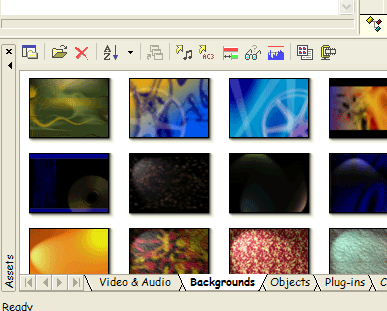
When designing a DVD menu, you can use a set of already built-in libraries, which is located in the Assets window. If for some reason you do not have enough pre-installed templates, you have the opportunity to independently supplement the libraries with your own objects.
Among other things, the program contains a standard set of functions for aligning and centering objects. All changes you make are immediately displayed on the project screen, so you can customize all the elements according to your plan.
Now it's time to start creating the episode menu. Using this menu, you can quickly select the desired fragment of the film. IN automatic mode We have divided the film into four episodes, each of which will be displayed in the working menu window as a small repeating fragment. This type of menu is called a Motion Menu. In addition to being clear, Motion Menu gives your DVD a professional look.
Creating such a Motion Menu is extremely simple. Click on the Wizards panel -> Add chapter selection menu, and go to a small window where we select a template for the future menu for episodes.

The program will create a new menu, and after that another line Scenes1 for Movie1 will appear in the Project window. Double-click on it and go to the menu editing window that is already familiar to us. In each of the template windows, the first frame of the corresponding episode will be automatically inserted.

At the bottom of the frame it is indicated which disk location the object is associated with. Next to each frame, the order of navigating the disc using the remote control is displayed remote control DVD player. And below is the name of the object from which it was taken and the episode number. The resulting menu is already fully functional. But let's change it up a little by adding a decorative border to each frame. You can get them in the Assets library. The program will automatically adjust the frame to fit, as if “flowing around” the frame on which it was placed. Also, if an object has a link, the frame will inherit the same link. You can also import your frame samples in *.png format. But this is only with more professional use of the program. For now, standard elements will be enough for us.
Making connections
Let us dwell in more detail on the methods of selecting personnel and establishing connections. First, we can check how our menu works; to do this, click the “Simulation” button.

A “navigator” will appear, emulating the DVD player remote control. By clicking on the arrows, we see how the menu reacts to these actions. In our case, the active frame is highlighted with a different frame color. Let's try to ensure that the entire active frame is highlighted, i.e. frame and frame inside it. To do this, you need to use the “Group objects” function.

It allows you to group multiple objects. The group acts like a single element. Click the “Group Objects” button and draw a circle around one of the frames. The group is highlighted with a red and white dotted line. All that remains is to restore connection with the desired fragment of the film. Right-click on the group and then click Link/Movie/ChapterXX, where XX is the number of the corresponding episode. We do the rest of the frames in the same way.
Now let's try to change the highlight color of the active element when hovering over it. Open the “Map” tab in the Properties panel.

Use the switch in the “Color Map” tab Normal/Selected/Activated to select the button state, where Normal is an unselected button, Selected is a selected button, Activated is a button at the moment of pressing. Each of them includes three sliders, which are responsible for the color in each group of buttons. The third group is set by default, so we use the lower regulator.

The color is assigned by clicking on the square (a palette of sixteen colors), and its transparency is assigned by the position of the slider. Customize according to your project.
Now is the time to make video clips in the episode selection windows. Select Menu->Animate Menu (the program will issue a warning that 10 seconds of an uncompressed AVI file can take up 300MB) and go to the "Animate Menu" window.

The top left is the preview area. It displays a general view of the menu, with a red rectangle indicating the active link.

In the right corner there is a list of objects that can be animation objects. In the Preview window you can view the active clip, and using the slider (to the left of the window) we select the starting points of each Motion Menu clip. Next, set the duration of playback of the clips “Total Clip Time”, within 10-40 seconds. To make a smooth transition from the end of the clip to its beginning (don’t forget that the clip is “loop”), check the “Smooth development at the end of the loop” checkbox and indicate the duration in frames just below.
The “Screen Saver Effect” feature is worth noting. It allows you to add the effect of a menu “appearing” on the screen. There are several preset options: cross-fade, top/bottom, right/left, etc. In addition, there are two special options: Buttons Cut and All Objects Cut. The first one makes all buttons invisible for the time specified in the Intro Effect parameter (all other objects remain visible), the second one makes all objects invisible except the background.
Finally, we select the MPEG-2 encoding method, bitrate and temporary folder in which the rendering result will be stored. When everything is ready, click the “Create” button. The process occurs in two stages, the rendering time depends on the duration of the menu clip and the number of episodes. The finishing touch is to set the background music that will play while the menu is playing. Simply transfer the required file to the Audio track.
Let's summarize
Now let's finish editing the main menu. All we have to do is associate the buttons with the corresponding project objects and arrange navigation links. We associate the “Watch” button with the first chapter of the film (Movie 1)

“Episodes” is linked to the episode menu (Scenes 1 for Menu 1), “Settings” is connected to the settings menu.
Defining connections
The main part of the work on the future DVD menu has been completed. All we have to do is determine how the various elements of the project are related to each other. For these purposes, go to the special Connections window.
Each project object is presented in the form of a conventional graphic icon. Audio/video data files are displayed as a fragment of film, menus are framed in various frames, etc. As you can see, some of the connections have already been made. They appeared at the stage of creating the menu and determined the links for the buttons.

If you want to change something, the connection is determined using the “Draw Link” tool.
Next we need to loop Menu 1, i.e. connect the end of the menu icon to its beginning. When looping, a special LOOP connection is formed. Thus, after loading the disc, the main menu is played, which will continue to play until the user chooses what to do next. We loop the episode menu in the same way. In principle, there is practically no need to loop (LOOP), since by default the duration of the menu in the program is set to infinity. But just in case, I did it myself. Now let's get acquainted with some interesting additional objects. The line of these objects is located at the bottom of the Connections window.
Return to last Menu. When the movie ends, it determines the link to the last displayed menu. Therefore, if we started watching a movie from the episode menu, then after the end of the movie we will return to it. Very logical from a navigation point of view.
Random List. Plays movies listed in random order. Ideal for use in audio/video clip collections.
Chapter Play-List (Movie Branching Object). Allows you to create a playlist and play movie episodes in a given order.
Almost FINISH!
Almost everything has already been done, and all we have to do is compile the project and burn it to a DVD. Click Project->DVD Compilation.

In the “DVD Compilation” window, specify the path to the folder in which the disk image will be located. If you need to burn the disc right away, check the box next to Autostart recording.

That's all. Click “Run” and wait a few minutes for the program to compile the project. Since we have virtually no experience in creating DVD menus, we will make a test recording on DVD-RW. Then check it on your DVD player. The program provides the opportunity to professionally create projects of any complexity. The purpose of this article was to introduce you to the program and help you understand the basic concepts. If you want to study the program's capabilities in more depth, there is a lot of literature on the Internet. The program also has a help (F1), but in English. I assure you that there is nothing complicated, and there is no need to be afraid to create a menu for a DVD disc on your own. Remember, no one will ever do for you better than you yourself. Good luck!(/spoiler)
Editing a ready-made DVD menu
Editing a ready-made DVD menu will allow you to change the design or structure of all content. Also, sometimes, on different DVDs, you can find intrusive advertising, all sorts of agreements, movie trailers and the like. You can get rid of all this and make the appropriate changes to that menu, and make it your own, using the program, which we will consider below. But first, in order to edit a ready-made menu, you need to familiarize yourself with the principle of operation and the structure of the root directory of a DVD disc.
(spoiler title=Instructions for editing the menu opened=0)
DvdReMake Pro is a program that we will use to edit DVD menus. The program interface is quite simple and should not cause any difficulties. You can download it at the end of the article. The program presents the menu in a tree form, which facilitates the editing process. Therefore, it will not be difficult for you to find and remove advertising or unnecessary elements menu. As an example, let's delete the part of the disc menu called "Episodes". So let's get started.

Open the program and specify (using the Import DVD command) the path to the folder with the DVD movie.

- Please note: you need to specify not just any file, but the folder itself. The program will download the content. You just need to wait a little while the DVD content is imported.

- We have a tree-like menu structure. Since we want to remove the button from the menu, we need to find where the main menu is located. In our case, this is Video Title Set 1/Menus en/PGC 2.

- Now we work directly with the main menu of the disc. To remove the “Episodes” menu button, right-click on it and select “Hide button”

- We removed the "Episodes" button function, but the name of the button remains because it is written in the picture background. Unfortunately, you won't be able to edit the background image in this program. To do this you need to use other programs.

- If you accidentally deleted the wrong thing, DvdReMake Pro has the ability to return the button function. To do this, right-click on the title “Episodes” and select the “Restore block” command. Using this method, you can remove not only menu buttons, but also advertisements and other unnecessary menu elements.
- Now you need to save changes made. To do this, click File/Export modified files or using

A window will open in which you specify the path to save the files. There is one peculiarity at this stage: by specifying a folder to save, the files will be saved not in it, but near it. Then you should replace the original ones with these files.
DVD disc structure
 A standard DVD disc consists of two folders and several files with different extensions. The AUDIO_TS folder is usually empty on DVD video discs. It is used in DVD-Audio as a directory of audio files. The Video_TS folder contains files, the meaning of which we will now consider in more detail.
video_ts.ifo is a file that is responsible for the disc menu. It is this that needs to be launched by the player in order for the disc menu to open.
*.ifo - files containing information that the player uses during playback.
*.bup - file Reserve copy*.ifo file in case of possible damage.
*.vob are DVD files that store information about video, audio and titles.
DVD movies are compressed using the MPEG-2 codec. The .vob video format takes up a lot of space because the bitrate of such videos varies from 2000 to 9800 Kbps. The size of a video frame in the PAL standard is 720x576 pixels, and for the NTSC standard - 720x480 pixels.
The DVD menu display can be static (not changing over time) or animated (the first few seconds of the movie will be played).
Since editing a finished menu is a rather complicated process that requires the use of third-party programs, we decided to make detailed description the process of editing a ready-made DVD menu without delving into technical issues. If you have any questions, write in the comments.
Creating a DVD Menu from any video formats
In order to create a DVD disc with a full-featured menu using video files of other popular formats (*.avi, *.mp4, *3gp, *.ts, *.mkv, *.wma, *.flv, etc.) , which are not supported by programs for creating DVD menus, you need to convert them to a format supported by the program. For these purposes, you can use any converter from the “Video Converters” category. But I recommend using the free video converter “Format Factory”, which also contains a description of the conversion process.
Conclusions from everything done
The first one is aimed at the novice user. That is, the program that is used in the first method creates a menu in a few clicks. It uses ready-made pre-installed templates. The advantages of this method are the simplicity and speed of creation. The disadvantage is that it is impossible to move away from the theme of the template.
The second method uses a more professional program, where the user needs to set all the parameters and settings himself. It takes more time, but also gives you more creative options.
We wish you success!!!
- In this article, we suggested two ways to create a DVD menu. The process of creating a DVD menu is accessible to everyone: both beginners and experienced users.
- The first one is aimed at the novice user. That is, the program that is used in the first method creates a menu in a few clicks. It uses ready-made pre-installed templates.
Advantages
- This method lies in the simplicity and speed of creation.
Disadvantage
- is that it is impossible to move away from the theme of the template.
- The second method uses a more professional program, where the user needs to set all the parameters and settings himself. It takes more time, but also gives you more creative options.
- We wish you success!!!
This is why there are programs for creating DVD videos, or, in other words, DVD authoring. Currently, there are a huge number of such programs on the shelves (the law-abiding citizen himself will choose the desired counter) and on the Internet, but in this article we will talk about only one of these products called DVD LAB Pro. Canadian made considerable efforts in creating this program, as a result of which this product, to some extent, can be classified as professional solutions. In this article, we will be able, using both the built-in techniques implemented in the program, and using our imagination and creative fervor, to create a full-fledged DVD video disc. So, let's begin.
To
1. Launching the program and creating a new project
Launching the DVD-lab PRO shortcut will open a program window with a choice of parameters for our future DVD.
In the first line you need to select the project color system (PAL or NTSC). In Russia, as you know, PAL is used (set by default). Now you need to select your project type. To create a regular DVD video, just check the box Normal. How is it different? Advanced from Normal, what's happened VTS And VMG and why we considered the type sufficient Normal? Each DVD disc consists of a set of films (clips) and a menu, this is VTS, that is, a kind of container in which clips and menus are stored. In DVD LAB, each VTS can contain 99 movies (clips) and 250 menus. However, all menus and all films (clips) in one VTS must have the same settings, and if you set, say, the proportions to 4:3, then in the entire project all clips and menus will have the same proportions, however, if you want to watch the same film also in a wide format, for example, 16:9, then you need to create an additional VTS with 16:9 parameters. But in order for the DVD player to understand that your disc includes two VTS (4:3 and 16:9), you need to create VMG- Video Manager menu. From the above it can be assumed that regular user is unlikely to create a DVD with a film about how he had fun in Turkey in two or even three formats, so this lesson uses only the project type Normal, which is quite enough to create an amateur DVD video disc.

The next item of project properties that needs to be considered is Simple. Selecting this item will create a project with space only for a video fragment ( Movie).

You can add the remaining items yourself, but more on that later. Paragraph Template creates an empty project, but the meaning of the phrase Open project(Open project) is understandable to everyone without exception. 2. Import video, sound fragments, pictures
So, in stock - an empty project for now. Pay attention to the bottom open window programs.

It is called Assets window(the window in which our “property” will accumulate). Here, namely in the tab Video & Audio, all video fragments, pictures and sounds needed for work are imported. The remaining tabs represent various objects built in by default: Backgrounds(background pictures), Objects(objects), Plug-ins(plugins), Clips(clips), Music(musical fragments), Images(Pictures). Import is done in several ways, the first way is the simplest: just drag the selected file from Windows Explorer into this window. Second way: press the button Import Files and select the desired file.

The third way is to open File Browser using DVD Lab by clicking the appropriate button.

The file browser will launch, from which you can simply drag it into the window Assets Window you can import files.
However, you may notice that the file import button is present not only in the tab Audio & Video, but also in other tabs, respectively, the import will be carried out in the tab that is in this moment open. The difference is that in the tab Assets Window there is a link to video and audio fragments and pictures located in any folder you created, and when importing, say, into a tab Images, the image file is copied to the Images folder, located in the directory where the program is installed. Therefore, when loading a new project, the window Assets Window will be empty, and in the tab Images You will find pictures that are there by default, as well as pictures that were imported earlier (if they were imported).
Unfortunately, DVD LAB Pro can only work with certain file types, in particular .mpeg, .mpg, .mpa, .wav, .m2v (see ), and to convert your video to these formats you need to use third-party programs (for example, TMpgenc, Canopus ProCoder). Importing files is done by simple transfer. In our case, these are files with the extension .m2v and .mpa. If the parameters of the files that you try to import for some reason do not correspond to the supported ones, a window will appear with a list of errors or warnings. If you try to import one video file containing video and audio (.mpg) into the program, a window will appear containing two items: Demultiplex to Elementary Streams(Demultiplex) and Quick mode without Demultiplexing(Quick insert).

Let's talk briefly about demultiplexing. To put it simply, this is an ordinary splitting of a .mpg file into its constituent parts, video and sound. The demultiplexing process makes two files from one .mpg file, a video file and an audio file, which are then imported into the project. It is recommended to select demultiplexing (otherwise the program will do this for you when compiling the project), after which in the Window Assets window you will also receive 2 files, video and audio.
Let's continue working on the project. Go to the window Movie by double-clicking on the shortcut Movie in the window Project.

By simply dragging files from the Assets window to the Movie window, add audio and video files.

Now in this window you have a movie track and an audio track. 3. Creating chapters of the future film.
There are two ways to create chapters. The first is automatic chapter detection using DVD LAB Pro. Why do you need to select the menu item Movie>AutoChapters...

A dialog box will appear Add Chapters by Scene Detection.

In this window you can set the sensitivity to scene changes - Scene Detection Options. The higher the value in a point Sensitivity(Sensitivity) the more chapters you get. In field Chapters Distribution Type(Chapter Allocation Type) there are two options. By selecting Add X Chapters in whole movie, you will indicate the number of chapters into which the film will be divided, and selecting the option Find all possible chapters provides for the minimum length of one chapter in minutes. Thus, if in this field you specify a chapter duration of one minute and set the maximum sensitivity to scene changes (255), then the number of chapters will be equal to the length of the film in minutes.
The second way is to distribute chapters manually. For this you will need a window Preview(View).

The buttons at the top of the window mean (from left to right): playing the movie in normal mode, in accelerated mode, stop, frame left, frame right, add a chapter, open the automatic chapter splitting mode and show or hide the timecode display. Therefore, having selected the desired frame in this window, click on the add chapter icon and it appears in your film.
What if you installed the chapter in the wrong place and want to remove or move it? To do this, select the chapter by clicking on the green diamond or red arrow (the arrow or diamond means, respectively, whether the frames of the clip are indexed or not. Indexing is used to more accurately distribute chapters).
In the square under the diamond the sign will change from plus to minus; by clicking on it, you can delete the chapter. You can also use the Eraser tool in the toolbar, just click on the unnecessary chapter and it will be deleted. To move a chapter, activate the move tool, point at the chapter and move it to Right place. 4. Creating the Main Menu
To create a main menu (or root menu), you need to open the menu itself. Double-click on the corresponding shortcut in the project window.

The Movie window will change to a blank black background. First of all, add a background image to your menu. To do this, you need to import the image you are interested in in advance into the Assets Window tab and add a background by simply dragging and dropping. You can also use the available pictures in the tab Backgrounds Assets Window.
The background is ready. Now let’s create the menu itself, let it consist of four items: Start watching, Scene selection, Setting the sound, Installing subtitles. To create inscriptions, click on the button Ahh and click where you would like the text to appear.

A window for entering text, as well as its formatting (changing the font, location, etc.) will appear.

By repeating the operation four times (since you have 4 menu items) you will get the following:

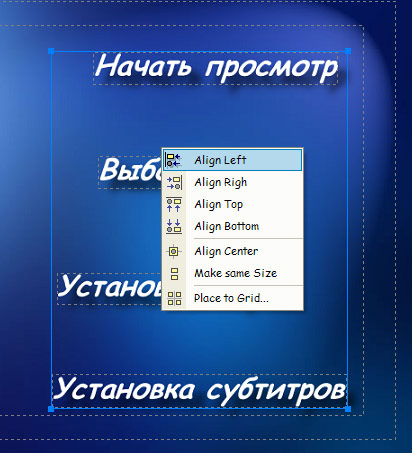
The text can be moved. Click and hold it with the mouse, positioning it however you like, it all depends on your imagination. Or place the lines one below the other, select them and click on the selection with the left mouse button. A menu will appear containing additional tools for arranging your text in the window. IN in this case align the lines left using the command Align Left.
Next, using the knowledge you’ve already acquired, decorate the menu a little with pictures. In our example, pictures were cut from movie frames and imported into the tab Images Assets Window so that you can later use these images in other projects. Pictures were imported in .psd format and created in the program Adobe Photoshop- DVD LAB Pro allows you to work with layers. You can change the direction of the picture using the toolbar to the right of the window Menu, in the same place where the text creation button is located.
As a result, you can get something like this:

Now create links for the lines of text. For now, you can only link to the first menu item “Start watching”, since the film already exists and you can find it as follows: right-click on the text, select Link>Movie1>Chapter 1(Movie Start). It's simple.

Now create three more empty menus, in which we will have the chapter menu, and the settings for sounds and subtitles. Right-click in the project window and select Add Menu, or use hotkeys Alt+N.

Let's say that you have not four menus, but a hundred. Of course, it's hard to remember which material is where, so you need to assign names to each object. To do this, select the desired menu in the project window with the left mouse button and click F2. You can now rename your menus. These names are displayed only in the program itself and nowhere else.


After all the links are installed, numbers will appear next to the lines, indicating that this line has a link with a certain serial number. If you select a line, you will see below it where the link is installed. For example, number 1 “Start watching” will start showing the movie, and link number 2 “Select Scenes” will take you to the scene selection menu.

5. Menu testing and improvement.
Test your menu to see how all this beauty will work and look. To do this, select the command Menu>Simulate.

A menu simulator with a nice control panel will start. Move your mouse over the links, press a button on your keyboard or remote control.

Please note that when you select a menu item, the color of the line changes. Exit menu test mode and notice the window Properties(Properties) to the right of the menu window.

This properties window provides a wide range of options for controlling colors, textures, connections, etc. Open the tab Map.

In this tab you can see the fields Button Hi-Lite group And Color Map. In the first field, check the box Antialised(Smoothing), and go to the second field, which has the option set by default Selected. Click the arrows located to the left and right of the option name. It is easy to guess that this function is responsible for the state of the menu buttons at a certain point in time. So, Normal- normal button state, Selected- the state of the button when this menu item is selected, and Activated- the state of the button clicked on the link. For each position, you can select your own color parameters - use the slider for this. If the slider is moved all the way to the left, then there will be no color. Remember that these three modes do not apply to each button individually, but to the entire menu, and you need to configure them once for each menu. Now complicate your menu. Make sure that when you hover over the desired menu item, it is underlined, no matter what or from what side. To do this, draw a line under one link (for example) using the menu toolbar. Select the rectangle icon.
Copy it and paste it under each menu item (use hotkeys Ctrl+C And Ctrl+V) . Then in the properties window, in the tab Color(Color) Change the color of each line.


Please note that in the screenshot the dash under the “Start viewing” menu item is highlighted with an orange dotted line. This means that the dash is not normally visible. This is set again in the properties window, but in the tab Link(in the picture on the right). In addition to setting the visibility of the buttons in this window, you can also set links as you did by right-clicking on the dash or text and selecting the link. Click on the button visibility selection item.

In principle, everything is quite simple: Visible the button is always visible, regardless of whether it is selected or not; Invisible Normal the button is not visible in the normal state, but when selected ( Selected) it becomes visible; Invisible Selected reverse Invisible Normal, the button is visible when not selected; Invisible All the button is not visible in all cases. Set the mode for all created lines Invisible Normal and test your menu. There are no lines, but hover over the line where it should be and it will appear. However, you won’t look for this dash before watching, and you never know where it might be located - below, on the right, on the left, on top, or maybe it’s not a dash at all. It’s easier to click on the visible text and start viewing. Go back to the toolbar and select a tool Group HotSpot.

In the work area of your menu, circle the line "Start viewing" and your dash.

This way you have grouped both objects - text and line. Do the same for the other four items, test the menu. At the same time, enjoy the resulting beauty. The main menu is ready. 6. Create a chapter menu.
First of all, go to edit the "Scene Selection" menu. Give the menu any background and create 12 text links for each chapter.
The second option is to create beautiful menu with windows in which video clips of the beginning of your chapters will be played. In DVD LAB Pro, for this you need to use the function Motion Menu. Import the background and take a look at the toolbar in the menu editor.

Click the button Insert Chapter Still(Insert first frame of chapter). You will receive a list of the movies in your project and a list of all the chapters in the movie. Just select the desired chapter and click on it with the mouse, for example, Chapter 2. A video fragment will appear in the center of your future menu, the frame of which will coincide with the frame of the beginning of the second chapter. Arrange its window to your liking, using the parameter Change Size(Resize), which can be found by right-clicking on the frame itself.

In the window that appears, arrange the objects on the menu screen as you please. So, after importing 6 fragments, you will get the following menu, and each picture will have a link to each chapter, starting from the second:

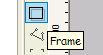
And here is the first drawback: we do not see which menu item the cursor is currently on. We'll fix it now. In the case of text links, we used underlining, but here it would be more appropriate to use frames, that is, appearing frames. To do this, you first need to remove all links from your fragments. Then find the shortcut in the toolbar Frame and, having selected it, draw a frame of any size.
Then use the window resizing and positioning options again. Enter the same values as the first clip in our menu with a link to Chapter 2. You will get something like this:

Next, each frame must be assigned a link according to the frames, and in the properties window, select the parameter for each frame Invisible Normal, as in the main menu. Test the menu, if everything is done correctly, then when you select the desired item, it should be highlighted with a frame of the color specified in the tab Map menu properties windows. You need to remember that in the same tab the color value for the button in the mode Normal must be at zero, otherwise all frames will be highlighted as usual. Now proceed to creating not static pictures, but a moving menu, for which select the item Menu>Render Motion.

The window for creating a moving menu will open.

What do we see in this window? The first is a picture of your menu, the second Motion Objects, that is, those objects to which movement extends. Next to each name there is a checkbox, unchecking which will disable the creation of a moving menu (in this case, a red cross will appear opposite the name instead of a checkbox). Next after Motion Objects field for setting dynamic effects ( Dynamic-FX Objects)? responsible for setting up special effects used as an addition to Motion Menu. The bottom part of the window shows the frame from which the menu should begin playing. Click the mouse in the window Motion Objects by name, and you will see that the starting frame also changes in this window. To the right of the menu window there is a slider, by moving which you can select a different starting frame. This can be useful when you don't want the first frame of the chapters to match what will be shown on screen. Well the last part this Global Settings and Outputs, that is General settings along with output parameter settings.
In the window Motion Menu nothing more than a video file is created that plays while viewing the menu on the screen. After reviewing everything carefully, decide on the settings for the duration of clip playback Total Clip time(set it to 10 seconds), Intro Effect this is the effect of frames appearing when you go to your menu, leave it blank. Check the box next to the option Cross-fade the End for looping in 50 frames. This will mean that when the clip ends, it will start playing again, and to avoid mismatch between the beginning and end frames, we created a smooth transition within 50 frames from the end of the clip to the beginning. Now click Render and wait for the rendering process to complete, having first specified the name of the file that will be contained in motion menu. Notice that after rendering you now have another clip in Assets Window, and 2 tracks appeared at the bottom of the menu window, audio and video. The video track contains your video file as you just created it. But to Audio you can add any audio track that will be played while viewing the menu.
So, the menu you created contains frames with links to scenes from the film. If desired, each frame can be provided with a short text comment. But, since this example contains 12 chapters, all of them are unlikely to fit into one menu, so you will need to create a second menu of chapters, not forgetting to provide all menus with buttons Further And
Making a DVD from existing video files in AVI, MPEG, MP4 and other formats seemed like a simple task to me. But I did not imagine that you would also have to pay for conversion to a de facto standard. But videos shot with a smartphone or tablet can easily turn out to be an interesting video.
1.Windows DVD maker
Included with Windows 7, no additional cost. It understands a bunch of file formats, you can make both a disc from video files and a presentation from photos, you can create a DVD menu. But a huge minus is that the program immediately writes to disk. In my case, this turned out to be impossible, because... The drive in the laptop has long since outlived its usefulness. I just wanted to make a DVD project, and I wanted to burn DVDs on a desktop computer.

2. WinX DVD Author
WinX DVD Author is found by Google when searching for free DVD authoring software. And she even works for free. You can create a menu there. Only here is the program logo and a message that the DVD has been made free version, negate all the capabilities of the program.

3. DVD Styler
It turns out that there are still programmers who simply do good for other users. Alex Thuring has released a program called DVD Styler, with which you can create a DVD from a set of video files of different formats. The program contains several nice menu templates.

Today I’ll tell you about a couple of programs with which you can quickly create any DVD menu without any special knowledge. If you thought it was difficult, then I can only say that you are deeply mistaken. The programs described below will make the process of creating a DVD menu easy and interesting! Now you can make your own collections of your favorite films with easy navigation through fragments, which is very important when watching DVD on a regular DVD player.
The developers of Super DVD Creator have built three utilities into the program:
- Converter video files to VOB format to create movie fragments. I would like to emphasize that you can convert existing ones VOB files— useful if you want to reduce the size of the film or trim it.
- Creating a DVD menu, followed by burning to DVD and, of course, creating an auto launch for the menu
- Burn movies to DVD. I think no comments are required.
So, let's launch the converter. There are a minimum of buttons and all sorts of bells and whistles, everything is clear - this is already good, but I would like to point out a drawback - you cannot adjust the pixel resolution for video, which would be useful for laptops or just home computers.
The beginning and end of the fragment, the quality and format of the screen - that’s all that Super DVD Creator offers to choose in its converter - it’s not rich, but we need to create a menu and therefore we go to the next stage and see how the program works there.
Click on the “DVD compiler” button. It’s even easier here; the developers of Super DVD Creator fit the entire process of creating a DVD menu in one window.

On the right, select a background screensaver for the menu (you can create your own), add movie fragments at the bottom and specify the screen format (16:9 or 4:3). Next, you should pay attention to the function of adding text to the menu and background music, this completes the process of creating a menu, all that remains is to burn the resulting DVD, which can be done both in the program itself and using any other DVD burner, for example Nero, but this It's up to you now.
Specifications:
Weight: 10.2 mb
Interface: English Systems: Windows 95/98/ME/xp Vista
Main disadvantages:
- There are few possibilities, you can only make a simple menu, nothing more. For home viewing no more needed ;)

A more powerful solution for those who want to make a professional DVD menu. In DVD-lab Pro, the developers paid special attention fine tuning effects and unique menu items. The program has the ability to create beautiful animation effects, such as the movement of buttons when selected. You can make a slideshow of images, for example for a presentation or your favorite photos for easy viewing on TV. DVD-lab Pro can also create a DVD reading mode in karaoke format. I won’t describe the capabilities of this program in more depth, but if you are confident in your capabilities, download, I’m always available for help, write in the comments what is not clear. I'll help.
Specifications:
Weight: 27.3 MB
Interface: English Systems: Windows 95/98/ME/xp
Main disadvantages:
- Quite a complex interface. In general, everything you might need is available in the program.
Update from 03/26/2012! Review updated great program DVDStyler.
DVDStyler (added 03/26/2012)
DVDStyler - free application from the developer “DVDStyler Team”, which allows for DVD authoring. This is the creation of DVD images that can be played in a standard DVD player. Using this program, anyone can create one DVD image with all the relevant functions from any video or series of videos.
The set of features of the DVDStyler program primarily includes the ability to create an interactive menu through which the user gains access to the contents of the disc. For ease of use, the program itself has the ability to burn with a ready-made menu.

Simplicity of work is ensured by the fact that the user immediately has several templates to choose from, from which he selects the most suitable one. With their help, you can quickly create your own menu for the disc.
The list of supported formats includes AVI, MPEG, WMV, MP4, MOV, OGG, as well as some other file formats that users encounter in their work. Among the supported audio formats it is worth noting MP3, MP2, MPEG2, MPEG4, AC-3, DivX, XviD. Moreover, using this program you can mount an image using several files of different formats.
The program interface is implemented based on the drag&drop principle, i.e. To use a particular file or template, simply drag it into the appropriate cell. The DVD menu is created using vector graphics, and you can also import other files to create backgrounds, etc.
The user independently chooses not only the appearance of the created menu, but also the arrangement of elements, active buttons and other things. He selects fonts, primary colors, button sizes, etc. at his discretion.
OS: Windows, Mac OS, Linux
To summarize, I will say that depending on the complexity, quality of the DVD - Menu it depends which program is better to choose. To quickly and easily create simple menus, help you - for others who want to do something more interesting, help or DVDStyler. By the way, DVDStyler was recently added to the review, for good reason - the application is completely free and multifunctional. I recommend!