Disk Windows recovery 8 or Windows 8.1 recovery disc is designed to troubleshoot operating system problems when the computer cannot boot. From the recovery disk, recovery tools are launched to carry out work to restore Windows functionality.
While working on a computer, sometimes problems arise due to various reasons. Malfunctions occur due to abnormal operation of equipment, errors software, and perhaps the most common reason: incorrect user actions.
If serious problems occur, the user can launch system recovery in different ways:
- Recovery system files and settings using previously created system restore points
- Restoring your computer (Refresh) without deleting personal data
- Removing all data and reinstalling Windows
These recovery options are launched directly from the operating system. If impossible Windows startup, it is possible to start recovery by booting from bootable flash drive or with DVD disc with an operating system image, and if the user does not have a Windows image, then by booting from a recovery disk.
An installation DVD or bootable USB flash drive with Windows 8.1 (Windows 8) can also be used as a recovery disk by entering the operating system recovery environment.
You will need a Windows 8.1 system repair disc in the following cases:
- the user does not have installation disk or bootable flash drive with operating system Windows1 (Windows 8)
- in case of serious computer failure
- if Windows cannot boot
After booting from the recovery disk, using the recovery tools, the user can carry out the necessary troubleshooting work on the computer.
Creating a Windows 8.1 Recovery Disc
The user can independently create a Windows 8.1 recovery disk and burn it to a USB flash drive.
When creating a Windows 8.1 recovery disc, follow these steps:
- Go to “Settings”, then click on “Control Panel”.
- Enter "Recovery", select "Create a recovery disk".
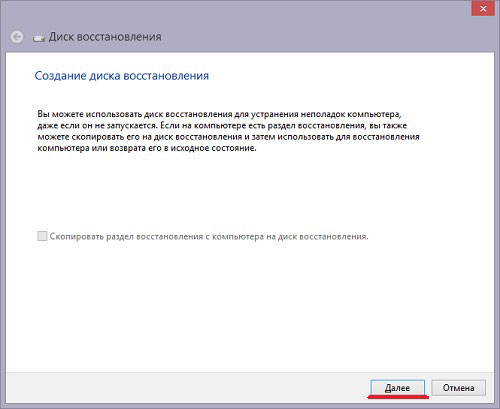
- The next window asks you to copy the recovery partition from your computer to the recovery drive. If such a partition exists on the computer, the user can check the box next to “Copy recovery partition from computer to recovery disk” in order to use it to restore or return the computer to the initial state.
- Click on the "Next" button.

- The application will check your computer for connected drives. In Windows 8, it is possible to burn to a CD/DVD disc (to do this, you will need to run another application); in Windows 8.1, a recovery disk is created only on a flash drive.
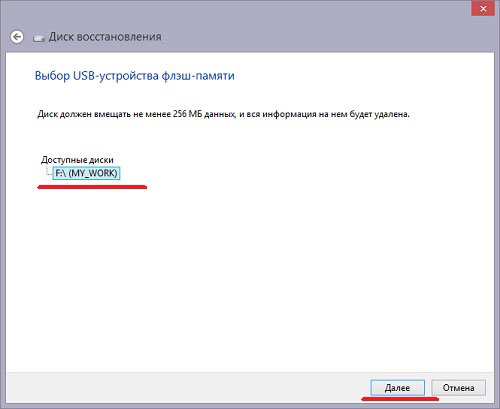
- Then a window opens with available drives. Select required disk with USB drive. The size of the flash drive must be at least 256 MB, all information from USB devices will be deleted.

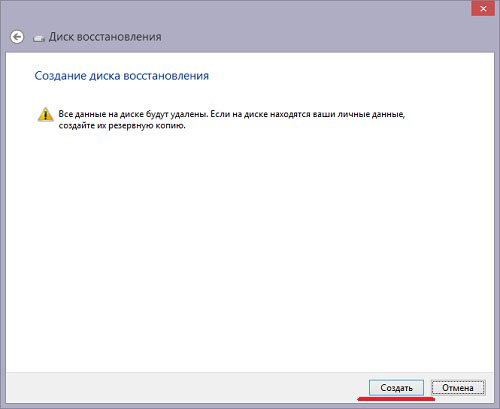
- Agree to delete all data from the flash drive. Transfer data (if any) from the USB device to another drive in advance.
- Click on the “Create” button.
- Next, the service files are formatted and copied.
- The recovery disk is ready, click on the “Finish” button.

Remove the USB flash drive containing the Windows 8.1 recovery disc from the computer.
A bootable USB flash drive with a Windows 8.1 system recovery disk has been created. Now, in the event of an operating system failure, the user will have a chance to return the computer to working condition.
Windows 8.1 bootable USB flash drive for system recovery
Now let's see how to start recovery in Windows 8.1 from the installation disk or from a bootable USB flash drive. The recovery disk (not the installation disk) will start in a similar way, only without the windows for installing Windows 8.
Select in the BIOS or UEFI the priority to boot the system from the connected disk (USB drive or DVD drive), or immediately enter boot menu to launch the disk from there.
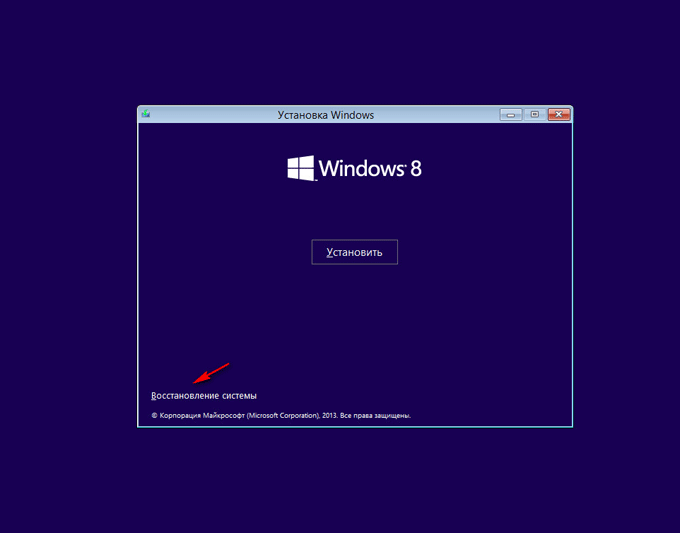
In the “Install Windows 8” window, click on the “Next” button. Here, by default, the language and keyboard layout are already selected correctly.

In the next window, click on “System Restore”.
The “Select Action” window offers two action options:
- Diagnostics - system recovery, returning the computer to its original state, or using additional tools
- Turn off computer
Select Diagnostics.

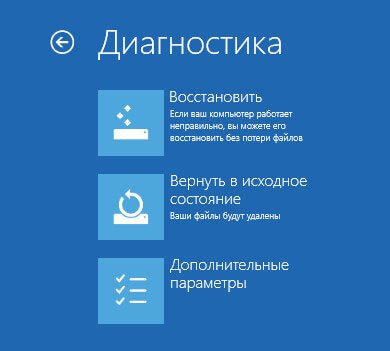
The Diagnostics window offers the following actions:
- Restore - restore the system while preserving personal files
- Reset to original state - reinstalling the system with loss of personal data
- Extra options- use of other means of recovery
Select Advanced Options.
The following system recovery tools are available in the Advanced Options window:
- System Restore - restore Windows using previously created restore points
- System Image Restore - Recovering Windows using a previously created backup system image
- Startup Repair - fixing a crash that prevents the operating system from loading
- Command line - launch command line for troubleshooting
Choose the right tool to solve your computer problem.

Conclusion
User can create boot disk Windows 8.1 (Windows 8) recovery, which will help you run system recovery tools if serious problems occur with your computer or Windows cannot start.
Having heard a lot about all sorts of advantages of Windows 8, many PC users decide to install it on their computer at all costs in order, so to speak, to fully enjoy all the advantages of the 8th version of Windows. Meanwhile, not everyone can successfully cope with this task: as luck would have it, after installation the system turns out to be not working, or an eternal error message appears out of nowhere. The question arises, how then to install correctly and, if possible, reinstall from disk on your Windows computer 8? Is this even real? Of course! Shall we sort out the details?
Step No. 1: Burn the Windows image
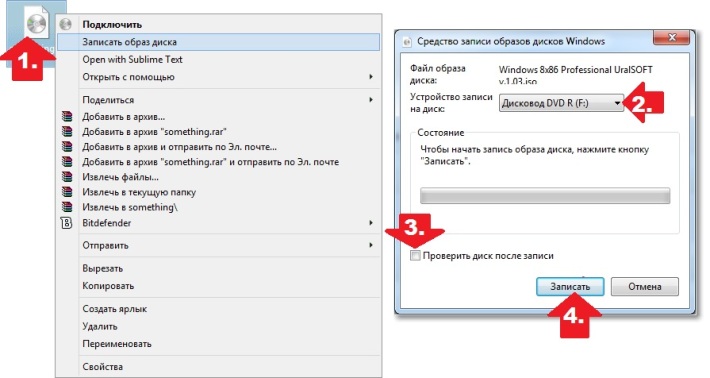
For those who are encountering Windows 8 for the first time, it is unlikely that it will be a revelation that to install it on a PC, just as in the case of other versions of Windows, you must first make a working installation disk or flash drive. There is no problem with this, since if you want to install the iso image on external storage quite simply using the ImgBurn program or the same system tools Windows.
Option #1: Preparing the distribution in ImgBurn
In order to make a bootable disk from a regular disk using ImgBurn, after installing and launching the utility on your PC, you only need to perform 5 simple steps:

and then just wait for it to complete.
Option 2: Recording using Windows
It is no more difficult to make a boot disk using the tools of Windows 7 / 8 itself. In this case, to obtain a successful result, we only need to:
In any case, after the disk with Windows image 8 will be ready, before installing Windows we will also need to pre-configure the system to boot from the prepared distribution.
Step No. 2: Set up PC boot
It should be noted that setting the system to start at Windows installation 8 is also not distinguished by any originality. All the steps are the same as if we had to reinstall or install XP, Vista or 7 on the computer from scratch. In particular, in order to manually set the PC to boot from disk, we will need to either set the appropriate parameters in the BIOS or use shortcut keys.
Which option is closer to you? We prefer the second one, since it is much simpler. Judge for yourself: in order to reinstall the computer boot option, you just need to press the appropriate buttons (button), and then select the item with the name of the drive in the settings menu that opens. Let us remind you that these same “hot keys” look like different models laptops something like this: 
Step No. 3: Install Windows
After we have successfully managed to boot from the previously prepared disk, all that remains is to take the last step - install, in fact, Windows 8 on the computer. In this case, we note that for the installation to be successful, you need to abandon the option of downloading the “update” on top of the previous ones Windows versions in favor complete reinstallation Windows. We do it like this: after restarting the PC and the black welcome window appears, press any key in it to start the installation: 
After that, indicate the preferred keyboard layout option, click “Next”, and then in the new window click the “Install” button. Next, enter the Windows activation key, click “Next” again, and then agree to the installation under the specified license conditions: 
In this article I will tell you how to create a recovery disk with an operating Windows system 8. It can be useful to you in several cases: if failures occur and the computer is unstable, if the computer or laptop does not start at all, if you need to enter safe mode.
On a computer or laptop, move your mouse cursor to the right top corner and from the side pop-up panel, select Search.
Enter the phrase in the search field "Recovery Disk".
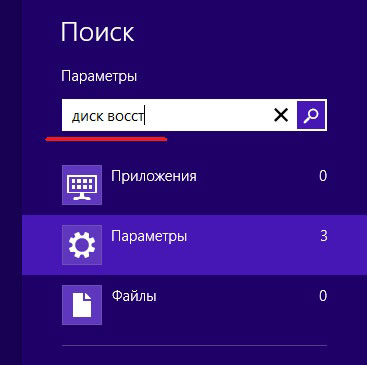
The search results will be shown on the left. Click on the icon "Creating a recovery disc".

Now we need a disk or flash drive with a capacity of at least 256 MB. Insert the selected device into your computer.
The recovery disk is created using a wizard. In the next window, click “Next”. If you bought a computer or laptop with pre-installed Windows 8, then the device has a recovery partition. In this case, the field "Copy the recovery partition from the computer to the recovery disk" will be active. If you wish, you can check the box, then the files from this partition will be copied to the disk or flash drive. Just keep in mind that you will need more free space on a removable device. For example, a flash drive will need to be at least 16 GB.
Select a flash drive connected to the computer. If you want to create a CD, then do not connect the flash drive, but insert the disk into the drive, then at the bottom there will be an item "Create a system repair disc on a CD or DVD instead". Click "Next".
The wizard will warn you that all data from the device will be deleted. If stored on a flash drive important files, it is better to interrupt the creation of the disk and copy all the files to a safe place. Click Create.
Wait until the wizard finishes the formatting process and copies all the necessary data to the flash drive.

This completes the process and the recovery disk with the Windows 8 operating system is ready.

If you have problems with the operating system, you can use a recovery disk. To do this, you will need to boot from a flash drive or disk, and then select the desired menu options.
I also wrote about how to change boot priority in the BIOS in the article. Follow the link and read more information about it.
Using the created recovery disk, you can also. For many users, this will be very useful, since in Windows 8, it is not always possible to do this by pressing F8 or Shift+F8.
If on a computer at all, then you can create a recovery disk on a friend’s computer, with the operating system we need installed. In this case, the disk or flash drive from which you installed the operating system can also help.