From the author: Greetings. Pictures are practically one of the most important elements on web pages. Thanks to them, it is much easier and more interesting for us to perceive what we see on the screen. But if we start talking about embedding them in web pages, then you need to know at least how to control the size of an image in html. That is what we will talk about today.
Ways to size images
We will look at everything simple example. Here is the code:
This is a block with an identifier, inside of which lies the picture. Let's assume that our block has a fixed size. For clarity, let's also set a red frame to clearly see its boundaries:
#img( width: 200px; height: 160px; border: 2px solid red; )
So, the width of the block is 200 pixels, and the height is 160. And now we need the photo to fit into it. But let's say we don't know its magnitude. Well, okay, I can tell you that I made about 300 by 200 pixels, in which case the photo simply will not fit into the block. Let's see what happens:
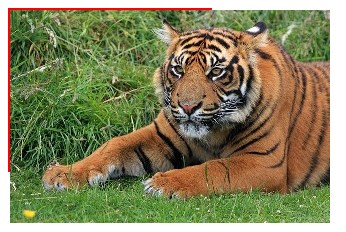
In this screenshot, you can clearly see that it goes beyond the red box, that is, it does not fit into the block in which it should be inside. How can the situation be corrected?
Let's assume that the photo is on the server and you can't directly change its width and height. In this case, one of the options is to set a fixed width and height to the image using the img tag attributes: width and height.

Here, now everything fits perfectly into the block, because now it has the same parameters as itself. But remember one important detail: if you yourself prescribe both the width and height, then most likely you violate the proportions. In order not to violate them, you need to register only one value (width). Then the browser will calculate the second one itself, without violating the proportions.

Now the image does not occupy all the available space in height, but its proportions are not violated.
Actually, this way of setting the size (directly in html through attributes) is only suitable when you are working with a specific image on a specific page. If the dimensions need to be determined by a group of pictures, it is much more correct to use separate file styles, in which to prescribe all the necessary rules.
IN css rules can be set as a separate image (highlighting it with an identifier), a group (by assigning a class to each image or using other available selectors), or all at once, by referring to the img selector.
How to make responsive images in css?
For this, web developers and layout designers have long been using this rather simple code:
Img( max-width: 100%; height: auto; display: block; )
That is, a maximum width of 100% of the size of the parent container, automatic height (the browser calculates itself without violating proportions) and block display. The latter is not necessary at all, and if you remove it, it will not affect the behavior of the pictures in any way.
If we remove the width attribute from the html code, the result will be the same.
To resize a picture using HTML for a tag attributes width (width) and height (height) are provided. Pixels are used as the value, and the arguments must match the physical dimensions of the image. For example, in fig. 10.6 shows an image that has dimensions of 100x111 pixels.
Rice. 10.6. original size picture
Accordingly, the HTML code for placing this figure is shown in example 10.4.
Example 10.4. Drawing dimensions
If the dimensions of the image are specified explicitly, then the browser uses them to display the empty area corresponding to the image during the loading of the document (Fig. 10.7). Otherwise, the browser waits for the image to fully load before changing the width and height of the image (Figure 10.8). In this case, text reformatting may occur, since initially the size of the picture is not known and it is automatically set to small.
Rice. 10.7. The size of the image is not specified and it has not yet loaded

Rice. 10.8. Image uploaded, text reformatted
The width and height of the image can be changed both up and down. However, this does not affect the download speed of the picture in any way, since the file size remains unchanged. Therefore, reduce the image with caution, because. this may cause confusion among readers, why such a small drawing takes so long to load. But increasing the size leads to the opposite effect - the size of the image is large, but the file is loaded faster relative to the image of the same size.
On fig. 10.9 shows the same image as shown in fig. 10.6, but doubled in width and height.
Rice. 10.9. View of the image enlarged in the browser
The code for such a drawing will remain almost unchanged and is shown in Example 10.5.
Example 10.5. Resizing a picture
This resizing is called resampling, and the browser algorithm is inferior in its capabilities to graphic editors. Therefore, it is necessary to increase the image in this way only in special cases, otherwise the image quality deteriorates too much. It is better to use some kind of graphics program. The exception is drawings containing rectangular areas. On fig. Figure 10.10 shows a pattern file that takes 54 bytes and has an original size of 8 by 8 pixels, scaled up to 150 pixels.
Rice. 10.10. Enlarged Image
Browsers use two algorithms for resampling - bicubic (gives smooth edges and a smooth tonal range of colors) and closest points (preserves the original set of colors and sharp edges). Latest Versions browsers use a bicubic algorithm, and older browsers, on the contrary, use a nearest point algorithm.
You do not know how to increase the size of the picture? This is a very simple task as everything you need is already installed on your computer. Read this guide and you'll learn how to resize a photo with 5 simple tools.
Method 1: How to resize an image in Microsoft Paint
- Find and launch MS Paint. It is preinstalled on all versions operating system Windows. Start > All Programs > Accessories > Paint:
- Drag the image into the Paint window or use Menu > Open (Ctrl+O).
- In the main menu of the program, find the item " Resize' and select it:

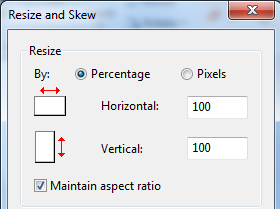
- The image resizing and aspect ratio panel will open. You can specify the value in pixels. Don't forget to check the box " keep proportions". Otherwise, the image will be deformed:
- To increase the size of the picture, click the " OK' and save the photo.
Adviсe:
- If you can't set the desired dimensions of the photo without stretching it, you can use the " pruning” to remove unwanted edges. How to do this is described in paragraph 3;
- To quickly open a photo, click on it right click mouse and select from context menu paragraph " Open with Paint»;
- It is best to save the image in the same format as the original.
Method 2. How to resize an image in MS Photo Gallery
- If Microsoft Photo Gallery is not installed on your computer ( Start > Photo Gallery ), you need to download and install it as part of Windows Essentials 2012 ;
- Launch MS Photo Gallery and find your graphic file;
- Right click on it and select " Resize...»:

- Choose a preset: " Small 640 pixels», « Medium 1024», « Large 1280" etc.
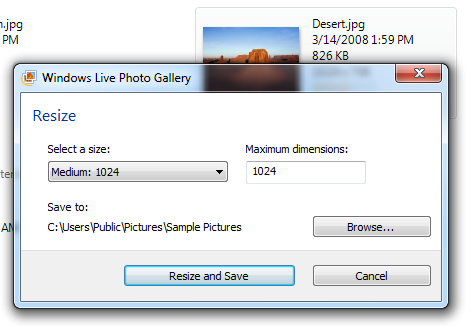
- Click " Resize and save". After you increase the size of the picture, the image will be placed in the same folder, the original will also remain in it.
Adviсe:
- If you want to set the exact size of the image, in the drop-down menu, select " Custom» and set the size for the larger side of the photo;
- To resize multiple photos at the same time, select them while holding down the Ctrl key.
Method 3. How to resize an image in Photoscape
You can resize an image in Photoshop. Or use Photoscape for this.
- Download Photoscape and install it. Run the program;
- Go to the " Editor"and find the photo you want to change:
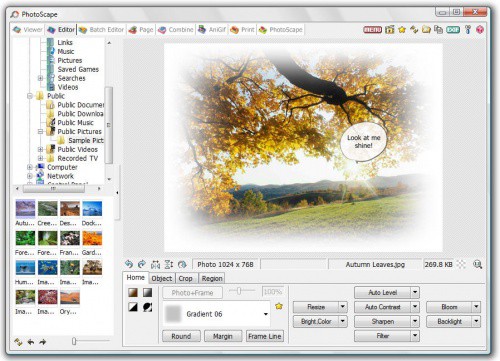
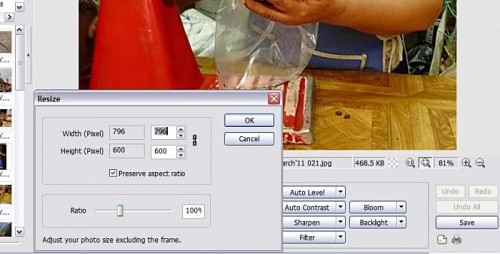
- At the bottom of the image is a button Resize”, click on it.
- Set a new photo size. Make sure the option " Maintain aspect ratio» is turned on and press the button « OK»:
- Save the edited image.
Adviсe:
- If you need to resize multiple images, use the " Batch editor". Add a folder and resize all photos in it;
- If you do not know the exact size, you can set " Percent» from the original size.
Method 4. How to resize an image in IrfanView
- Install IrfanView - a great tool for viewing and increasing the size of a picture;
- Add a photo by dragging it to the program window, or by clicking the first button in the toolbar:

- Go to the " Image”, select “ Resize/proportion» ( ctrl+r );
- Set the new size in pixels, centimeters, inches, or a percentage of the original image:
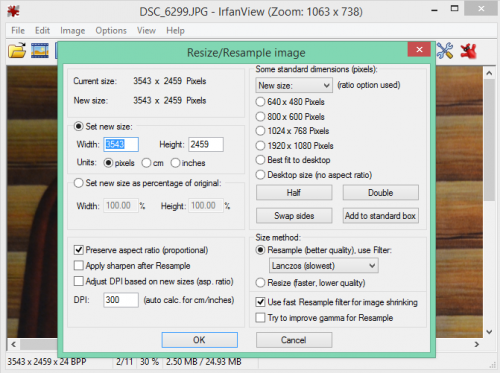
- Save the image.
Adviсe:
- You can use standard sizes: 640 by 480 pixels, 800 by 600 pixels, 1024 by 768 pixels, etc.;
- To save high quality photos, make sure the DPI is set to at least 300.
Method 5. How to resize an image online
- To increase the size of a picture online, go to the PicResize website.
- Click the button Browse” to select a photo. Click " Continue »:

- Select a percentage of the original image, such as 50% smaller. The tool will display the output image size. Alternatively, you can enter the exact size by selecting " custom size »:

- Then click " I'm Done, Resize my Picture and wait a little;
HTML allows you to diversify the content of the page by adding images. For this there is an element , which does not require a closing tag. It has a number of attributes that allow you to determine: where to download the image, what size it is, how to set its alignment and text wrapping. All this will be discussed in this article.
Tag is designed for inserting images in JPEG (abbr. JPG), PNG or GIF formats. The location of the image is specified in the src attribute. The path must be .
Coder Booster Logo
Text alignment and wrapping
Inserting a picture inside a string leads to an unexpected result. It breaks the display of the border text. It looks as if another line is inserted inside, but with a very large font. The text is broken randomly and can be distributed in pieces around the image.
This text will be broken by the image of our resource inserted into it

pic 1. Image breaks border text
To solve the problem, you need to set the alignment of the image. In HTML, this is done with the align attribute. Modern standards require the use of CSS for alignment, so we'll only look at two values for the align attribute.
The values that the align attribute can take are:
- left - the image will be moved to the left edge of the container, and the text will wrap around it to the right.
- right - the image is aligned to the right edge of the container, and the text wraps around it on the left.
This text will frame the logo of our resource on the left side

Fig 2. Image right aligned
Image size
It is important to understand that the actual size of the image may not match the space allotted on the HTML page. element You can set the width (width) and height (height) attributes. They explicitly define the dimensions that the image will have after loading.
The values of the width and height attributes are specified in pixels or percentages. If the image dimensions are set as a percentage, then the space occupied is calculated relative to the parent element. An expression in which the height of the image is given as a percentage and the width in pixels can look like this: ».
If you specify only one of the size attributes, the second one is calculated automatically based on aspect ratio considerations.
If the dimensions specified for the image are larger than the actual size, the image will be stretched. Similarly, if you specify a smaller size, the image will shrink. Nothing will happen to the original image. The transformations only affect the copy that has been loaded into the browser.
The note
In fact, you need to specify sizes for all images. It doesn't matter if you use attributes or CSS for this. The browser will be able to determine the allotted space for the image even before it is loaded, which will prevent terrible twitching of the page.
Alternative text
W3C standards (abbr. Consortium world wide web) require addition to each element the special alt attribute. Its value must contain alternative text that briefly describes the contents of the image. This is necessary for better indexing of images. search engines, and people using screen readers will be able to understand their content. Also, this text will be shown to the user instead of the image if the browser is unable to load it.
The volume is required to "degrade" the quality of the picture or picture, but this "deterioration" will not be noticeable when viewed on the screen or in printed form. For the quality of a computer image, the format and quality level, which is measured as a percentage, is responsible.
The most compressed formats, which have the smallest volume, are the JPG (JPEG) and PNG formats, with PNG having no “quality” settings. PNG has only a bit depth setting (256 bit is the default, equates to 100% quality in JPG format, but can beat it in size).
Also extra-large resolutions for conventional monitors also useless - therefore, it makes no sense to use as wallpaper or store images with a resolution of, for example, 6000x8000 pixels in the home photo archive if the screen resolution is 1920x1280. Naturally, a high resolution allows you to zoom in on small objects in the photo, but if you do not jam computer graphics professionally, the image resolution can also be reduced to free up space on the computer's hard drive.
The free Paint.NET program will help you change the format, visual quality and resolution of an image. Paint.NET is not a product that comes with Windows, unlike the regular Paint editor. Paint.NET can be downloaded absolutely free on the Internet, while the program is constantly updated, supports the Russian language and has a nice interface. The Paint.NET distribution weighs about 100 times less than the distribution Adobe Photoshop, so the program downloads quickly and takes almost no disk space.
After starting Paint.NET, drag the graphic file into the working window of the program. The image will open in the editor. To change the resolution, select top menu program "Image" - "Resize". In the window that appears, adjust the resolution of the new image to your liking. Don't forget to check the "Keep aspect ratio" checkbox. After entering the desired resolution, click “OK”.
Now we need to change the image format and the “quality” level. To do this, select everything in the same top menu "File" - "Save As". Enter a name for the new file and select the file type "JPEG", then click "OK".
A pop-up window will appear asking you to specify the quality. On the right, you will see how the image quality (preview) visually changes, as well as the final file size. As you can see, there is practically no difference between the quality of 100% and 95% in JPEG format, and this saves disk space. After setting the quality level, click Save. Image saved.
High-quality and colorful photos, as a rule, have a large volume, which is unacceptable if photos are posted on the network. However, everyone wants to put in social network or on photo hosting frames that have not lost their quality after downsizing a. Learn how to optimize photos for online publications so that their quality does not suffer after changes - for this you need Photoshop.
Instruction
Load the photo in Photoshop and then adjust its color reproduction, saturation and contrast if necessary. After retouching the frame, open the Image -> Image Size menu to bring up the image resizing window.
The window will display the original size of the original frame, which can be anything. To change the size, enter the desired numbers in the Width and Height fields. The program automatically determines the proportional frame size, so it is enough to enter only the height or only the width of the photo - for example, 800x600 or 1024x768.