Today, there are quite a few ways to forward a USB device to another computer or virtual machine over the network.
Of the most popular - hardware such as AnywhereUSB and purely software products, of those that I tried myself: USB Redirector and USB / IP.
I would like to tell you about another interesting method that works directly with the QEMU emulator.
It is also part of the spice project, officially maintained by RedHat.
UsbRedir is an open protocol for forwarding usb devices via tcp to a remote virtual server, developed with the support of RedHat as part of the spice project. But as it turned out, they can be used quite successfully without spice. The role of the server is usbredirserver, which fumbles the usb device on a specific port, and the client is QEMU itself, which emulates the connection of the exported usb device to a specific usb controller of your virtual machine. Thanks to this approach, absolutely any OS can be used as a guest system, since it does not even know that the device is remotely forwarded, and all the logic falls on QEMU.
First, a few words about the above solutions
- AnywhereUSB is a pretty good solution, but expensive, and has unpleasant glitches, for example, it happens if a shared flash drive falls off, then you can reconnect it back only by physically removing and inserting it.
- USB/IP - OpenSource project. Looks like it was abandoned. In fact, it's pretty buggy. When the connection is broken, the machine often goes into complete freezee, and windows shows BSOD
- USB Redirector - Wonderful software. To share devices from linux to linux is free, in all other cases it already costs money, not as much as AnywhereUSB, but not free as we would like :)
Setting up a virtual machine
In order to have a place to connect the exported devices, you need to create the necessary usb controllers on the virtual machine:
- uhci - for USB1.0
- ehci - for USB2.0
- xhci - for USB3.0
For qemu (without libvirt)
Add options to the VM startup command:
-device ich9-usb-ehci1,id=ehci,addr=1d.7,multifunction=on -device ich9-usb-uhci1,id=uhci-1,addr=1d.0,multifunction=on,masterbus=ehci.0 ,firstport=0 -device ich9-usb-uhci2,id=uhci-2,addr=1d.1,multifunction=on,masterbus=ehci.0,firstport=2 -device ich9-usb-uhci3,id=uhci-3 ,addr=1d.2,multifunction=on,masterbus=ehci.0,firstport=4
For libvirt
In the source configuration file of the virtual machine in the host <devices> remove all USB controllers and add the following block:By the way, if you use spice, then by adding 3 more special devices to the controllers, it will be possible to transfer usb devices from the spice client to the server.
Example under the spoiler
For qemu
We add the following options to the command to start the virtual machine, in addition to the controllers we defined earlier:-chardev spicevmc,name=usbredir,id=usbredirchardev1 -device usb-redir,chardev=usbredirchardev1,id=usbredirdev1,debug=3 -chardev spicevmc,name=usbredir,id=usbredirchardev2 -device usb-redir,chardev=usbredirchardev2,id =usbredirdev2,debug=3 -chardev spicevmc,name=usbredir,id=usbredirchardev3 -device usb-redir,chardev=usbredirchardev3,id=usbredirdev3,debug=3
For libvirt
In the initial configuration file of the virtual machine in the <devices> node, add the following options, in addition to the controllers we defined earlier:Now everything is ready for the forwarding.
Server start
The usbredirserver package can be found in the standard repositories of almost all popular linux distributions.We insert the USB flash drive into the computer, we look at the output of usb devices:
$ lsusb ... Bus 003 Device 011: ID 125f:c82a A-DATA Technology Co., Ltd. ...
We see that the vendorid:prodid pair is equal to 125f:c82a, and the kernel has determined the flash drive 003-001 usbbus-usbaddr, respectively.
Now let's share it on port 4000:
# Using the vendorid:prodid pair $ usbredirserver -p 4000 125f:c82a # Using the usbbus-usbaddr pair $ usbredirserver -p 4000 003-011
Connecting a device to a virtual machine
Via options on VM startup
The device to connect to the VM can be specified at startup by adding the following options to the startup command
For qemu
-chardev socket,id=usbredirchardev1,port=4000,host=192.168.1.123 -device usb-redir,chardev=usbredirchardev1,id=usbredirdev1,bus=ehci.0,debug=4For libvirt
This block is placed before the tag </devices>, next to the controllers we defined earlier:Or via qemu-monitor
We go to the hypervisor and in the qemu-monitor of our machine we execute the following commands:# Add our device chardev-add socket,id=usbredirchardev1,port=4000,host=192.168.1.123 # Connect it to ehci controller (USB-2.0) device_add usb-redir,chardev=usbredirchardev1,id=usbredirdev1,bus=ehci. 0,debug=4
To turn off the flash drive, the following command is enough:
device_del usbredirdev1
That's all, after these steps, your VM will see your flash drive and will be able to work with it natively.
If there are many devices and they are all the same
Here an interesting problem appeared, how to forward several identical devices to different VMs?At the same time, it is worth noting that all devices have the same vendorid:prodid pair, and the usbbus-usbaddr pair is not at all constant, you just need to remove and insert the device, so it will immediately change its usbaddr.
I solved it with udev.
By the way, if you do not quite understand how udev works, the Debian Wiki has a great
And so let's get started
First, we need to find out the serial number of our device, by which we will identify it in udev:Let's start the udev monitor:
$ udevadm monitor --environment --udev
And we insert our device, after that we will immediately see a list of variables for this device that udev kindly initialized for us:
... UDEV add /devices/virtual/bdi/8:16 (bdi) ACTION=add DEVPATH=/devices/virtual/bdi/8:16 ID_SERIAL_SHORT=11C130317234004B SEQNUM=4352 SUBSYSTEM=bdi USEC_INITIALIZED=189056149826 ...
Information about the serial number and other attributes can be obtained in another way, but it should be borne in mind that to write the rules we will use the variables from the command above, and not the attributes from the command below. Otherwise, the remove trigger will not fire when the device is disconnected.
$ udevadm info -a -n /dev/bus/usb/003/011 | grep "(serial)"
Now let's create a file /etc/udev/rules.d/99-usb-serial.rules and write the following rules into it:
ACTION=="add", ENV(ID_SERIAL_SHORT)="11C130317234004B", RUN+="/usr/bin/usbredirserver -p 4000 $attr(busnum)-$attr(devnum)" ACTION=="remove", ENV(ID_SERIAL_SHORT )="11C130317234004B", RUN+="/usr/bin/fuser -k 4000/tcp"
Reload udev rules:
$ udevadm control --reload-rules
Done, now when our device is connected, it will automatically be rummaged to the port we need, and when disconnected, usbredirserver will stop working.
By analogy, we add other devices.
That's all. Thank you for your interest:)
A very powerful tool in capable hands. For various technical reasons, the virtual machine does not have direct access to the USB drive by default. In this article, we will understand how to forward a USB disk to a Hyper-V virtual machine. The implementation of the idea will be simple, one might say, in two clicks. No additional programs, as sofa “gurus” sometimes advise, are required, we use our personal hands and nothing more.
IMPORTANT. Removable, that is, we will not be able to throw removable devices into the VM, although there are some tricks in this regard, but this is not about that now. Our algorithm only works for USBs that show up as fixed. We will not be able to take a snapshot for such drives.
Let's start manipulation
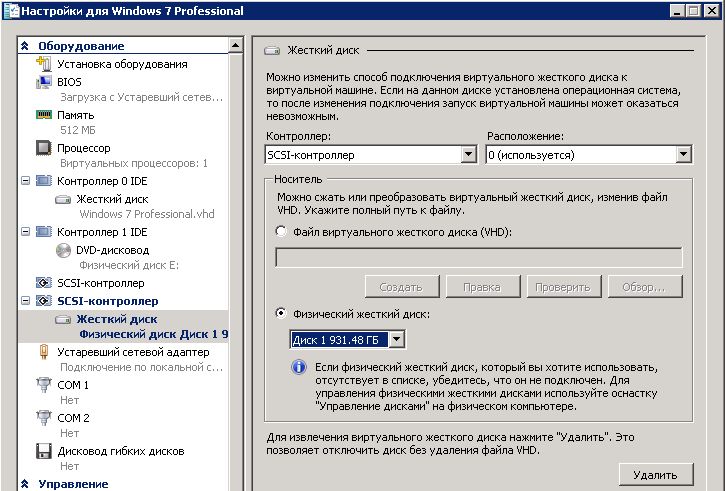
IMPORTANT. It is not at all necessary to turn off the VM before adding a hard drive. For this, there is a special technology of hot addition and hot removal.
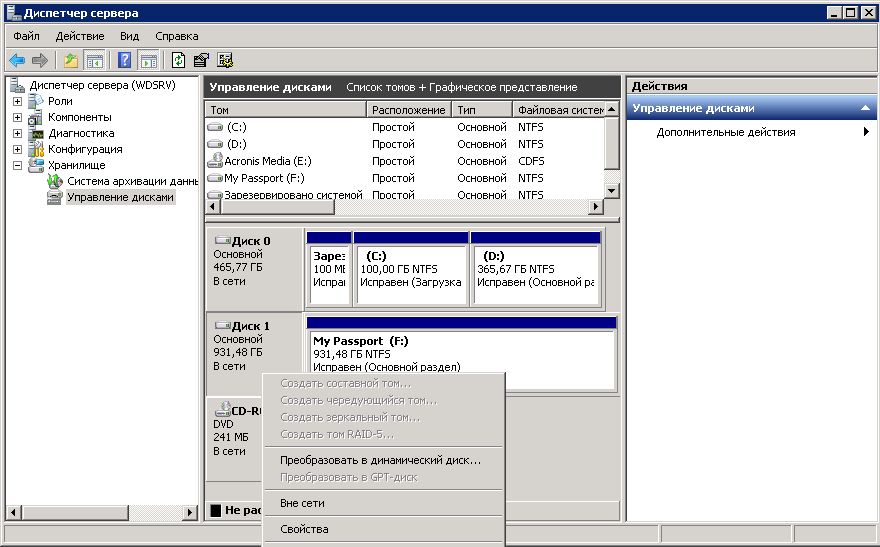
- We connect to the VM via rdp or just open the console. We go into disk management. If the new one is in place, then we are doing everything right. Check if it is online. If not, then we fix it, as before, by calling context menu. Our partitions do not have mount points and letters, we need to fix this matter. Click on any section right click and select the item "Change drive letter or path to it ...". We choose any free.
USB forwarding to virtual machine Hyper-V is over, now we can use it for our purposes.
USB Network Gate is a program that allows users to connect USB devices a, connected to other computers using IP channels.
There are different implementations of remote control on the market. USB connections devices, both hardware and software. Some of them require certain knowledge and skills from users, in some cases the setup can take a long time. USB Network Gate surprised me with its simplicity. I downloaded the program, installed it, clicked on the Share button and the device is immediately available for connection on a remote machine with an installed client.
USB Network Gate can be indispensable, for example, when using USB tokens on the RDP server, the program allows you to configure exclusive access to devices for a separate remote desktop user, isolating him from other users. The program can also be used in a virtual environment, if for some reason the device cannot be connected directly. There are versions for Windows, Linux (RPM and Deb packages), Apple OS X and, most interestingly, for Android. Now about how it works.
Server
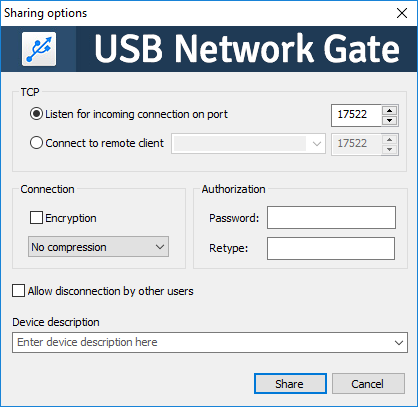
The program is both a server and a client. On startup, it shows all USB devices connected to the computer by default. But you can display and customize general access to all ports.
It is possible to configure the connection separately for each device or port, to allow connection only for a specific address. To protect the connection, authorization and encryption are provided.
Client
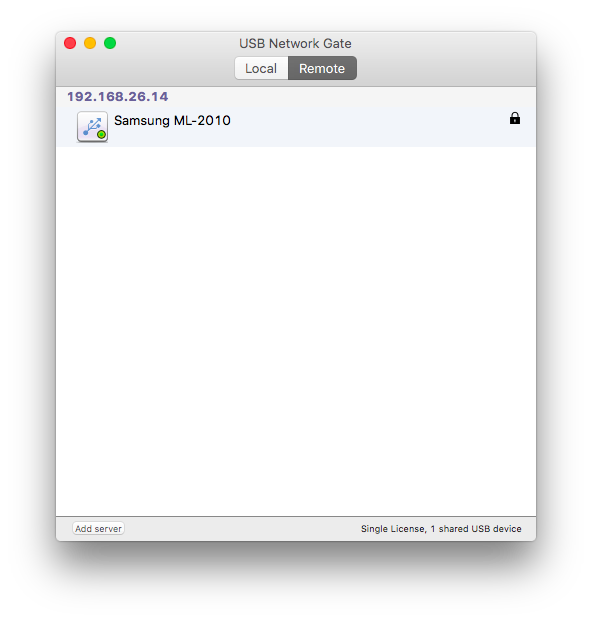
At using USB Network Gate as a client, the application scans local network for the presence of servers displays all devices available for connection. If the server is located on a different subnet, for example when connected via VPN, you can add it using the “Add server” button. After I shared the printer, it appeared in the list available for connection on my MacBook. In addition to the printer, I connected USB HDD with HFS + partitions, it also connected, but the partitions were mounted for about three minutes, apparently due to their large volume.
Summary
Trial version allows you to open access to only one device, registered - depending on the level of licenses, from one to $89, 95 up to unlimited $699,95 . If you need to quickly connect a device over a network, USB Network Gate is what you need, especially if you do not have a strong knowledge of computer hardware.
These instructions are correct from version 2.
It seems that why write something else when there is an official instruction? However, there is something here that is not there.
There are two options for transferring a USB device to a guest system:
- transfer a certain device to the “guest”;
- transfer the USB port to which this device is connected.
Forwarding USB devices
If you have a USB dongle, or external drive, it is more convenient to transfer the device itself to the guest system, regardless of which USB port this device is physically connected to. After all, during maintenance, we can next time connect to a different connector.
# lsusb Bus 002 Device 002: ID 8087:8000 Intel Corp. Bus 002 Device 001: ID 1d6b:0002 Linux Foundation 2.0 root hub Bus 001 Device 002: ID 8087:8008 Intel Corp. Bus 001 Device 001: ID 1d6b:0002 Linux Foundation 2.0 root hub Bus 004 Device 001: ID 1d6b:0003 Linux Foundation 3.0 root hub Bus 003 Device 004: ID 051d:0002 American Power Conversion Uninterruptible Power Supply Bus 003 Device 003: ID 051d :0002 American Power Conversion Uninterruptible Power Supply Bus 003 Device 002: ID 046d:c00c Logitech, Inc. Optical Wheel Mouse Bus 003 Device 001: ID 1d6b:0002 Linux Foundation 2.0 root hub
We find the device we need and take its ID, which we will use.
I had a task to forward UPSs.
(The situation, in fact, is not typical, rather from a series of how it should not be: 2 of the simplest uninterruptible power supplies for workstations were installed on the server and network equipment. UPSs turned out to be tender and began to cry with or without reason. To quickly cut their voice and not yet deal with UPS management from Debian and it was decided to hook up two uninterruptibles to Windows guests.)
At this stage, I found that both devices I need have the same ID ... But let's try.
Forwarded devices are registered in configuration file the corresponding virtual machine.
# nano /etc/pve/qemu-server/101.conf usb0: host=051d:0002
Rebooted. The device is hooked up, everything seems to be fine. But here we remember that the second device with the same identifier. How to distinguish them? Indeed, experience has shown that if two virtual machines are assigned the same identifier, then when they are turned on, they will take the same device from each other. Despite the fact that there are several USB devices with this identifier in the host system.
This is where we remember that there is another way to forward.
USB port forwarding
It is necessary to determine which port the device we need is connected to.
First way:
# lsusb -t /: Bus 04.Port 1: Dev 1, Class=root_hub, Driver=xhci_hcd/6p, 5000M /: Bus 03.Port 1: Dev 1, Class=root_hub, Driver=xhci_hcd/15p, 480M |__ Port 4: Dev 2, If 0, Class=HID, Driver=usbhid, 1.5M |__ Port 7: Dev 3, If 0, Class=HID, Driver=usbfs, 12M |__ Port 8: Dev 4, If 0, Class=HID, Driver=usbfs, 12M /: Bus 02.Port 1: Dev 1, Class=root_hub, Driver=ehci_hcd/3p, 480M |__ Port 1: Dev 2, If 0, Class=hub, Driver=hub/ 8p, 480M /: Bus 01.Port 1: Dev 1, Class=root_hub, Driver=ehci_hcd/3p, 480M |__ Port 1: Dev 2, If 0, Class=hub, Driver=hub/6p, 480M
As it turned out later, the devices I need are on bus 3, ports 7 and 8. But so far this is not obvious to us, and here is the second option:
Qm monitor
Here we clearly see who is who. And now boldly:
# nano /etc/pve/qemu-server/101.conf usb0: host=3-7
To complete the picture, I will supplement the instructions with an example from the official documentation.
This option is possible:
Qm monitor