The company is one of the largest Internet providers in Moscow (Rostelecom representative in this city), and also provides connections to online digital and interactive television, offering customers profitable channel packages at affordable prices, which other companies cannot offer. More and more Muscovites are choosing Online cameraman every day.
What is an HD receiver for?
The device is designed to provide HD quality TV broadcasts. OnLime HD receiver with built-in hard drive You can connect it both as a multimedia player and connect it to your home Internet network via Wi-Fi and DLNA. Do not confuse it with another device for receiving Interactive Television - OnLime TV set-top box. A set-top box is another device.
The user can record programs for later viewing and control the broadcast (pause, stop, start, rewind). HDD, built into the Onlime receiver, has a memory capacity of 500 GB.
The start time for recording programs can be set in advance using a timer. You can record two programs at once, even while away from home.
Option " Parental control» will limit broadcast content: access to prohibited channels will be password protected.
The Online HD receiver supports broadcasting in foreign languages: just switch the audio track (not available on all channels).
The “TV guide for the week” function will show you the program schedule for the coming week.
How to connect a receiver and receive online interactive TV services
To obtain a receiver with a hard drive and connect to services you need:
- Make sure that your address is within the Online service area. This can be done by calling the help desk or on the website OnLime.ru
- The device must be correctly connected to a TV with a DVB-C digital tuner.
- Any package of digital TV Online services must be activated.
- If following the above conditions does not help, contact help desk company by phone listed on the website.
Device contents
Now, in addition to the basic functions (switching channels, adjusting the volume, muting the sound), the following options are available to you:
- image format. You can edit the width and height of the picture;
- subtitles. Enable/disable subtitles and switch their language;
- teletext. You can display the sound in text;
- information about the program. View transmission parameters;
- overview of available channels. Convenient display of connected channels with the ability to quickly select them;
- editing channels, managing the channel list;
- TV guide. Displays the program schedule for the coming day or the coming week. In the program you can search for the desired program, create a schedule (set reminders), make a list of programs you need to watch;
- recording/playback of desired programs. You can record the show in real time or set a timer to record the show in advance if you are unable to watch it during the broadcast period. Then you can play the desired program at a time convenient for you;
- playback of multimedia files: your own videos, photos and music from hard drive. Here you can manage files: move, delete, create, place in folders;
- software update. In automatic and manual mode the user can install new versions of programs, download new movies, connect new channels when available;
- Also in the receiver menu displayed on the screen, the user can configure and change many parameters of the device and its additional modules.
Synchronization with a PC will significantly expand the functionality of the TV. Therefore, it is not surprising that all users want to know how to connect a computer to a TV? Note that there is a huge number various methods, each of which we will carefully analyze. Much will depend on the TV model. Old equipment is equipped with connectors that are not found on computers. Because of this, certain difficulties may arise.
A PC is connected to an LG TV or equipment from any other manufacturer using special cables. There are also wireless synchronization methods. However, not all TVs are equipped with a built-in Wi-Fi module, which is necessary for a wireless Internet connection.
Why is this necessary?
Each user must independently determine whether it makes sense to connect the TV to the computer? For example, if you only watch preset channels, then connecting your PC to your TV is unlikely to be of much use to you. To a greater extent, such synchronization will be of interest to users who want to watch new movies, TV series and other content.
Outputting images from a computer to a TV will definitely expand the functionality of the equipment. After setting up this connection, you will be able to:
- play video games on the big screen TV;
- watch films, TV series, videos;
- communicate with friends and acquaintances via Skype;
- make presentations.
Resolution and color saturation modern TVs Samsung, Sony, LG are much higher than an inexpensive computer monitor. Therefore, synchronizing your equipment will allow you to watch new films in excellent quality. This is especially true if you purchased a device without a built-in Wi-Fi module and Smart TV support.

Setting up is much easier than it might seem at first glance. Every user can cope with this task. It is enough to decide on the synchronization method and also acquire the necessary cord. It is possible that you already have the necessary cables at home.
Connection options
How to connect a computer to a TV? Conventionally, all existing methods can be divided into two large groups– wireless and using cable. When choosing one method or another, take into account the technique used. See which computer and TV inputs can be used for synchronization.
First, we will briefly list the methods that ensure broadcasting of TV images on a large screen without loss of quality. If none of these options work for you, then you can use less popular connectors.
As mentioned earlier, it is likely that you will have to purchase a specific cable additionally. The cost of such wires is minimal. If you plan to use adapters, then you should go to an electronics store. This scenario is relevant in cases where an old PC or TV is used.

All kinds of additional coverings for cords are advertising tinsel. This aspect does not in any way affect the quality of the transmitted image. Think carefully about how long the cable should be for your convenience. It is important not only to configure the connection, but also to maintain the aesthetic appearance rooms.
The easiest way to connect an LCD TV to a computer is. Firstly, absolutely all modern technology is equipped with this interface. Secondly, it transmits audio and video simultaneously. Alternatively, you can use one of the following options:
- S-Video;
All these connectors are obsolete. Therefore, they should only be used if you are using old equipment. HDMI remains the priority.

Let's say a few words about wireless synchronization. This option assumes that your TV will have a built-in Wi-Fi module. Mostly they are equipped with models that support Smart TV. Today you can buy a wireless adapter and insert it into a regular TV.
HDMI
Not included in the basic package of a computer or TV. Therefore, this cable will have to be purchased separately. In electronics supermarkets they are presented in a wide range. Wire length from 1 to 20 meters. There will be no problems with the choice. Once the cord is purchased, find the corresponding ports on the TV and PC.
How to connect a TV through a computer via HDMI? Follow the step by step instructions:

Old computers do not have an HDMI connector. The problem is solved by purchasing an adapter. For example, a USB to HDMI adapter will work for you.
Mostly, the default settings set the picture to be displayed only on the second display, which is the TV screen. Due to the difference in resolution between TV and PC, the image may not be displayed correctly. Therefore, you need to open the operating system settings Windows systems, and make changes to some parameters.
Open menu "Screen", and select the item "Multiple monitors". You should definitely activate the display duplication function. After this, the problem should disappear. The computer desktop will appear on the TV screen.
How to improve picture quality? Go to personalization and then change the resolution. However, it is possible that the resolution will be selected automatically. If not, then set your TV resolution. The image quality will increase noticeably.

WiFi
Wireless networks can also be thought of as a way to connect your TV to your computer. What is needed for such synchronization? First, you need to study the specifications of the LCD or plasma TV. Unfortunately, only modern models support data transfer by Wi-Fi settings connections. If your model does not support wireless connection to the Internet, then buy a special adapter. It is connected via a USB connector.
Connecting your PC to your TV wirelessly has obvious advantages:
- Internet access;
- viewing content saved on the PC hard drive;
- simple connection process;
- free arrangement of devices;
- no wires.
To configure such synchronization, you need to use a special utility. The software comes with the TV. If the disk with the software was not included in the basic package, then download the program from the official website of the equipment manufacturer.

The main function of the software is to quickly connect a PC to a TV via home Wi-Fi network. The utility's interface is extremely simple and clear. You will need to create a special directory on your computer’s hard drive through which content for TV will be sent.
Many users solve such problems using another router. A single wireless network will cover absolutely all devices, including the TV. Therefore, you can play all kinds of files on the big screen.
S-Video
Another way to synchronize TV and PC is to use the S-Video interface. This option is good because absolutely all equipment is equipped with such a connector. An exception may be computers with extremely old GPU modules. Another strength of this synchronization is its simplicity. The user just needs to connect the S-Video connectors on the PC and TV using a cable
Before connecting the TV to your computer via S-Video interface, you need to turn off the equipment. One end of the cable is inserted into the connector on the PC video card - a round black socket. The other plug is connected to the corresponding TV input; it is located mainly on the rear panel of the device.

Turn on the TV first, and then the PC. While loading operating system The TV screen will begin to flash, indicating that a new signal source has been detected. Now the user's task is to configure the GPU module. Right-click on the desktop and select from the context menu "Properties", go to section "Options".
Open item "Additionally". In the dialog box that appears, opposite the name of the GPU, check the box "Clone". When the parameter is applied, click on the “Display” section. From the list that opens, you need to select the name of the TV. Take the remote control remote control TV and set the appropriate signal source. In our case, this is the S-Video connector. When the image appears on the big screen, you can proceed to adjust it. Now you know how to connect a computer or laptop to an old TV.
Miracast
Many users confuse this technology with DLNA. In fact, it differs in that it significantly simplifies the playback of not only files stored on the PC hard drive, but also allows you to play content online. For example, you can turn on your favorite movie or new series popular show using a regular browser.
To use Miracast technology, you need to have powerful computer. This is because it is a resource-intensive application. Therefore, synchronization via Miracast is relevant among owners of PCs, laptops and tablets with powerful hardware.
How to set up a TV if it supports the technology in question optionally? You need to purchase a special adapter. It connects to the device via HDMI. The wireless monitor technology is characterized by maximum ease of use. The image displayed on the large screen will be broadcast using a special algorithm. The image is mirrored via Wi-Fi to a large TV screen. 
The user does not need to connect the TV to one of local networks using a router. With the help of routers, a mini-network is created, which greatly simplifies synchronization with a PC. You will need a program to connect a wireless monitor - the Wireless Display utility. When the add-on is installed, you can start broadcasting.
Make sure that the Miracast option is enabled in the TV menu. You can activate this feature in the settings. Open the “Networks” tab, and then go to the “Intel WiDi” subsection.
VGA and DVI
How to connect old TV to the computer? DVI and VGA connectors are ideal for this task. Let's look at each of them to determine the features and rules of such synchronization. Let's start with VGA. Almost all equipment is equipped with this interface. The exception is inexpensive laptops and netbooks. The VGA connector is standard and also the oldest method of analog connection of TV to system units.
Why is VGA considered obsolete, and in what ways is it inferior to HDMI? Firstly, image transmission is carried out through analog signals. Secondly, by today's standards, the speed of information transfer is extremely low.

If the equipment you use is equipped with this interface, and you also have a VGA cable, then there should be no problems with connection and subsequent setup. Step-by-step instruction:
- Insert the wire plugs into the corresponding connectors.
- Turn on the equipment.
- Select VGA interface as the main signal source.
- Make the appropriate settings in the Windows operating system.
The connection process itself should not cause any difficulties. Mostly users have questions regarding the setup. If you ignore this stage, then achieve broadcast high-quality image the user will absolutely not succeed.
If the picture is not transmitted to the TV screen, and certain problems, interference, and defects are visible, it means that the user has specified incorrect settings. Particular attention should be paid to the picture broadcast mode. There are two modes - "Only on TV", "Display and TV at the same time".

Before connecting your TV to your PC using the VGA interface, you need to configure the operating system accordingly:
- By free space desktop, right-click.
- Select a section from the context menu "Screen resolution".
- Open menu "Screen".
- Select one of the available image broadcast modes.
- Save your changes.
As you can see, connecting a PC and TV via VGA is as simple as possible. The main thing is to ask required parameters.

The DVI interface is considered more modern and advanced when compared to VGA. Firstly, both analog and digital signals are transmitted. Secondly, there is a gradation of the interface into groups with a specific, narrow focus:
- DVI-D – designed for digital connection;
- DVI-A – suitable for analog signals;
- DVI-I is a universal option.
As for the connection process itself, it is carried out in the same way as in the case of other interfaces. First, the user connects the cable plugs to the connectors of the TV and computer, and then selects the appropriate signal source.
Common problems
If you decide to connect a laptop or PC via HDMI, you first need to check for an audio driver. Without High support Definition Audio sound signal will not be. To check if this driver is installed, open "Device Manager". Select a tab "Sound Devices". In the list that appears, find a device that supports “High Definition Audio”. If there is no such line, then it will absolutely not be possible to adjust the sound at .

What to do, if the required driver No? The answer is very simple - you need to download it to your computer or laptop and then install it. Downloading is carried out from the official website of the manufacturer. Enter your name in the search box sound card, after which you will be offered a distribution kit for installation. In some situations, the operating system is able to independently detect missing drivers, and then download and install them.
Some users configure the operating system in a different way. To find available playback devices, open the system tray - lower right corner. Click right click mouse on the sound playback icon. In the opened context menu, select item "Playback Devices". This is where the connected TV should be displayed along with other devices: speakers, headsets, headphones. The user needs to select the audio source, and then click on the button "OK".

Displaying an image on a large screen is half the success. Mostly users encounter problems related to sound. It’s clear that no one wants to watch a new movie with sound playing through the speakers of a PC or laptop. Modern models TVs are equipped with powerful speakers with the clearest and most natural sound possible. Some even buy additional audio systems to increase the level of immersion in viewing.
In many situations, achieve high-quality sound, i.e. Playing sound through TV speakers can be extremely difficult. Common problems that almost all users encounter after synchronizing their TV and computer:
- there is no sound at all;
- excessive noise or other disturbances are heard;
- audio signal delay;
- volume problems.
Please note that there are several problems. Therefore, the initial task of the user is to determine what exactly the problem is.
In the process of using a certain technique, you try to use all of it. additional features. It is reasonable. For example, when connecting a computer to a TV via an HDMI cable, we expect comfortable viewing, but problems cannot always be avoided. Difficulties rarely arise with image adjustment. Since on modern devices automatic selection of resolution and other parameters is carried out.

Sound is the most common problem. What should the user do so that the TV starts playing sound correctly? You need to start by setting up audio signal transmission in the “Taskbar”:
- Open "Control Panel".
- Go to menu "Equipment and Sound".
- Go to the tab "Sound Resource Management".
- Select an item "AMD HDMI Output".
The last point may be called a little differently. It all depends on which company produced the hardware. Finding the necessary parameters to fine-tune is not difficult. The whole process takes only 2-3 minutes. Just follow the instructions.

Please note that if the PC video card supports audio transmission, the user can select the option in the settings "Digital Audio S/PDIF". If this is not done, the audio signal will be transmitted through the motherboard, which is connected to the GPU module.
Note.
A pressing problem for many users today is expanding the image from a personal computer to a home plasma display. “We connect the TV to the computer via HDMI, but there is no image,” - this is exactly how negative sounds come from the mouths of computer equipment owners.
In this article, the reader will become acquainted not only with the method of connecting an additional display to a PC or laptop, but will also learn about correct settings equipment. He will also be interested in recommendations from experts in the field of IT technologies.
About the goals pursued
The larger the diagonal of the LCD screen, the more comfortable it is to view multimedia and the better the image detail in games and software. A film on a TV from a computer will allow you to see the smallest details, and a fan of a dynamic toy will feel the reality of the events taking place on the plasma screen. In fact, there are many advantages of using such a symbiosis, and all of them relate to the comfortable work or leisure of the user.
In recent years, many users have become interested in Internet television. Why pay money to the provider if you can watch your favorite channels for free from the official website of the television company? Therefore, the question is: “How to connect a computer to a TV?” sounds more and more often in the media. But so far things are going badly with ready-made solutions.
Computer hardware capabilities
It's better to start with technical capabilities personal computer or laptop. The fact is that it is not enough to buy an HDMI cable for your computer. It will be possible to connect to the TV only if there is an appropriate digital video output on the PC. Therefore, the user must become familiar with all outputs system unit and find the required port. It can be located on the video card or on motherboard at the computer and at one of the ends of the mobile laptop.

There are devices that do not have an HDMI connector. It is quite possible to find VGA (D-Sub) video output or DVI digital ports with DisplayPort on old ones. Here everything depends to a large extent on the TV, which should have similar inputs. Having selected the right cable for your TV, you will always find the opportunity to output an image from your computer.
TV availability
But modern liquid crystal devices with HDMI ports have no problems - all manufacturers provide their equipment with a popular interface. Often they are not limited to one port at the factory and provide the user with the opportunity to connect several sources to output images via HDMI.
Larger LCD displays have a slightly different problem. We are talking about the resolution of the reproduced image and the frame rate. Before connecting a computer and TV via HDMI, the user needs to familiarize himself with technical characteristics both devices, compare their video signal transmission capabilities and find a parameter that will be supported by both plasma and PC. Often, all equipment manufacturers strive to ensure that equipment supports FullHD resolution (1920x1080) at a frequency of 60 Hz. True, there are exceptions that create problems for users.
Operation of devices of different generations
In situations involving connecting two devices with different interfaces (HDMI, VGA), users are often surprised why the computer does not see the TV via HDMI. The explanation is simple - it is impossible to connect equipment of different generations by combining analog and digital signal one cable. In such situations, no adapter will solve the problem - you need a converter that can decode the signal at the hardware level.

Fortunately, foreign auctions offer ready-made solutions that can solve all users’ problems with video signal transmission between devices of different generations. The cost of one converter is in the range of 20-30 USD. That is, which attracts a potential buyer. All the necessary cables for video transmission are always included with the converter, so the algorithm for solving the problem is simple: buy a converter and connect the TV to the computer via HDMI.
When the required interface is not available
Not all computers and TVs have an HDMI port - that's a fact. But you shouldn’t get upset ahead of time, since with obsolete devices the problem can always be solved. The fact is that old equipment is geared towards transmitting analog signal. Let by image quality this technology and lags behind, however, it has an order of magnitude fewer problems with the compatibility of different standards. Combining S-Vidio, VGA or RCA interfaces is much easier than converting to digital.
The user just needs to buy a cable for the TV and connect both devices. There are also many inconveniences that users will have to face. Firstly, audio cannot be transmitted over an interface cable. Accordingly, you need to buy another cable. Secondly, during operation, the sound card of a computer or laptop will not be able to create an individual audio stream for the TV. Accordingly, you can forget about the convenience of sharing a computer and TV.
The right approach to buying a cable
Problems may also arise for the user when choosing the wrong HDMI cable. The fact is that a digital video signal is not capable of being transmitted over long distances via cable without loss of quality. Therefore, the future owner needs to decide on the length before buying an HDMI cable for a computer to a TV.

The main thing is to always remember that the longer the quality cable, the higher its cost. It is necessary to measure the distance between the PC and the liquid crystal display (of course, not in line of sight, but taking into account the installation) and find a cable of the appropriate length on the market. Yes, it is customary for buyers to purchase wires with a reserve, but it should be small, since often the excess is rarely in demand - more often they just collect dust behind the TV or behind the computer. The main thing here is to find a middle ground in terms of the “cost - cable length” ratio.
Real offers from manufacturers
It is not easy to choose a cable for a TV of the HDMI-HDMI form factor on the market. Any buyer can verify this for himself; just look at the prices and assortment. It is logical to assume that expensive accessories have a high price only because they are made by serious brands. There is truth in this, but, as practice shows, the more expensive hdmi cable, the less likely it is that the video signal will deteriorate over a long distance. In fact, you have to pay for quality. Chinese consumer goods have no place in the domestic market.
IT experts recommend paying attention to the brand name (for example, Prolink, Cablexpert, Viewcon, Belkin), as well as focusing on the quality of the winding and the presence of ferrite filters near the connectors (barrels near the contacts). If an HDMI cable is required, the length of which exceeds 30 meters, then the user cannot do without a signal amplifier. The device is expensive, but copes with the assigned tasks 100%.
Physical connection of two devices
This article is not about potential difference from a school physics course, but the user still needs to know that there is a small electrical charge on the video ports when the equipment is plugged into the mains. Naturally, when connecting two devices, equipment with a large charge will transfer energy through the cable to the port of the connected device. Often the TV turns out to be more powerful, which, when connected, burns the output on the computer’s video card. Therefore, before connecting your computer to the TV via HDMI, you need to turn off the power to one of the devices (unplug the plug from the socket). Naturally, this problem avoids all users who have grounding in their home.
Another problem that the buyer may encounter is the lack of a video signal when connecting the cable or the image transmission with noise. There is no need to touch the settings of your TV or computer - 99% of the time the problem is a low-quality cable. It needs to be replaced. In general, experts recommend checking the HDMI cable directly in the store to avoid connection problems.
TV settings
It will not be difficult for the owner of a liquid crystal display to remote control device, press the “Source” button and select the desired signal source. All ports on the TV panel are registered and numbered, so all that remains is to combine software part from the hardware room. Don't expect the PC image to appear on the screen right away. The main thing here is to get the display ready to receive a video signal. This will complete the setup of connecting the TV to the computer via HDMI. All that remains is to configure the video output of your PC or laptop.

Many users are owners of home theaters and other video and audio equipment that is connected to an LCD TV. Naturally, a situation may arise when all HDMI ports are busy. Many users are unlikely to want to physically rearrange the HDMI cable when working with a computer, so another solution is proposed. The video signal from the laptop can be transmitted to a tuner or receiver. In fact, there is no difference, since manufacturers use single standard transfer images via HDMI.
Modern platforms
When it comes to the Windows 10 or MacOS operating systems, there are practically no configuration issues. The user only needs to restart the computer for the device to detect and connect the new display. The more modern the technology, the more effective the automatic tuning is - often via HDMI the signal is transmitted from the computer to the TV in FullHD format with a frequency of 60-65 Hz.
But there are exceptions, and they are primarily related to the video device driver. Therefore, there is no need to try to make the TV work correctly using the remote control, only fine tuning video cards. The main thing is to always remember that you need to change the parameters not global, but just one port, otherwise, through negligence, you can destroy the signal to the PC monitor, which will be very difficult to restore.
Working with drivers
Making a TV work like a computer monitor via HDMI, although difficult, is quite possible. There are many ways to do this, which the reader will get to know. Operating system owners Windows versions 7,8 and 10 you need to go to the control panel and select “Screen”.
By going to the “Setting screen parameters” tab, the user will find that the operating system has already detected the connected TV, but is not yet transmitting the image to it. The Multiple Displays option allows you to connect your TV as an additional monitor to your computer. The list contains several options from which the user is asked to make a choice:
- Duplicate these screens. The contents of the computer desktop will be displayed on the TV screen, and all actions performed by the user will be visible on both displays.
- Expand these screens. The most interesting setting that allows you to virtually increase the desktop area (both vertically and horizontally).
- Show on screen no. Manually assigning a port for video output is not popular among users.
Driver configuration features
It's easy to send a signal to a TV, but adjusting the picture quality and transferring sound from a computer to a TV is not so easy. First, you need to decide on the extension of the desktop - diagonally or vertically. Experts recommend focusing on the physical location of the TV in the room relative to the PC monitor. On the control panel, in the “Screen Resolution” menu, you need to use the mouse to place icon No. 2 relative to icon No. 1 so that it is convenient to move desktop objects between displays.

The second step is to adjust the TV screen resolution. The main thing here is to select a parameter that is supported by the connected display, otherwise a failure will occur and the video output port will be disabled. By clicking the "Advanced Settings" button, the user can select the display refresh rate, however, IT experts do not recommend changing the frequency unless the video card and TV support the 4K (144 Hz) standard. After making all the settings, you need to save the changes and exit the control panel.
Tricks with sound transmission
All users know that an HDMI cable transmits not only high-quality images, but also sound, but there is no corresponding setting in the display resolution settings. With audio transmission, everything is simple - at the hardware level, the sound is sent to additional screen along with the video. That is, the user just needs to move the video player window onto the TV display with the mouse. The sound will be muted in the computer speakers, but the sound will be activated in the TV speakers.
It is worth noting that mobile device or a computer is capable at the hardware level of supporting several video devices connected via HDMI and transmitting to them different image and provide them with sound accompaniment. True, there are exceptions, and they depend on the video adapter and sound card. Low-performance devices sometimes malfunction; they simply do not have enough power to process digital video signals and high-quality audio.
Alternative driver setup
Not only Windows tools can configure video transmission to the TV screen. Owners are given the opportunity to ensure high-quality transmission using a video adapter driver (Nvidia or Radeon). The setup algorithm is still the same: we connect the TV to the computer via HDMI and set the HDMI signal source from the remote control.
But then the proprietary software video card manufacturer. By going to the Nvidia app control panel GeForce Experience or AMD Catalyst Control Center, you need to find the “Display” tab. One of the sub-items of this menu is responsible for setting up multiple displays.
Feedback from users
Often, when connecting a TV to a computer or laptop, device owners encounter problems that they try to solve together in the media. Most of the negativity that is found in reviews is associated with low-quality HDMI cables that were purchased at foreign auctions or in stores at a low price. A greedy person pays twice - all users who decide to save on buying an HDMI cable need to know about this.

After adjusting display settings and saving, did the image on the main monitor disappear? This is the second problem that users often have to face. The reason is quite simple - the parameters of the main monitor have undergone changes. There is only one recommendation here - when connecting a TV to a computer, you need to control your actions. Number 1 in the system is always the main monitor - its settings cannot be changed. You can do whatever you want with the remaining numbers (2,3,4).
Finally
Yes, in order to create convenience for yourself, the user needs a little time and investment. You simply cannot do without this. There are instructions that spell out all the steps, they need to be followed clearly:
- buy an HDMI cable;
- configure the video adapter driver;
- enjoy watching.
The algorithm is simple, but there is a lot of work to be done. In fact, there is nothing complicated, the main thing is to follow the recommendations of experts and carry out strictly specified actions. Only after receiving an image from a computer or laptop on the TV screen and making sure that there is sound transmission, can you enter Extra options and make fine tuning.
Few users of modern TVs know that you can easily and quickly transfer photos, video and audio from a computer to a TV without using special wires (HDMI cables).
Wireless connection between computer and TV
A couple of years ago, when buying a TV, I simultaneously purchased a long, high-quality and expensive HDMI cable, so as not to carry around with a flash drive and establish a direct connection between the “box” and the computer, for convenient movie watching and photos (slideshow).
Imagine my surprise when a week ago I finally noticed (not even three years had passed) in the context menu of the video file to the “mysterious” item - “Transfer to device”...
I clicked on my detected device and “teleported” the film to the TV without any wires, media servers, settings or other dances with tambourines. How is this possible? I'll tell you now.
In order not to waste the time of some users, I will list 3 mandatory conditions wireless transmission media files into a modern brainwashing device...
...or did you think that everything is decided by the power of thought?
- This “magic” happens thanks to Wi-Fi technology, therefore, the most important condition is that you have this network created by a regular wi-fi router (with horns).
- Your favorite TV and computer should have built-in or external wi-fi adapters. Most smart TVs and laptops have it by default.
- Video player built into the operating system Windows Media must play (“understand”) your video.
The most important condition is the second one - the rest are easily solvable. Wi-Fi router Most people already have it, and if they don’t have it, it costs a penny. With the system player everything is also simple - codecs to help you.
I have modern Windows 10 installed with current update- no problems with codecs, playback of mkv files, etc. It didn’t occur to me. Everything worked immediately and without problems. I had to tinker a little with my wife’s computer (Windows 7) and install some codecs.
So, let's go...
Connecting your TV to your computer wirelessly
Right-click on the network icon in the taskbar (in the tray)…

...and go to the “Network and Sharing Center” shared access" By the way, you can get to your destination through the usual system control panel.

...and enable network discovery in your current network profile...

After that, in the same window, open the “All networks” tab and check (configure) the media streaming settings...


The wireless connection between the TV and the computer has been established - now you can safely watch movies from the computer via wireless communication. The broadcast is provided by the built-in Windows Media Player (as it turned out in the advertisement - the sponsor of our program...)...

By the way, numerous family photos You can also show it to friends and relatives this way...

Modern TVs can easily replace a computer display. But how does a computer connect to a TV?
We have collected various ways solutions to this common problem.
Connection selection

Attention will be given first optimal options regarding image quality, with which you can easily make a connection. After this, several additional methods will be given.
There is a possibility that the user will need to buy a cable from the store. Usually it is not very expensive, but it can be purchased various devices You can go to a specialized radio store or a retail chain that sells consumer electronics.
Please note that the presence of gold plating on expensive cables does not in any way affect the quality of the displayed image.
So, here are a few options for how to connect your computer to your TV:
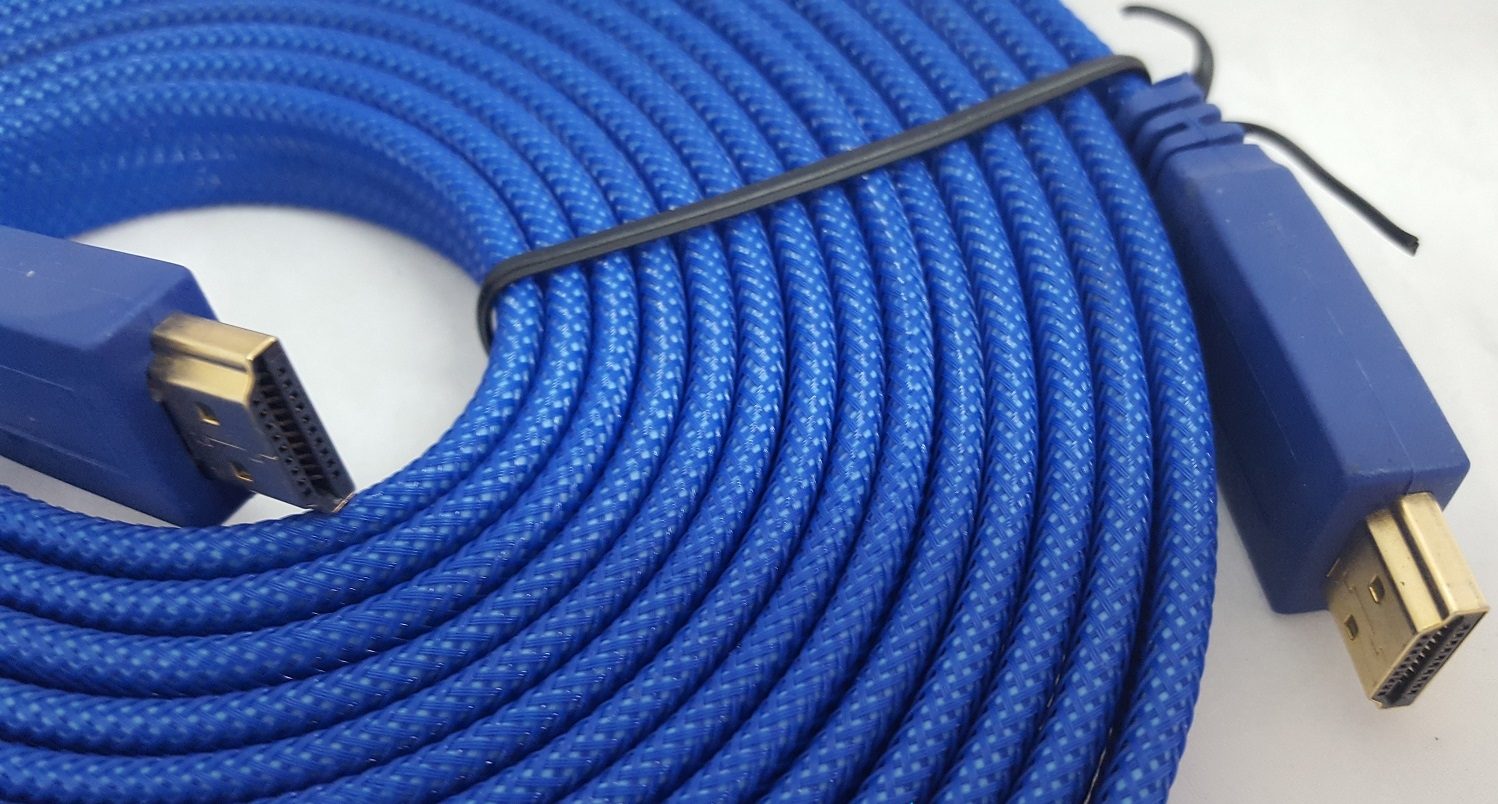
- HDMI- an ideal option, because to work with it you just need to connect the connectors. As a result, not only sound, but also image will be transmitted well. The only possible problem is that the sound from the laptop may sometimes not work.
- VGA- one of the easiest ways to connect television. To do this, you only need a cable, which is sold complete with monitors. There is a possibility that the user has an unused device at home. If necessary, you can buy it at a specialty store.
- With cable from DVI the situation is the same - to work with it you only need to buy an adapter and cable.
- Alternatively, you can use a composite cable S-Video. You can work with it either through a cable or through an adapter. It’s just that he’s not considered the best way connections because the image may not be very clear. So such a connection is not used if modern technology is available. The connection occurs in the same way as when working with household players.
Connecting using HDMI
Surely many users have heard about this connector. It is on all modern TVs.
The HDMI cable has the same connectors on both ends.
You can buy a cheap cable. But if the user plans to work in 3D mode, it is better to use latest version HDMI cable.
A similar socket is located on the video card near the monitor connection.
If there is no discrete video card, the socket will be located on the motherboard, that is, near the USB port. However, it will look similar.
With a laptop everything is much simpler - it has the same HDMI socket. But it’s located on different sides depending on the model the user is working with.
Sometimes the TV is hanging on the wall and it can be very difficult to insert the cables from the back. It is for this situation that a cable with plugs at right angles is sold.
Alternatively, buy a special HDMI corner.
VIDEO: How to connect a computer to a TV via HDMI
How to connect a computer to a TV via HDMI
How to connect a computer to a TV? Wired and wireless methods
Connecting a TV to a computer via a VGA connector
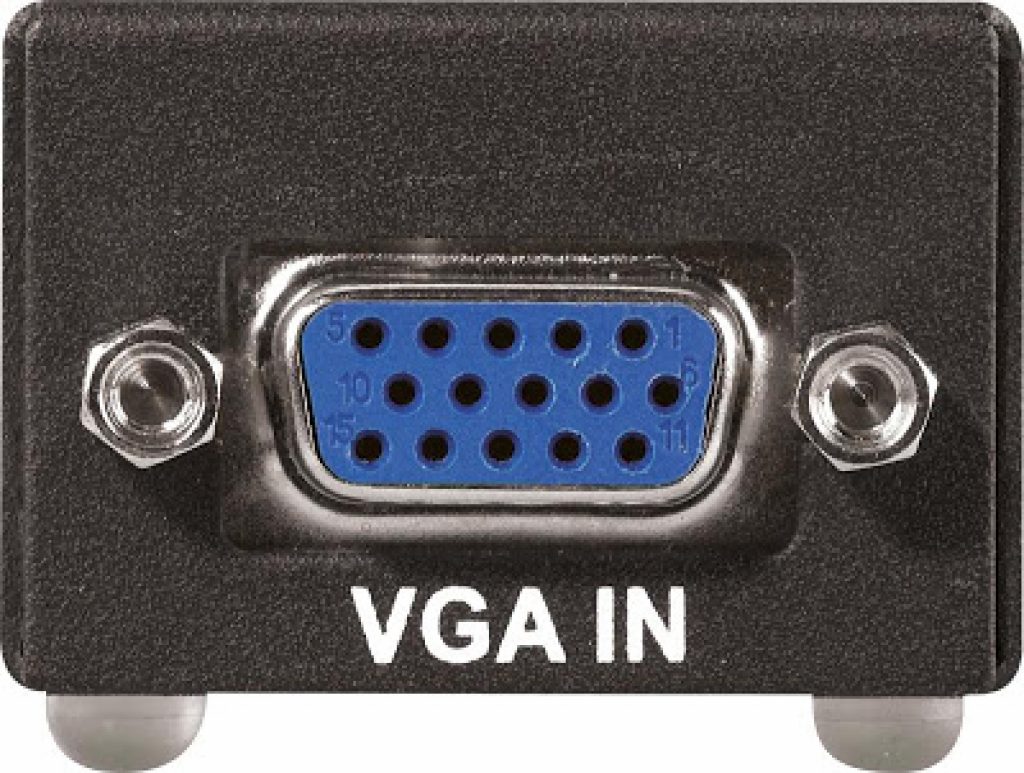
Video Graphics Array is an interface designed to receive and transmit analog video signals. There is no sound transmission in this option for connecting the TV to the computer.
Before connecting, make sure that both devices - the computer and the TV - are equipped with VGA connectors and have a special cable.
To make such a connection, your computer must be equipped with an operating system of at least Windows 7.
Connect the PC and TV with a VGA cable when turned off, then press the SOURCE button on the TV remote control (in some models this may be INPUT) and in the menu that appears on the screen, specify as an external signal VGA(in some models - PC or RGB).
After this, confirm the selected changes by clicking OK.

Right click on free space on the desktop and in the drop-down list, go to the screen resolution menu.
IN this menu you are given the choice of using both a TV and a computer monitor, as well as setting the required resolution.
Additionally, you can choose to use multiple screens, which gives you the following options:
- Duplicate screens- a function that allows you to get the same image both on the monitor and on the TV screen;
- Expand screens- will allow you to simultaneously watch a video on the TV screen and, for example, type text on a computer;
- Show desktop 1 or 2 - this function operates only one of the available screens - either a monitor or a TV.
In general, the process of such connection is not difficult, however, it creates some inconveniences associated with the transmission of sound in this embodiment.
It will have to be connected with a separate cable or use an external speaker system for these purposes.
S-Video
Another option for connecting a TV to a computer is to connect using S-Video connectors.
This option is convenient because all TVs and computer video cards (except very old ones) are equipped with an S-Video connector.
All you need to do is connect these devices with an “S-Video to S-Video” cable.

Before connecting, both the TV and the computer must be de-energized, after which you insert one end of the cable into the connector on the computer’s video card, which is a round black socket, and the other into the S-Video socket on the TV.
As the operating system loads on the computer, the TV screen will blink, indicating that it has detected external source signal.
The next step is to configure the video card. To do this, click on an empty space on the desktop and in the menu “ Properties» go to the tab « Options» .
Then select the item « Additionally» and in the window that opens, opposite the name of the video card, activate the item « Clone» .
After use this parameter click on the item « Display" and select the name of the TV from the available list.
Then, on the TV, search for the signal source and adjust the image.
Miracast

Miracast technology differs from DLNA in that this option for outputting multimedia information from a TV to a PC simplifies the task of viewing not only recorded files stored on the gadget’s hard drive, but also played online on one of the built-in web browsers.
But Miracast technology has the only drawback - it is very demanding on computer resources.
So it is supported only by certain computers, as well as tablets and laptops that have powerful hardware.
It is important to implement such modern technologies on the TV itself.
If the TV only optionally supports Miracast, then you will have to spend extra money on an adapter that easily connects to the HDMI port.
The technology of a wireless monitor is very simple - the displayed image is compressed using a special algorithm.
After this, it is mirrored via Wi-fi to large display TV.
In this case, there is no need to connect the TV to one of the local networks using a router.
Thanks to the receivers, a separate mini-network is organized, simplifying communication with a PC.
To successfully transfer the image, install the Wireless Display add-on on your computer and start broadcasting.
A PC and Smart TV can be connected without a special router.
As many probably know, home network can be created without using a router. IN in this case The laptop will serve as an access point.
This is done in several ways:
- You can create a connection in one of the special management consoles;
- Alternatively, use ;
- Take advantage third party programs, For example, Virtual Router Plus.
Please note that a distinctive feature of most built-in Windows tools– greater reliability and stability of operation.
In addition, users will no longer have to waste time searching for programs and installing them on Personal Computer. So the registry won't be too clogged.
This method is considered one of the simplest.
Once logged in as an administrator, proceed to launch the command line. To cope with this Windows 8 task, use the key combination Win+X.
When the menu appears, you must select " Command line" In the seventh version of the operating system, you need to press the combination Windows keys+ R in the window that opens, and also write CMD and press Enter.
Be sure to write the following command netsh wlan set
and after that press Enter.
Creation new network After this it will be completed and you can start launching it. For this purpose, write on the command line
Hostednetwork
It is important to say what to create virtual network you can only do it once.
However, after the module is rebooted, the user must enter a command to successfully launch the Internet.
As a result, the user will only have to connect the TV to the computer by performing the necessary steps that have already been done when working with the router.
Control TV from PC wireless network Wi-Fi is possible using the same programs.
There are various add-ons that make it much easier to control your TV using a smartphone.
In this case, the phone is used as a control panel.
So, this article provides the basic ways to connect a computer to a TV.
It is very easy to cope with this task if you choose the appropriate option and follow the instructions given. Then the user will not have any difficulties connecting.