As a rule, most problems arise when connecting to the router via wireless network. And connecting via a network cable should not cause any difficulties. But, I have already met similar questions several times, and I decided to write a small instruction with a photo in which I will tell you how to use LAN cable connect a computer (or laptop) to the router.
And what is there to actually write about here, they took the cable, connected it to the router, then to the computer, and everything is ready. But still, it might be useful for someone.
As a rule, modern routers have 4 LAN connectors. This means that you can connect 4 devices via a network cable. And all of them will receive Internet from the router, or work in local network. By the way, read the article on setting up a local network.
We will need:
- Router with a free LAN connector (it is yellow).
- Network cable. A small cable is included with the router. But, if you need a longer cable, you can make it yourself. How to do this, I wrote in the article. Or just go to a computer store and ask them to crimp the network cable to the length you need.
- Computer with network card (usually integrated into motherboard) . Well, or a laptop, a netbook with an RJ-45 network connector.
Let's get started 🙂
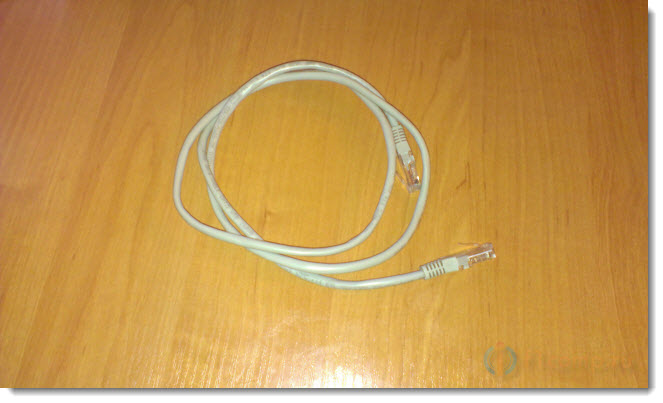
We take our network cable, it looks like this (you may have a slightly different one, I have a different length):
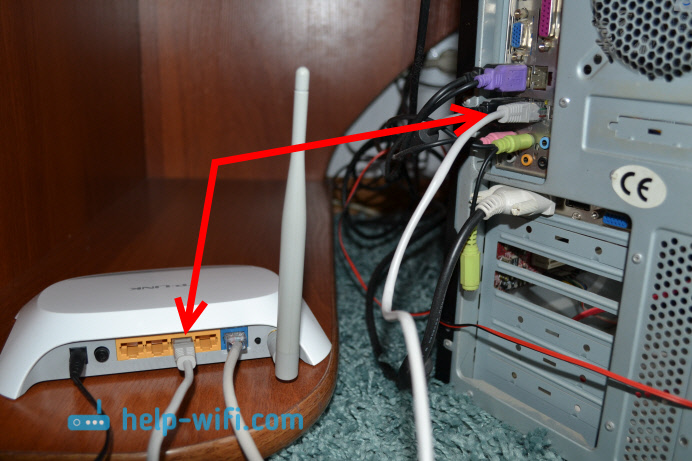
We connect one end of the cable to the yellow connector (LAN) of our router.
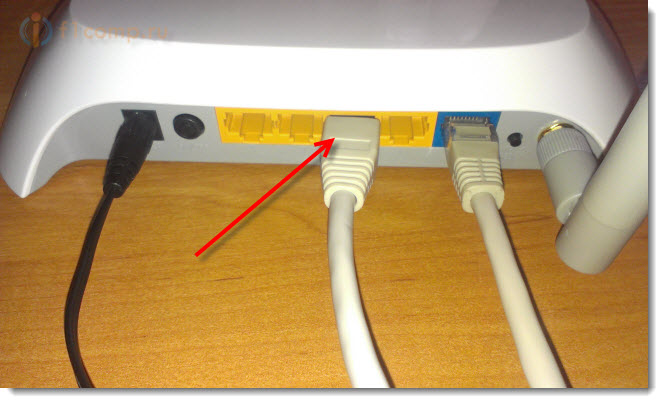
It doesn't matter which of the four connectors you plug the cable into.
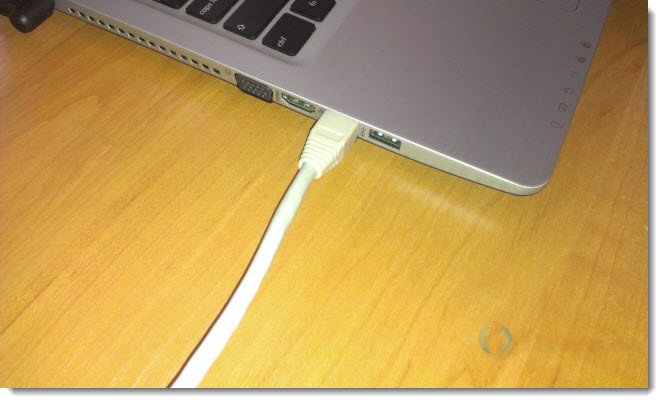
Now we connect the other end of the cable to our computer or laptop.
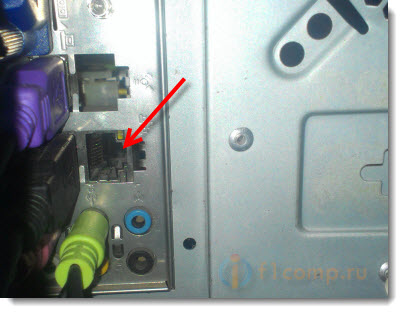
This is what the network connector looks like on the computer:
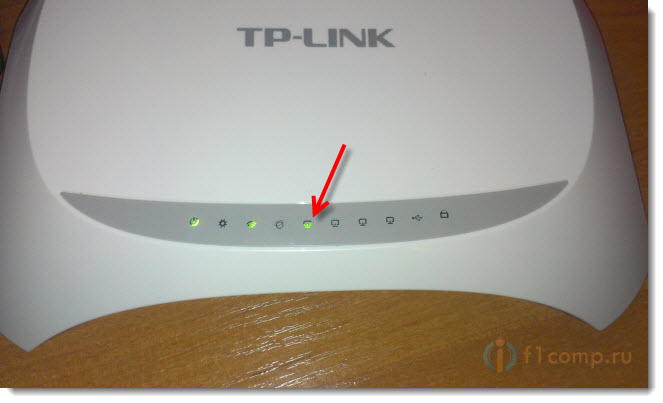
After connecting the network cable, one of the four indicators should light up on the router, which indicate the connection to the LAN connector.
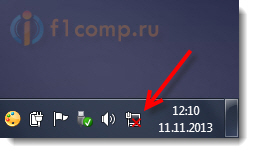
Now look at the computer screen. If on the notification panel (bottom, right) you will see the following connection status (as in the screenshot below), then all is well. The Internet is already working.

But, in this, it would seem easy way, can also cause problems. Now some of the most popular, we will consider.
Problems when connecting a computer to a router via a network cable
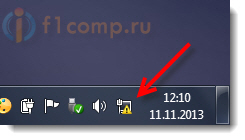
After connecting, the status on the notification panel may not change, you will see the computer crossed out with a red cross.
In this case, first of all, you need to check the cable with which you connected the computer to the router. How to do it? You can, for example, take another cable, or connect the cable through which the Internet goes directly to the computer. If this connection status changes (even if a yellow triangle appears) then the problem is in the cable. Perhaps there is something gone. Just change it.
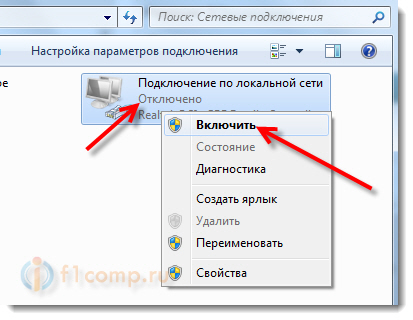
It is possible that the network card is simply disabled. Let's check. Go to and find there LAN connection. If there is a status near it Disabled then click on this connection right click mouse and select Turn on.
If a connection such as No LAN connection at all, then most likely that the driver is simply not installed on your network card. Download and install the driver. If there was a disk included with the computer (laptop), then most likely it has this driver.
Plugged in cable but no internet connection
And this may be. The problem looks like this:
First, you need to determine what the problem is. This may be due to issues on the router side. See the article for this.
But I will tell you in a simple way. If other devices work fine from this router, and there is Internet on them, then most likely the problem is on the computer itself. This is clear:).
And usually there is only one problem.
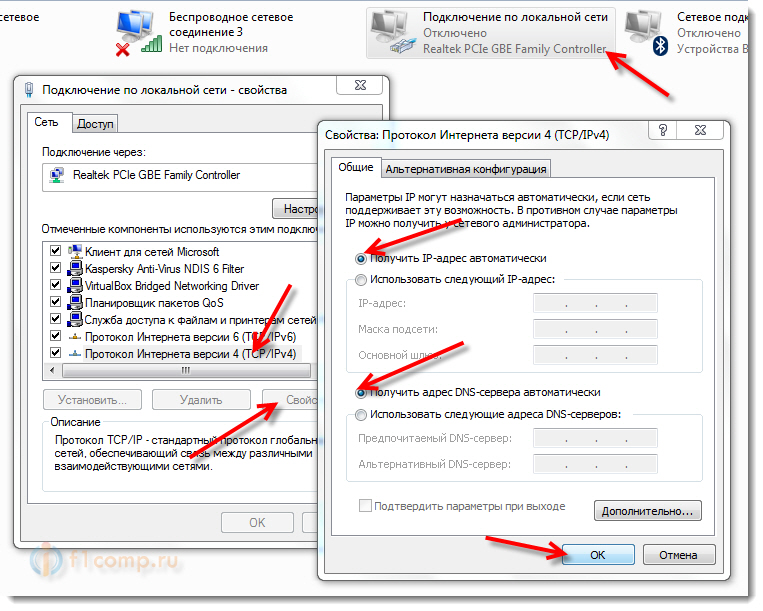
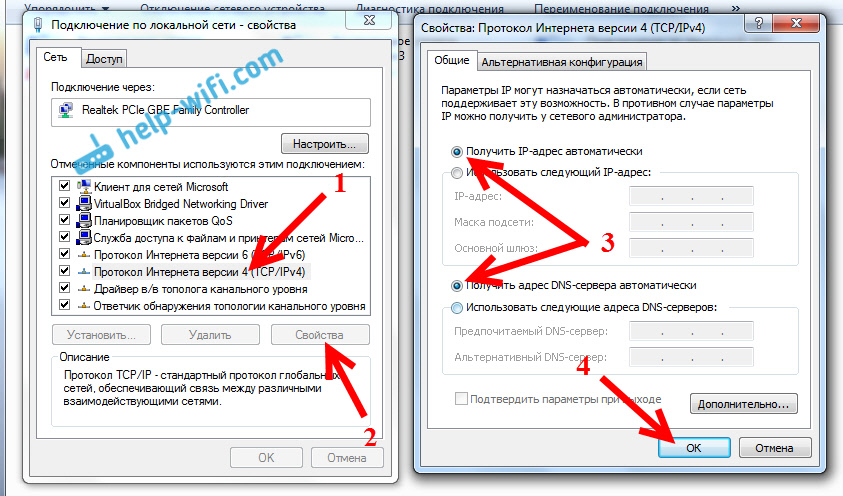
Go back to Control Panel\Network and Internet\Network Connections and right-click on Local Area Connection. Select properties. Then select "Internet Protocol Version 4 (TCP/IPv4)" and press the button again Properties.
Set to receive IP and DNS automatically and click OK.
This should help.
But, do not forget that there may be, for example, technical problems with the network card (maybe she just burned out) and other very different reasons for which various problems can arise.
Here is such an instruction, everything seems to be simple, but it turned out to be not very small. I hope it will be useful to someone.
Wi-Fi is a modern and very convenient technology, thanks to which you can connect various technical devices between themselves. For example, when you have your own home network of several computers and devices. But today we will figure out how to connect the printer through wifi router and why is it needed.
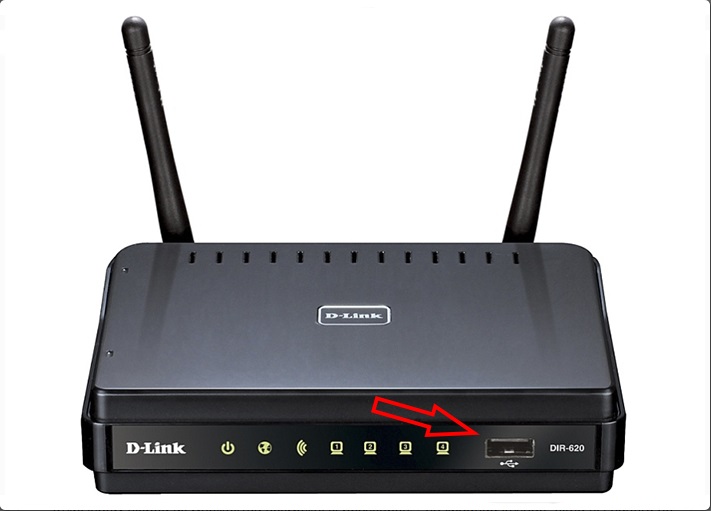
The main ways to connect the printer to WiFi networks just two. In the first case, the printer is connected remotely to the router, in the second we need a special wire. For remote connection the printer requires a special adapter. For wired connection The router needs to have a USB port.
First connection option
We usually use the printer's USB cable to connect to the computer. But it can be used not only in this way. Follow the written algorithm:
- Turn off the printer and router. They will not be able to recognize each other in the on state on the go.
- Connect the router and printer with a cable. Modern wi-fi routers must have a USB socket.
- We turn on the router. The distribution point should be fully loaded. Only after that we press the ON button on the printer.
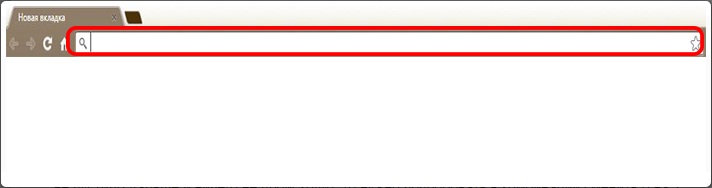
- Now you need to check if the printer is connected to the router. We click on the icon of any browser that is not buggy and can serve our further goals.
![]()
- I think there is no need to explain where the address bar is. We click on it with the mouse.
- We type on the keyboard the address: 168.0.1. We are transferred to the internal menu of the router. This is a universal address. If it does not work, then look among the documentation for your router. It might be your address. Or just replace 0 with 1. When one of the combinations works, write it down on a separate piece of paper.

- Now you need to enter your login information. If you did not change them, then the word "admin" in both lines will work as standard - login and password. You can also see the login with a password in the documentation for the router. In general, it is desirable to have the documentation for the router at hand. We enter the data and move on.

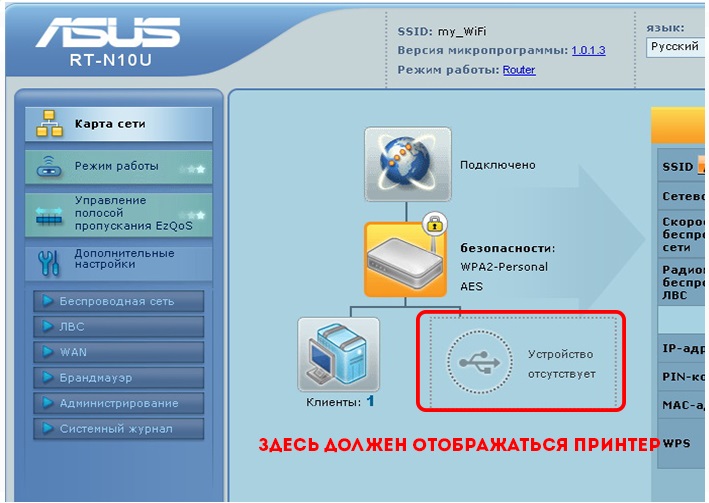
- Go to the Network Map tab. It lists all devices that have active connections to the router. The printer will also be listed there if everything worked out. If not, then we repeat the steps and look where we made a mistake.
Ready! The printer is directly connected to the router. And perhaps that will be enough for you. However, we will first look at wireless way connection, and only after that, how to properly configure the printer.
Second connection option
If you have a fairly modern printer with a built-in adapter, then you can connect it to your router via Wi-Fi. This will be much more convenient, since the printer will not be tied to the router by its location. And it can be located in any part of the room where there is an outlet. Agree, it's much more convenient.
To plug wireless system between the printer, computers and router in two ways. If one of the methods does not work, then try the second.
- Connecting the printer using WPS
- Find a button on the router with the corresponding inscription.
- We study the instructions for the printer and look for whether there is support for the WPS function and how to enable it. Activate WPS.
- Press the WPS button on the router and keep it pressed for about two minutes.
Done, the printer has just joined the router with using Wi-Fi networks. You can continue setting up, or try the second method.
- Connecting a printer through settings
- Press the "Settings" button on the printer.
- We are looking for items in the settings that are somehow connected with the network.
- Select the name of your Wi-Fi network to which you want to connect.
- Enter the network password and you're done.
The connection can be considered complete. Plus exactly wireless connection not only that the printer can be located anywhere. Also, to use it, you do not need to turn on the specific computer to which it is attached. It can be used by any device connected to your network.
Printer setup and preparation
The setup is much easier than it might seem at first glance. Just follow the given instructions:
- We go to the "Control Panel" in a convenient way for you. You can do this through the start menu.
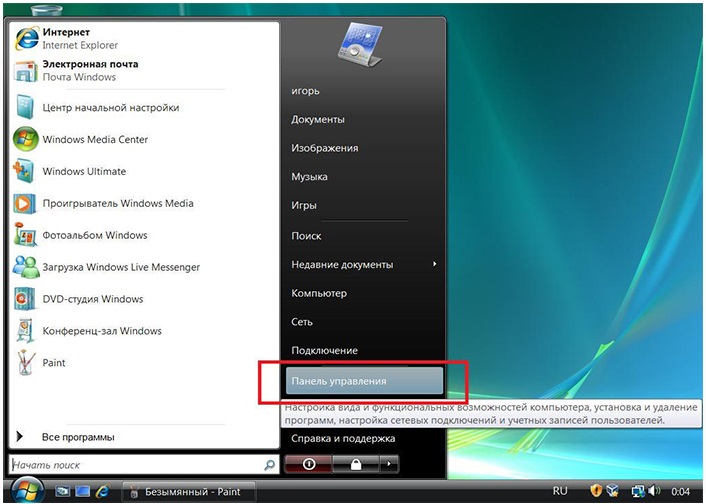
- We need the item "Printers and Devices". We click on it with the mouse.
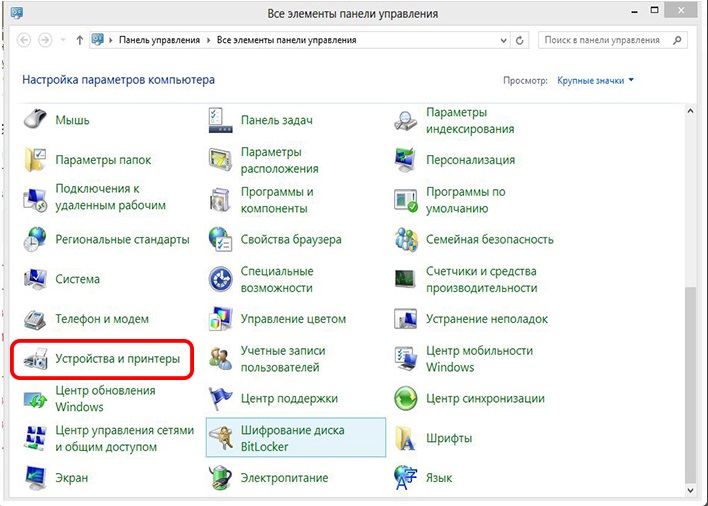
- Next, we need to add our printer to the computer's device list.
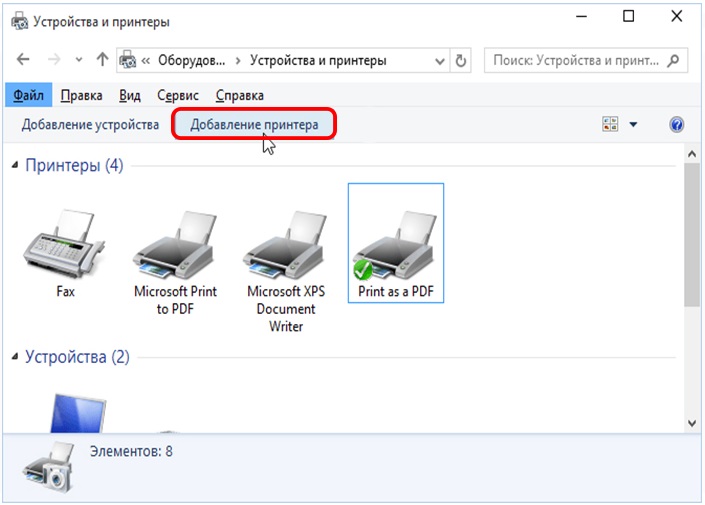
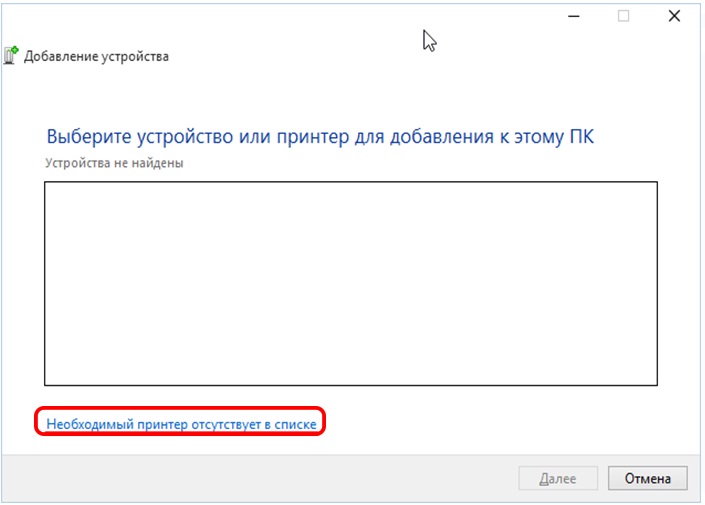
- The search for available printers has begun. We will not wait for its completion and simply select the item “The required printer is not in the list” at the bottom. We click.
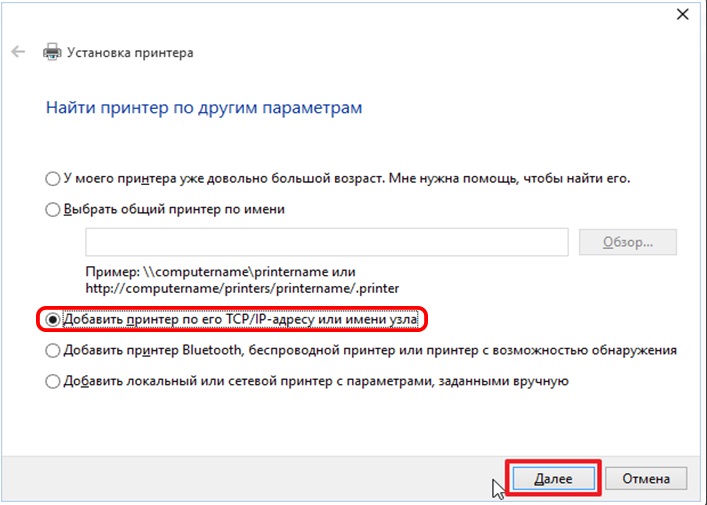
- In the window that opens, select the item "by TCP / IP address or host name".
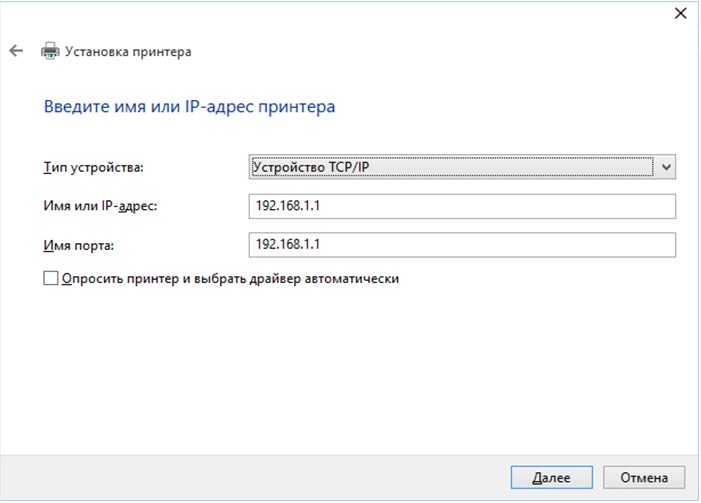
- Select the device type by TCP. The remaining two lines are filled with the address that we drove into address bar browser to open the internal menu of the router. 168.0.1 You may have a different address.
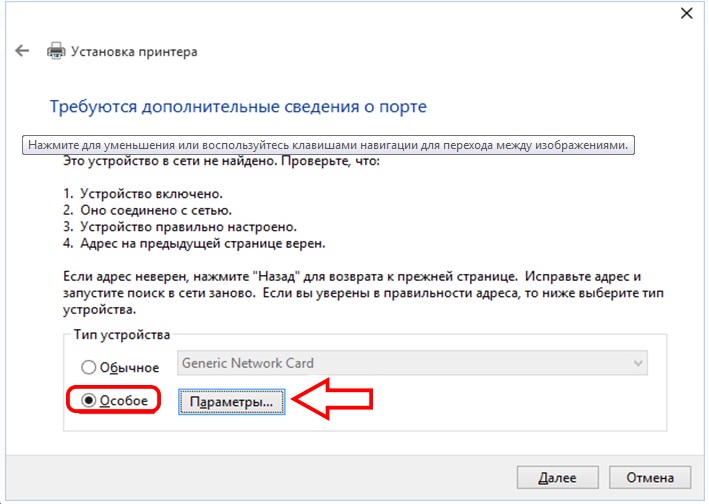
- Select the item "Special" and click on the parameters.
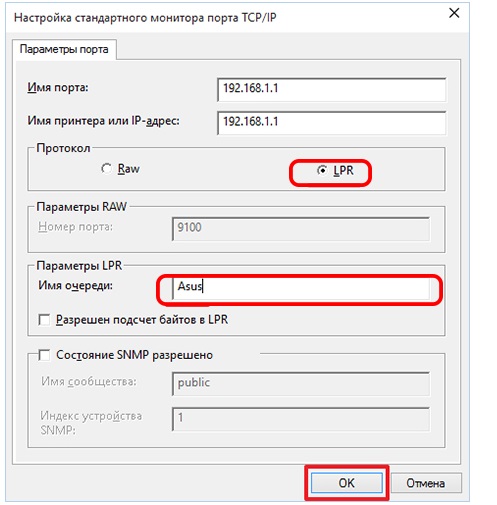
- The protocol is needed by LPR. Next, at the bottom, we are looking for a line of parameters for our protocol. In the column "queue name" enter any name you like.
- We got to the previous page, where we chose special parameters. Now we have everything selected, so click on the next button. There is not much.
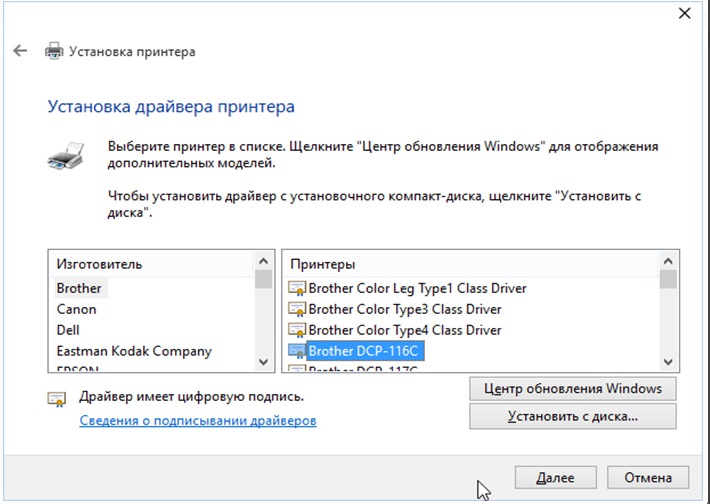
- Now you need to install the drivers. Select your printer model and either use the Update Center or the disc from the manufacturer.
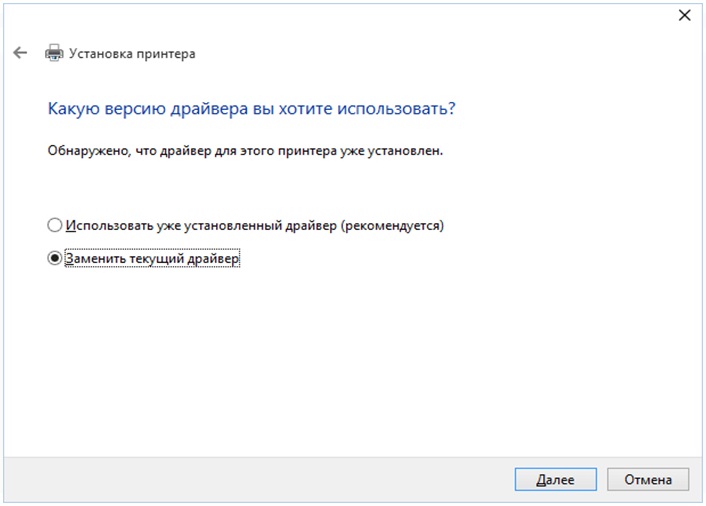
- We do not leave old driver! We replace it with a new one.
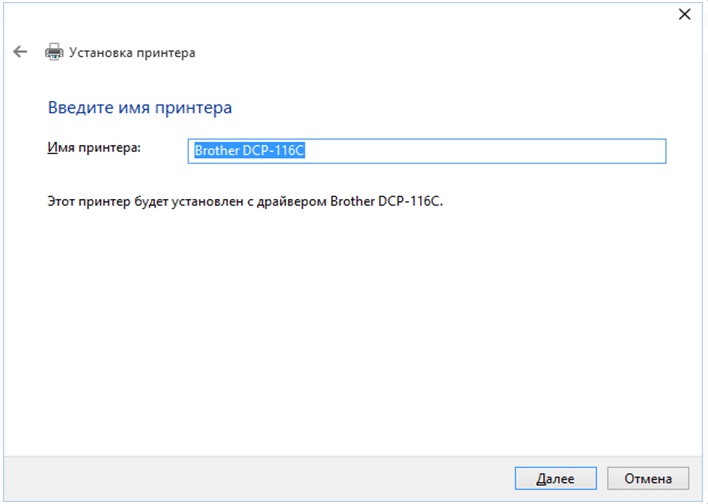
- You can come up with a new name for the printer. But this is not necessary if you like the old one. Just click next when you're ready.
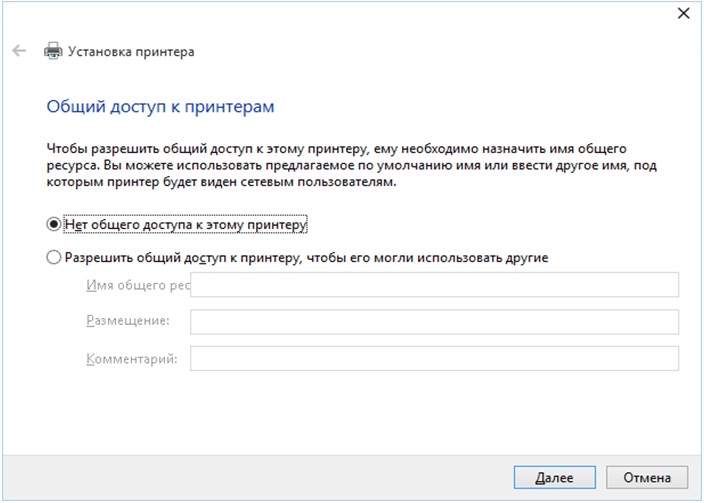
- Put a checkmark on the refusal to share the printer.
Using these instructions, you can also connect the printer to other computers on your Wi-Fi network. Now any of your devices can make a request to your printer to print documents. We hope that the article turned out to be useful for you, and you were able to learn how to connect a printer via a wifi router.
How to connect a printer through a wifi router: we take it apart
Many articles have already been written on the topic of connecting to the Internet via a wireless network. Instructions for connecting, solving various problems, errors, etc. And in this article we will look at connecting the router to a computer using a network cable, which usually comes with the router. With a cable connection, everything is much easier than with Wi-Fi. But despite this, sometimes there are issues with connecting to the router using a network cable (LAN).
Basically, of course, using a cable to connect to the Internet desktop computers, which do not have a built-in Wi-Fi receiver. And if you buy for a computer, then here you can refuse wires. I always advise you to connect the router via cable to configure it, and of course firmware updates. There are different cases, maybe Wi-Fi does not work on a laptop, but you need to connect to the Internet, or the speed over a wireless network is low, here we need a network cable. A cable connection is always more stable than an air connection.
All we need is the network cable itself, with which we will connect the computer to the router. This is a regular twisted pair cable with RJ-45 connectors on both sides. This cable should be included with your router. It's true, it's short. (depending on router manufacturer). If you need a long cable, then you can make it in a computer store. You can do it yourself, but you need a special tool. There are plenty of instructions on the internet.
As a rule, 4 devices can be connected to the router via a network cable. It is 4 LAN connectors that you will most likely find on your router. In some cases, the LAN connector can be 1 or 8. It doesn't matter which Windows version installed on your computer. The instructions are suitable for Windows 7, Windows 8, and Windows 10. In Windows XP, everything is connected in the same way, but the IP settings will be slightly different.
Connecting to a router using a network cable (LAN)
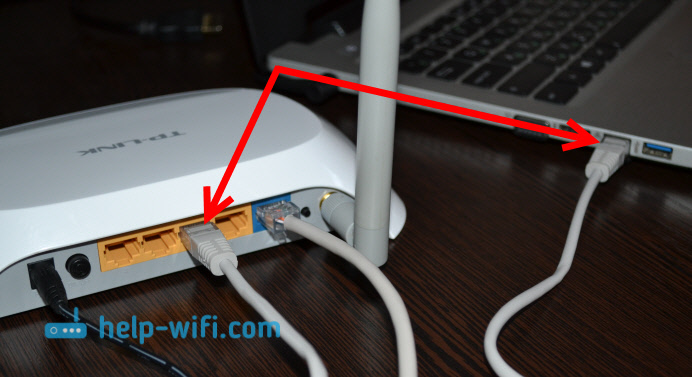
Everything is very simple. We take a network cable, connect one end to the router in one of the LAN connectors (they are signed by LAN, or home network) . And the other end of the cable is connected to the network card of the computer. It looks like this:
If you connect a laptop to the router, then we do everything in the same way. One end of the cable to the router, and the other to the network card of the laptop:
That's all the connection. If the router is turned on, then the computer should immediately respond to the connection to the router. The connection status in the tray will change (lower right corner).
If the Internet is connected to the router, and it is already configured, then most likely the connection icon will be like this:
![]()
This means that everything is fine, and the Internet is already working.
And if the router is not yet configured (you are only going to set it up), or there are some problems in the computer settings, then the connection status will be yellow exclamation mark. And no internet access. The Internet will not work on the computer.
![]()
If the Internet from this router works fine on other devices, but on the computer that we connected without access to the Internet, then you need to check the IP and DNS settings for connecting via local network.
No internet access when connected via cable
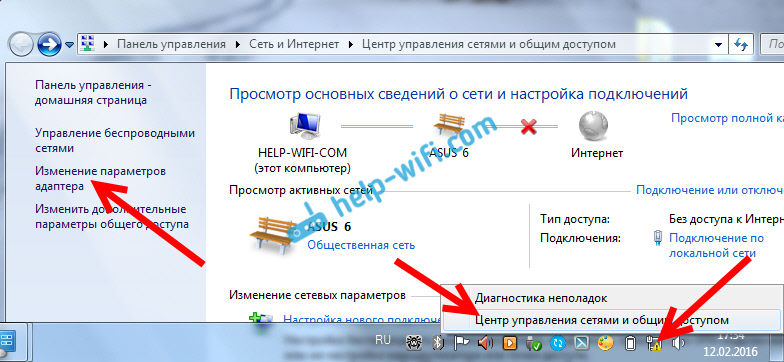
It may be that after connecting the Internet will not work. The connection will be "no internet access", or "Limited" (in Windows 8 and Windows 10) . If the problem is not in the router (he distributes the Internet), then you need to check the settings on the computer itself.
Right click on the connection icon and select Network and Control Center public access . In the new window select Change adapter settings.
And we expose everything as in the screenshot below. It is necessary to set automatic receipt of IP and DNS addresses.
After that, restart your computer, everything should work.
What to do if the computer does not respond to the network cable connection?
It may be that after connecting the cable to the computer, the connection status will not change, and there will be a computer with a red cross (no connection).
![]()
In that case, try the following:
- Connect the network cable on the router to another LAN connector.
- If possible, replace the network cable. It is possible that the problem is in the cable.
- Install or update the network card driver.
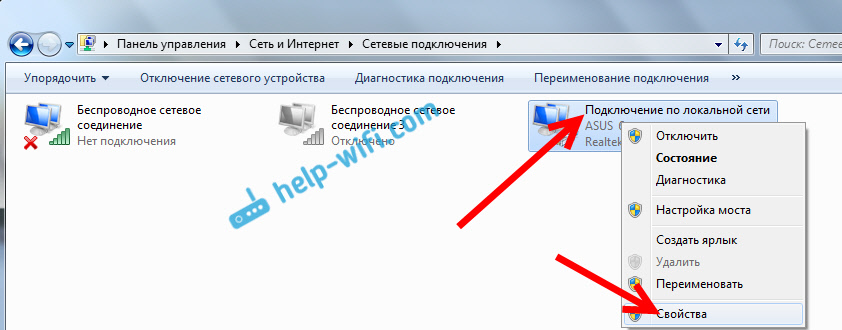
- Go to adapter management and check if the adapter is enabled Local Area Connection. Right click on it and select enable.
- If the Internet via cable does not work on a Windows 10 computer, then see this article.
As practice shows, everything works via cable immediately after connection. Without any problems and settings. If you were unable to connect your computer to the router, then describe the problem in the comments. I will definitely answer and help with advice.