Today we will create account V iTunes Store, which is also necessary to enter App Store, cloud service iCloud and many others Apple services. All this is possible thanks to the creation of a universal Apple ID that is personal and starts once for all your Apple gadgets; it is thanks to it that all content is so easily and naturally synchronized between devices.
The main difficulty that beginners face is ignorance of the features of working with the application store and therefore, before downloading paid content, they first try to work with free applications, but in order for this operation to be successful, it is necessary to correctly perform all the steps described below at the stage of creating an account . We will look at two ways to register an account:
Dear users, I once again strongly recommend that you take the utmost responsibility in filling out all fields, as this is a guarantee that everything will work out the first time. And one more piece of advice, it has been noticed that mailboxes with domain name such as *.com, those chosen to create an Apple ID are registered a little more successfully, so it makes sense to get yourself a Gmail mailbox specifically for this. Well, now, as always, step by step, we analyze the registration process in detail.
Create an Apple ID in iTunes on Mac
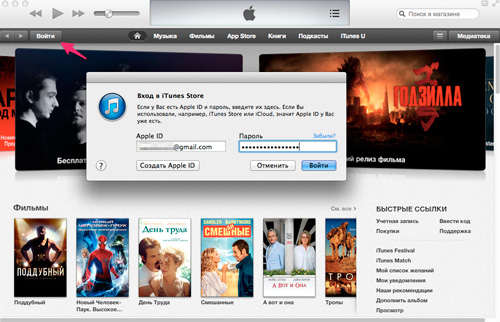
1. On your Mac, open iTunes and click on the iTunes Store tab.

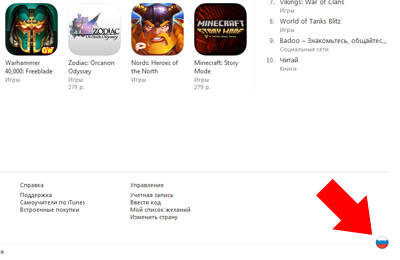
2. Now scroll to the very bottom of the page and make sure that the flag of our Mother Russia is there, if not, select it from the list that appears when you click on the flag.

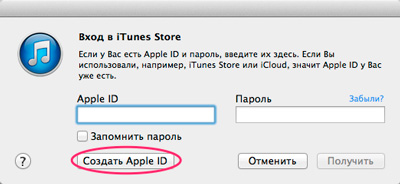
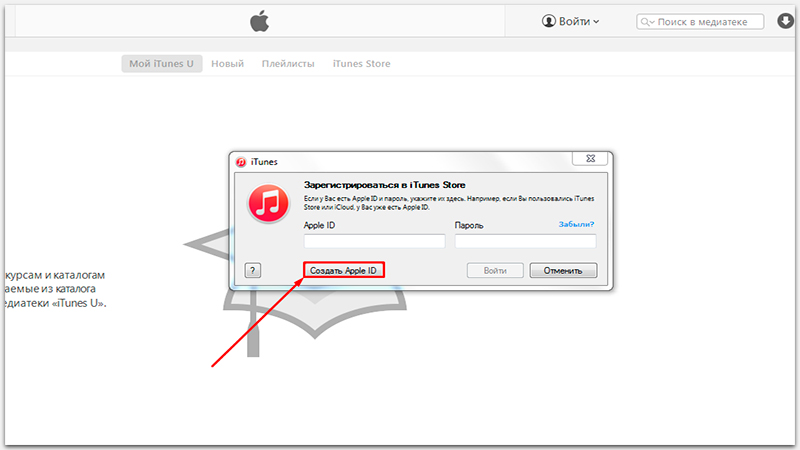
4. In the window that appears, click create an Apple ID, then continue.
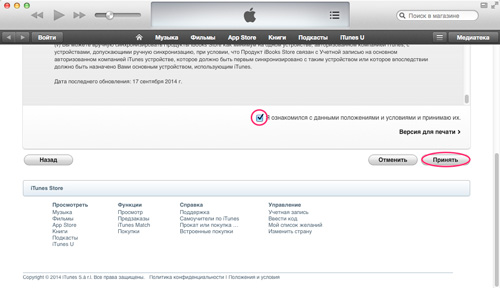
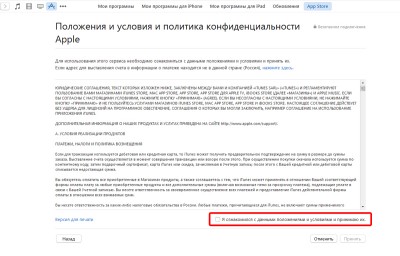
5. At the next stage, Apple invites us to read the privacy policy and accept all the company’s terms and conditions. By the way, according to “official” statistics, residents of Russia are record holders for the speed of familiarization with this section :)
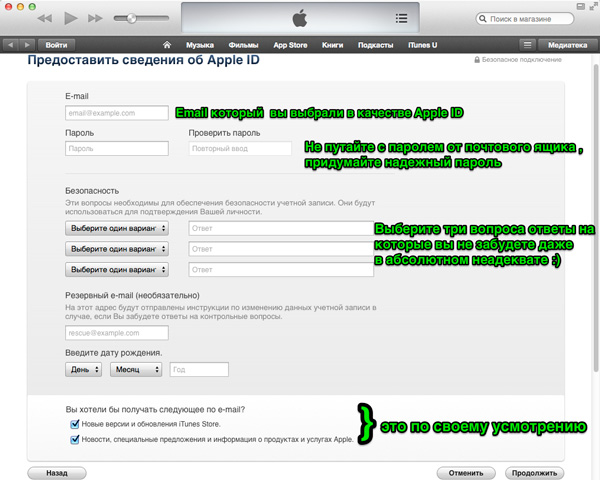
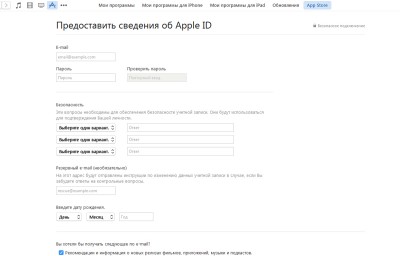
6. Next, you need to provide some information to create an Apple ID; treat this moment extremely responsibly and be sure to fill out all the fields. Another mandatory requirement is that you must have access to the email that you specify at the very beginning, since you will receive a letter confirming your registration.
Password requirements:
— At least 8 characters;
- At least one letter is required;
- At least one capital letter;
- At least one number;
— You cannot write several identical characters in a row (111, qqq);
— Must not match the Apple ID account;
— Should not be easy to guess (qwerty, 1234567890).
Well, a mega complicated and long password is also useless, firstly, you will be tortured to write it every time, for example, if you decide to make a little extra money using your iPhone (you will have to download applications often and, accordingly, enter the password each time), and secondly, no guarantees that you will easily remember it in a couple of months.
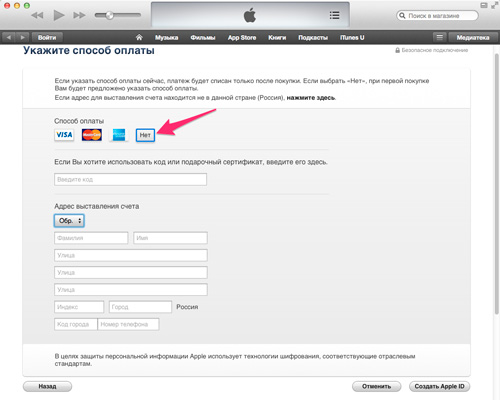
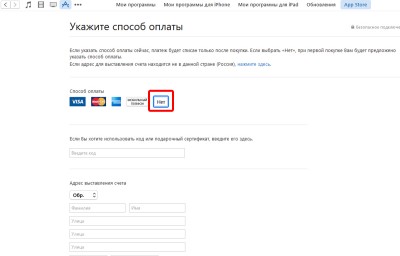
7. And here it is the treasured button No, click it, fill out the address fields (you can even enter the left data) and click create Apple ID .
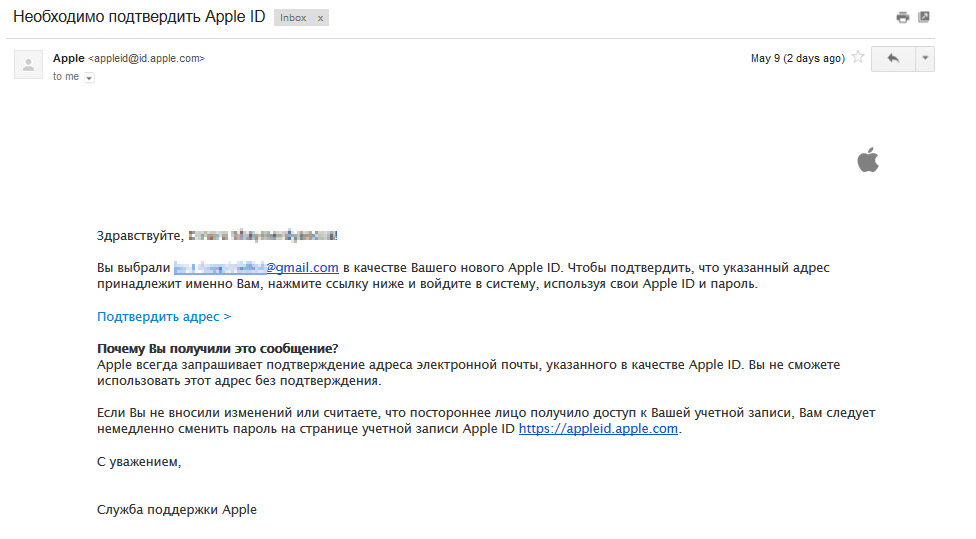
8. Now a letter with approximately the following content will be sent to the specified email address:

Click confirm now and rejoice, all the free things are at our disposal. All that remains is to enter your data into iTunes .
Creating an account on iOS
Now let's look at a similar operation for iPhone and iPad owners.
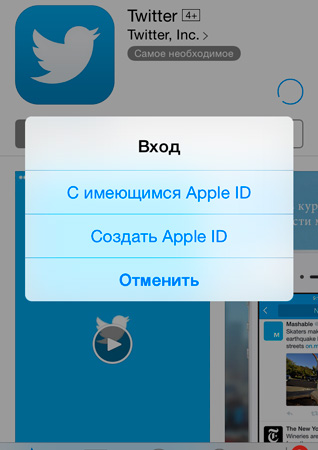
1. Open any of the “stores” (App, iTunes or iBooks), I will do it using the App Store as an example. Just like in the previous method, we look for any demon paid application so as not to bother, you can select a category social media almost all applications there are free, then click on the free button, and then on install.

2. A window will appear in which we select create an Apple ID.
4. Read the 66 pages of the privacy policy (just kidding, just kidding 🙂) and click accept.

5. At this step you need to do everything the same as in point 6 of the first method.
6. In the payment information, select No and fill in the address information.

7. Open the activation letter in mailbox and confirm the creation of an Apple ID.
8. Enter your credentials in the App Store (iTunes Store or iBooks Store) and enjoy life, Apple will not receive a penny from us!
Dear friends, I may have gone over some points in too much detail, but I am sure that new owners of Apple gadgets will appreciate this and will not repeat the mistakes of many now seasoned Mac and iPhone users. If the article helped you, do not be lazy - click the buttons below, and so as not to miss many other useful and interesting articles subscribe to blog updates.
Greetings, dear readers. Today I will tell you how you can create an account Apple entry ID (Apple ID) on your iPhone or iPad with two different ways, as well as in a way that does not require you to have bank card. But, first things first.
Apple ID - unique identificator, an account to speak of in simple language– profile in Apple services. It is he who allows you to use tools such as: AppStore or iCloud.
You can create an account in two ways (+method without a card), which one to choose is up to you, in principle there is no difference between them:
- Creating an Apple ID using a program that is installed on your Personal Computer– iTunes;
- Creating an Apple ID directly from the very beginning iPhone devices or iPad. This method will work if you don't have one iTunes programs or you don't want to use it;
- Without a map. If you don't have a card or don't want to use your credit card, you can create an Apple ID without using it, or using a virtual card.
Using iTunes
To create an Apple ID using iTunes (via a computer), do the following:
Registration with card
Registration without a card
You can create an Apple ID account without using a card (via your computer). To do this, do the following:

You can also register an account (both with a card and without a card) directly from the device itself.
From a mobile device with or without a card
For Apple registration ID from the device follow these steps:

Virtual card
If you want to buy an app from the AppStore, but don't want to register an Apple ID with a real card, you can issue a virtual VISA. To do this, follow these steps:
- Go to the site payment system QIWI;
- Complete the registration process;
- In the menu, find the “Maps” item;
- We look for the “Buy QIWI VASA Virtual” button and click it;
- Enter your mobile phone number, top up your account and register your card;
- After paying for the card, you will receive an SMS with the following information: card number, expiration date and security code.
You can use this data when creating an Apple ID.
Many new users of Apple devices do not know how to create an account for the AppStore and other similar resources. It's actually very easy. In this article you will learn why an Apple ID is needed and how to create one.
What is an Apple ID for?
It is necessary iPhone owners, in order to:
- Find your smartphone if it is stolen or you lose it;
- Synchronize iPhone with iCloud;
- Sway free apps from AppStore;
- Purchase various products in the AppStore;
If you have no plans to purchase paid products in Apple stores in the future, first create an Apple ID without a credit card, for free. In the future, you can always attach a credit card to your ID to top up your account.
How to create an Apple ID without a credit card
In the Russian Federation, credit cards began to become popular quite recently, which is why in Russia, iPhone owners have difficulties registering an account on the device and indicating bank information. Also, the owner of an iPad or iPhone may not have his own bank account, and therefore a credit card, because he is a minor user who was given the device by his parents.
There are also users who do not want to show off their credit card when creating an ID. Therefore, there may be many reasons for reluctance to indicate payment information when creating an ID. Luckily, you can quickly open an Apple ID without a credit card at any time.
Some novice mobile device users complain that there is no “None” column, which allows the user to log in for free. Where is the way out? Follow the instructions below.
To register you need to perform simple manipulations:
- To get started, launch the App Store on your smartphone and use the “Featured”, “Top Charts” or “Search” sections to select a free application.
- Open the free software you have chosen and click “Download” and then “Install”. Next, a window will appear on the device screen in which the user can enter an existing Apple ID or create a new one.
- Since you don’t have an account yet, click “Create an Apple ID.”
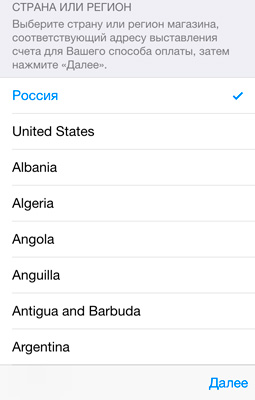
- Registering an account involves selecting a country, click “Next”.
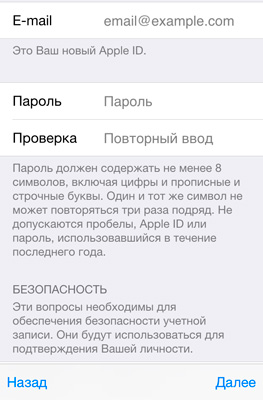
- In the “email” field you need to enter your email address. This will be your login.
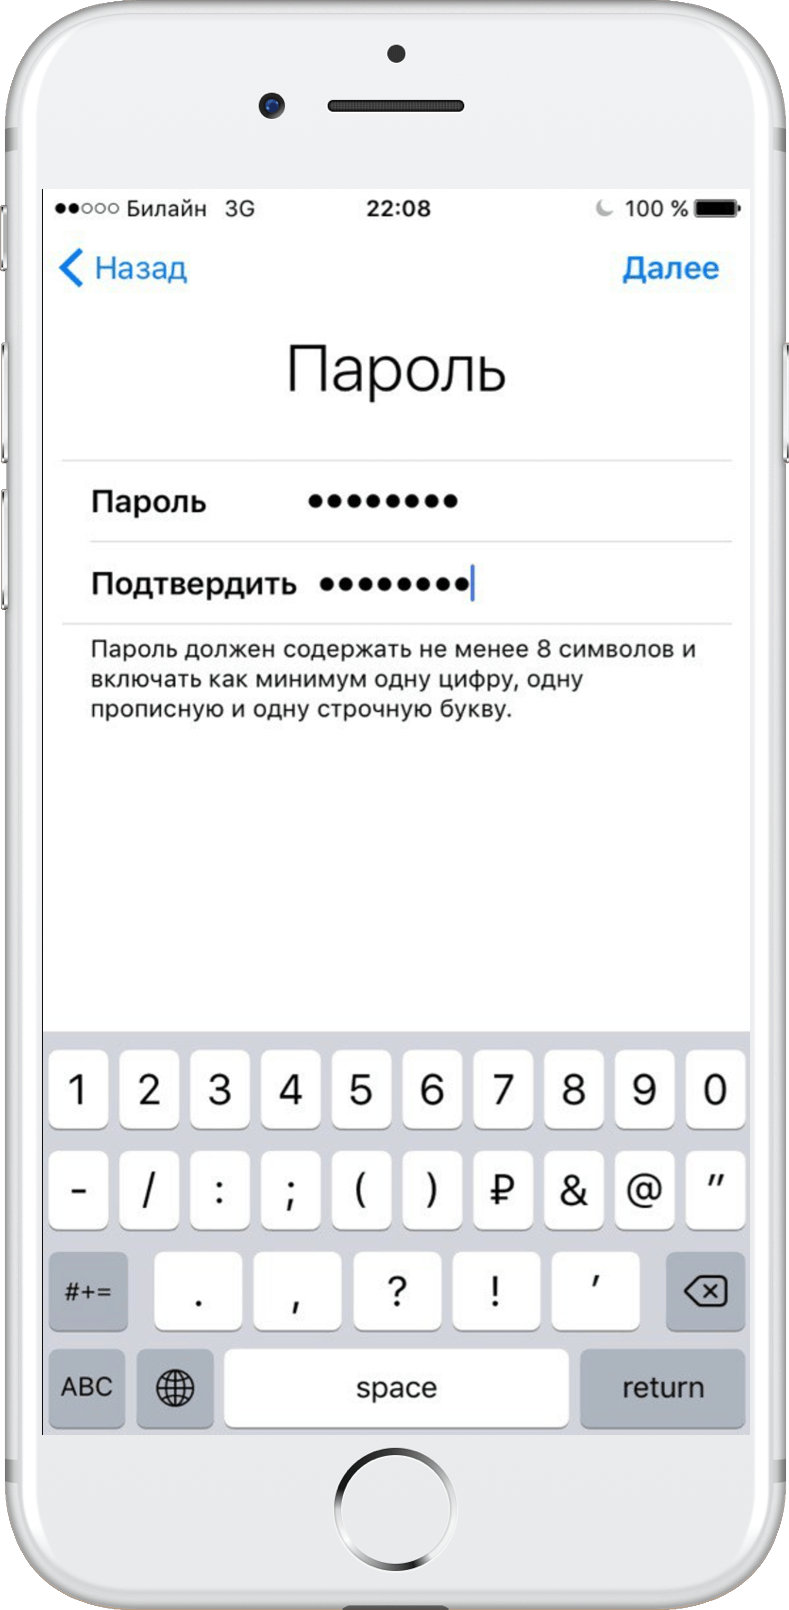
- Next, enter the password twice and click the “Go” button. If you can’t log in, you should pay attention to the fact that the password must contain letters of different sizes and numbers. The minimum number of characters for a password is eight characters.
- Then you need to enter your security settings.
- If you want to make an ID on iPhone without a credit card, then click the “None” button. If you decide to register an ID on your iPhone with a credit card, you need to enter all your card details. You can also enter this information later.
If you want to create a free Apple account, but nothing works, then you tried to download a paid application. The “No” item, which allows you to refuse paid registration, appears only if you go through the account registration process when purchasing free software.
To complete registration, enter your personal information and check your email. To the address you entered when registering your new account, you should receive a letter, opening which you will only have to click on “Verify Now” and specify your login and password ID to complete the registration.
How to create a free Apple account using iTunes
If you are unable to create a new account on your smartphone, you can use the registration instructions from using iTunes.
When trying to create a new account on your computer, you will need the following components:
- PC with free access to the Internet;
- Current version of iTunes;
- Personal email.
There is nothing difficult about creating a new account. This is a fairly common operation that can be done with virtually no problems. So, having prepared everything you need, you need to do the following:
- Launch the program and enter the store.
- Click “Create…” and confirm the action.
- Confirm your agreement to the terms of creating a new account on iPhone.
- The password must not contain the same letters, numbers or spaces three or more times.
- Registration with Apple includes age restrictions. If you are under thirteen years of age, you will not be able to create a new ID, so if the system does not allow you to create an account, indicate your age is over 13 years. It is best to indicate an age of over 18 years, this will expand access to the products that the AppStore offers.
- Next, registration will continue, enter all the necessary data and at the end click “Create Apple ID”
- Check your email. If it is empty, check the email in spam.
How to restore access to your account
Sometimes device owners choose questions in the security settings to which they forget the answers in the future. Fortunately, it is possible to restore access to your account if there are problems in the password and security questions section. To familiarize yourself with the method, watch the video:
If you don't want to encounter similar problems in the future, you won't need to use security questions to activate it.
If you still cannot log into your Apple account, you can contact Apple support. When contacting the regional support service department in order to change or create an account, you need to understand that they, as a rule, do not have information about your account. To do this, specialists must contact the central support service department. This can take up to half an hour, so be patient.
An Apple ID is required for all owners of Apple devices. Without it, it is impossible to download an application or music, purchase a movie or book, or use the iCloud network service. In addition, with using Apple ID users can place orders for products at Apple retail stores. In this material we will look at two ways to create an Apple ID without a credit card, and also describe possible mistakes During registration…
It is worth noting that the process of creating a new identifier is quite simple. Users need to fill out a number of fields and come up with a password. Many people are confused by the need to enter payment card details when registering. This step is required to make purchases from the iTunes Store. But if desired, users may not fill out this item. To do this you need to use a little trick.
There are two ways to create an Apple ID: mobile device or using iTunes. However, we would like to immediately highlight several key features:
When registering, be sure to indicate your existing E-mail. In the future, you will receive a link to complete registration.
Apple does not allow you to register an Apple ID under 13 years of age. In addition, some restrictions apply for users under 18 years of age.
2. Launch the application and go to the App Store section.
3. Select any free application.
4. Click the “Download” button.

5. In the new window, click on Create Apple ID.

6. Check the box “I have read and accept these terms and conditions,” and then press the “Accept” button.
7. Here you need to fill in a number of fields. Among them are E-mail, password, date of birth, etc. It is worth noting that all fields in this section are required.
- The Apple ID password must contain at least 8 characters.
- The password must contain numbers (1,2,3,4,5,6,7,8,9)
- The password must contain small letters (lowercase)
- The password must contain capital letters(CAPS)
8. In payment methods, check “no”.
If the “no” option is not available, check your regional settings. If you indicate a Russian address, make sure that there is a Russian flag in the lower right corner of the program. By clicking on the flag icon you can change the region to the desired one.
9. Click on the Create Apple ID button.
10. After this, an email with a link to confirm registration will be sent to the email address specified as the ID.
It is noteworthy that you can make purchases in the iTumes Store not only using credit cards. Also available for sale special cards called Gift ID or Gift cards iTunes, in denominations from 500 to 3000 rubles. However, when purchasing them, you need to remember that there are Gift Cards for sale for different sections of the iTunes Store and cards for the RU region are not suitable for purchases in the US region and vice versa.
Every device running iOS or macOS must be paired with Apple ID ID. Apple ID is needed not only for authorization, it also allows you to synchronize data across all devices via iCloud.
Today we will tell you how to create a new Apple ID directly on your device with operating system iOS. Two versions of instructions are provided - for iOS 10.3 and firmware 10.2.1 and older. The algorithm of actions in the case of iPhone and iPad is the same.
How to create a new Apple ID on iOS 10.3 and later firmware
If you updated to iOS 10.3, follow the instructions provided to create new Apple ID on the device. The procedure has changed from earlier versions of the operating system.
Step 1
Step 2
From the Settings menu, select Sign in to iPhone/iPad.

Step 3
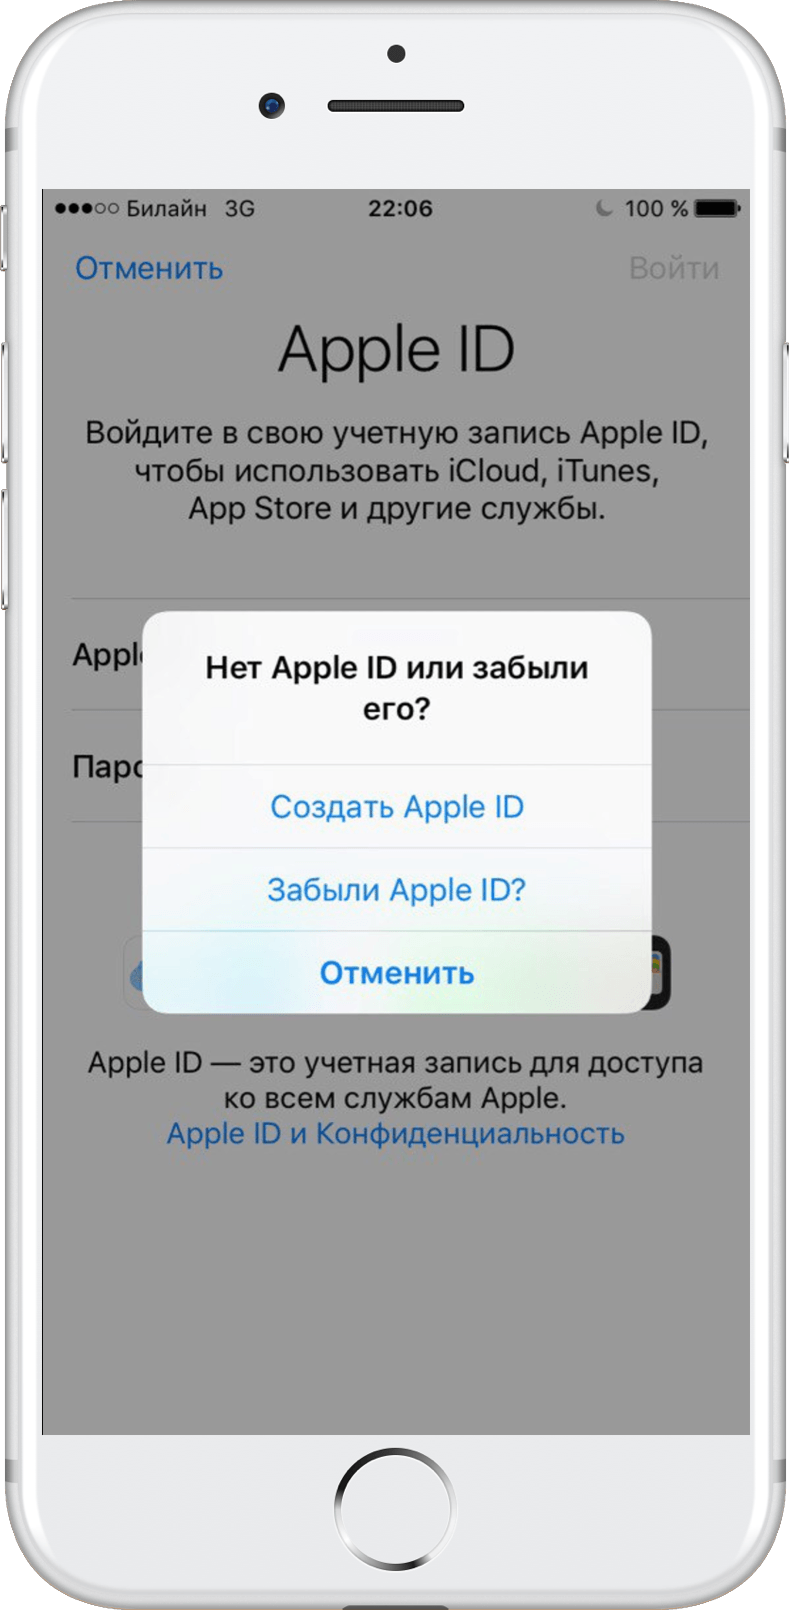
The operating system will prompt you to enter your Apple ID and password for authorization. To create a new Apple ID, click "Don't have an Apple ID or forgot it?"

Step 4
In the new window, select “Create an Apple ID.”
Step 5

Step 6

Step 7
Important! If you want to use as Apple ID email address iCloud, select “Set an email on iCloud” and then follow the on-screen instructions.

Step 8

Step 9
Step 10
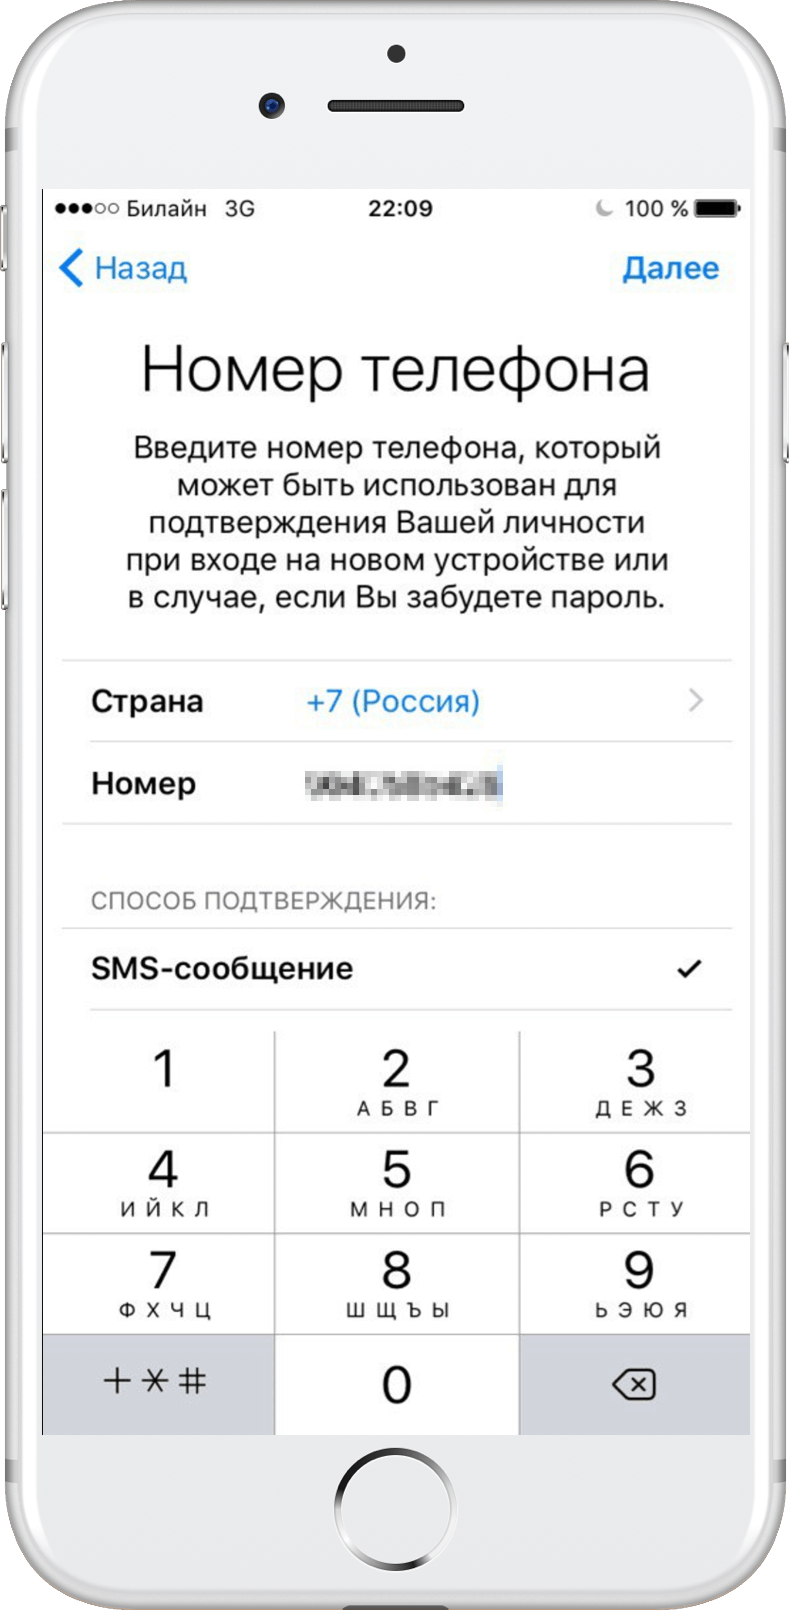
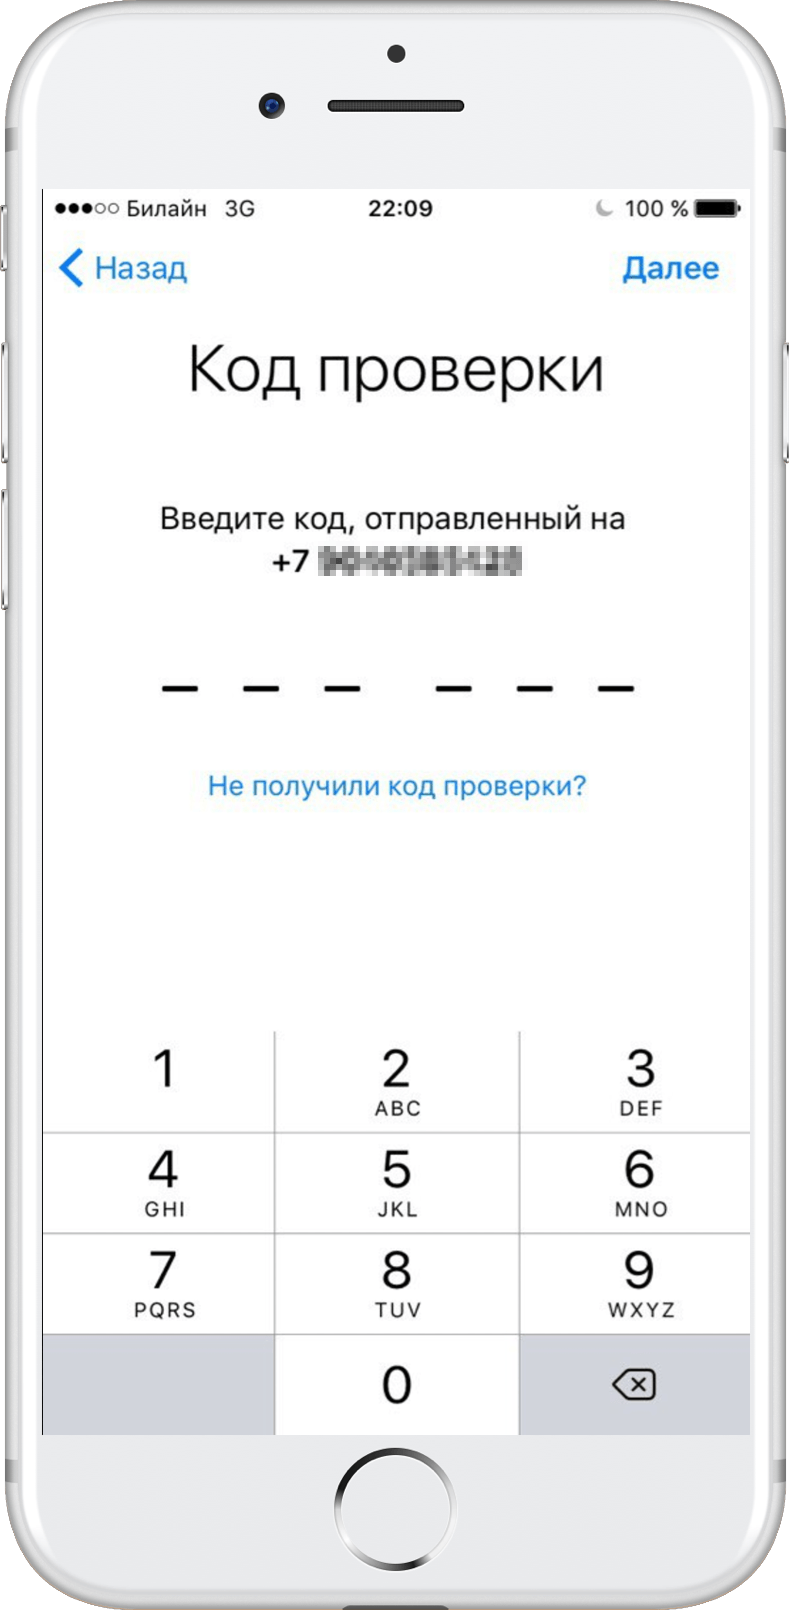
To verify your identity when signing in with your Apple ID on a new device or browser, or if you need to recover your password, you will need to enter your number mobile phone. Select your country and enter your real phone number. Proceed further.
Step 11
A message with a verification code will be sent to the mobile phone number you entered. Enter it in the appropriate field when prompted.
Step 12
You must accept the Terms and Conditions to continue. Select "Accept".

Step 13

Step 14
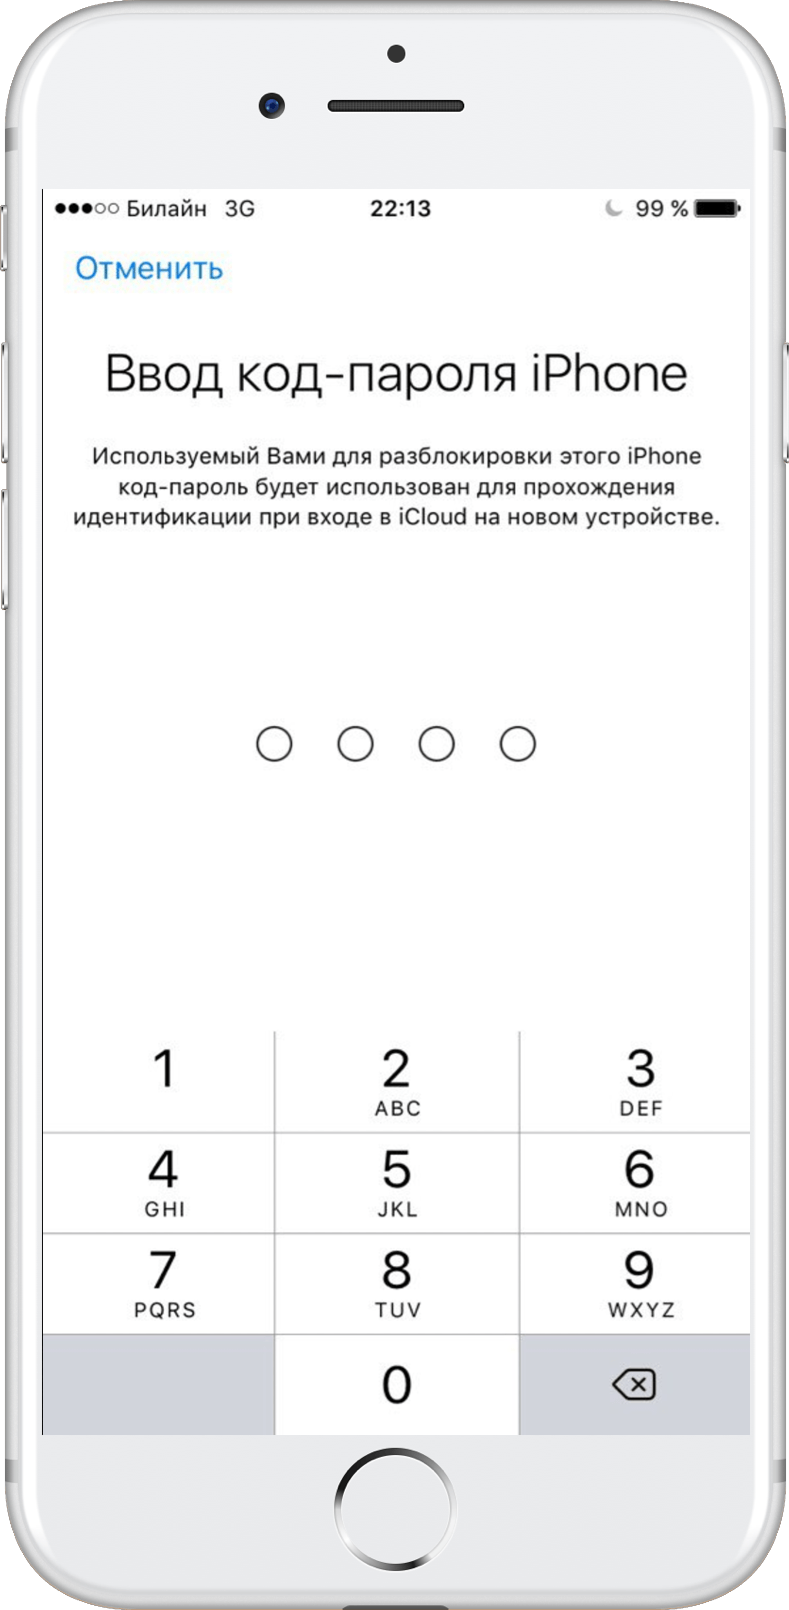
Enter the password you use to unlock your iOS device.
Step 15
Step 16

Step 17
How to create a new Apple ID on iOS 10.2.1 and earlier firmware
If you're using iOS 10.2.1 or earlier, you'll need to do the following to create a new Apple ID.
Step 1
Go to Settings from your home screen.

Step 2
From the Settings menu, select iCloud and then Create an Apple ID.
Step 3
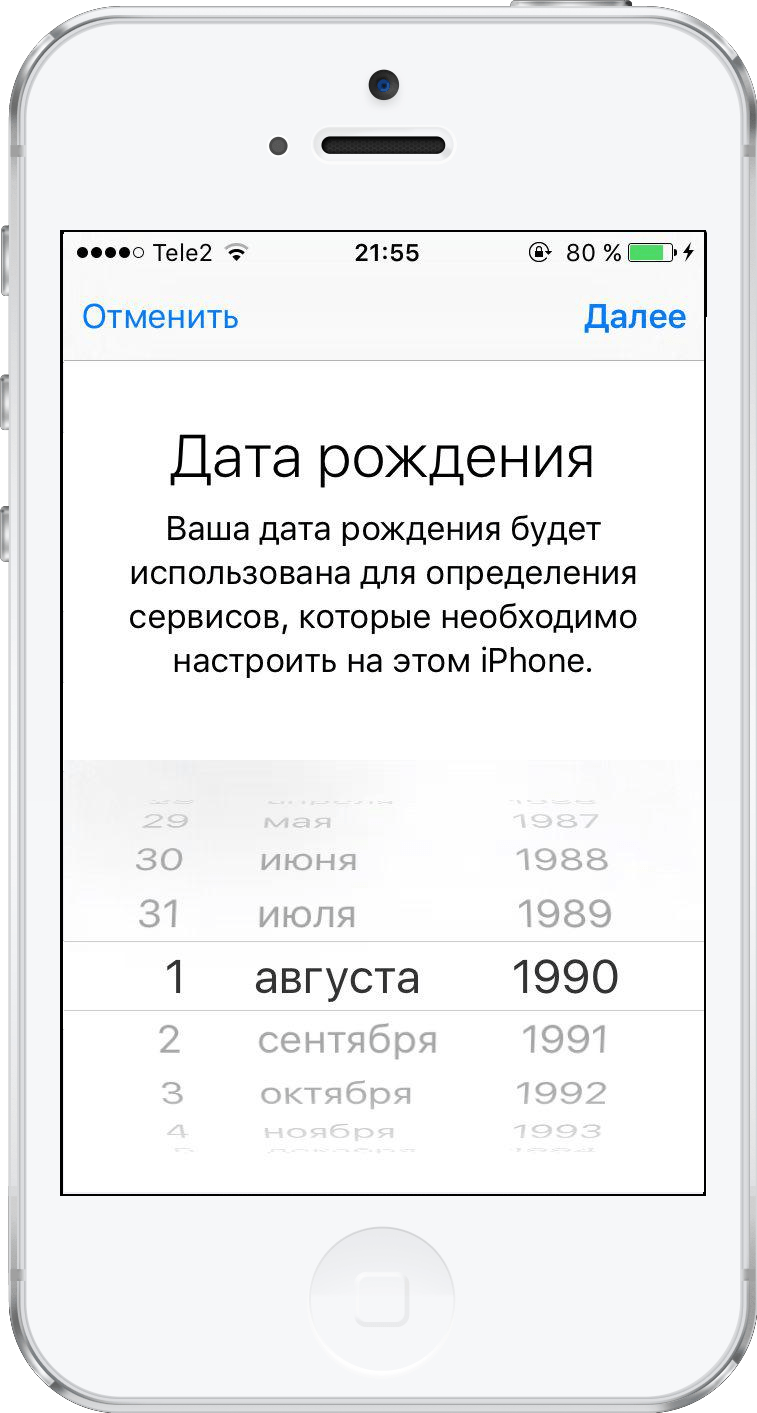
Scroll to set your date of birth, and then click Next.
Step 4
Enter your first and last name in the appropriate box. Click Next.

Step 5
In the email input field, you can use your email or create free mail iCloud. In these instructions, we suggest creating an Apple ID using an existing e-mail, so click “Use current e-mail.”
Important! If you want to use your iCloud email address as your Apple ID, select “Set an email on iCloud” and then follow the on-screen instructions.

Step 6
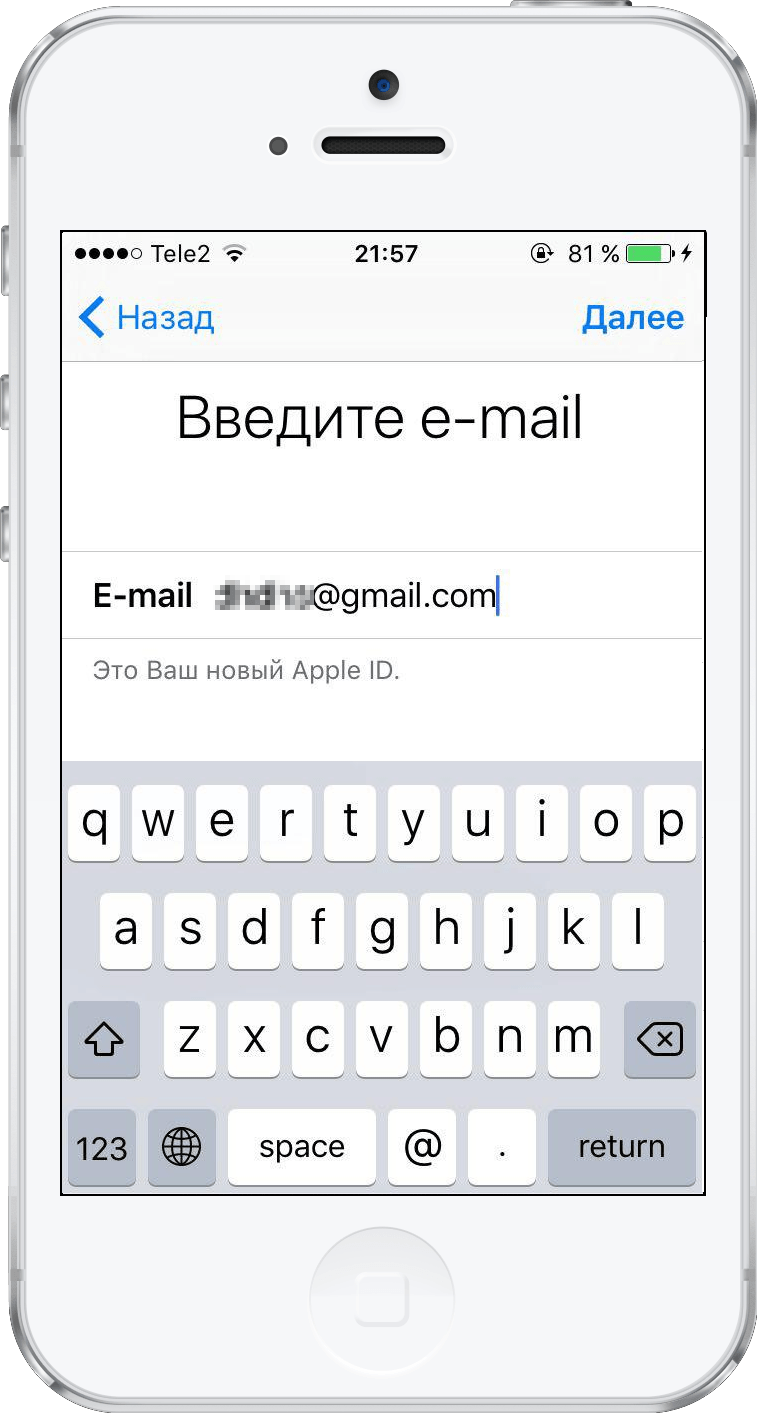
In the input field, enter the email address that you want to use as your Apple ID. Click Next.
Step 7
Set and confirm a password for your new Apple ID. Click Next again.

Step 8
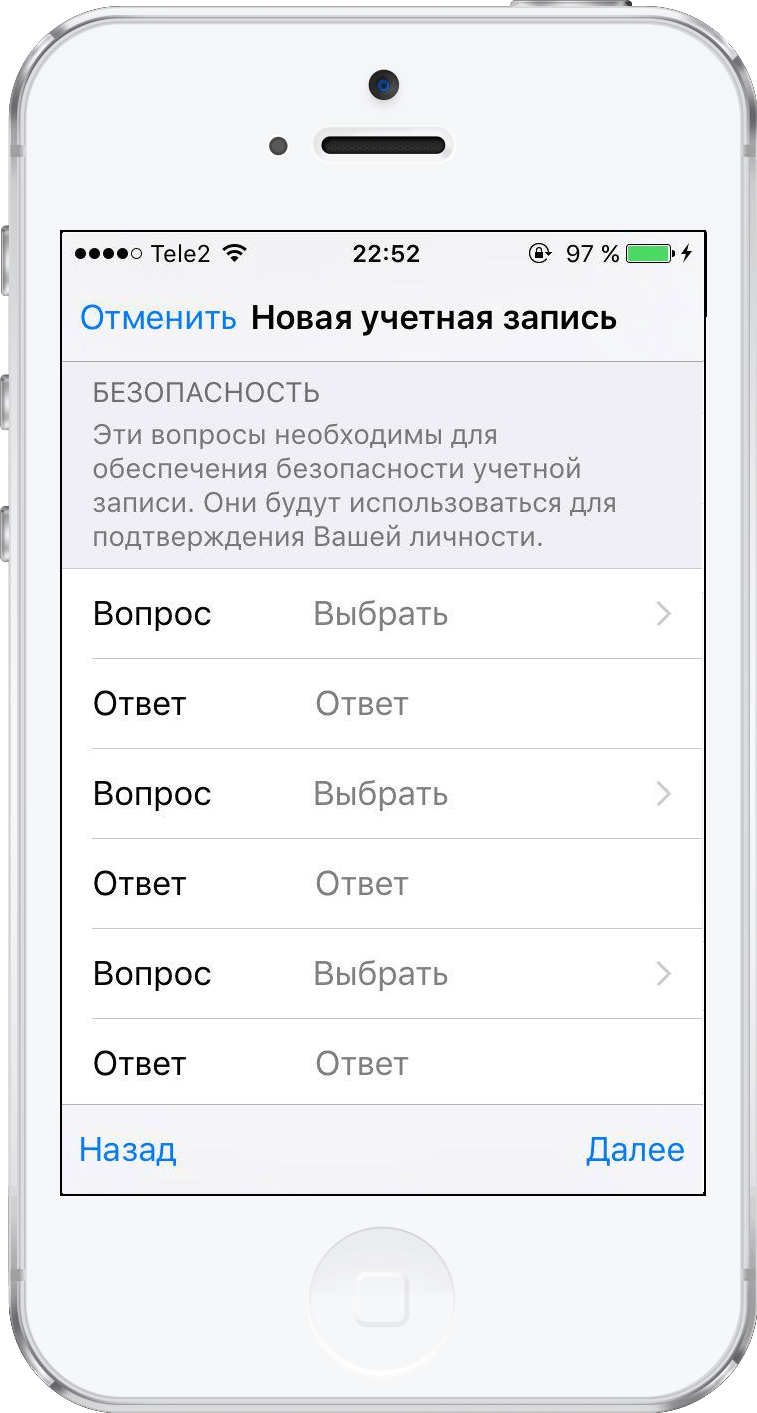
A security page will appear asking you to select three security questions. Click on the first question to open a selection menu.
Step 9
In the dialog box that appears, select the question you like.

Step 10
You will be automatically redirected to the security page. Click on the empty answer field for the selected question to begin entering your answer.
Repeat steps 8-10 for the remaining two questions.

Step 11
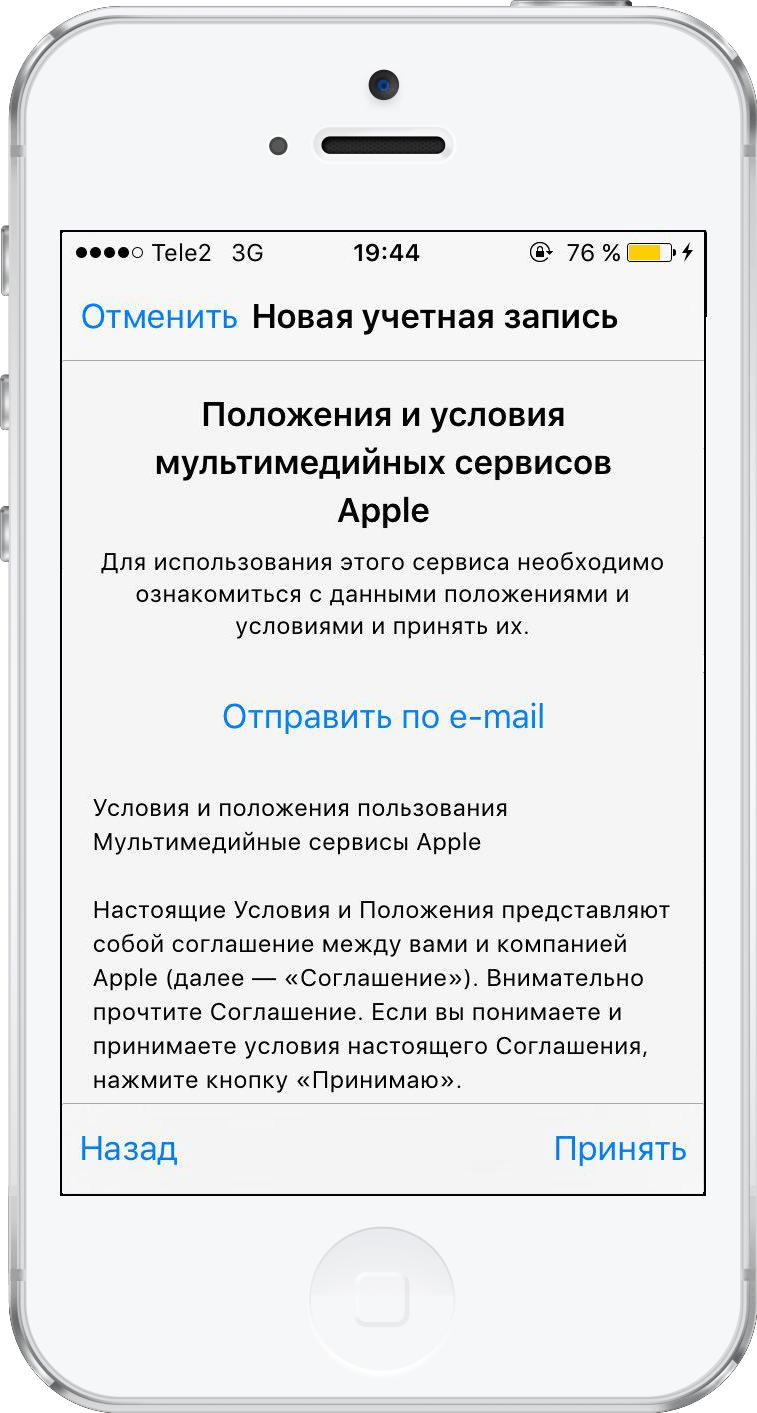
After selecting three security questions, you will need to agree to the “Terms and Conditions” by clicking “Accept.”
Step 12
Click "Accept" again when another agreement appears on the screen.

Step 13
A verification message will appear on the device screen.

Step 14
Now you will need to confirm the entered e-mail. Check email and follow the link to confirm your address.
Step 15
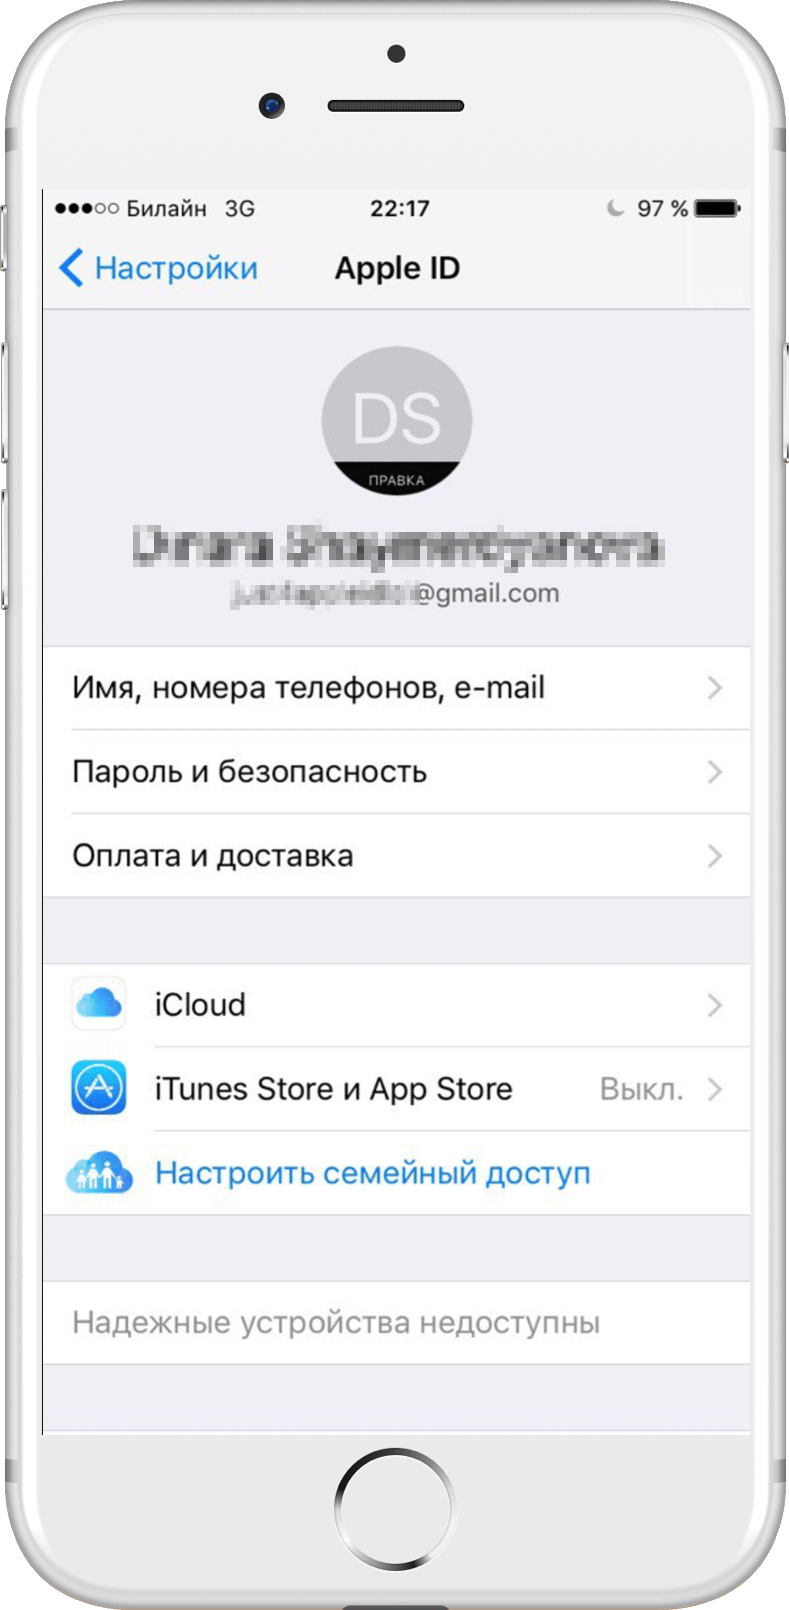
After confirming your email, you will be automatically signed in to your device using your new Apple ID.
Step 16
The Find iPhone/iPad feature will automatically become active. Click OK.

You can also create a new ID in your browser by clicking “Create an Apple ID” on the Apple ID website. However, in this case, Apple will ask you to enter a custom email to create an iCloud address. If you create a new ID through the Apple ID website, the original address will remain linked to your Apple ID.
Therefore, if you want to use exclusively an iCloud email address as an Apple ID without linking other email addresses, then at the email entry stage, select “Create an email on iCloud.” Then the only email associated with your Apple ID will be your iCloud email address.