It often happens that installation or startup certain programs require administrator rights. Such utilities are marked with a colored shield.
Step 1: General Method
We find the utility we need. We highlight executable file(has an EXE extension), press the right mouse button. Select the option “ Run as administrator»:
But this procedure can quickly get boring if you often use the same program. Therefore it makes sense to do necessary settings Once and for all. To do this, right-click on the utility file and select “ Properties» → tab « Compatibility» → « Run this program as administrator»:

Press the button " Apply».
Step 2: Disable UAC
Beginning with Windows Vista, Microsoft has introduced a special User Account Control (UAC) system that allows you to work with operating system to different user groups according to their level of authority or rights. Disabling the UAC system will allow us to forget about intrusive messages about making changes from various programs.
Open " Start" In the search window we type UAC:

A checkbox will immediately appear that says “ Change Account Control settings" Let's choose it.
The following window will open:
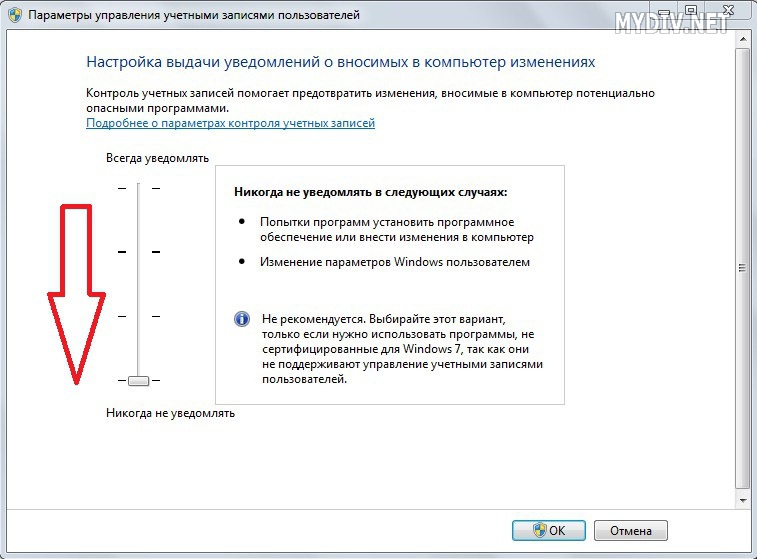
Here you need to drag the slider down to disable UAC.
Step 3: System Files
Unfortunately, it is not always possible to get by account user. Some system applications run only under an administrator account. For example, you will not be able to run the scan program CHKDSK for all disks at once, using the command line under the account regular user or a guest. Therefore, you need to change the user account to an administrator account via “ Start» → « Shutdown» → « Change user»:

Under an administrator account we will be able to run system programs without error: " Not enough privileges».
Some of our Windows 10 tips require tweaking the registry (like this tip about ) or typing a few lines of code in the Command Prompt or Windows PowerShell.
If you are already confident in different aspects of Windows 10, and are comfortable working with the registry or command line, you may have noticed that you can't run programs as an administrator by default. Instead, you should click right click Click on the shortcut in the Start menu, select "Run as administrator", and then click "Yes" when the User Control (UAC) window pops up. This happens even if you have an administrator account. This is a minor inconvenience, but if you're in the middle of setting up your system, the process can become annoying.
Here's how to set a program to always run in Administrator mode, so you don't have to see a UAC warning every time you want to use the Run program. Remember, a UAC warning protects you from accidental changes to the system, so it's important that you only apply this advice to programs that you have complete confidence in.
Step 1: Open the Start menu and select All Apps. Find the program you need, which should always be run in administrator mode, and right-click on its shortcut. In the menu that appears, select "Open file folder." Desktop programs only (not native) Windows applications 10) will have this option.

Step 2: An Explorer window will open with the folder where the selected program is located. Right-click on the program and select "Properties" from the context menu.

Step 3: In the Properties window, click the Shortcut tab, and then click the Advanced... button.
Step 4: In the "Advanced Properties" window, check the "Run as administrator" box and click "OK".

Step 5: Now the program will open in administrator mode when you click on the shortcut in the Start menu. You will need to repeat these steps for each program for which you want to enable this feature.
Pretty simple, right? There is a way to configure all programs at once so that they always run in administrator mode without changing the properties for each individual application. But it's not worth the risk of doing this (and it involves editing the registry), so maybe we'll think about it and write an article about it next week.
Hello friends! If you remember, then in we talked about one interesting program for which it was necessary run as administrator in Windows 10. Now let’s expand our knowledge on this topic a little.
And the thing is that there is another cool way to make this setup once and for all. That is, after applying it, any application will launch with administrator rights in automatic mode.
So, dear ones, let’s immediately figure out why launching with such privileges might be necessary. The answer will be very simple: if any program requires this, then without them it will not even start.
Therefore, I propose to get down to business. The easiest way to give an application administrator rights is as follows. Right-click on the shortcut and select the appropriate item from the menu:

But there is one significant drawback in such a scheme. After all, you will need to perform this combination every time you start it. But there is another option with which you can correct this defect.
We do everything in two minutes. Right-click on the shortcut icon again the desired program and select the "Properties" section:

Then go to the "Compatibility" tab and check the box "Run this program as an administrator":

Click "OK" to accept the changes made and that's it. It is done. Now you know how to correctly and quickly run as administrator in Windows 10. Although in Win 7 and 8 everything is configured in a similar way.
That's all for now and see you again. And at the end of this small publication, I suggest watching a video about very big and strong people.